
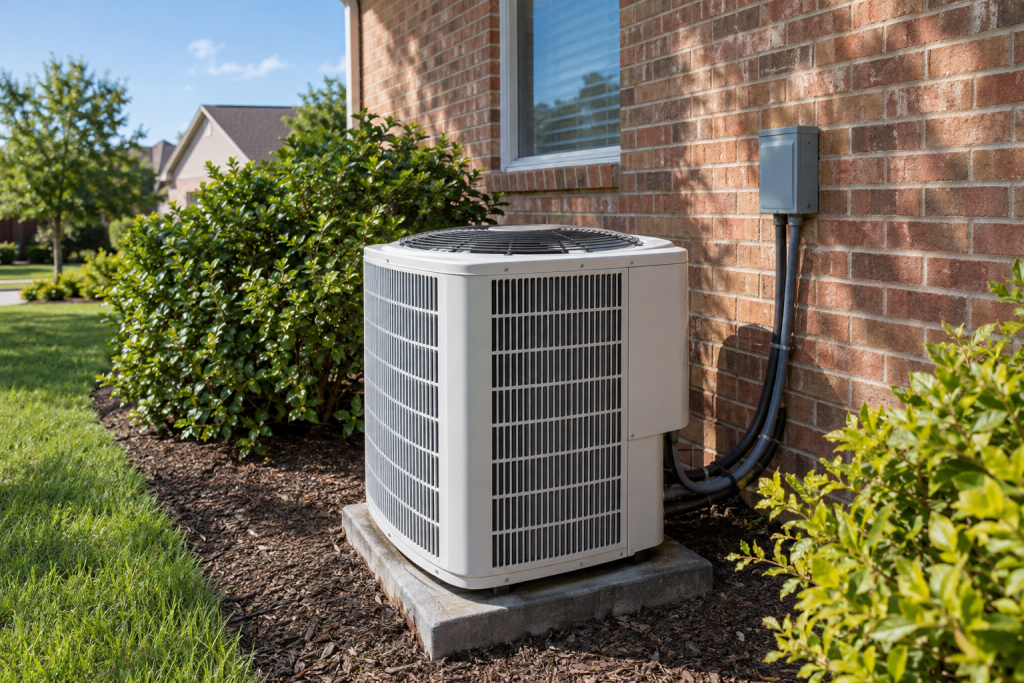
Most air conditioners that quit can be put back to work with a thermostat check, a reset breaker, a clean filter, a cleared drain line, or a $20 capacitor. Work through the eight checks below in order, since each one rules out the cause of the next. If you get to refrigerant or the compressor, stop and hire an HVAC tech, because those two repairs need an EPA 608 license and gauges.
Quick steps: fix an air conditioner that isn't cooling
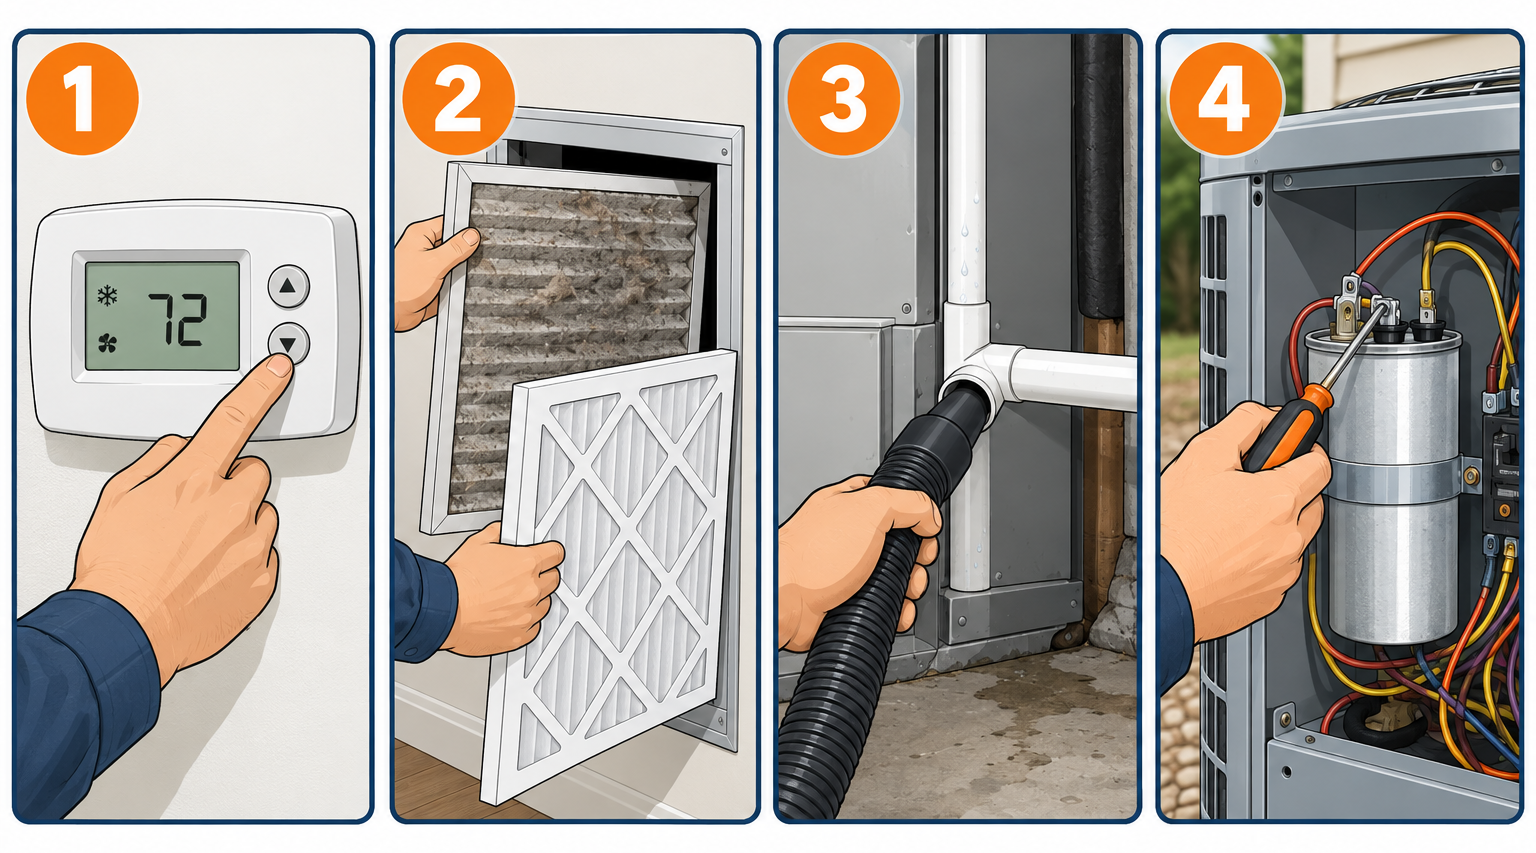
- Set the thermostat to Cool, drop the setpoint 5°F below room temperature, and replace its batteries.
- Reset the breakers for the condenser and air handler once, then pull and reseat the outdoor disconnect.
- Replace a dirty filter and open every supply and return register.
- Clear the condensate drain line with a wet/dry vac and reset the float switch.
- If the indoor coil or copper lines are iced, run the fan only for 2 to 4 hours to thaw them.
- Shut off power and rinse the outdoor condenser coil from the inside out with a garden hose.
- Test the run capacitor with a multimeter and swap it if it reads more than 6% low or bulges.
- Check the contactor for pitted contacts and confirm 24 volts reaches its coil; call a pro for refrigerant or compressor faults.
Tools and materials
- Multimeter with capacitance (µF) setting
- Non-contact voltage tester
- Insulated screwdriver and 1/4″ and 5/16″ nut drivers
- Wet/dry shop vacuum with a 1-1/4″ or 2-1/2″ hose
- Replacement pleated filter (size printed on the old frame, MERV 8 to 11)
- Foaming coil cleaner (no-rinse for indoor coil, rinse type for outdoor)
- Fin comb sized to your coil (most residential coils are 14 to 22 fins per inch)
- Garden hose with spray nozzle
- Replacement dual run capacitor matched to the microfarad and voltage on the old label
- Replacement contactor (24V coil, 30 or 40 amp, 1 or 2 pole to match)
- Zip ties, electrical tape, duct tape for the vacuum seal
- Work gloves and safety glasses
Calculators for this job
Safety first
Flip the condenser breaker off and pull the outdoor disconnect before opening the service panel, then confirm zero volts with a tester. Discharge the capacitor terminals with an insulated screwdriver before touching it; a charged 440V capacitor can stop your heart.
Step 1: Rule out the thermostat and power supply
Start indoors. Set the mode to Cool (not Auto, not Fan), lower the setpoint at least 5°F below the current room reading, and wait. Most modern condensers have a 3 to 5 minute compressor delay after any power change, so standing at the outdoor unit for 30 seconds tells you nothing.
If the thermostat screen is blank or dim, replace the batteries. Honeywell, Emerson and most Ecobee and Nest units either run on AA or AAA cells or need a C wire for power. A dead screen with fresh batteries usually means the 3 amp automotive-style fuse on the furnace control board blew, or the float switch in Step 4 opened the circuit.
Now go to the electrical panel. The condenser normally sits on a double-pole 30 to 60 amp breaker, and the air handler or furnace on a 15 or 20 amp single breaker. A tripped breaker often rests halfway between On and Off, so push it fully Off, then back On. Reset once. If it trips again within a minute, you have a shorted compressor, a seized fan motor, or a bad capacitor, and you should not keep resetting it.
The last link is the pull-out disconnect mounted on the wall near the condenser. Pull the handle, look for scorched blades or a blown cartridge fuse, and push it back in firmly. Landscapers and kids knock these loose more often than you would think.
Expected result after Step 1: the indoor fan runs, the outdoor fan spins, and the large insulated copper line feels cold within 10 minutes. If the outdoor unit hums but nothing spins, skip to Step 7.
Step 2: Replace the filter and open the airflow path
A clogged filter is the single most common reason an AC blows cool but weak air, then freezes up. Pull the filter from the return slot or the blower compartment and hold it to a light. If you cannot see light through most of it, replace it.
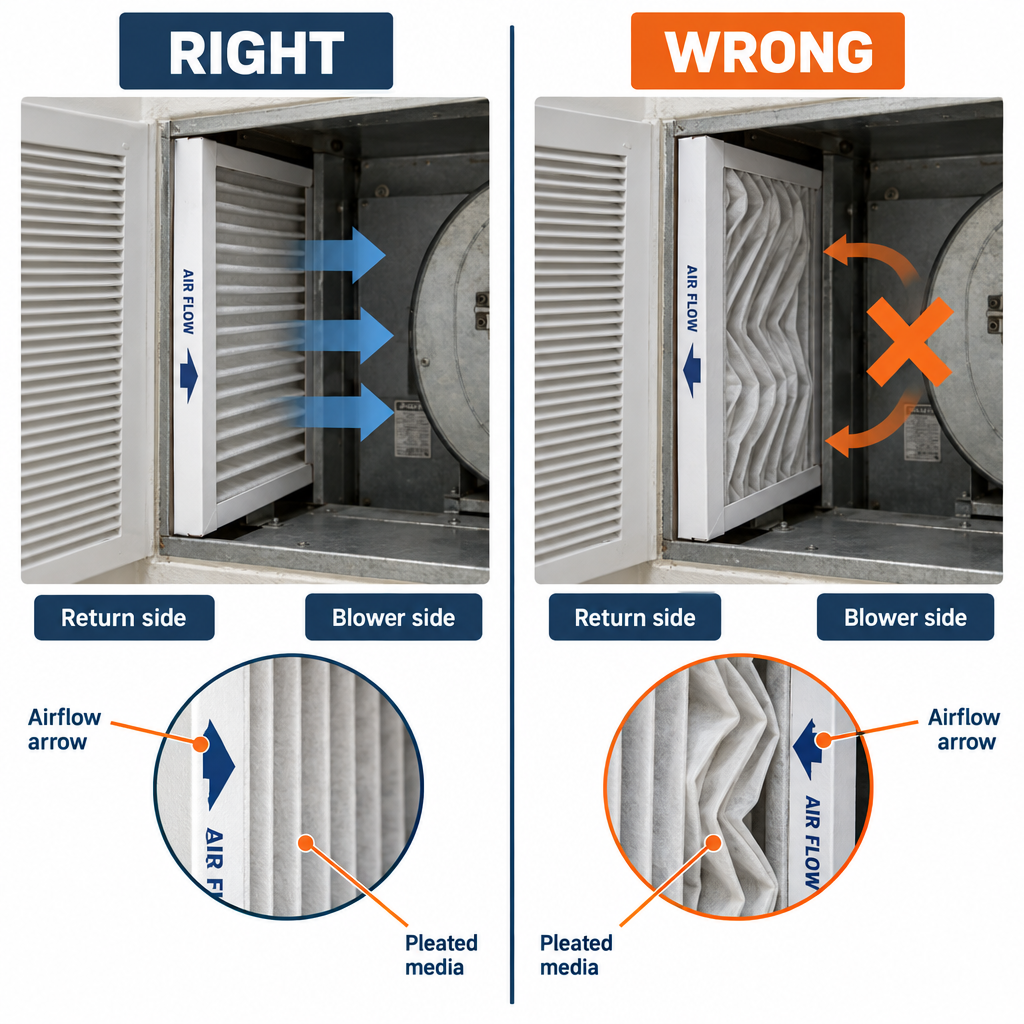
The size is printed on the cardboard frame. Common sizes are 16x25x1, 20x25x1, 16x20x1 and 20x25x4 for media cabinets. The arrow on the frame points in the direction of airflow, which is toward the blower, never toward the return grille.
Stick with MERV 8 to 11 for a standard residential blower. A MERV 13 filter in a 1-inch slot chokes airflow on many older systems and causes the same freeze-up symptoms as a dirty filter. Change 1-inch filters every 30 to 60 days in summer, 4-inch media filters every 6 to 12 months.
While you are at it, walk the house and open every supply register, pull furniture off floor vents, and clear the return grille. Closing vents in unused rooms does not save energy on a fixed-speed system. It raises static pressure, cuts airflow across the coil, and drops coil temperature below freezing.
Pro tip
Write the install date on the filter frame with a Sharpie. When a tech asks “when did you last change the filter,” you want an answer better than “a while ago,” because a frozen coil from a 6-month-old filter is not a warranty claim.
Step 3: Measure the temperature split before you go further
This 2-minute test tells you whether the system is cooling at all, and whether the problem is airflow or refrigerant. Let the AC run 15 minutes, then hold a probe or infrared thermometer in the return grille, then in the supply register closest to the air handler.
A healthy system shows a 16 to 22°F drop between return and supply air. Here is how to read what you get:
| Temperature split | What it means | Where to look |
|---|---|---|
| 16-22°F | System is cooling normally | Thermostat placement, duct leaks, undersized unit on a 100°F day |
| 8-15°F | Weak cooling | Dirty condenser coil, low refrigerant, failing compressor valves |
| 23°F or more | Low airflow | Dirty filter, closed vents, dirty evaporator coil, blower on low speed |
| 0-3°F | No cooling at all | Compressor not running, contactor, capacitor, no power outdoors |
Record the number. It also makes you a much harder customer to upsell, because a tech who says “your coil is shot” on a system showing a 19°F split needs to explain that.
Step 4: Clear the condensate drain and reset the float switch
If the thermostat went blank or the system shut down on a humid day, the condensate drain is the first suspect. Your evaporator coil pulls 5 to 20 gallons of water out of the air daily in summer. It leaves through a 3/4-inch PVC line, and algae in that line plugs it every couple of years.
Most systems installed since the mid-2000s have a float switch (a small white or gray box on the drain line or in the pan) that cuts 24-volt power to the thermostat when water backs up. Lift the cover. If the float sits up, you found the problem.
Find where the drain line exits outside, usually a PVC stub near the condenser or a foundation wall. Seal your wet/dry vac hose over it with a rag or duct tape and run the vacuum for 2 to 3 minutes. You will hear the slug of water and gunk let go. Then go inside, pull the cap off the vent or cleanout tee near the air handler, and pour in one cup of distilled white vinegar. Skip bleach, which eats the metal drain pan and the rubber in the float switch over time.
Wipe out the primary drain pan under the coil if you can reach it. A rusted pan with standing water needs replacement, which runs $200 to $500 installed because the coil usually has to come out.
Expected result: the float drops, the thermostat lights up, and the system restarts after its delay. Repeat the vinegar flush monthly during cooling season and you will not see this again.
Step 5: Thaw a frozen evaporator coil
Ice on the large copper suction line at the condenser, or frost on the indoor coil, means the coil dropped below 32°F. The two causes are low airflow (Step 2) or low refrigerant. Either way, you cannot diagnose anything until it thaws.
Turn the thermostat mode to Off and the fan setting to On. The blower pushes room air across the ice and melts it in 2 to 4 hours. A solid block of ice on a coil can take overnight. Put towels around the air handler because the drain pan will overflow as it melts.
Do not chip at the ice with a screwdriver. The coil fins are aluminum and the tubing walls are thinner than a soda can.
Once thawed, put in a fresh filter, set the system back to Cool, and watch it for an hour. If the suction line sweats cold droplets but stays ice-free and the split is in range, you are done. If frost creeps back within an hour with a clean filter and open vents, the system is low on refrigerant, and that means a leak. Keep the thaw-then-freeze cycle going and you will kill the compressor by sending liquid refrigerant back into it, so stop running it and book a tech.
Step 6: Clean the outdoor condenser coil
A condenser coated in cottonwood fluff, grass clippings and dryer lint cannot dump heat. The symptoms are a weak temperature split, high head pressure, a compressor that trips its internal overload after 20 minutes of running, and a power bill 20 to 30% higher than last July.
Shut off the breaker and pull the disconnect. Remove the screws holding the top grille and fan assembly (usually 5/16-inch hex heads), and lift the fan out, resting it on the side of the unit without stretching the motor wires. On some units you can skip this and spray through the outside of the coil, but inside-out is the only way to push debris out the way it came in.
Spray the coil from the inside with a garden hose nozzle at moderate pressure, working top to bottom. Never use a pressure washer, which folds fins flat in a single pass. For a greasy or heavily packed coil, spray on a rinse-type foaming coil cleaner from outside, wait 10 minutes, then rinse from inside until the water runs clear.
Straighten bent fins with a fin comb that matches the fins-per-inch count. Pull it gently in the direction of the fins; it is a 15-minute job on a badly dented coil and improves airflow noticeably.
Before reassembly, trim shrubs and grass back to leave 24 inches of clearance on every side and 5 feet above the fan. Reinstall the fan, restore power, and check the split again after 20 minutes.
Pro tip
Check the side of the condenser for the manufacture date on the data plate. If it is 15 years or older and running R-22, do not spend $800 on a refrigerant top-off. R-22 has been out of production since 2020 and costs several times what R-410A does per pound, so that money belongs toward a replacement.
Step 7: Test and replace the run capacitor
The capacitor is the part that fails most, and it is the easiest part to replace. The signs are unmistakable: the outdoor unit hums or clicks but the fan does not spin, the fan starts only after you push it with a stick, the compressor starts and shuts down within seconds, or the breaker trips on startup. A capacitor with a domed top or oily residue at the base is already dead.
With power off at both the breaker and disconnect, open the service panel on the condenser. The capacitor is a silver can, 2 to 3 inches in diameter, with three terminal clusters labeled C (common), HERM (compressor) and FAN. Confirm with your voltage tester that nothing is live.
Discharge it by laying an insulated screwdriver blade across C and HERM, then C and FAN. You may see a small spark. Now photograph the wiring, or label each wire with tape, before pulling the spade connectors. Needle-nose pliers help; grab the connector, not the wire.
Set your multimeter to capacitance and read HERM to C, then FAN to C. Compare against the label. A capacitor marked 40/5 µF should read 37.6 to 42.4 on the HERM side (the usual tolerance is ±6%) and roughly 4.7 to 5.3 on the fan side. Anything lower, or a reading that drifts, means replacement.
Buy an exact match on microfarads. On voltage, a 440V capacitor can replace a 370V, but never the reverse. Round versus oval does not matter as long as it fits the strap. A dual run capacitor costs $10 to $40 at a supply house or online, and an HVAC company typically charges $150 to $400 to do the same job.
Mount the new one in the strap, reconnect the wires per your photo, restore power, and listen. The fan should start within a second of the contactor pulling in, and the compressor should settle into a steady hum instead of a strained one.
Step 8: Inspect the contactor and low-voltage circuit
If the capacitor tests good and the outdoor unit still sits silent, the contactor is next. It is a black relay about the size of a deck of cards, with two heavy line wires in the top, two load wires out the bottom, and two thin 24-volt wires on the coil terminals at the sides.
With power on and the thermostat calling for cool, carefully set your meter to AC volts and read across the two small coil terminals. You should see 24 to 28 volts. If you do, but the contactor does not pull in with an audible clunk, the coil is dead. If you read zero volts, the problem is upstream: a tripped float switch, a blown control fuse, a chewed thermostat wire, or a bad thermostat.
Kill power again and look at the contacts. Pitted, burned or welded contacts stick, which is why some units keep running after the thermostat satisfies. Ants are also a surprisingly common cause, since they crawl into the contact gap and get crushed, building an insulating layer.
A replacement contactor runs $15 to $40 and installs in 15 minutes: photograph the wiring, remove the two mounting screws, move wires one at a time to the new part, and match the amp rating (30 or 40 amp) and pole count (1 or 2 pole) printed on the old one. Pros charge $150 to $350 for the same swap.
If the contactor pulls in, the capacitor is good, and the compressor still only buzzes or trips the breaker, that is a locked rotor or grounded windings. A hard start kit occasionally buys a tired compressor another season, but a compressor that is shorted to ground is a $1,500 to $3,000 replacement, and on a system over 12 years old, usually a full system replacement instead.
Repair costs: DIY versus hiring it out
Prices vary by region and refrigerant type, but these ranges reflect what homeowners across the US pay in a typical cooling season.
| Repair | DIY part cost | Typical pro cost | DIY-friendly? |
|---|---|---|---|
| Filter replacement | $5-25 | $75-150 (service call plus filter) | Yes |
| Condensate drain clearing | $0-10 (vinegar) | $100-250 | Yes |
| Condenser coil cleaning | $10-20 (cleaner) | $100-300 | Yes |
| Dual run capacitor | $10-40 | $150-400 | Yes, with care |
| Contactor | $15-40 | $150-350 | Yes, with care |
| Condenser fan motor | $100-250 | $300-700 | Experienced DIYers |
| Blower motor (PSC) | $100-200 | $400-900 | Experienced DIYers |
| ECM/variable-speed blower motor | $300-700 | $700-1,800 | No |
| Refrigerant leak search and repair | Not legal without EPA 608 | $200-1,500 plus refrigerant | No |
| Refrigerant recharge (R-410A) | Not legal without EPA 608 | $50-150 per pound installed | No |
| Evaporator coil replacement | n/a | $1,200-2,800 | No |
| Compressor replacement | n/a | $1,500-3,000 | No |
Diagnostic or service call fees run $75 to $200 and are often waived or credited if you approve the repair. Weekend and after-hours rates add 50 to 100%.
Troubleshooting: symptoms, causes and fixes
| Symptom | Likely cause | Fix |
|---|---|---|
| Thermostat blank | Dead batteries, open float switch, blown 3A board fuse | Replace batteries; clear drain and reset float; replace fuse after finding the short |
| Indoor fan runs, outdoor unit silent | Tripped condenser breaker, pulled disconnect, bad contactor coil, no 24V | Reset breaker once, reseat disconnect, test for 24V at contactor |
| Outdoor unit hums, fan does not spin | Failed capacitor or seized fan motor | Replace capacitor; if the fan is stiff by hand, replace the motor |
| Blows warm air, both fans running | Dirty condenser, low refrigerant, compressor not running | Clean coil; measure split; listen for compressor hum; call for refrigerant |
| Ice on copper line or coil | Dirty filter, closed vents, low refrigerant | Thaw with fan only, replace filter, retest; recurring frost needs a leak check |
| Short cycles every 2-5 minutes | Oversized unit, dirty coil, low refrigerant, failing capacitor, thermostat near a register | Clean coil, test capacitor, move or recalibrate thermostat |
| Water pooling at air handler | Clogged drain, cracked pan, missing trap | Vacuum drain line, inspect pan, add a P-trap if the line has none |
| Breaker trips on startup | Shorted capacitor, grounded compressor, weak breaker | Test capacitor; if good, have a tech megohm test the compressor |
| Runs constantly but never reaches setpoint | Undersized unit, leaky ducts, dirty evaporator, low charge | Check split; seal ducts; clean indoor coil; call for charge check |
| Loud grinding or squealing | Fan motor bearings, bent fan blade hitting shroud | Shut off immediately; replace motor or blade |
| Burning smell from vents | Dust on first start, failing blower motor, overheating wiring | Normal for 10 minutes on first run; persistent smell means shut it down |
Common mistakes that turn a cheap fix into an expensive one
Resetting a tripped breaker over and over. Each reset on a shorted compressor pumps more current through a weakened winding, and the breaker itself wears out.
Running the system with a frozen coil. Liquid refrigerant flooding back to the compressor washes oil off the bearings and destroys valves. One frozen weekend can finish a 10-year-old compressor.
Buying a capacitor by looks instead of label. A 45/5 µF in place of a 35/5 µF overdrives the compressor winding and shortens its life.
Pressure-washing the condenser. Flattened fins block more airflow than the dirt did.
Paying for a refrigerant “top-off” without a leak repair. Refrigerant does not get used up; a system that needs 2 pounds has a hole in it, and you will pay again next year.
Topping off a system yourself with a DIY can. Those cans are for cars. Home systems need a weighed charge, and the EPA requires a 608 certification to buy and handle R-410A and R-22 in quantity.
When the job stops being DIY
Anything involving the sealed refrigerant circuit is off limits for an unlicensed homeowner, and that is federal law, not just caution. That includes leak searches, brazing a line, replacing an evaporator coil or TXV, and adding charge. Electrical work inside the panel, a new disconnect, or a new circuit for a replacement condenser also needs a licensed electrician and usually a permit.
When to call a pro
Call an HVAC technician if the coil refreezes after a filter change, the breaker trips again after one reset, the compressor buzzes with a good capacitor and contactor, you see oil stains on refrigerant lines, or the temperature split stays under 12°F after a coil cleaning. Ask for a tech with EPA 608 certification, and for anything over $1,500, get a second quote.
How to pick a repair company you will not regret
Confirm the company is licensed in your state (most states list HVAC contractors in a searchable online database) and carries liability insurance. Ask whether the tech on the truck holds NATE certification; it is not required, but it is the one credential in the industry that tests actual diagnostic skill.
Get the diagnostic fee in writing before they roll a truck, and ask whether it is credited toward the repair. Then ask for the diagnosis in terms you can verify: “the capacitor reads 22 µF on a 40 µF rating” or “suction pressure is 95 psi with a 20°F superheat” are real findings. “The system is old and tired” is not.
Be wary of any tech who recommends replacement without showing you a measurement, pushes same-day financing, or quotes refrigerant by the “top-off” without mentioning a leak. A good company will also tell you when a repair is not worth it. A reasonable rule of thumb: multiply the repair cost by the system’s age in years, and if that number passes $5,000, replacement usually wins on math alone.
What a fixed air conditioner looks like
You will know the repair worked when all of the following hold for a full afternoon of operation. The thermostat reaches setpoint and the system cycles off, with run times of 15 to 25 minutes on a hot day. The temperature split sits between 16 and 22°F. The large copper line at the condenser is cold and sweating but not frosted, and the small line is warm. Water drips steadily from the outdoor drain stub, and the condenser fan discharges air noticeably hotter than outside air.
Write down the split, the date, and whatever you replaced. Next summer, that record is the fastest diagnosis you will ever get.
FAQ
Why is my AC running but not cooling the house?
Both fans running with warm supply air points to one of three things: a dirty condenser coil that cannot reject heat, a refrigerant leak, or a compressor that is not actually running inside the humming outdoor unit. Clean the coil first, then measure the temperature split. A split under 10°F after cleaning means it is time for a tech with gauges.
Can I fix a refrigerant leak myself?
No. EPA regulations under Section 608 of the Clean Air Act require certification to buy and handle refrigerants like R-410A and R-22, and the fix involves nitrogen pressure testing, brazing, vacuuming the system to 500 microns, and weighing in a charge. Expect $200 to $1,500 for the leak repair plus refrigerant, which runs roughly $50 to $80 per pound installed for R-410A, about $80 per pound for R-454B, and anywhere from $90 to $350 per pound for R-22.
How long should I wait after resetting the breaker?
Give it 5 minutes. Nearly every condenser built since the 1990s has a compressor anti-short-cycle timer of 3 to 5 minutes, so the outdoor unit will sit silent after a power interruption even when nothing is wrong.
How do I know if the capacitor or the fan motor is bad?
Shut off power and spin the condenser fan by hand. If it turns freely and the unit hums with power on, the capacitor is the likely culprit. If the blade is stiff, wobbly or grinds, the motor bearings are gone. A multimeter capacitance reading settles it in under a minute.
Is it worth repairing a 15-year-old air conditioner?
For a capacitor, contactor or drain line, absolutely, since those are under $400. For a compressor, evaporator coil, or any R-22 refrigerant work, replacement is nearly always the better buy. Systems made since 2023 must meet higher SEER2 efficiency minimums, and new units built from 2025 on use lower-global-warming refrigerants like R-454B and R-32. The higher efficiency rating, not the refrigerant, is what lowers your power bill compared with a 15-year-old 10 SEER unit.
Why does my AC keep freezing up?
Ice means the coil is colder than 32°F, which comes from too little air moving across it or too little refrigerant inside it. Replace the filter, open every vent, and check that the blower is actually running on its cooling speed. If a clean system still frosts within an hour, it has a leak.
How often should I have my AC serviced?
Once a year, before the cooling season, is the standard. A proper tune-up includes checking refrigerant pressures and superheat, cleaning both coils, testing the capacitor and contactor, flushing the drain, and measuring amp draw on the compressor and both motors. Expect $80 to $200 for a standalone visit, less with a maintenance plan.