
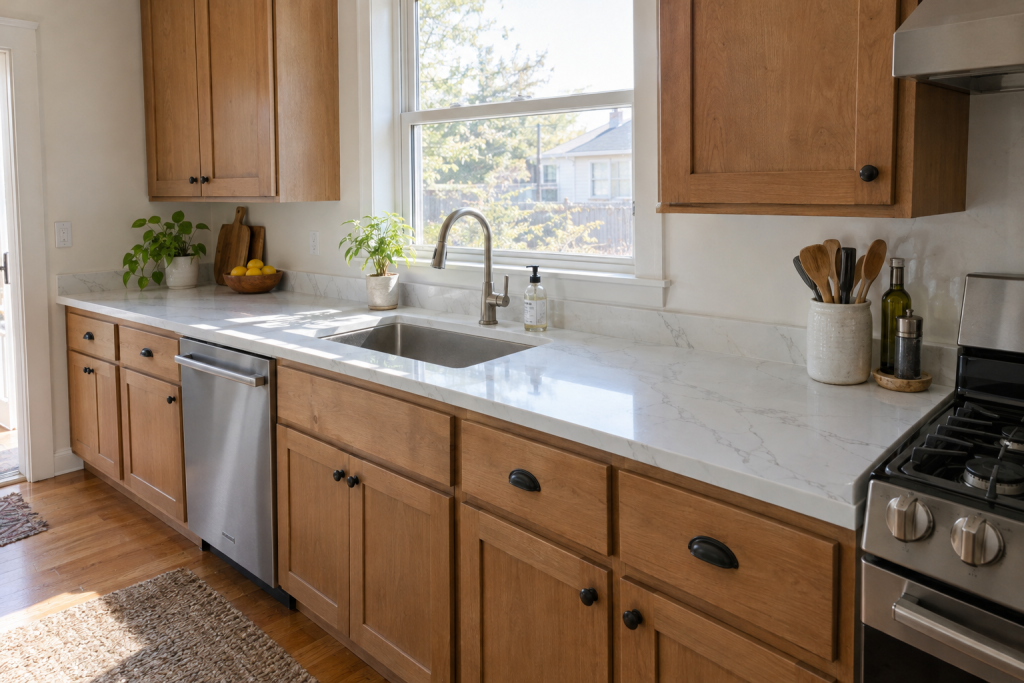
Quartz countertops are the right choice for most kitchens: they don’t need sealing, they shrug off stains and daily wear, and they cost about the same as mid-grade granite at $60 to $120 per square foot installed. The trade-offs are heat sensitivity, poor outdoor performance and a look that some people find less lively than natural stone. Here’s how to judge quartz as a countertop for your kitchen, budget it, and get it from showroom to installed slab without surprises.
Quick steps: choosing and installing quartz countertops
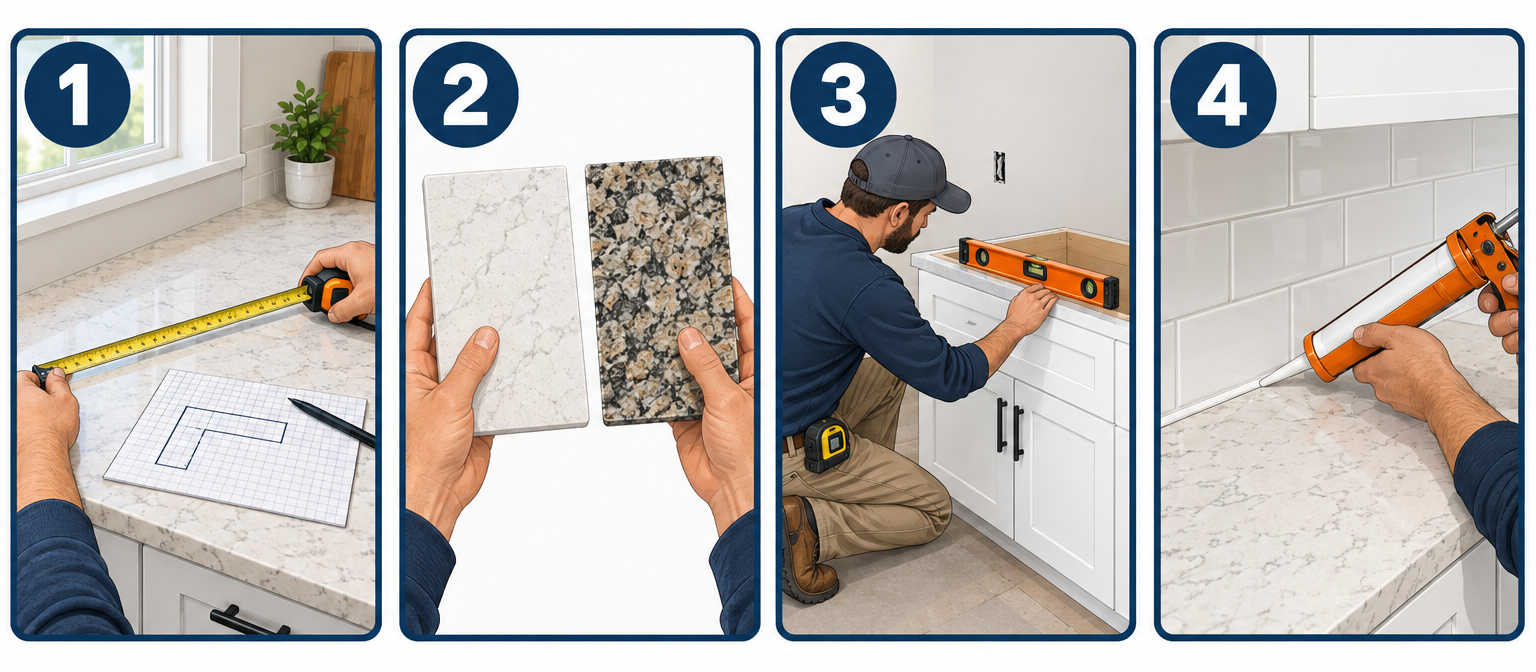
- Measure your counters and sketch the layout to estimate square footage.
- Decide whether quartz beats granite, quartzite or marble for your kitchen.
- Pick a brand, color, thickness and edge, and take full-size samples home.
- Get three fabricator quotes that include sink cutouts, seams and removal.
- Book the template visit with cabinets level and sink on site.
- Clear and prep the kitchen; demo the old top if you’re doing it yourself.
- Inspect seams, overhangs and level on install day before signing off.
- Let adhesives cure 24 hours, then reconnect plumbing and seal to the backsplash.
Tools and materials
- 25 ft tape measure and graph paper (or a free kitchen planner app)
- 4 ft level for checking cabinets
- Cordless drill with Phillips and square bits for removing the old top
- Flat pry bar and utility knife
- Adjustable wrench, bucket and towels for disconnecting the sink
- 100% silicone caulk, color-matched to the slab, plus a caulk gun
- Composite shims for leveling cabinets
- 3/4 in plywood if you’re installing 2 cm prefab quartz (substrate)
- Quartz samples, at least 4 x 4 in, in your finalist colors
Calculators for this job
Safety first
A 3 cm quartz slab weighs roughly 18 to 20 pounds per square foot, so a 10 ft run is 300 pounds or more. Never cut, grind or drill quartz indoors or without a wet saw and a respirator; the dust is crystalline silica, which causes silicosis.
Step 1: Understand what quartz actually is
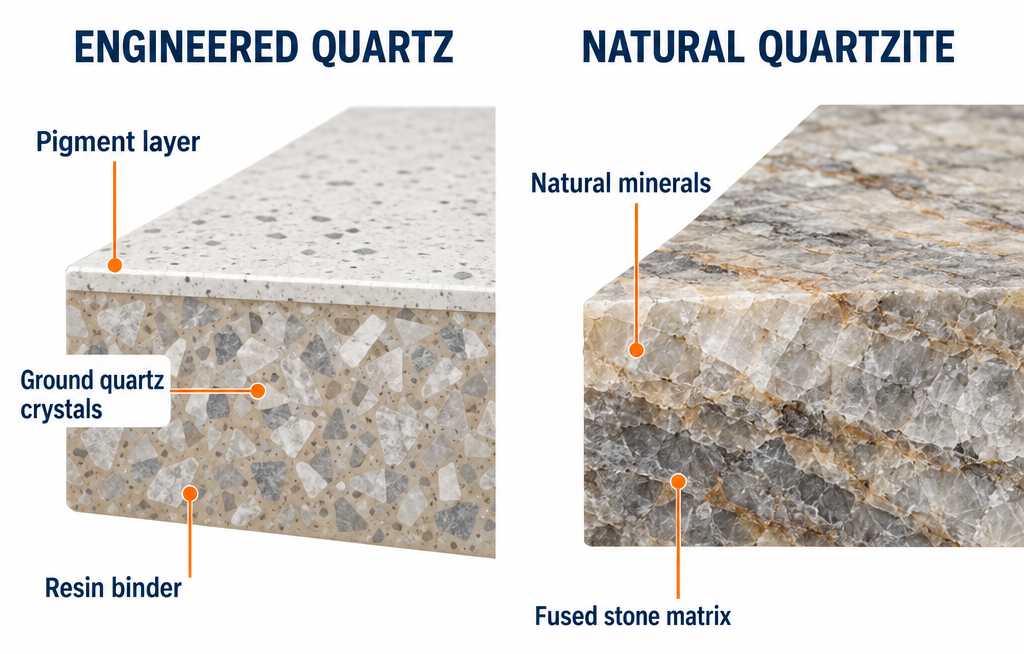
Quartz countertops are engineered stone, not quarried slabs. Manufacturers grind natural quartz crystals, mix them with about 7 to 10 percent polymer resin and pigment, press the slurry under vacuum and vibration, then cure and polish it. The result is a dense, non-porous slab with a consistent pattern from one end to the other.
That manufacturing process explains nearly every pro and con on the list. The resin is what makes quartz stain resistant and seal-free, and it’s also what scorches under a hot pan and yellows in direct sun.
Don’t confuse quartz with quartzite. Quartzite is a natural metamorphic rock cut straight from the ground, harder than granite, and it needs sealing like any natural stone. Showrooms sometimes blur the two, so ask directly which one you’re looking at.
| Factor | Quartz (engineered) | Quartzite (natural) |
|---|---|---|
| Made of | 90-93% ground quartz, 7-10% resin and pigment | 100% natural sandstone fused by heat and pressure |
| Sealing | Never | Every 1-2 years |
| Heat tolerance | Trivets required | Handles hot pans |
| Pattern | Consistent, repeatable | Unique per slab |
| Installed cost | $60-120 per sq ft | $80-200 per sq ft |
| Stain risk | Very low | Moderate without sealer |
Step 2: Weigh the pros and cons honestly
Quartz has topped the Houzz kitchen trends survey as the most chosen countertop material for several years running, and for good reason. Still, it isn’t the automatic answer for every home.
| Pros | Cons |
|---|---|
| Non-porous, so coffee, wine and oil won’t soak in | Resin scorches and can crack from thermal shock; use trivets every time |
| No sealing, ever | UV exposure yellows and fades it; most warranties exclude outdoor use |
| Consistent color makes seams and matching easy | Pattern can look flat compared with granite or marble |
| Hard to scratch, roughly Mohs 7 on the quartz content | Chips at edges from dropped cast iron are hard to repair invisibly |
| Hundreds of designs, including convincing marble looks | Price overlaps with real granite and lower-end quartzite |
| Lifetime residential warranties from several brands | Heavy; 2 cm needs plywood support, 3 cm needs solid cabinets |
| Easy to clean with dish soap and water | Harsh cleaners (bleach, oven cleaner, high-pH degreasers) can dull the surface |
The heat issue deserves emphasis because it’s the one that bites people. Manufacturers commonly cite roughly 300°F as the point where resin starts to discolor. A pan straight off a burner, a slow cooker base, or an air fryer running for 40 minutes on the counter can all exceed that. Granite and quartzite take that abuse; quartz does not.
The flat-pattern complaint is subjective. Modern printing and veining processes have closed the gap dramatically, and a well-made Calacatta-style quartz fools most guests. Decide by looking at a full slab, not a chip, because that’s where the difference between a $55 and a $110 quartz usually shows.
Step 3: Compare quartz against granite and marble
If you’re torn, compare on the four things that matter in a working kitchen: upkeep, durability, look and price.
| Material | Installed cost per sq ft | Sealing | Heat | Scratch resistance | Best for |
|---|---|---|---|---|---|
| Quartz | $60-120 | None | Trivets required | High | Busy families, low maintenance, consistent look |
| Granite | $45-100 | Yearly for most colors | Excellent | High | Heavy cooks who set hot pans down |
| Quartzite | $80-200 | Every 1-2 years | Excellent | Very high | Natural marble look with better durability |
| Marble | $60-150 | Every 6-12 months | Good | Low, etches with acid | Bakers and anyone who accepts patina |
| Butcher block | $35-80 | Oil monthly | Poor | Low | Islands, budget kitchens |
Marble is the material quartz most often imitates. Real marble etches the instant lemon juice or vinegar touches it, leaving dull spots that polishing won’t remove. If you want the marble look without babying the surface, a marble-look quartz is the practical answer. If you want the real thing and will treat it as a luxury finish that ages, buy marble.
Granite remains the value play. Entry-level granite colors often undercut quartz by $15 to $25 per square foot installed, and granite laughs at heat. The cost is annual sealing and a pattern you have to accept slab by slab.
Step 4: Set a realistic budget
Quartz pricing is quoted per square foot installed, and the final number depends on brand tier, color, thickness, edge profile and how many cutouts and seams your layout needs. A standard kitchen has 40 to 50 square feet of countertop. An island with seating adds 15 to 25 more.
| Cost item | Typical range | Notes |
|---|---|---|
| Entry-tier quartz (MSI, Viatera, big-box house brands) | $50-75 per sq ft installed | Solid colors and simple speckles |
| Mid-tier (Silestone, Caesarstone, LG Viatera premium) | $70-100 per sq ft installed | Marble looks and larger veining |
| Premium (Cambria, Caesarstone Calacatta series) | $95-150 per sq ft installed | Bold veins, book-matched designs |
| Undermount sink cutout | $150-400 each | Polished cutout costs more than a drop-in |
| Cooktop cutout | $100-250 | |
| Upgraded edge (ogee, mitered, bullnose) | $10-40 per linear ft | Eased edge is usually included |
| Waterfall end panel | $800-2,000 each | Includes mitered seam and extra slab |
| Removal and disposal of old tops | $150-500 | Often waived if you demo yourself |
| Plumbing disconnect and reconnect | $150-400 | Or DIY in under an hour |
For a 45 square foot L-shaped kitchen in mid-tier quartz with one undermount sink and a standard edge, expect $3,800 to $5,500 all-in. The same kitchen in a premium veined quartz with a 2 cm mitered edge runs $6,500 to $9,000.
Two ways to save real money. First, ask fabricators about remnant slabs, which are leftover pieces from larger jobs; a bathroom vanity or small island can often be done from a remnant at 30 to 50 percent off. Second, keep your layout to one slab if possible. A typical slab is about 55 by 120 inches, and jumbo slabs run roughly 63 to 65 by 126 to 130 inches. If your longest run fits inside a jumbo, you skip a seam and a second slab charge.
Pro tip
Get quotes by sending every fabricator the same hand sketch with dimensions, sink model and edge choice. Quotes come back comparable instead of each shop guessing a different layout, and you’ll immediately spot the shop that forgot to include the cutout.
Step 5: Choose brand, color, thickness and edge
Brand matters less for durability than people assume. The major players (Cambria, Caesarstone, Silestone by Cosentino, MSI Q, LG Viatera, Dekton’s parent Cosentino, HanStone) all use similar Breton-style production. Where they differ is design quality, warranty and availability.
Cambria is made in Minnesota and backs its product with a full lifetime residential warranty, and it skews premium. Caesarstone and MSI also offer lifetime residential warranties. Silestone carries a 25-year warranty. Read the exclusions: nearly all of them void coverage for outdoor installs, heat damage and improper support.
Thickness comes down to 2 cm (about 3/4 inch) versus 3 cm (about 1-1/4 inch). In the US, 3 cm is standard, needs no plywood underlayment, and can overhang up to about 12 inches for seating without corbels. Choose 2 cm only for a built-up mitered edge, a backsplash or a bathroom vanity, and plan on a 3/4 inch plywood substrate underneath.
Finish options are polished (glossy, most common), honed or matte (soft, hides fingerprints, shows oil marks more) and textured or “suede” finishes. Honed white quartz looks stunning and shows every grease smear; wipe it down more often or go polished.
Edge profiles in order of cost: eased (nearly square with a slight soften), bevel, half bullnose, full bullnose, ogee, and mitered waterfall. Eased suits almost every kitchen and is the easiest to keep clean.
Pro tip
Borrow or buy the largest sample the showroom offers and set it on your actual cabinets next to your flooring and backsplash tile for a full day. Quartz shifts noticeably between showroom LEDs and the warm light in most kitchens. Whites especially can read gray, cream or blue-tinged depending on bulbs.
Step 6: Prep for the template visit
Fabricators measure with a laser or digital template, and the number they capture is the number they cut. Anything not finished or on site at template becomes a change order.
Have these ready before the template appointment:
- Cabinets fully installed, screwed to the wall and to each other, and level within 1/8 inch across the run. Shim them now, not on install day.
- The actual sink on site, or at minimum the manufacturer’s cutout template. Undermount sinks are sized to the slab, and “roughly 33 inches” won’t cut it.
- The cooktop or range, or its spec sheet with cutout dimensions.
- Faucet, soap dispenser and any filtered water tap, so holes get drilled at the shop.
- Decisions on overhang length (1 to 1-1/2 inches is standard at the front), seating overhang (10 to 12 inches), and where seams can go.
Expect the templater to ask where you want seams. Push for seams away from the sink cutout and near corners, and ask the shop to lay out seams on the slab so veined patterns run through them. Good shops send you a photo of the slab layout to approve before cutting. If they don’t offer, ask.
Fabrication takes one to three weeks after template. Your kitchen can keep the old countertops right up until the day before install.
Step 7: Demo and install day
Most fabricators remove old tops for $150 to $500. Doing it yourself is a half-day job and saves that fee. Shut off the hot and cold angle stops under the sink, disconnect the supply lines and P-trap into a bucket, unplug the dishwasher and disposal, and unscrew the dishwasher mounting tabs from the underside of the old counter. Laminate tops are usually screwed up through the cabinet corner blocks; back the screws out, cut the backsplash caulk with a utility knife, and lift. Tile tops over plywood need a pry bar and will throw debris.
Installers arrive with the slabs, dry-fit each piece, shim low spots, then set them on beads of silicone along the cabinet tops. Seams are joined with color-matched two-part adhesive, pulled tight with a seam setter, and scraped flush. A good seam is 1/16 inch or less and nearly invisible on solid colors.
Before the crew leaves, walk the kitchen and check:
- Overhang is consistent along the front edge, and cabinet doors clear it.
- Seams are tight, flush (run a fingernail across; it shouldn’t catch) and color-matched.
- Surface is level across the sink run so water doesn’t pool.
- Undermount sink is centered in its cutout and clamped, not just glued.
- No chips at corners, cutouts or edges; shine a flashlight at a low angle.
- The gap at the back wall is 1/4 inch or less, ready for backsplash or caulk.
Keep weight off the counters for 24 hours while the silicone and seam adhesive cure. Reconnect the plumbing the next day, run water, and check every joint for drips. Then run a bead of 100% silicone where the counter meets the wall, and between the counter and the undermount sink rim if the installers didn’t.
If you’re using prefab 2 cm quartz pieces from a stone yard or home center, the process is DIY-able: pieces come pre-polished on the front edge, you cut the back edge and sink hole with a wet saw and diamond blade outdoors, set them on 3/4 inch plywood with silicone, and finish the raw edges with a polishing pad. It’s heavy, dusty work, and the finish never quite matches a shop edge, but a small galley or laundry room can come in under $1,500.
Step 8: Daily care that keeps the warranty intact
Quartz needs less than any other countertop, which is the whole point. Wipe with warm water and a drop of dish soap. For dried-on food, a plastic scraper or a non-scratch sponge. Glass cleaner without ammonia is fine for streaks on polished finishes.
Keep these off the surface permanently: oven cleaner, drain cleaner, bleach left to sit, paint stripper, high-pH degreasers, nail polish remover and anything with abrasive grit. All of them attack the resin and leave dull patches no polish fixes.
Use trivets or hot pads for every pot, pan, baking sheet and countertop appliance. Use cutting boards; quartz is hard enough to dull knives and the resin can still show fine scratches on dark colors. Clean up turmeric, beet juice and permanent marker quickly on white quartz. The surface doesn’t absorb them, but a long sit can leave surface staining that takes a magic eraser and patience.
Pro tip
Keep a 4 x 4 inch offcut from your install. If an edge chips years later, a repair tech can match the color and resin to that sample instead of guessing from a discontinued swatch, and a good chip repair with color-matched epoxy costs $150 to $300.
Troubleshooting quartz countertops
| Symptom | Likely cause | Fix |
|---|---|---|
| Cloudy or dull patch | Harsh cleaner or heat exposure damaged the resin | Light cases respond to a quartz polish compound; deep scorch needs a pro refinish or replacement section |
| Seam visible or catching a fingernail | Poor adhesive color match or seam set unevenly | Call the installer within the warranty window; seams can be re-cut and refilled |
| Hairline crack near sink or cooktop | Thermal shock, unsupported span, or cabinets settled | Stop using heat there; pro epoxy fill for cosmetic cracks, replacement if it’s spreading |
| Yellowing along a sunny window | UV breaking down resin | No reversal; shade the area with film or blinds and expect to live with it |
| Chip on front edge | Impact from a pot or cast iron | Color-matched epoxy chip repair kit ($20-40) for small chips, pro repair for anything over 1/4 in |
| Water pooling at sink | Counter installed out of level | Installers can lift and re-shim within the first week before silicone fully bonds |
| White haze after cleaning | Soap film or hard water buildup | Wipe with 50/50 water and white vinegar, then rinse; don’t leave vinegar sitting |
Where DIY stops
When to call a pro
Custom slab countertops are fabricator work, full stop: slab handling, seaming and cutouts need a shop, a crew and a wet saw setup. Call a licensed plumber if the sink or dishwasher supply uses old compression stops that won’t shut off cleanly, and an electrician if a new cooktop cutout means moving a 240 V circuit. If cabinets are out of level by more than 1/4 inch over a run, bring in a carpenter before the templater shows up, because quartz will crack on a twisted base.
One more reason to leave cutting to the shop. The dust from cutting engineered stone is nearly pure crystalline silica, and dry cutting it has caused a wave of silicosis among fabrication workers; Australia banned engineered stone outright in mid-2024 over it. Reputable US shops cut wet with dust extraction. Ask yours, and never let an installer dry-cut a slab in your driveway.
FAQ
Is quartz a good choice for a countertop?
For most households, yes. Quartz as a countertop gives you a non-porous, stain-resistant, never-seal surface at a mid-range price, with hundreds of designs from plain to marble-look. The exceptions are outdoor kitchens, sun-drenched windows and cooks who refuse to use trivets.
Can I put quartz on top of existing cabinets?
Yes, as long as the cabinet boxes are sound, screwed together and level. A quartz cabinet top in 3 cm needs no plywood; 2 cm quartz needs a 3/4 inch plywood substrate. Old face-frame cabinets with sagging corner blocks should be reinforced with 2×4 cross supports before templating.
How long do quartz countertops last?
With normal care, 20 to 30 years is routine, and several brands warranty residential installs for the owner’s lifetime. The surface doesn’t wear out; failures come from heat damage, UV exposure, or cracking from unsupported spans.
Does quartz stain?
Rarely, because it isn’t porous. Strong pigments like turmeric, beet juice or hair dye can leave surface marks on light colors if left for hours. A paste of baking soda and water, or a melamine sponge, removes most of them.
Which is better, quartz or granite?
Quartz wins on maintenance and consistency; granite wins on heat resistance and often on price for basic colors. If you set hot pans down without thinking, buy granite or quartzite. If you want to wipe and forget, buy quartz.
How much does a quartz slab cost by itself?
Material alone runs about $25 to $100 per square foot depending on grade and brand (roughly $25 to $40 for entry-level, $40 to $70 for mid-range and $70 to $100 or more for premium), and most fabricators sell quartz as part of an installed package rather than as bare slabs. Prefab 2 cm pieces at stone yards and home centers cost roughly $20 to $45 per square foot and are the only realistic DIY route.