
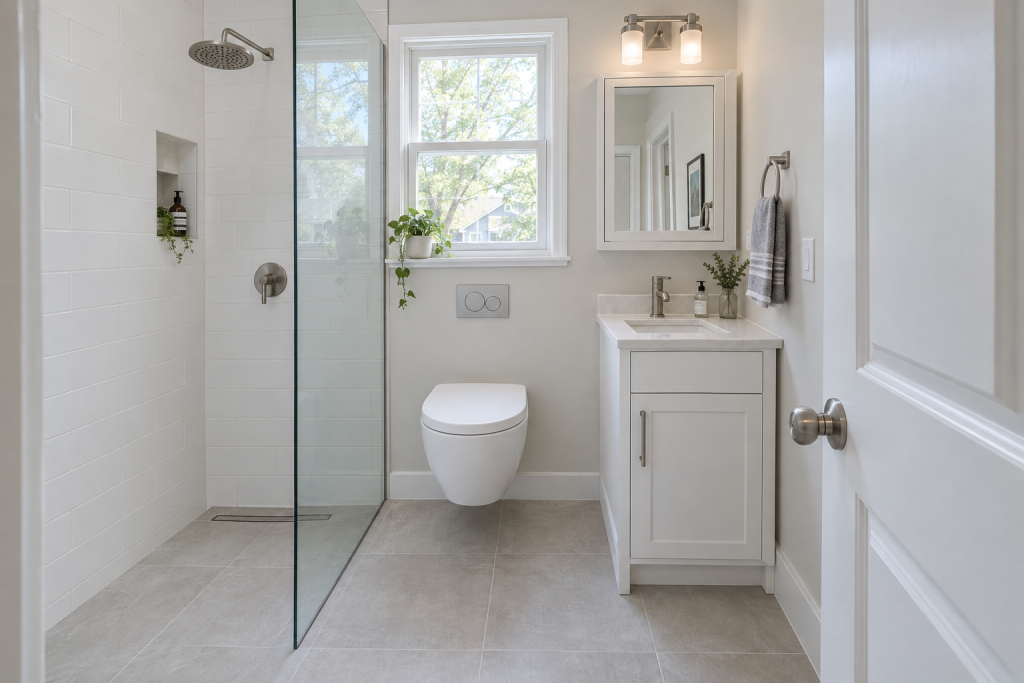
You keep a small bathroom fully functional by moving fixtures in, not out: swap the swing door for a pocket door, replace the 21-inch vanity with an 18-inch one, hang the toilet on the wall, and trade the tub for a 32-by-60 curbless shower behind a fixed glass panel. Done in that order, a 5-by-8 room still holds a toilet, sink, shower, storage and a full-size mirror, and most of the work stays within reach of a careful DIYer.
Quick steps: remodel a small bathroom
- Measure the room, mark code clearances and sketch two layouts.
- Pick space-saving fixtures: pocket door, shallow vanity, wall-hung toilet, glass panel.
- Pull permits, shut off water and power, then demo to the studs.
- Rough in plumbing, the 20-amp circuit, the exhaust fan and blocking.
- Build and waterproof the shower, set the drain, test for leaks.
- Tile floor and walls with large-format tile and a recessed niche.
- Set the toilet, vanity, faucet and shower trim.
- Add recessed storage, the mirror, lighting and the glass panel.
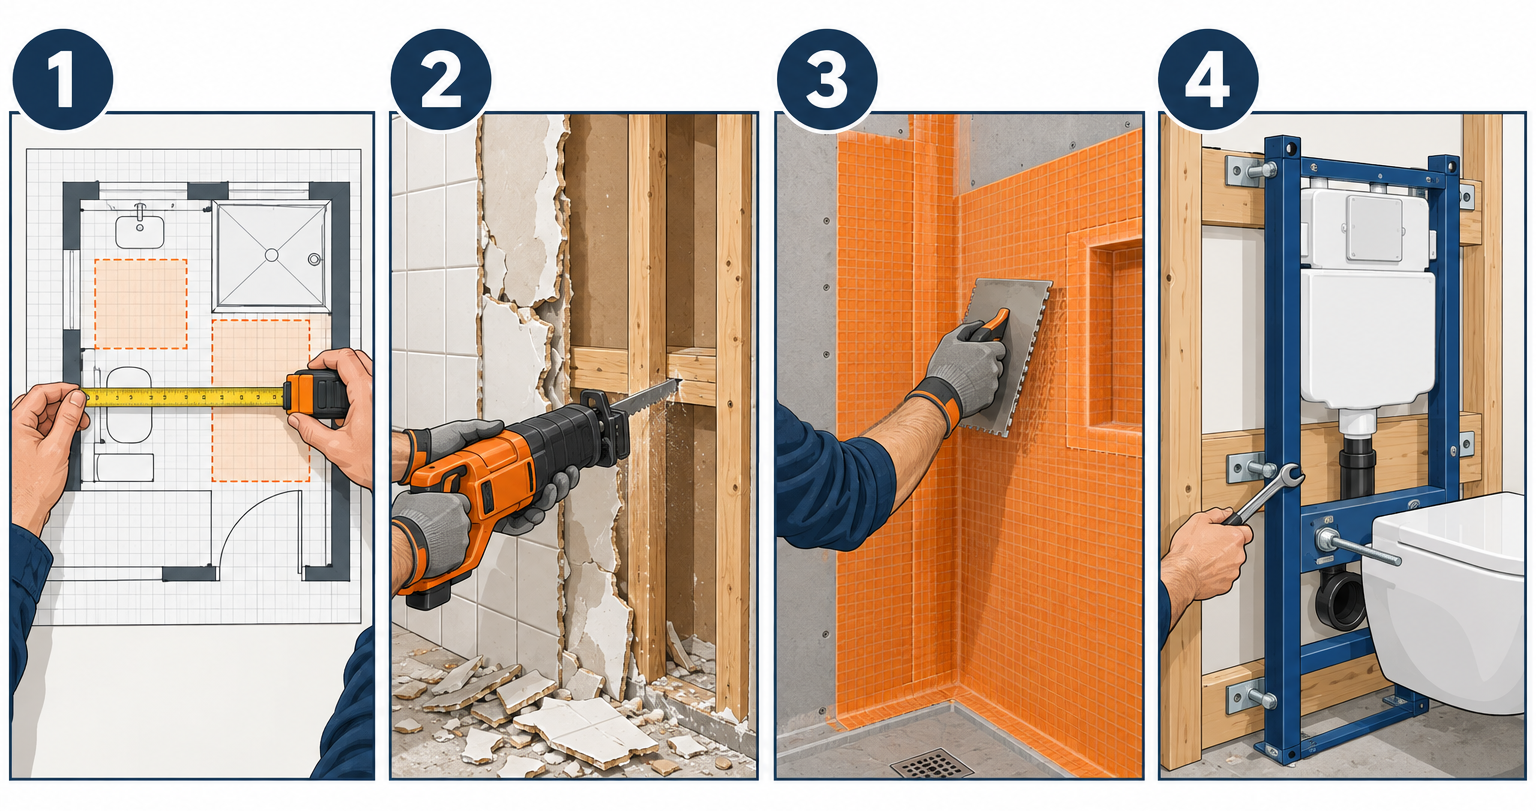
Tools and materials
- 25-foot tape measure, 4-foot level, stud finder, laser level
- Reciprocating saw, oscillating multitool, pry bar, flat bar
- Drill/driver, impact driver, 1/2-inch hammer drill for concrete
- Wet tile saw (7-inch or 10-inch), angle grinder with diamond blade
- 1/4-by-3/8 square-notch trowel for 12-by-24 tile, 1/2-inch square-notch for floors
- 1/2-inch cement board or foam board (Schluter Kerdi-Board, Wedi), alkali-resistant mesh tape
- Sheet membrane (Kerdi) or liquid membrane (RedGard, Hydro Ban), seam tape
- 2-inch PVC shower drain, 3-inch toilet flange, 1/2-inch PEX, PEX crimp or expansion tool
- 12/2 NM cable, 20-amp GFCI receptacle, 4-inch exhaust fan rated 50-80 CFM
- Modified thinset, unsanded or urethane grout, 100 percent silicone caulk
- Pocket door frame kit (Johnson 1500 series or similar) and 2-by-4 lumber for blocking
Calculators for this job
Safety first
Kill the bathroom circuit at the panel and confirm with a non-contact tester before demo. Shut the main water valve and open a lower faucet to drain. Wear a P100 respirator for any drywall or tile removal in a house built before 1980, because joint compound and vinyl flooring from that era can contain asbestos.
Step 1: Measure the room and map every clearance
Start with a dimensioned sketch on graph paper at 1/2 inch per foot, because every decision after this one depends on inches you can prove. Measure wall to wall at floor level and at 36 inches up, since old walls bow and the narrower number is the one that counts.
Mark the window, the door swing, the toilet flange center, the supply stub-outs and the existing drain for the sink and tub. Measure the flange from the finished wall behind it, not from drywall you intend to remove, and note which wall carries the vent stack.
Then overlay the clearances building inspectors actually check. The International Residential Code sets the ones below, and nearly every US jurisdiction enforces them or something within an inch of them.
| Fixture | Code minimum | Comfortable target |
|---|---|---|
| Toilet, centerline to side wall or fixture | 15 inches | 18 inches |
| Toilet, clear space in front | 21 inches | 24-30 inches |
| Sink, clear space in front | 21 inches | 30 inches |
| Shower interior | 30 by 30 inches (900 sq in) | 32 by 48 inches or larger |
| Shower door opening | 22 inches | 24-28 inches |
| Clearance in front of shower opening | 24 inches | 30 inches |
| Door width (not code, but practical) | 24 inches | 28-30 inches |
Draw both candidate layouts with these rectangles shaded in front of each fixture. If the toilet’s 21-inch zone and the vanity’s 21-inch zone overlap, that is allowed, and in a small bathroom it is the whole trick. Those two fixtures share floor because you never use both at once.
A standard 5-by-8 bathroom is 40 square feet. After a 60-inch tub takes the back wall, a 30-inch vanity and a toilet share the opposite 60 inches of wall, leaving a walkway about 33 inches wide. Your goal in the next step is to widen that walkway without giving anything up.
Step 2: Choose the layout and fixtures that give back floor
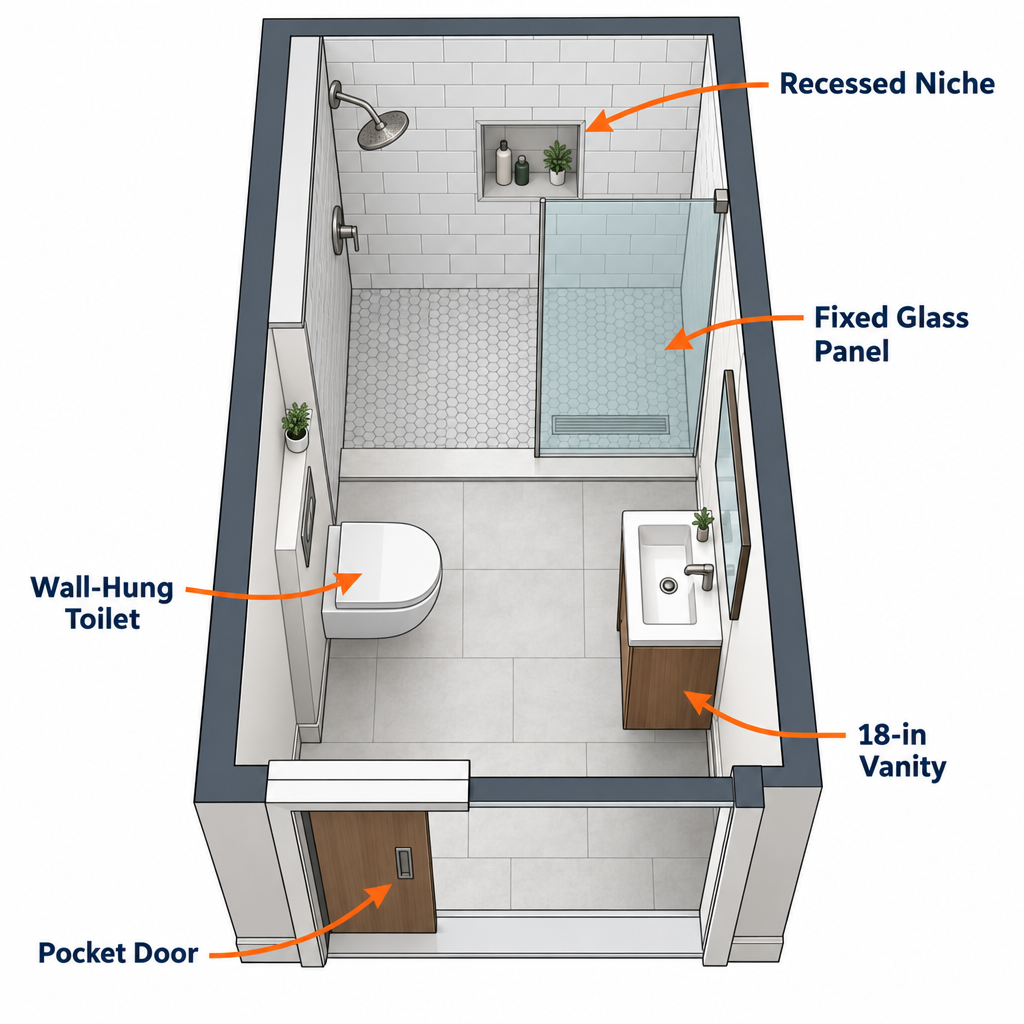
Think of each of these nine moves as buying square footage. Most small bathroom remodels only need four or five of them, and the table shows what each one returns.
| Move | Replaces | Floor or wall space gained | Typical added cost |
|---|---|---|---|
| Pocket door | 28-inch swing door | About 6 sq ft of swing zone | $300-700 |
| Outswing door | Inswing door | Same 6 sq ft, cheaper | $50-150 |
| 18-inch-deep vanity | 21-inch standard | 3 inches across the width | $0-200 |
| Wall-hung vanity | Floor cabinet | Visual floor, easy mopping | $200-600 |
| Wall-hung toilet with in-wall tank | Floor toilet, 28-30 inches deep | 9-12 inches of depth | $900-1,800 |
| Round-front toilet | Elongated bowl | 2 inches of depth | $0 |
| 32-by-60 curbless shower | 60-inch tub | Walkway feels 6 inches wider | $800-2,500 |
| Fixed glass panel | Shower curtain or bypass door | Sightline through whole room | $400-1,000 |
| Recessed medicine cabinet and niche | Surface cabinet, shower caddy | 4 inches of projection | $150-400 |
The pocket door is the single highest-return change and the most skipped, because it means reframing the wall beside the opening. You need a wall section about twice the door width with no plumbing, no wiring you can’t reroute, and no load path you can’t carry with a proper header. Most 5-by-8 bathrooms have exactly one wall like that, the one facing the hallway.
If the wall beside the door carries the vent stack or a supply line, hang the existing door to swing out into the hall instead. Hallway outswing doors are legal in residential work; you lose nothing but a few seconds of thought at the hinges.
Pick the vanity next. An 18-inch-deep, 24- or 30-inch-wide vanity with a vessel-free undermount or integrated sink keeps a usable 16-inch bowl and leaves three more inches of walkway than the 21-inch standard. Avoid a pedestal sink unless storage is already solved elsewhere; it saves floor but kills the one cabinet a small bathroom gets.
For the toilet, a wall-hung model on an in-wall carrier (Geberit, Toto and Kohler all make them) tucks the tank inside a 2-by-6 wall and leaves the bowl projecting only about 21 inches. A good compromise, if you keep a 2-by-4 wall, is a compact elongated floor toilet, which fits an elongated seat into a round-front footprint, roughly 26.5 to 27 inches from wall to rim.
The tub question decides the whole room. If this is the only bathroom and you plan to sell within a few years, keep a tub; buyers with toddlers expect one. If a second tub exists anywhere in the house, go to a shower, and make it a curbless one. A curbless entry lets the floor tile run continuously, which is the single biggest reason a 40-square-foot bathroom reads as larger.
Pro tip
Tape the new layout out on the existing floor with blue painter’s tape, full-size, including the 21-inch clearance rectangles. Then stand, sit and turn in it for five minutes. Every layout mistake I have seen was obvious at this stage and invisible on paper.
Step 3: Pull permits, shut everything off and demo to the studs
Any remodel that moves a drain, adds a circuit or changes framing needs a permit in nearly every US city, and the inspector is on your side here because they catch a bad shower pan before the tile hides it. Expect $150-500 in permit fees and two to four inspections: rough plumbing, rough electrical, shower pan flood test and final.
Shut the main water valve, open the vanity faucet and the tub spout to drain the lines, then turn off the bathroom breaker and tape it in the off position. Pull the toilet first: disconnect the supply, remove the two closet bolts, rock the bowl free and stuff a rag in the flange so sewer gas and dropped screws stay out.
Take the vanity out by cutting the caulk at the wall with a utility knife, unscrewing the cabinet from the studs and lifting the top off. Cap the supplies with 1/2-inch push-fit caps and the drain with a test plug so you can turn the house water back on tonight.
Drywall comes down fastest in full sheets: cut along the studs with the oscillating tool set shallow, then pry each panel free. Tile on mud set (common before 1970) weighs 15 to 20 pounds per square foot and comes down in chunks with a demo hammer. Keep the vent stack and any shared plumbing wall intact until you have seen what runs through it.
Bag debris as you go. A full gut of a 5-by-8 bathroom usually calls for a 15-yard dumpster; a 10-yard container, which runs $250-450 for a week in most markets, is typically enough only for a cosmetic or partial remodel or a powder room.
Step 4: Rough in plumbing, the circuit, the fan and the blocking
With the room open, build the pocket door frame first because it dictates where wiring can go. Cut the existing king stud and header out, install the kit’s split jambs and track per the included layout sheet, and set the header for a 30-inch door at 2-by-6 minimum for a non-bearing wall. Check the track for level across its whole length; an eighth of an inch of slope sends the door rolling open on its own forever.
Plumbing comes next. Moving a toilet flange means cutting into the 3-inch drain and the vent, which is where the job turns into licensed work in many states, so check before you cut. Keeping the flange where it is and only replacing it with a new PVC flange set at finished floor height is well within DIY. Dry-fit the new vanity drain at 18 to 20 inches above the finished floor and the 1/2-inch PEX supplies at 20 to 22 inches, centered 4 inches apart.
For the shower, set the 2-inch drain body where the slope will run cleanly. With a linear drain against the back wall, the whole floor pitches one direction at 1/4 inch per foot, which is easier to tile with 12-by-24 pieces than a four-way pitch to a center drain. Mount the mixing valve at 48 inches to center, the shower head drop at 78 to 80 inches, and add 2-by-10 blocking behind both.
Pro tip
Block now for everything that will ever screw to the wall: the glass panel channel, the grab bar you will want at 70, the towel bar, the toilet paper holder and the medicine cabinet frame. Flat 2-by-8 blocking between studs costs ten dollars and ten minutes today, and it is impossible after tile.
Electrical in a bathroom means one 20-amp circuit on 12/2 cable serving the receptacles, with the first receptacle a GFCI protecting the rest. The National Electrical Code requires at least one receptacle within 3 feet of the sink’s outside edge and bars any receptacle inside a tub or shower space. Lighting can share that 20-amp receptacle circuit only if it serves no other room, which is why most people put the bathroom lights on a separate circuit; that lighting circuit is allowed to serve other rooms as well.
The exhaust fan is the function homeowners lose most often in a small bathroom, because they pick a tiny one. Size it at 1 CFM per square foot with a 50 CFM floor, then go up a step: an 80 CFM fan at 1.0 sone or less, on a timer switch, vented through 4-inch rigid or smooth-wall duct to the exterior. Never into the attic.
Call for your rough inspection with everything exposed, the drain lines capped and filled for a water test if your jurisdiction requires it, and the circuit pulled but not terminated.
Step 5: Build and waterproof the shower, then flood-test it
A curbless shower in a small bathroom has to drop the subfloor in the shower zone so the sloped pan ends flush with the rest of the floor. On a wood-framed floor you either sister and notch the joists (engineer’s call, often a pro job) or use a presloped foam tray set into a recess cut from the subfloor. On a slab, a grinder cuts the recess; it is dusty and slow but not hard.
Set the tray or build the mud pan with a 1/4-inch-per-foot pitch to the drain, then wrap the whole wet area in a continuous membrane. Sheet systems like Kerdi go over cement board or directly over moisture-resistant drywall; liquid systems like RedGard need two coats to a 30-mil cured thickness over cement board. Treat the corners, the drain flange and the niche with preformed pieces or extra coats, because that is where every failed shower I have opened was leaking.
Frame the niche between two studs at 14.5 inches wide, with its bottom shelf at 48 inches so it sits above the mixing valve, and slope the shelf 1/8 inch toward the shower. Membrane it as carefully as the floor.
Plug the drain, fill the pan to about an inch below the curb line (or the top of the sloped zone on a curbless floor), mark the water line, and leave it 24 hours. If the mark holds, call for the pan inspection; if it drops, find the leak now while the fix is a tube of sealant.
Step 6: Tile the floor and walls to make the room read larger
Tile choice does more for a small bathroom than any paint, and the rules are simple. Use one floor tile from the door to the shower drain, choose 12-by-24 or larger on the walls to cut grout lines by half, run the long dimension horizontally to stretch the wall, and keep grout within a shade of the tile color.
Porcelain in the 12-by-24 size runs $2-6 per square foot at the big-box stores, and a 5-by-8 bathroom with tiled shower walls to the ceiling needs about 40 square feet of floor and 120 square feet of wall, plus 10 percent overage. Large-format floor tile in the shower works only with a linear drain; a center drain needs 2-by-2 mosaics to follow the four-way pitch.
Lay the floor first. Snap a line down the center of the room’s longest axis, dry-fit a row to keep cuts at the walls larger than half a tile, then set with modified thinset on a 1/2-inch notch using a leveling-clip system to tame lippage on big tile. Back-butter every piece. Let it cure overnight before you walk on it.
Walls go next, starting with a ledger board screwed level at the second course so the first full row floats above the floor until you fill it later. Tile to the ceiling in the shower, and consider taking the same tile up one full wall behind the vanity; a single tall field of tile tricks the eye more reliably than any light color.
Grout with an unsanded or urethane product for joints at 1/8 inch or less, and caulk, never grout, every change of plane: floor to wall, wall to wall, tile to tub. Use 100 percent silicone in a color matched to the grout. Seal cement-based grout after 72 hours.
| Finish choice | Makes the room feel | Trade-off |
|---|---|---|
| 12-by-24 porcelain, horizontal | Wider | Needs a very flat wall, leveling clips |
| Same tile floor and shower | One continuous space | Needs a linear drain for large tile |
| Light grout matched to tile | Fewer visual breaks | Shows dirt faster on floors |
| White or pale green walls, matte | Taller, brighter | Scuffs show, plan for touch-up |
| Dark floor, light walls | Grounded, wider | Dark porcelain shows dust and water spots |
| Glass panel instead of curtain | Twice as deep | Daily squeegee or spots build up |
Step 7: Set the toilet, vanity and faucet
Set the toilet onto a new flange with the wax ring or a waxless seal and tighten the closet bolts alternately until the bowl stops rocking, then stop; overtightening cracks porcelain. For a wall-hung model, the carrier was framed and plumbed back at rough-in, so now you only hang the bowl on the two threaded rods, snug the nuts to the gasket and set the flush plate.
The vanity goes against the wall with its top at 34 to 36 inches finished height. Shim it level in both directions before driving 3-inch screws through the back rail into studs, then set the top in a bead of silicone. Mount the faucet and the drain assembly before the top goes on if you can; the clearance under an 18-inch vanity is tight enough that doing it upside down on sawhorses saves an hour.
Connect the P-trap with 1-1/4-inch tubular slip joints, and route the trap arm to the wall stub. In a shallow vanity the trap often lands where the drawer wants to be, which is why most 18-inch vanities use a false front on the top drawer or a U-shaped drawer box. Order that version up front rather than discovering it at install.
Supplies connect with 3/8-inch compression stops and braided stainless supply lines. Turn the water on slowly, check every joint with a dry paper towel, then let it run ten minutes and check again.
Step 8: Add recessed storage, the mirror, lighting and glass
Storage is the function most small bathroom remodels sacrifice without meaning to. Recessed storage replaces it without taking an inch of floor. A recessed medicine cabinet fits the 14.5-inch stud bay above the sink and holds 2.5 to 4 inches of shelf depth; use a 2-by-6 wall or a wall backing a closet to get the deeper box. A second recessed box between studs beside the toilet, with a door that matches the vanity, holds toilet paper and cleaners.
Over the toilet, a single floating shelf at 60 inches plus a hook rail at 70 keeps the surface above the tank clear. Skip the over-toilet étagère; it projects 10 to 12 inches and makes every sightline shorter.
The mirror should be as large as the wall above the vanity allows, ideally running the vanity’s full width and up to the ceiling if you are building the medicine cabinet into it. A mirror that reflects the window or the glass panel doubles the perceived depth of the room, which is the cheapest square footage you will ever buy.
Lighting works best in two layers. Put a 3,000K dimmable fixture at each side of the mirror at 66 inches to center, or a single bar above it at 78 inches as a fallback, and add one 4-inch wet-rated recessed can centered in the shower. A damp-rated ceiling fixture or the fan light covers general light. Lumens total about 1,500 to 2,000 for a 40-square-foot room.
Mount the fixed glass panel last. A 3/8-inch tempered panel 24 to 30 inches wide, set in a U-channel screwed into the blocking you added at rough-in, costs $400-700 from a glass shop with a custom template. Set it plumb with shims inside the channel, silicone both sides and let it cure 24 hours before the first shower. Leave an open gap of 24 inches or more at the entry so the room stays accessible and the panel never fogs the whole bath.
Pro tip
Order the glass after tile is grouted and never from a plan dimension, because tiled walls are never perfectly plumb. A glass shop that measures on site will warranty the fit; one that cuts from your numbers will not.
Step 9: Finish, caulk, and run the three-day check
Paint comes before the final hardware. In a room this size, a satin or matte bathroom-rated paint in a pale warm white or a soft green (both read as larger in low light) covers in two coats with a quart and a half. Cut in tight to the tile line and caulk any gap larger than 1/16 inch before painting.
Install the toilet paper holder at 26 inches high and 8 to 12 inches in front of the bowl, towel hooks instead of a bar where wall length is short, and a 24-inch bar on the back of the pocket door if you need one more. Hang the door, adjust the hangers so the leading edge meets the jamb evenly top to bottom, and install the recessed pull and a soft-close bumper.
Then check for three days before you call it finished. Run the shower five minutes and look for water outside the glass line. Fill the sink and release it to confirm the trap seals. Flush ten times and watch the base of the toilet. Run the fan with the door closed and hold a tissue to the grille; it should pin flat.
Cost breakdown for a 5-by-8 bathroom
| Line item | DIY (materials) | Contractor (installed) |
|---|---|---|
| Demo and disposal | $300-600 | $800-1,500 |
| Permits and inspections | $150-500 | $150-500 |
| Pocket door kit, slab door and hardware | $350-800 | $900-1,800 |
| Plumbing rough-in (same locations) | $200-500 | $1,200-3,000 |
| Electrical, GFCI circuit, fan, lights | $300-700 | $1,000-2,500 |
| Curbless shower pan and waterproofing | $600-1,500 | $2,000-4,500 |
| Tile, thinset, grout, 170 sq ft | $700-2,000 | $3,000-7,000 |
| Wall-hung toilet and carrier | $900-1,800 | $1,500-2,800 |
| 18-inch vanity, top, faucet | $500-1,500 | $1,000-2,500 |
| Fixed glass panel | $400-1,000 | $800-1,500 |
| Medicine cabinet, mirror, accessories | $300-800 | $500-1,200 |
| Paint and trim | $100-200 | $400-800 |
| Total | $4,800-11,900 | $13,250-29,600 |
Moving the toilet or the drain for the shower adds $1,500-4,000 to the contractor number and usually pushes the plumbing out of DIY range. Keeping fixtures on their existing stubs is the biggest single saving on this list.
Troubleshooting
| Symptom | Likely cause | Fix |
|---|---|---|
| Pocket door drifts open or closed | Track out of level | Loosen hangers, shim the track to dead level, retighten |
| Pocket door rubs the wall | Split jamb studs bowed or drywall screws too long | Replace with 1-1/4-inch screws, straighten studs with shims |
| Water pooling at shower edge of curbless floor | Pitch under 1/4 inch per foot or tile lippage | Grind high spots; if widespread, retile that section |
| Pan flood test loses water | Pinhole at drain flange or inside corner | Add membrane patch or extra liquid coat, retest 24 hours |
| Grout cracking at floor-to-wall joint | Grout used where caulk belongs | Rake it out, fill with color-matched silicone |
| Vanity drawer hits the P-trap | Standard drawer box in a shallow vanity | Swap in a U-shaped drawer or false front |
| Wall-hung toilet rocks | Carrier not bolted to floor or rods uneven | Tighten carrier feet, re-level rods before hanging bowl |
| Mirror fogs every shower | Fan undersized or ducted into attic | Upgrade to 80 CFM, run rigid duct to a roof or wall cap |
| GFCI trips when fan runs | Fan sharing the receptacle circuit and drawing moisture | Separate the fan to the lighting circuit, check duct for condensation |
| Light at mirror makes shadows under eyes | Single overhead fixture only | Add side sconces at 66 inches to center |
When to call a pro
Call a licensed plumber if moving the toilet means cutting the 3-inch drain or the vent stack, or if the shower drain has to relocate across a joist. Call an electrician if the panel has no open 20-amp slot or any wiring is aluminum or cloth-covered. Call a structural engineer before notching or sistering joists for a curbless recess on a wood floor, and a general contractor if the wall you want the pocket door in turns out to be load-bearing.
FAQ
What is the smallest bathroom that still fits a toilet, sink and shower?
A legal three-fixture bathroom fits in about 5 feet by 6 feet (30 square feet) using a 30-by-30 shower, a wall-hung toilet and an 18-inch vanity. Comfortable use starts at 5 by 7 with a 32-by-48 shower, and most planners treat 5 by 8 as the practical floor for a room with a tub.
Should I replace the tub with a shower in a very small bathroom?
Yes, if another tub exists anywhere in the house. A 32-by-60 curbless shower behind a fixed glass panel makes the room feel roughly a third larger and adds a safer entry. Keep the tub only when it is the one bath in the home, because families with young children consistently expect one.
Does a wall-hung toilet really save enough space to justify the cost?
It saves 9 to 12 inches of projection compared with a standard floor toilet, which in a 5-foot-wide room turns a 33-inch walkway into a 42-inch one. At $800-2,500 or more for the carrier and bowl before installation, with name brands like Geberit, Toto and Kohler at the top of that range, it is the most expensive single upgrade here, so skip it if a compact elongated floor model gets you past the 21-inch clearance on its own.
How long does remodeling a very small bathroom take?
A contractor crew finishes a full gut of a 5-by-8 bathroom in 10 to 15 working days, with tile and glass lead times setting the schedule. A part-time DIY job runs three to six weekends, mostly waiting on cure times for the pan, thinset and grout, plus inspection scheduling.
What color makes a small bathroom look bigger?
Pale warm white, soft gray-green or any light matte color on the walls, with the floor tile one or two shades darker, reads largest in a room this size. The bigger gains come from a floor tile that runs unbroken into the shower, a mirror the full width of the vanity, and a glass panel instead of a curtain.
Can I do the plumbing myself on a small bathroom remodel?
Replacing fixtures on their existing stubs, setting a new flange at the same location and connecting PEX supplies are legal homeowner work in most US jurisdictions with a permit. Cutting into the main drain or vent, or moving the toilet across the room, is where most cities require a licensed plumber, and it is also where DIY mistakes get expensive.