
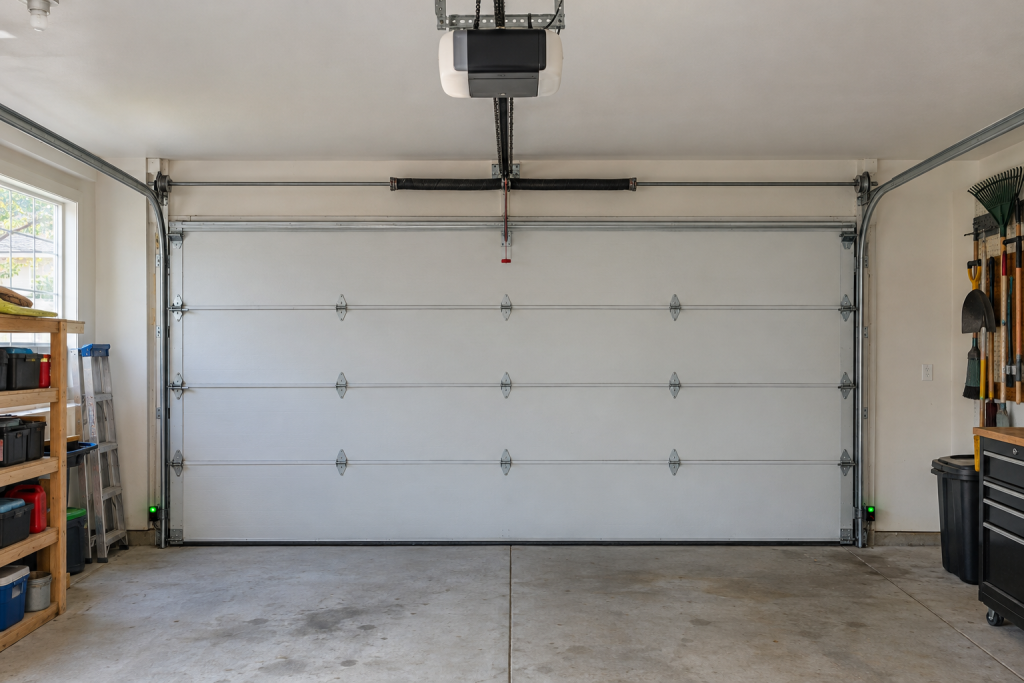
Most garage door openers that stop working have a simple cause: a dead remote battery, a blocked or misaligned safety sensor, a tripped outlet, or a wall console stuck in lock mode. Run through the ten checks below in order and you will fix a garage door opener in under an hour in most cases, usually for the price of a coin battery. The checks also tell you quickly when the problem is the door itself, which is a different and more dangerous job.
Quick steps: fix a garage door opener
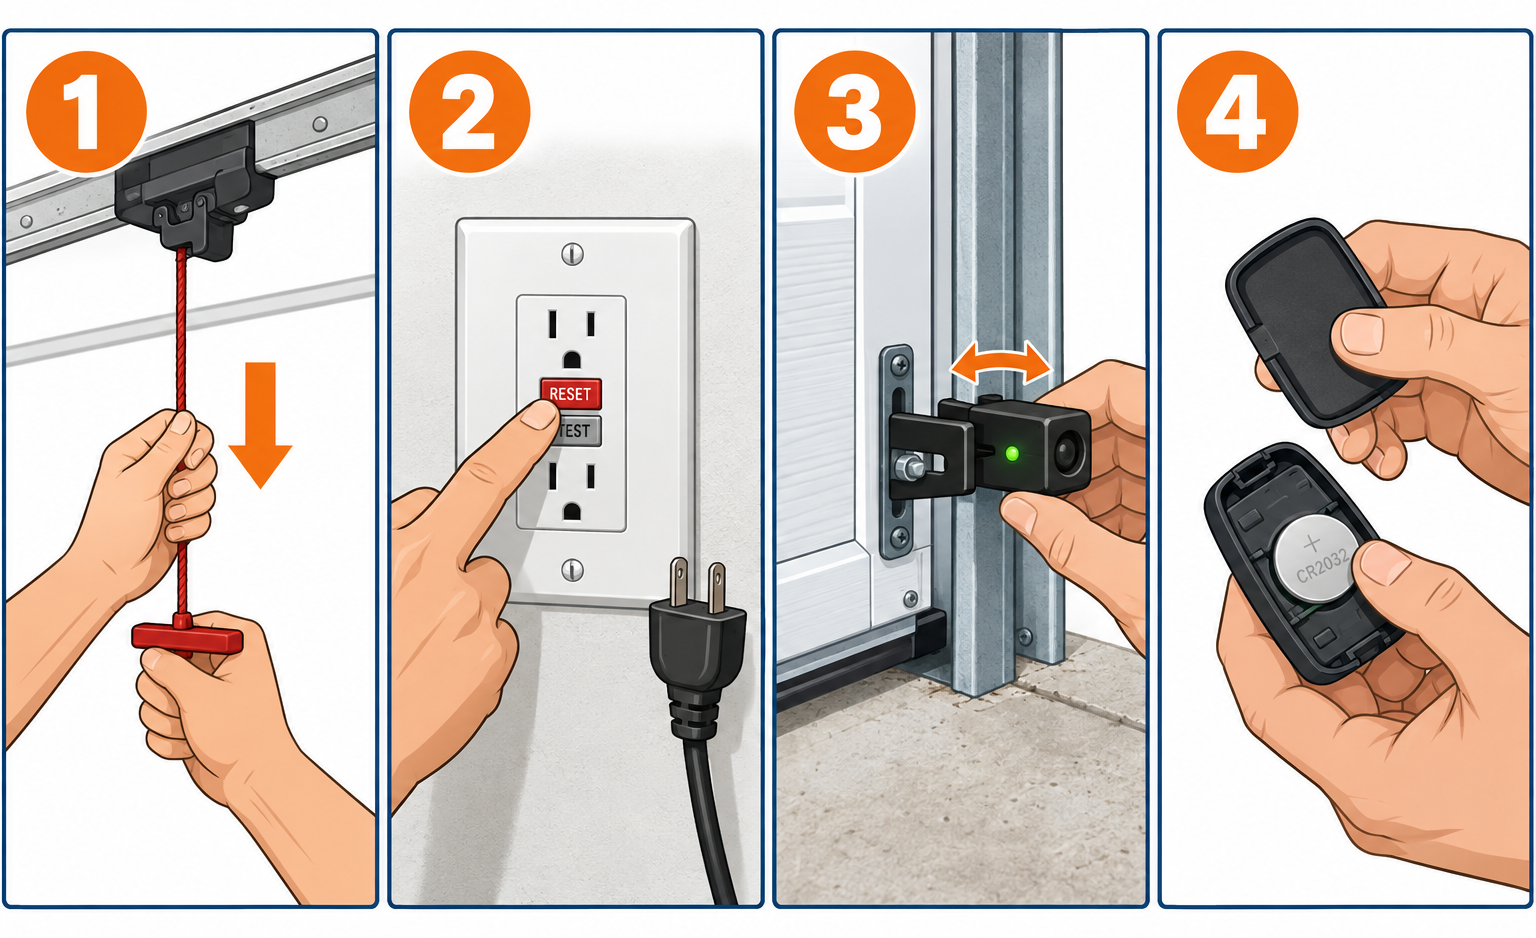
- Pull the red emergency release cord and lift the door by hand to confirm the door itself moves freely.
- Confirm the opener has power: plug, outlet, GFCI reset, breaker.
- Press the wall button. If it works, the problem is the remote or keypad.
- Check the wall console lock (vacation) mode and turn it off.
- Clear, align and clean the two photo-eye sensors until both LEDs glow steady.
- Replace the remote and keypad batteries, then reprogram if needed.
- Adjust the travel limits and force settings if the door reverses or stops short.
- Inspect the door tracks, rollers and cables, then re-engage the trolley and test.
Tools and materials
- 6 ft stepladder
- Flathead and Phillips screwdrivers
- 3V CR2032 or 12V A23 remote battery (check the remote’s battery door)
- 9V battery for the keypad (most Chamberlain, LiftMaster and Genie keypads)
- Soft cloth and glass cleaner for the sensor lenses
- Small level or string for aligning the photo eyes
- Non-contact voltage tester or a lamp to test the outlet
- Silicone garage door lubricant (not WD-40 penetrating oil)
- 7/16 in. and 1/2 in. sockets or wrenches for track and bracket bolts
- Flashlight
Safety first
Unplug the opener before touching the motor head, logic board or drive gear. Never loosen, adjust or cut a torsion spring, a cable, or the bottom bracket the cable attaches to. Those parts hold hundreds of pounds of stored energy and injure people every year. If the door is stuck open, do not pull the emergency release while anyone is under it.
Step 1: Pull the emergency release and test the door by hand
Start by separating the two possible problems: a bad opener or a bad door. With the door fully closed, pull the red cord that hangs from the trolley on the rail. You will hear a click as the trolley disengages. Now lift the door by hand. A properly balanced door lifts with roughly 10 to 15 pounds of effort and stays put when you let go at waist height.
If the door is heavy, drops when released, or binds partway up, stop here. That is a spring, cable, roller or track problem, and the opener was never the issue. A standard residential opener produces far less lifting force than most people assume. It is designed to guide a balanced door, not hoist a dead one. Running the motor against a broken spring strips the drive gear and can crack the logic board, so leave the trolley disengaged until the door is repaired.
If the door glides smoothly and holds position, the door is fine. Leave the trolley disengaged for now and move on to the power checks. You will re-engage it in Step 10.
Pro tip
Before you call anyone, count the blinks. Most LiftMaster, Chamberlain and Craftsman openers flash the motor-head light or a diagnostic LED in a pattern when they refuse to run. The number of flashes maps to a specific fault on the label inside the light cover, and it often points straight at the sensors, the wall console wiring or the travel module.
Step 2: Confirm the motor has power
Look up at the motor head. If the small light does not come on when you press the wall button, there is no power reaching the unit. Check in this order. First, confirm the cord is fully seated in the ceiling outlet. Vibration from the rail works plugs loose over years, and a plug hanging a quarter inch out is a classic cause.
Second, test the outlet. Plug a lamp or a phone charger into it. Garage outlets are commonly on a GFCI circuit, and the GFCI that protects the ceiling outlet is frequently in a different spot: a wall outlet near the door, in a bathroom, or on the exterior of the house. Press reset on every GFCI you can find. Third, check the breaker panel for a tripped breaker, which often sits in the middle position rather than fully off. Flip it fully off, then back on.
If the outlet is dead and the breaker and GFCI are fine, the outlet itself has failed. Replacing a ceiling outlet is a straightforward job if you are comfortable with 120V wiring and shut the breaker off first. If not, that is an electrician visit.
Step 3: Try the wall button, then check lock mode
The wired wall console is your best diagnostic tool because it bypasses every wireless component. Press it. If the opener runs from the wall but not from the remote or keypad, skip to Step 6. If nothing happens from the wall either, keep working through this section.
Most modern wall consoles have a lock or vacation button that disables all remotes while still allowing the wall button to work. On many Chamberlain and LiftMaster consoles the opener light flashes when lock mode is on. Press and hold the lock button for about two seconds to toggle it off. Kids and cleaners trigger this constantly, and it is one of the most common reasons a remote suddenly stops working.
Also check the two low-voltage wires at the back of the console and at the motor head terminals. A staple that has cut through the insulation, or a wire that pulled out of the push-in terminal, will kill the wall button entirely. On many units the sensors and the wall console share the same wire run, so a single nick can take out both.
Step 4: Clear obstructions from the door path and tracks
An opener that starts to close and then reverses is almost always reacting to something in the sensor beam or something physically stopping the door. Walk the full width of the opening at floor level. A rake handle, a cardboard box corner, a ball, or a snow shovel leaning six inches into the opening is all it takes.
Look at the vertical and horizontal tracks for debris, a stray bolt, or a roller that has popped out. Check the rubber bottom seal for a buildup of ice or gravel that stops the door an inch short. In winter, a door frozen to the slab will make a perfectly good opener look broken; the motor strains, the force limit trips and the door reverses.
Clean the tracks with a rag and some degreaser if they are gummed up. Do not grease the tracks. Rollers should roll, not slide, and grease on the track collects grit. Spray a silicone or lithium garage door lubricant on the roller bearings, hinges and the torsion spring instead.
Step 5: Align the safety sensors
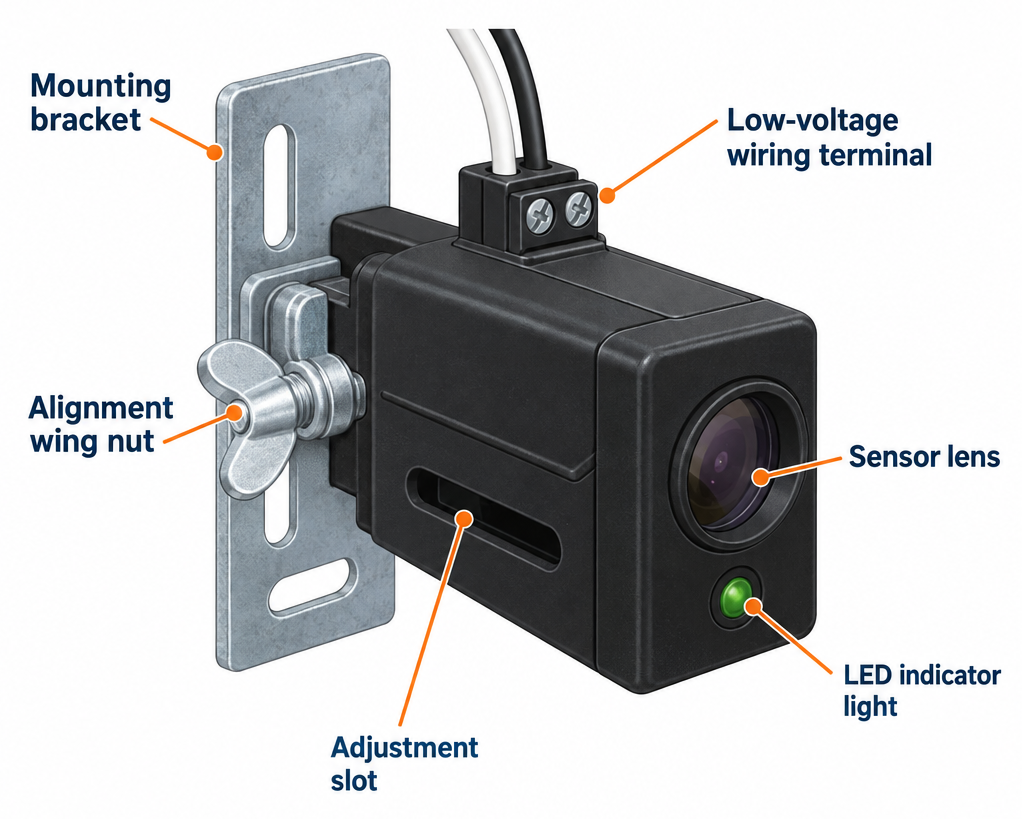
Every opener sold in the US since 1993 has two photo-eye sensors mounted on the tracks about 4 to 6 inches above the floor. One sends an infrared beam, the other receives it. If the beam is broken or the eyes are out of alignment, the door will not close from the remote or wall button. On most units the light flashes about ten times and the door reverses back to open.
Each sensor has an LED. On Chamberlain and LiftMaster units the sending eye is amber and the receiving eye is green; on Genie units they are red and green. The receiving eye’s LED should glow steady. If it flickers or is off, the sensors are not seeing each other. A bump from a bike tire, a wheelbarrow or a trash can is usually all it takes to knock one off angle.
Loosen the wing nut or bracket screw on the flickering sensor, then slowly pivot it until the LED turns solid. A string stretched from lens to lens, or a small level laid across each bracket, helps you get both eyes at the same height and pointing straight across. Retighten the bracket while watching the LED so it does not shift. If the brackets themselves are bent, bend them back with pliers or replace them; replacement sensor pairs cost around $20 to $40.
Sunlight can also fool the receiving eye. If the door only refuses to close in the late afternoon, direct sun is hitting the lens. A short piece of PVC pipe or a cardboard sun shade over the sensor fixes it.
Step 6: Clean the sensor lenses and check the wiring
If alignment did not solve it, wipe both lenses with a soft cloth and a little glass cleaner. Spider webs, dust and lawnmower chaff dim the beam enough to cause intermittent reversing that is maddening to diagnose because the door works nine times out of ten.
Then follow the sensor wires back to the motor head. The thin two-conductor bell wire is stapled along the ceiling and down the wall, and it gets pinched, stapled through, chewed by mice or yanked by a ladder. Look for breaks and check that the wires are seated firmly in the terminals on the back of the motor head. The white wire and the white-with-black-stripe wire have to go to the correct terminals; swapping them kills the sensors.
A quick test: with the opener unplugged, temporarily twist the sensor wires directly to the motor head terminals with short jumper leads, plug it back in and see if the LEDs light. If they do, the wall run is the problem and a new roll of 22-gauge bell wire for about $10 will fix it.
Step 7: Replace the remote and keypad batteries
If the wall button works but the remote does not, start with the battery. Most current remotes use a 3V CR2032 coin cell. Older remotes, particularly Genie and some LiftMaster models, use a 12V A23 battery. Pry the case open with a flathead screwdriver, note the orientation, and swap in a fresh one. A remote that works only when you are within a few feet of the door is the classic sign of a weak battery.
The wireless keypad mounted outside the door nearly always runs on a 9V battery under a slide-off cover at the bottom. Keypads live outdoors and the contacts corrode. If a new battery does not bring it back, clean the contacts with a pencil eraser or a little contact cleaner.
A remote that lights up its LED but still does nothing has lost its programming, or the opener has lost its memory after a power surge. That is Step 8.
Step 8: Reprogram the remote and keypad
Reprogramming takes about a minute. Climb the ladder and find the learn button on the back or side of the motor head, usually under the light lens. On LiftMaster and Chamberlain units the button is purple, yellow, red/orange or green, and the color tells you which remote generation is compatible. Genie units have a learn button near the antenna wire.
Press and release the learn button once. The LED beside it stays lit for about 30 seconds. Within that window, press and hold the button on the remote you want to program until the opener light flashes or you hear two clicks. Release the remote and test it. Repeat for each remote. For the keypad, press learn, then enter your four-digit PIN on the keypad and press Enter, again within 30 seconds.
If a remote refuses to program, confirm the frequency and generation match. A yellow-button opener will not learn a remote made for a purple-button unit, and some big-box universal remotes only work with specific color codes. Holding the learn button down for 6 to 10 seconds until the LED goes out erases every remote from memory, which is the right move when you move into a house or lose a remote.
Pro tip
If your remotes all die at once after a thunderstorm, the opener’s receiver board took a surge. Before you buy a new opener, try a plug-in external receiver kit, which runs around $35 to $50 for a basic single-channel unit or $70 to $160 for a kit bundled with remotes. It wires to the same terminals as the wall button and gives you fresh remotes and a working receiver without replacing the motor.
Step 9: Adjust the travel limits and force settings
Limit and force adjustments fix the door that stops a few inches short of the floor, reverses as it touches the floor, or stops partway up. On older openers these are screws on the side of the motor head labeled Up, Down, Up Force and Down Force, or Open and Close. Newer units have Up and Down arrow buttons with a programming routine printed inside the light cover.
Work on the limits first. If the door stops before it reaches the floor, turn the Down limit screw a quarter turn (clockwise on most units) and run the door. Each turn moves the stopping point roughly two inches. If the door hits the floor hard and then reverses, back the Down limit off a quarter turn. For a door that does not open fully, increase the Up limit the same way.
Only touch the force setting if the limits are correct and the door still reverses or stalls on a clean, balanced door. Increase the Down force in small increments and test after each one. Then run the mandatory reversal test: lay a 2×4 flat on the floor in the door path and close the door. It must reverse within two seconds of touching the board. If it does not, reduce the force until it does. A door that crushes the 2×4 is a door that can crush a child or a pet.
Cold weather stiffens springs and thickens old grease, so a door that reverses only in January often needs lubrication and a light force increase, not a new opener.
Step 10: Check the tracks, rollers and cables, then re-engage
With the opener sorted, look over the door hardware before you reconnect everything. Sight down each vertical track from the top. A track that has been hit by a car bumper will show a bend, and rollers will bind there. Minor dents can be tapped straight with a block of wood and a hammer; a crushed section needs a new track. Check that the track brackets are tight to the jamb with their lag screws and that the horizontal tracks are level.
Look at the lift cables that run from the bottom brackets up to the drums at each end of the torsion shaft. They should be tight and evenly wound. A frayed cable, a cable hanging slack on one side, or a door that sits crooked in the opening means a cable has jumped the drum or snapped. Also look at the spring above the door. A torsion spring with a two-inch gap in the coils is broken. Both of these are pro repairs, and you should not operate the door at all until they are fixed.
If the hardware checks out, re-engage the trolley. Pull the release cord toward the motor until the spring-loaded lever clicks back, or simply run the opener and the carriage will snap into the trolley on its own. Run the door through two full cycles from the wall button, then from the remote, and finish with the 2×4 reversal test. The expected result is a door that opens fully, closes to the floor without bouncing, and reverses promptly on the board.
Troubleshooting: symptoms and fixes
| Symptom | Likely cause | Fix |
|---|---|---|
| No light, no sound from motor head | No power to the unit | Reseat plug, reset GFCI, check breaker, test outlet |
| Motor hums but door does not move | Stripped drive gear or trolley disengaged | Re-engage trolley; if white plastic shavings are inside the housing, replace the gear and sprocket kit ($20-40) |
| Door closes partway then reverses, light flashes | Sensor beam blocked or misaligned | Clear path, align eyes until both LEDs are solid, clean lenses |
| Works from wall button, not from remote | Lock mode on, dead battery or lost programming | Toggle lock, replace CR2032 or A23, reprogram |
| Remote works only up close | Weak battery or antenna wire tucked up | New battery, let the antenna hang straight down |
| Door stops a few inches above the floor | Down limit set short | Turn Down limit screw a quarter turn, retest |
| Door hits floor and pops back up | Down limit too long or force too low | Back off Down limit, then adjust force and run the 2×4 test |
| Door is very heavy with trolley released | Broken torsion spring or cable | Stop using the door and call a garage door company |
| Opener runs a few seconds then stops, clicks | Overheated motor or failing capacitor | Let it cool 15 minutes; if it repeats, replace the capacitor or motor |
| Door opens or closes on its own | Stuck wall button, shorted wiring or a neighbor’s remote on the same code | Check wiring for pinches, erase and reprogram all remotes |
| Door loud and shaky but works | Dry rollers, loose hardware, worn chain | Lubricate rollers and hinges, tighten rail and bracket bolts, adjust chain sag to about 1/4 in. above the rail |
| Light on head stays on or will not turn on | Light bulb, socket or logic board | Use the recommended bulb wattage; if the socket is fine, the board is failing |
A few of these deserve a closer look. The stripped gear is the most common internal opener failure on chain and belt drives over ten years old. Unplug the unit, pull the light cover and look inside the housing for a pile of fine white or tan plastic dust. That dust is the nylon worm gear. A gear and sprocket kit is a 45-minute repair for a careful DIYer with a socket set and the manufacturer’s instructions, and it saves replacing an otherwise good opener.
The logic board is the other repeat offender, usually after a lightning strike or a long run of brownouts. Symptoms are random: remotes that stop working, a door that runs at odd times, or diagnostic lights that make no sense. Boards run roughly $80 to $200 depending on the model, and at that price a 15-year-old opener is often worth replacing outright with a new unit that includes battery backup and a safer belt drive.
When the fix is not DIY
When to call a pro
Call a garage door company if the door is heavy or drops when the trolley is released, if you see a gap in the torsion spring coils, if a cable is slack, frayed or off the drum, if the door is crooked in the opening, or if a track is badly bent. Those are spring and cable jobs with real injury risk, and most companies charge about $150 to $350 for a spring replacement. Call an electrician if the ceiling outlet is dead and resetting the GFCI and breaker does not restore it.
A garage door technician is also the right call for a failed motor on a unit under warranty, since opening the housing yourself can void coverage. Chamberlain and LiftMaster motors typically carry a lifetime warranty on belt-drive motors with shorter terms on parts, so check your paperwork before you buy a gear kit.
FAQ
What’s the average cost to repair a garage door opener?
A service call from a garage door company usually runs $50 to $150, which covers diagnosis and simple fixes like sensor alignment, limit adjustments and remote programming. Replacement parts add to that: a gear and sprocket kit runs about $17 to $80 for aftermarket kits and $80 to $135 for OEM kits, a sensor pair $20 to $40, a logic board $80 to $200, and a new remote $25 to $50. If the motor or board on an old unit has failed, a new 1/2 HP belt-drive opener costs $160 to $350 for the unit plus roughly $150 to $400 for professional installation, so expect about $300 to $900 installed. Most of the fixes in this article cost nothing but a battery.
Who to call to fix a garage door opener?
A garage door repair company handles openers, springs, cables and tracks, and that is the right first call for almost any opener problem. Many manufacturers list authorized dealers by zip code online. Call an electrician only if the problem is the outlet, the GFCI or the circuit feeding it. A general handyman can replace batteries and align sensors, but should not touch springs or cables.
What are the most common problems with garage door openers?
In rough order of frequency: a wall console left in lock mode, a dead remote battery, photo-eye sensors knocked out of alignment or blocked, a tripped GFCI or unplugged cord, travel limits that drift over time, a stripped nylon drive gear, and a logic board damaged by a power surge. Nearly every one of these is a 10-minute fix once you know where to look. The problems that look like opener failures but are not, broken torsion springs and snapped cables, are the ones that need a professional.
Does unplugging your garage door opener reset it?
Unplugging the opener for about 30 seconds clears a locked-up logic board and is worth trying whenever the unit behaves strangely, flashes an error you cannot explain, or refuses to respond after a storm. It does not erase your remotes or your travel limits on modern units, so you lose nothing by trying it. It will not fix a physical problem like a misaligned sensor or a stripped gear. To erase remotes you hold the learn button until its LED goes out; to reset limits on newer units you follow the programming routine inside the light cover.