
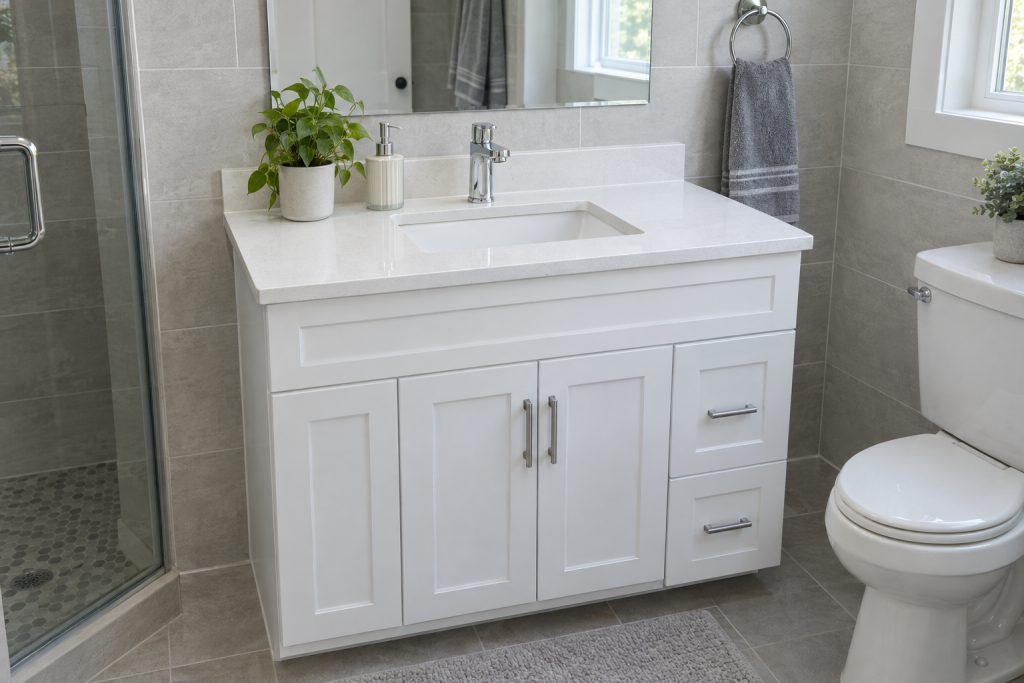
Installing a bathroom vanity means pulling the old cabinet, setting the new one level against the wall, screwing it into studs, setting the top, then hooking the faucet and drain back to the existing stub-outs. A single-sink vanity that reuses the current plumbing takes most people three to five hours and costs little beyond the vanity itself.
Quick steps: install a bathroom vanity
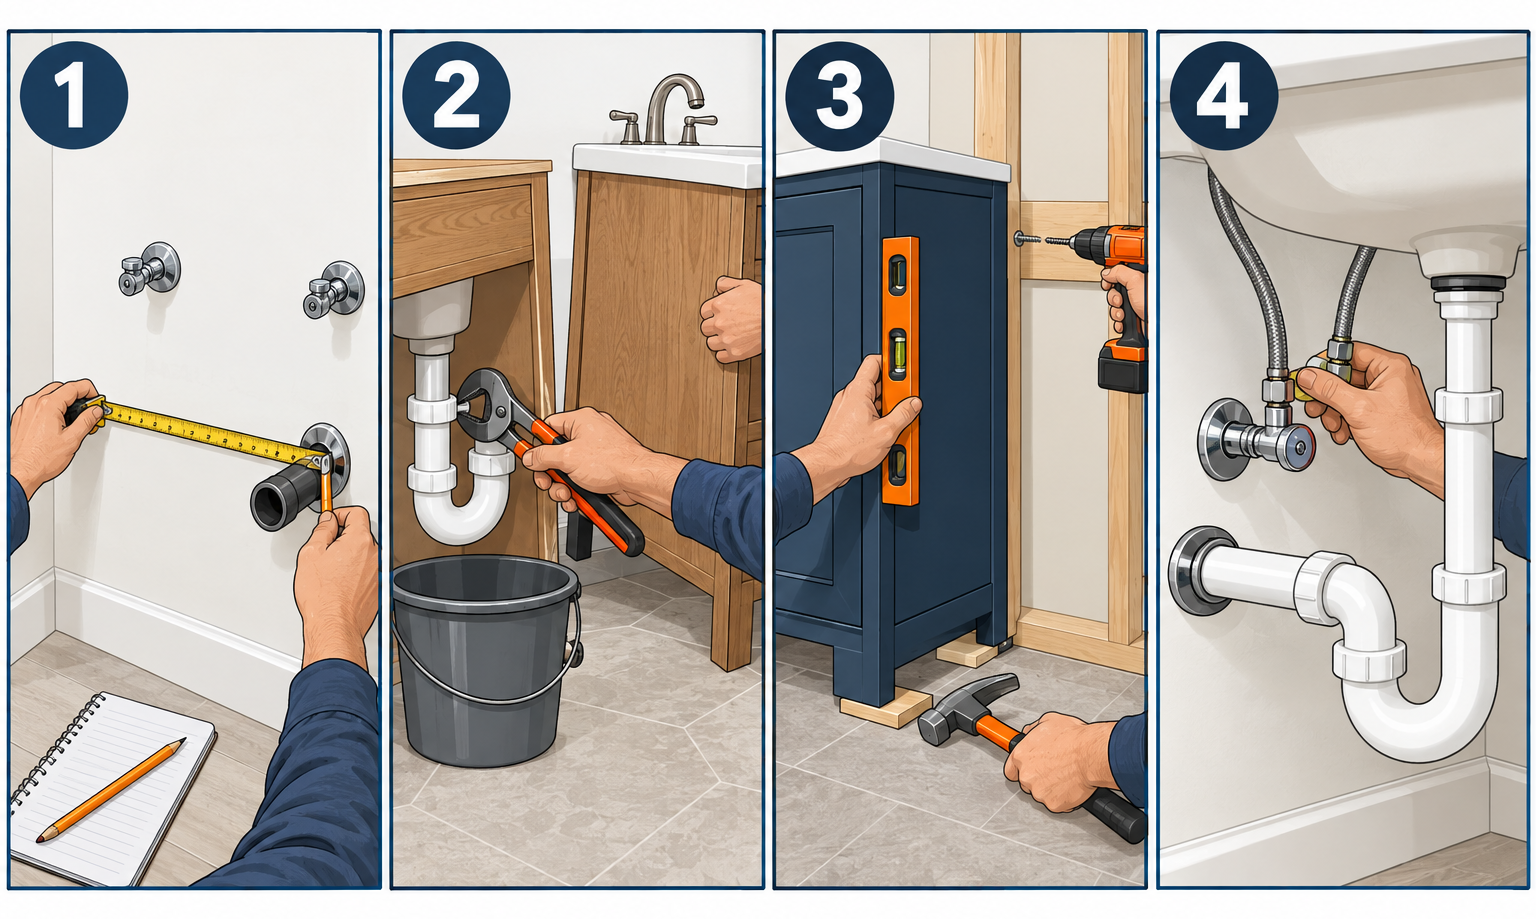
- Measure the space and the plumbing stub-outs, then buy a vanity that fits both.
- Shut off the supply valves, disconnect the P-trap and supply lines, and pull the old vanity.
- Patch the wall, find and mark the studs, and mark the top edge of the new cabinet.
- Cut holes in the cabinet back for the pipes, slide it in, and shim it level.
- Screw through the back rail into at least two studs with 3-inch screws.
- Mount the faucet and drain on the countertop, then set the top in silicone.
- Connect the P-trap and supply lines, caulk the top to the wall, and check for leaks.
Tools and materials
- Tape measure, pencil, 4-foot level and 2-foot torpedo level
- Stud finder (magnetic or electronic)
- Drill/driver with 1/8-inch pilot bit and Phillips or square-drive bit
-
10 x 3-inch cabinet screws or structural screws (4-6)
- Wood shims (one bundle)
- Jigsaw or hole saw (2-1/2 inch) for pipe openings in the cabinet back
- Basin wrench, 10-inch adjustable wrench, channel-lock pliers
- Utility knife, putty knife, oscillating tool or hacksaw
- Bucket and old towels
- 1-1/4 inch P-trap kit (PVC or chrome brass) plus a 1-1/4 to 1-1/2 trap adapter if needed
- Two 20-inch braided stainless supply lines (3/8-inch compression x 1/2-inch FIP, or match your faucet)
- 100% silicone caulk, color-matched, plus a caulk gun
- Plumber’s putty or the gasket supplied with your drain
- Clear or white silicone adhesive for setting the countertop
- Paintable latex caulk and drywall patch supplies if the old vanity leaves damage
Calculators for this job
Safety first
Close both angle stop valves and open the faucet to drain the lines before you touch any fitting. Unplug or switch off any outlet or lighting circuit you will be working around, and wear safety glasses when cutting the cabinet back.
Step 1: Measure the space and pick a vanity that fits the plumbing
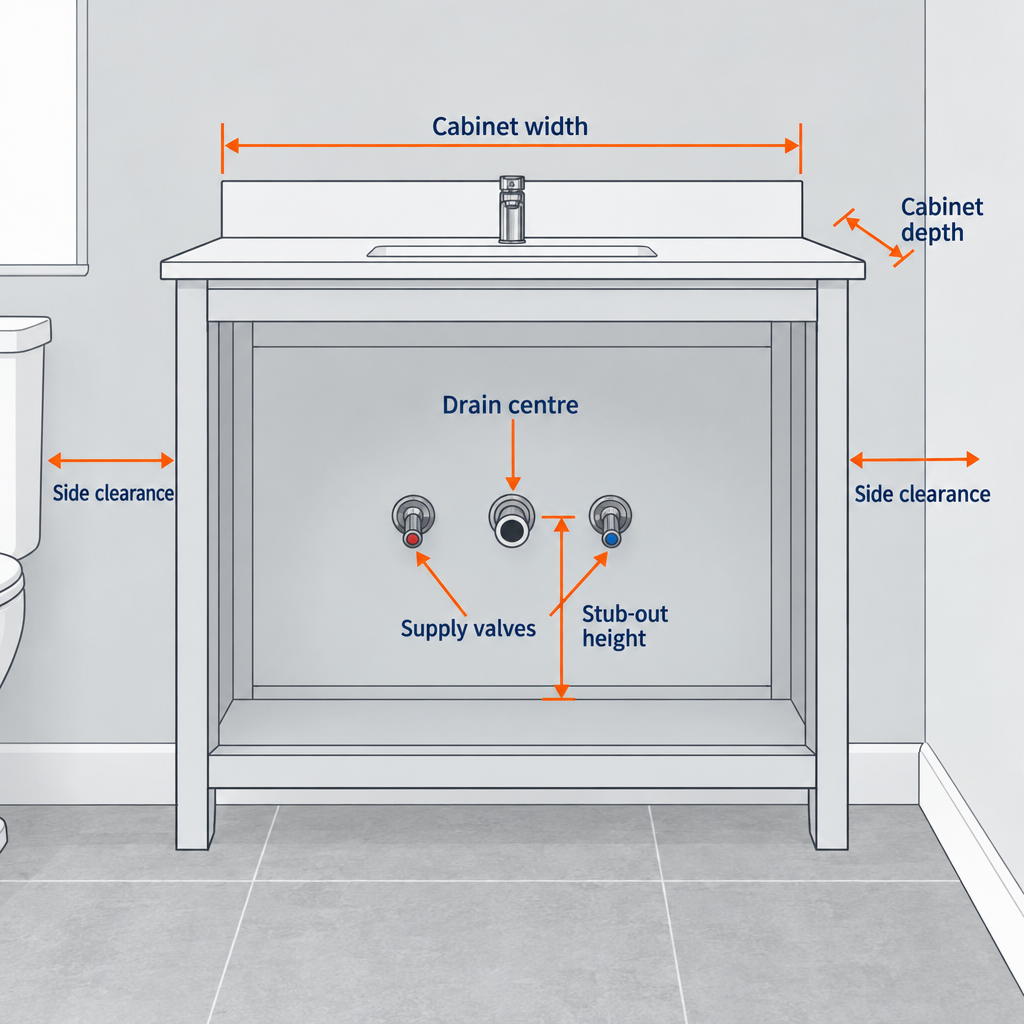
Measure three things before you shop: the width of the wall space, the depth available without blocking the door swing or toilet clearance, and the location of the drain and supply stub-outs. Write down how far the drain centerline sits from the side wall and how high it is off the floor. Do the same for each supply valve.
Code requires 15 inches minimum from the toilet centerline to the edge of the vanity, and 21 inches of clear floor in front of the sink. Those two numbers eliminate a surprising number of vanities in tight rooms. If you are tackling a bathroom remodel for small bathrooms, an 18-inch deep cabinet buys back three inches of walking room over a standard 21-inch unit.
| Spec | Common sizes | What to check against |
|---|---|---|
| Width | 24, 30, 36, 48, 60, 72 inches | Wall space minus 1/2 inch on each side for shims and caulk |
| Depth | 18 (shallow), 21 (standard), 24 inches | Door swing, toilet side clearance, 21 inches front clearance |
| Cabinet height | 30-32 inches (standard), 34-35 inches (comfort height) | Add 1-1.5 inches for the top; mirror and outlet heights |
| Drain stub-out | Typically 16-20 inches off the floor, centered under sink | Must land inside the cabinet, not behind a side panel or drawer glide |
| Supply stub-outs | Typically 20-22 inches off the floor, 4 inches each side of drain | Same, and the valves must clear any drawer box |
Vanities with full-height drawers are the biggest source of fit problems. A center drawer stack often sits right where the P-trap needs to go. Open the spec sheet, find the plumbing cutout zone the manufacturer lists, and compare it with your stub-out measurements before you buy.
For a double vanity, confirm whether you have one drain or two. A single drain can serve both sinks with a double-bowl waste kit, but you need the drain to sit between the bowls and a vent that still works with the longer trap arm. Two drains make life easier and are worth asking a plumber to rough in if you are opening the wall anyway.
Step 2: Shut off the water and remove the old vanity
Close both angle stops by turning them clockwise until they stop. Open the faucet to release pressure. If a valve will not fully close or keeps dripping, shut the main and plan to replace the valve while the cabinet is out. A quarter-turn 1/2-inch compression angle stop costs around $10 and takes ten minutes.
Put a bucket under the trap. Loosen the slip nuts by hand or with channel locks, pull the P-trap, and dump the water. Disconnect the supply lines at the valves with an adjustable wrench, holding the valve body steady so you do not twist the pipe behind the wall.
Score the caulk between the backsplash and the wall with a utility knife. Cut the caulk along the floor too. Pull the top first if it is a separate piece; most are held with a few beads of adhesive and pop loose with a putty knife and a gentle pry. Then back out the screws through the cabinet’s rear rail and walk the cabinet away from the wall.
Expect a mess behind it: unpainted drywall, a gap in the flooring, maybe an old water stain. Press on the drywall around the pipes. If it feels soft or crumbles, cut it back to sound material and patch it before the new cabinet hides the problem.
Step 3: Prep the wall and mark the studs
Patch any holes larger than a quarter with a drywall patch, and prime bare patches so the caulk later has something to grab. You do not need a finish-quality paint job behind the cabinet, but any area the new, narrower vanity will leave exposed does need to match.
Run a stud finder across the wall at the height of the cabinet’s back rail, usually 2 to 4 inches below the top edge. Mark each stud with a vertical pencil line. Studs sit 16 inches on center in most homes, which means a 30-inch cabinet usually catches two and a 48-inch catches three. If you can only hit one stud, plan to use a 1/4-inch toggle bolt on the other end.
Hold the level against the wall and draw a horizontal line at the finished cabinet height. Floors in bathrooms are rarely level, so also check the floor across the width of the cabinet and note which side is low. That tells you where the shims will go.
Pro tip
Use a rare-earth magnet as your stud finder. It sticks to the drywall screws with no batteries and no false readings near pipes. A 1-inch magnet from a hardware store costs a couple of dollars and will find every stud on the wall in a minute.
Step 4: Cut the cabinet back and set it level
Transfer your pipe measurements to the back of the new cabinet. Measure from the floor and from the side that will sit against the finished wall, and remember to account for shims if the floor is out of level. Add 1/2 inch of slack on every side so you have room to adjust.
Cut the openings with a jigsaw or a 2-1/2 inch hole saw. Many cabinets have a thin 1/4-inch back panel and a solid back rail; cut the panel but leave the rail intact, because that rail is what carries the screws. If a stub-out lands on the rail, notch around it rather than removing the whole thing.
Slide the cabinet into place and set the 4-foot level on top, side to side, then front to back. Tap shims under the low corners until the bubble centers both ways. Check that the front face is plumb and that the cabinet sits tight to the wall along the full back edge. If the wall bows, shim between the back rail and the wall rather than letting the cabinet rock.
Open and close the doors and drawers now. A cabinet that is racked out of square will show it immediately in uneven door gaps, and it is far easier to fix before the screws go in.
Step 5: Screw the cabinet to the studs
Drill a 1/8-inch pilot hole through the back rail at each stud line, 1 inch below the top of the rail. Drive a #10 x 3-inch cabinet screw into each stud. The screw should sink through 3/4 inch of rail, 1/2 inch of drywall, and bite at least 1-1/2 inches into the stud. Snug it, do not crank it, because overtightening pulls the cabinet out of level toward the wall.
Re-check the level after the first screw and again after the last. Score the shims flush with the cabinet base using a utility knife, then snap them off. On tile floors, a bead of construction adhesive under the toe kick keeps the shims from working loose.
A floating vanity skips the shims but demands more from the wall. The same principle you use for floating shelves applies: every mounting screw needs a stud or solid blocking, and a 48-inch floating cabinet full of stone and water should be hung with four 3-inch structural screws minimum.
Step 6: Mount the faucet and set the countertop
Install the faucet and drain assembly while the countertop is still off the cabinet. You will never have better access. Set the faucet through the mounting holes, thread the nut or mounting bracket from below, and tighten it with a basin wrench or the tool supplied in the box. Attach the supply lines to the faucet shanks now, hand tight plus a quarter turn.
For the drain, roll a 1/2-inch rope of plumber’s putty under the flange, press the flange into the sink opening, and tighten the locknut from below until putty squeezes out. Skip the putty on stone or quartz tops that call for silicone instead, since putty can stain porous stone. Hook up the pop-up linkage and test that the stopper opens and closes before moving on.
Run a 1/4-inch bead of clear silicone adhesive along the top of the cabinet sides and front rail. Lower the top into place, push it back to the wall, and check it with the level. Shim between the top and the cabinet rail if needed. Let the adhesive set for an hour before you start wrenching on plumbing underneath.
Pro tip
Dry-fit the P-trap to the drain tailpiece before you set the top. If the tailpiece lands more than an inch off from the wall stub-out, you can add a tailpiece extension or an offset now instead of discovering it with a top glued in place.
Step 7: Connect the plumbing, caulk and test
Attach the supply lines to the angle stops: 3/8-inch compression on the valve side, hand tight plus a quarter turn with the adjustable wrench. Braided stainless lines in 20-inch length cover almost every vanity, and a little slack is fine. Do not use lines so long they kink.
Assemble the P-trap. Bathroom sink tailpieces are 1-1/4 inch, while the drain stub-out in the wall is usually 1-1/2 inch, so you need a trap with a 1-1/2 inch outlet or a reducing washer at the wall. Cut the trap arm with a hacksaw so it enters the wall fitting at least 1 inch and slopes slightly downhill toward the wall. Hand-tighten all slip nuts, then give each a quarter turn with pliers.
Open the angle stops slowly and watch every joint with a dry paper towel. Fill the sink to the overflow, pull the stopper, and watch the trap while it drains. Repeat twice. A slow drip at a slip joint usually means the washer is seated backward; the tapered side faces into the fitting.
Finish with a continuous bead of 100% silicone where the top and backsplash meet the wall and along the floor at the toe kick. Smooth it with a wet fingertip, and leave it 24 hours before splashing water on it. The finished result is a cabinet that does not rock, doors that close with even gaps, a faucet that does not drip, and a dry cabinet floor the next morning.
DIY vs. hiring it out: time and cost
| Option | Typical labor cost | Time | Best for |
|---|---|---|---|
| DIY, reuse existing plumbing | $0 labor, $40-100 supplies | 3-5 hours | Same-size replacement, stub-outs in the right place |
| Handyman | $150-400 | 2-3 hours | Straightforward swap, you supply the vanity |
| Licensed plumber | $250-600 | 2-4 hours | New valves, relocated drain, double vanity on one drain |
| Plumber plus drywall and tile repair | $600-1,500+ | 1-2 days | Moving plumbing inside the wall, flooring gaps, wall damage |
Vanity prices vary just as widely. A 24-inch stock cabinet with a cultured marble top runs about $160-320 at a home center, with the most basic units at the low end and slightly upgraded models near the top. A 36-inch solid wood unit with a quartz top lands around $1,000-1,800 or more, and 60- to 72-inch double vanities with stone tops commonly run $750-3,200 before the faucets. Faucets add $60-250 each.
Troubleshooting
| Symptom | Likely cause | Fix |
|---|---|---|
| Cabinet rocks after screws are in | Shims missing under a corner, or wall is bowed | Back out screws, re-shim both floor and wall, re-drive |
| Doors hang unevenly | Cabinet racked out of square during install | Loosen screws, re-level, or adjust the European hinges with the cam screws |
| Slow drip at a slip nut | Washer backward or cross-threaded nut | Disassemble, flip the washer tapered side in, hand tighten plus a quarter turn |
| Drip at the supply valve | Compression ferrule not seated | Tighten another quarter turn; if it continues, replace the line and ferrule |
| Sink drains slowly | Trap arm pitched uphill or pushed too far into the wall fitting | Re-cut the arm, keep 1/4 inch per foot of fall toward the wall |
| Water under the drain flange | Not enough putty, or flange not centered | Pull the flange, clean, re-putty, re-tighten |
| Gap between top and wall | Wall out of plumb | Fill with backer rod if over 1/4 inch, then silicone |
| Trap will not line up with wall drain | Vanity cutout zone does not match stub-out | Add a tailpiece extension, use a flexible trap, or move the drain in the wall |
When to call a pro
Call a licensed plumber if the drain or supply lines need to move inside the wall, if a shutoff valve will not close and you have galvanized or old copper pipe, or if you are adding a second sink to a single drain. Those jobs involve venting and usually a permit. Call a general contractor if the subfloor under the old vanity is soft, which points to a long-term leak and possible joist damage.
FAQ
How easy is it to install a bathroom vanity?
A like-for-like replacement is a solid beginner-to-intermediate job. If you can use a level, drive screws into studs and tighten a slip nut, you can do it in an afternoon. The difficulty climbs fast when the new vanity’s plumbing cutout does not match your stub-outs, or when the floor and walls are badly out of level.
How much does a plumber charge to install a bathroom vanity?
Most plumbers charge $250-600 in labor for a standard swap that reuses existing supply and drain locations, and a handyman will often do the same job for $150-400. Relocating pipes inside the wall, replacing corroded valves or plumbing a double vanity pushes the bill to $600-1,500 or more.
What are the different types of vanity installation?
Freestanding vanities sit on the floor and screw to the wall for stability, and they are the easiest to install. Floating or wall-mounted vanities carry all their weight on the wall and need studs or blocking at every mounting point. Corner vanities follow the freestanding method but need two walls checked for square, and vessel-sink setups use the same cabinet install with a taller faucet and a shorter cabinet height.
Do I need a permit to install a bathroom vanity?
Replacing a vanity in the same spot with no changes to pipes inside the wall does not require a permit in most jurisdictions. Moving the drain, adding a second drain for a double vanity, or running new supply lines usually does, and that work needs to pass inspection before the wall is closed.
Should the countertop be glued to the vanity?
Yes, but lightly. Four to six dabs of clear silicone adhesive hold a top in place while still letting a future owner remove it without destroying the cabinet. Avoid construction adhesive on stone and quartz tops, because it is nearly impossible to release later.