
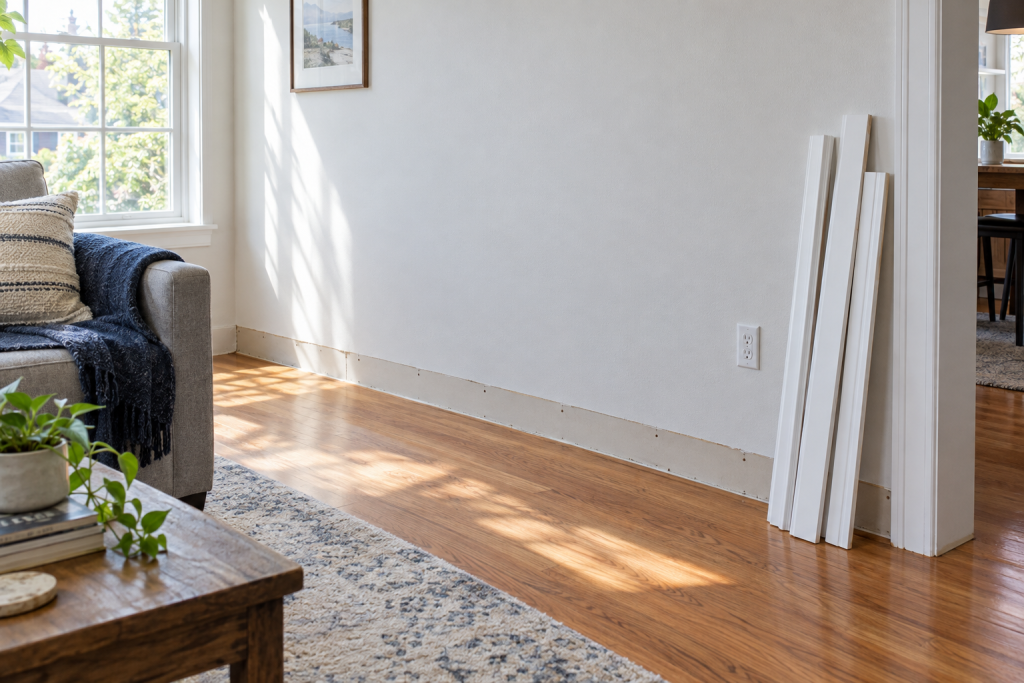
To remove moulding cleanly, cut the caulk and paint seam with a utility knife first, then pry with a wide flat bar or trim puller backed by a shim so the tool never digs into the drywall. The whole trick is breaking the glue-like bond of paint and caulk before you apply any leverage, because that bond, not the nails, is what tears the paper off your walls.
Quick steps: remove molding without wall damage
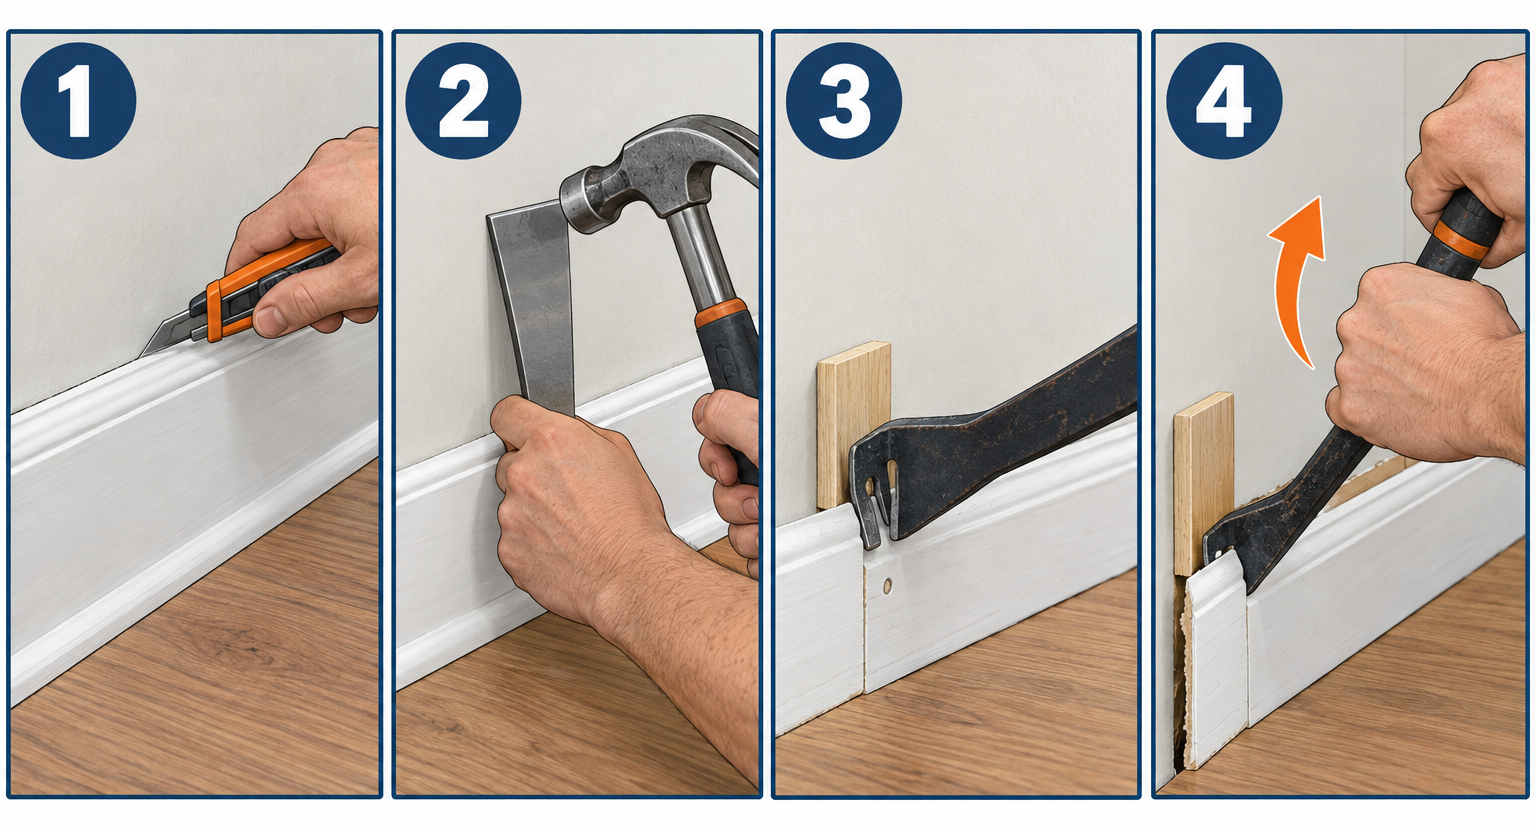
- Score the caulk and paint line along the top edge of the trim with a utility knife.
- Slide a stiff putty knife behind the molding and tap it in with a hammer to break the bond.
- Insert a flat bar or trim puller at a nail location, with a shim or scrap behind it to protect the wall.
- Pry gently at each nail, working down the length until the piece pops free.
- Pull nails through the back of the trim with end nippers if you plan to reuse it.
- Label each piece, pull or set any nails left in the wall, and scrape off old caulk.
Tools and materials
- Utility knife with fresh blades (snap-off or standard)
- Stiff 3-inch putty knife or 5-in-1 painter’s tool
- Flat pry bar (7-inch to 10-inch, such as a Wonder Bar style)
- Trim puller (Zenith style, optional but worth it, about $25-35)
- Hammer (16 oz) and a nail set
- End-cutting nippers or locking pliers for nail removal
- Wood shims or a 1/4-inch plywood scrap, 4×6 inches, to protect the wall
- Painter’s pencil or marker and masking tape for labeling
- Oscillating multi-tool with a flush-cut blade (optional, for thick paint buildup)
- Safety glasses and work gloves
- Lightweight spackle and a 3-inch taping knife for nail holes afterward
Calculators for this job
Safety first
Wear safety glasses, because finish nails and brittle old paint chips fly when trim pops loose. In a house built before 1978, assume the paint is lead-based: score and pry instead of sanding or grinding, and bag the dust and debris.
Step 1: Score the caulk and paint seam
Run a utility knife along the seam where the top of the molding meets the wall, holding the blade almost flat and cutting just deep enough to split the caulk and the paint film. One slow pass with firm pressure beats three fast ones. On baseboard you are cutting the top edge; on casing you cut both the wall side and the seam where the casing meets the door jamb; on crown you cut the ceiling edge and the wall edge. If the trim has been painted five or six times over the decades, the paint bridge can be 1/16 inch thick and will not cut in one stroke, so make a second pass and listen for the blade to drop into the gap behind the trim. Skipping this step is the single biggest cause of torn drywall paper. When the paint film stays attached to both the trim and the wall, prying the trim pulls a strip of the paper face along with it, and you end up patching a half-inch-wide trench the whole length of the room.
If the caulk is a thick, rubbery bead that the knife rides over instead of cutting, switch to a fresh blade and angle it into the bead rather than along the top. Siliconized acrylic caulk cuts easily; pure silicone gums the blade and needs to be cut from both sides of the bead. Also check the bottom edge of baseboard where it meets the floor. Flooring installers often caulk or glue that joint, and on vinyl or laminate floors you need to cut that seam too or you will lift the floor edge along with the trim.
Pro tip
Hold a 6-inch drywall knife against the wall just above the seam and run your utility knife along it as a guide. It keeps the cut straight and the blade off the wall paint, so the finished edge needs no touch-up beyond the trim line itself.
Step 2: Break the bond with a putty knife
Work a stiff putty knife into the scored seam and tap the handle with a hammer to drive it behind the molding. Push it in about an inch, then rock it slightly side to side and move along 6 inches at a time. You are not prying yet; you are separating the back of the trim from the wall so that when you do pry, the only thing holding the piece is the nails. A 5-in-1 painter’s tool works just as well and has a stiffer blade. Do the entire length of the piece before you pick up the pry bar. On walls that got painted after the trim went up, which is most walls, the putty knife will crackle as it breaks the paint film every few inches. That sound is the whole point of the step.
Old plaster walls deserve a gentler touch here. Plaster is harder than drywall but also brittle, and a putty knife hammered at a steep angle can chip the finish coat. Keep the blade as parallel to the wall as you can and tap lightly. You will usually find that trim on plaster walls sits against wood grounds or nailing blocks, so there is often a small gap behind the trim that makes this step easier than it is on drywall.
Step 3: Set the pry bar at a nail
Find the nails before you pry. On painted trim the nail heads are filled and invisible, but you can locate them by looking for slight dimples in a raking light, or by assuming they land every 16 inches at the studs. Baseboard is usually nailed at every stud with two finish nails, one high and one low, plus extra nails near corners and splices. Place your flat bar or trim puller directly over a nail, because prying between nails bends the trim and splits it, while prying at a nail transfers the force straight to the fastener. Slide a wood shim or a scrap of 1/4-inch plywood behind the heel of the bar so the fulcrum rests on the scrap, not on the drywall. Without that backer, the heel of a steel bar concentrates maybe 200 pounds on a quarter-inch of wall surface and punches a dent through the paper into the gypsum.
A dedicated trim puller changes the geometry in a useful way. The wide, wedge-shaped head spreads the load across about 3 inches of wall and has a center ridge that lifts the trim while the flat face stays on the wall. You tap the head in behind the trim with a hammer, then pull the handle toward you. For a house full of trim, the $25-35 cost pays for itself the first time you avoid patching a whole room. If you are working with a conventional flat bar, a thin, wide one such as a 7-inch flat bar with a beveled end is far better than a hex-shank cat’s paw, which is designed to dig into wood and will absolutely dig into drywall.
Step 4: Pry gently and move along the piece
Lever the trim out 1/4 inch at the first nail, no more. Move to the next nail and do the same. Then come back and go another 1/4 inch at each location. Three passes of small movements free a 10-foot board with no splits, while one big pull at one spot cracks the piece or rips a chunk out of a corner miter. Finish nails from a 15- or 16-gauge nailer are 2 to 2 1/2 inches long and are often glued in place by the coating that heats and melts on the way into the wood, so they resist more than you expect. If a nail refuses to come, stop pulling and look: the head is probably hooked on a stud edge or the nail is clinched behind the drywall. Slip a second bar in and work both sides.
At inside corners, one piece of baseboard is usually coped over the other. The coped piece has to come out first or you will break the thin feathered edge of the cope. The piece that runs full length into the corner, the one with the square-cut end, is the one that was installed first and comes out last. Outside corners are mitered and sometimes glued, so cut the corner joint with the utility knife before prying either side. Door casing is nailed in two rows, one into the jamb and one into the wall framing, with the jamb nails being thinner. Pry casing from the wall side first, then lift it off the jamb. Crown molding gets prying pressure at the ceiling edge rather than the wall edge, because crown is nailed into the top plate and ceiling joists, and the wall below is often unsupported where the trim meets it.
Pro tip
Cut the paint seam and pry a short test section on the least visible wall, usually behind a door. In two minutes you learn how many paint layers you are fighting, how long the nails are and how the wall paper responds, and you can adjust before you touch the wall everyone will see.
Once a piece is loose, lift it straight out rather than swinging it, because long pieces of baseboard whip around and gouge the wall at the far end. Set it face-down on the floor with the nails pointing up so nobody steps on them.
Step 5: Deal with the nails
Two kinds of nails remain after the trim comes off: the ones still stuck in the wall and the ones in the back of the trim. Nails left in the wall framing should be pulled with the claw of your hammer, with that same plywood scrap under the hammer head. If a nail breaks off flush or you cannot get purchase, drive it below the surface with a nail set so it does not hold the new trim off the wall. For trim you plan to reinstall, pull the nails through the back of the board using end-cutting nippers or a pair of locking pliers. Grab the nail shank near the wood and roll the tool on its own curved head. Pulling the nail out the back means the small head passes through the wood without enlarging the hole in the finished face, which is why trim carpenters never knock finish nails back out the front. Pulling 60 or 80 nails this way takes about 15 minutes for a room.
Mark the back of each piece in pencil with the wall and position, for example “north wall, left of closet,” and stack them flat. Masking tape on the back with the same note works for painted trim where pencil would not show. Miters and copes only fit back where they were, so this labeling is worth the five minutes. If the trim is going in the trash, skip the labeling and bend the nails over with the hammer before you carry it out.
Step 6: Clean up the wall and prep for what comes next
Scrape remaining caulk off the wall with the putty knife held at a low angle, then check the wall for damage. Hairline tears where the top paper layer lifted are normal and disappear under a coat of lightweight spackle applied with a 3-inch knife and sanded with 150-grit. Gouges deeper than the paper, where you can see white gypsum, need two coats of spackle or a setting-type compound like 20-minute joint compound for anything larger than a quarter. Nail holes in the wall below the old trim line will usually be covered by the new molding, but patch any that fall above the line. If you are removing a chair rail or picture rail rather than baseboard, you will also have a paint line and possibly a color change to deal with, so plan on priming and painting that band of wall before any new trim or “floating shelves” go up in its place.
The expected result is a wall with a clean trim line, no torn paper, and a pile of labeled trim with the nails pulled. If you did the scoring and the putty knife pass properly, you should have nothing worse than a few paper nicks at nail locations. A room with new baseboard going in needs the walls to be flat for the last 6 inches; run the putty knife along the wall and knock down any spackle ridges or drywall mud lumps that would hold the new trim away from the wall. This is also the moment to vacuum the floor edge, because a fresh baseboard installed over a line of old caulk crumbs will sit 1/8 inch proud of the wall.
Removing molding over different wall types
Drywall behaves as described above and is the most forgiving as long as the paint seam is cut. Plaster and lath is tougher: trim is nailed to wood grounds, nails are often old cut nails that are square and rusted, and the plaster can crack if the bar is levered against it. Use a wider backer behind the bar, a 6-inch square of 1/4-inch plywood, and pry in smaller increments. Expect some trim to be glued or caulked heavily where a previous owner tried to hide plaster cracks. Paneling and wainscot complicate things because the baseboard often holds the bottom edge of the panel in place, so once the base is off, the panel is loose and can crack if you lean on it. Tile walls in a “bathroom remodel for small bathrooms” are the hardest case, since trim is usually caulked to the tile with silicone; cut the bead fully through with a fresh blade and pry only against a shim set on a grout line, never on a tile edge.
MDF trim is now more common than solid wood and it needs a different approach. It does not bend, it snaps, and the nails crush the fibers so the piece often breaks at every nail if you pry between them. Pry only at nails, work in 1/4-inch increments, and accept that heavily painted MDF baseboard is often not worth saving when new material runs roughly $1 to $3.50 per linear foot, with installation adding to that. Solid pine or poplar trim survives removal well and the hardwood or ornate pieces in older houses are worth every minute of careful work, because matching a 1920s profile today means a custom knife at a millwork shop and $4 to $8 per foot.
Troubleshooting
| Symptom | Likely cause | Fix |
|---|---|---|
| Drywall paper tears along the top of the trim | Paint and caulk seam not fully cut | Stop, re-score the seam deeper, run putty knife along the full length before prying again |
| Dent or hole behind the pry bar | No backer under the bar heel | Fill with setting compound, use a plywood scrap backer on every pry |
| Trim splits or breaks at a nail | Prying between nails or lifting too far in one pull | Pry only at nails, 1/4 inch at a time, use two bars on stubborn sections |
| Trim moves but will not come off | Hidden nail, glue, or clinched nail behind drywall | Look for the dimple, pry at that spot, cut through construction adhesive with a flexible blade |
| Coped corner edge crumbles | Wrong piece removed first | Remove the coped piece before the square-cut piece it sits on |
| Floor edge lifts with the baseboard | Flooring caulked or glued to trim | Cut the bottom seam, hold floor down with a block while prying |
| Plaster cracks around the bar | Point loading on brittle plaster | Use a 6-inch wide backer and pry at the wood ground, not open plaster |
| Nail head pulls through trim face | Pulling nails out the front | Pull through the back with nippers; fill the enlarged hole with wood filler |
When to call a pro
If the trim is painted with lead paint and you are removing more than a small room’s worth, or if the paint is flaking badly, a lead-safe certified contractor handles containment and disposal. Call a finish carpenter if you need to remove and reinstall ornate historic trim, built-up crown with multiple pieces, or trim that is clearly structural, such as a baseboard hiding a stair skirt or a casing that supports a header. If removing a piece of trim reveals rot, water staining or active mold behind it, stop and get a general contractor or water damage specialist to find the source before closing anything back up.
FAQ
What is the easiest way to remove moulding without damaging the wall?
Cut the caulk and paint seam with a utility knife, break the bond with a putty knife along the entire length, then pry at each nail with a flat bar or trim puller backed by a shim. The scoring and bond-breaking steps are what prevent damage; the prying is almost incidental once the paint film is cut.
Can I remove molding and reuse it?
Yes, if it is solid wood and you pry in small increments at the nail locations. Pull the nails out through the back with nippers, label each piece with its location, and store it flat. MDF trim survives removal less often, and heavily painted MDF is usually cheaper to replace than to repair.
Do I need a trim puller or will a pry bar work?
A wide, thin flat bar with a scrap of plywood behind it does the job fine for one room. A trim puller is faster, spreads the load over the wall better and is worth buying if you are doing a whole house or working on walls where every dent will show.
How do I find the nails in painted trim?
Shine a flashlight along the trim at a low angle and look for small dimples where the filler shrank. If you cannot see them, assume nails every 16 inches at the studs plus one within 4 inches of each end, and pry at those spots.
What do I do about the caulk line left on the wall?
Scrape it with a putty knife held nearly flat, then spackle any paper tears. If new trim is going on, anything below the new trim line gets covered anyway, so only patch what will show.
Will removing baseboard damage my flooring?
Only if the floor is caulked or glued to the trim, which is common with vinyl plank and laminate. Cut that bottom seam with the utility knife and hold the floor edge down with a block while you pry, and the floor stays put.