
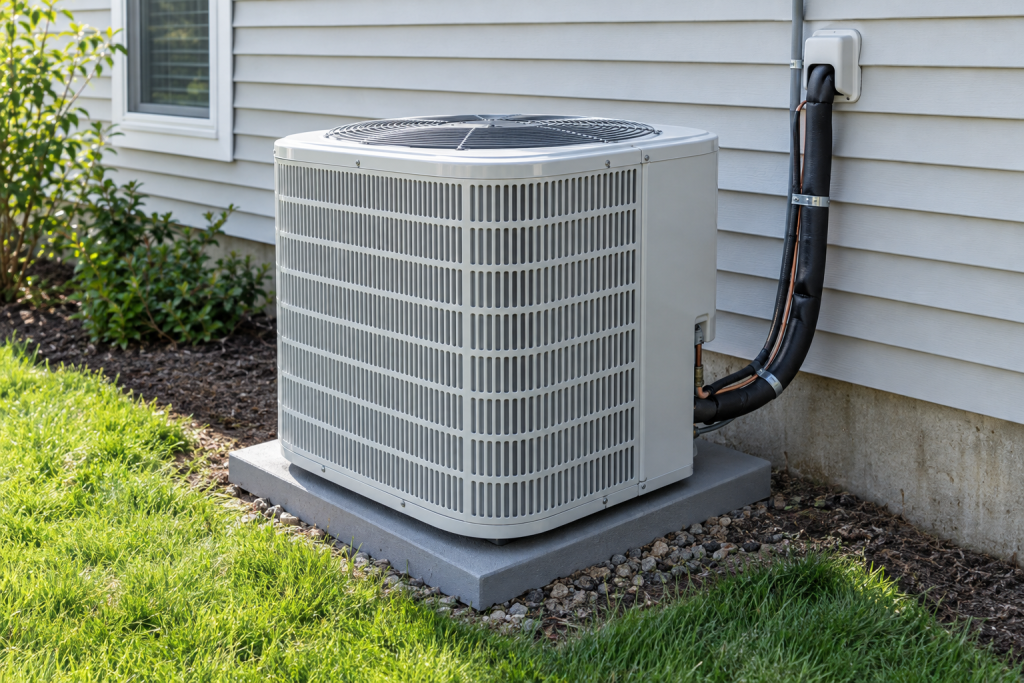
A central AC changeout takes a two-person crew about 4 to 8 hours and runs $5,000 to $12,000 installed, with the condenser, indoor coil, line set, electrical, drain and refrigerant charge all done in one visit. Refrigerant handling requires EPA Section 608 certification, so most homeowners do the prep work (pad, drain, electrical rough-in, thermostat) and hire a licensed tech for the brazing, evacuation and charge. Here is the whole job in order, with the specs a contractor actually works to.
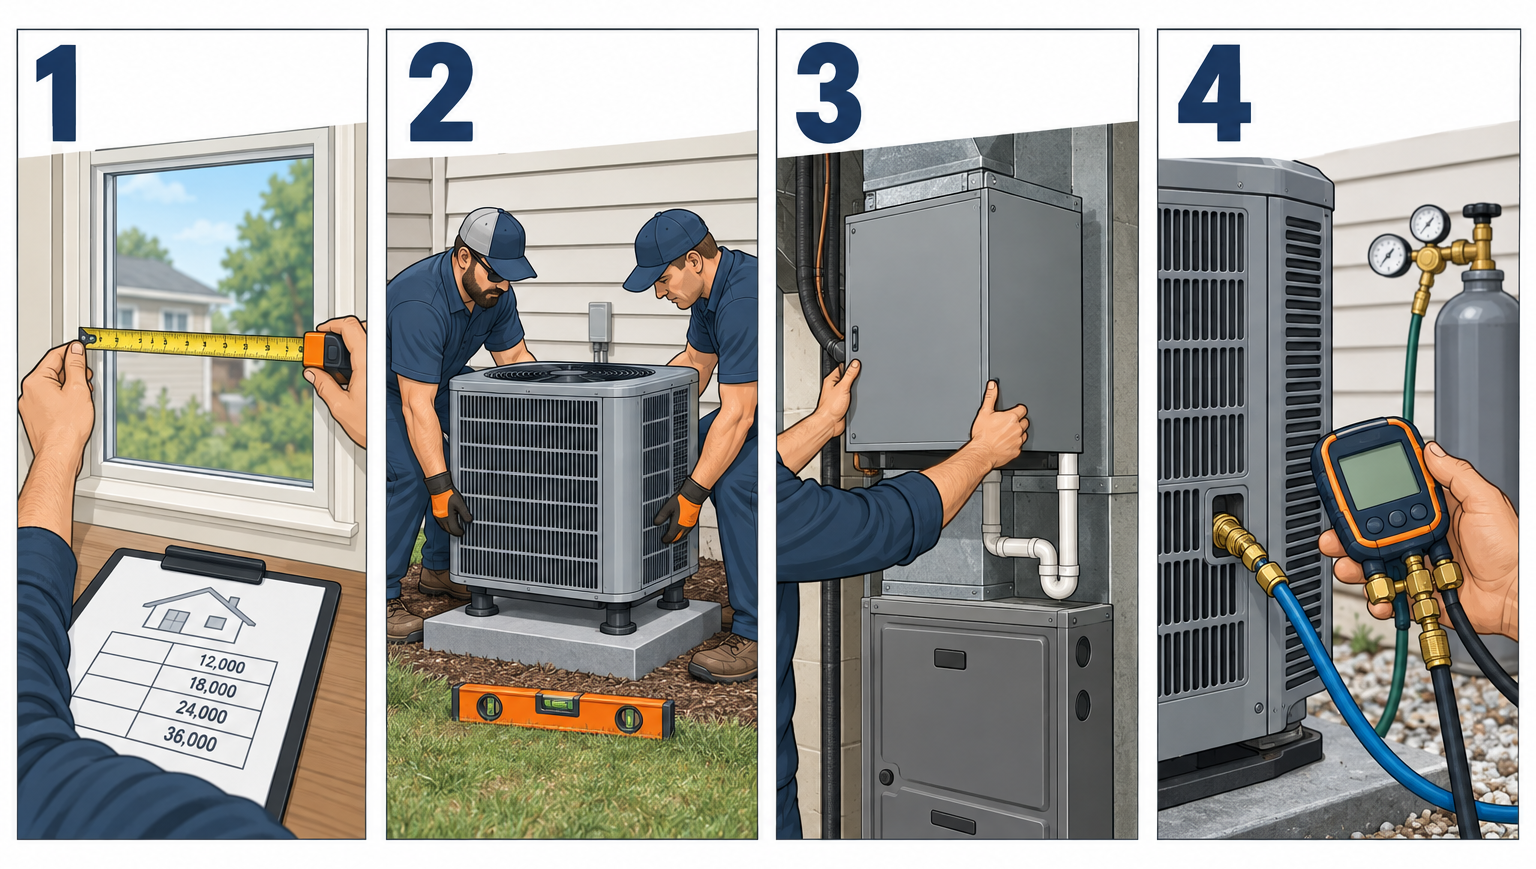
Quick steps: install a central AC unit
- Size the system with a Manual J load calculation, not the old nameplate.
- Pull the mechanical and electrical permits and schedule inspections.
- Recover the old refrigerant, then remove the old condenser and coil.
- Set a level pad and the new condenser with the clearances on the install manual.
- Mount the new evaporator coil and condensate drain with a trap and float switch.
- Run the line set, braze with nitrogen flowing, and insulate the suction line.
- Wire the disconnect, whip and thermostat; size breaker and wire to the nameplate.
- Pressure test with nitrogen, pull a vacuum to 500 microns, charge, and commission.
Tools and materials
- Condenser matched to a cased or uncased evaporator coil (AHRI-matched pair)
- Line set: 3/8 in liquid, 3/4 in suction for 2 to 3 tons (7/8 in for 3.5 to 5 tons), 25 or 50 ft
- Composite condenser pad, 3 in thick, sized 2 in beyond the unit base on all sides
- Liquid line filter drier (bi-flow if heat pump) and new TXV if coil is not pre-fitted
- Closed-cell line set insulation, 3/4 in wall, plus UV-rated line set cover
- Non-fused AC disconnect (60 A), liquid-tight whip (6 ft), breaker and wire sized to nameplate MCA
- 18/5 thermostat wire, 3/4 in PVC drain, P-trap, float switch, secondary drain pan
- Brazing torch (oxy-acetylene or MAPP for small lines), 15% silver phos-copper rod, nitrogen tank with regulator
- Tubing cutter, deburring tool, swage/flaring kit, torque wrench for service valves
- Vacuum pump (6 cfm), micron gauge, core removal tool, manifold gauges or digital probes
- Refrigerant scale, recovery machine and tank (A2L rated for R-454B/R-32), clamp meter, temperature probes
Calculators for this job
Safety first
Shut off the AC breaker at the panel and the outdoor disconnect, then verify dead with a non-contact tester and a meter at the contactor. Wear safety glasses and gloves when brazing and when opening any refrigerant line. R-454B and R-32 are mildly flammable (A2L), so braze only on open lines with nitrogen flowing and no refrigerant present.
What the job looks like start to finish
An installation has three phases. The planning phase (sizing, quotes, permits) takes a few days to two weeks. Installation day is one long visit for a straight changeout, or two days if the crew is adding ducts or moving the indoor unit. Commissioning and inspection close it out.
A straight changeout replaces the outdoor condenser and the indoor evaporator coil while keeping the furnace or air handler, ducts and thermostat. A full system swap replaces the air handler too. A new installation adds all of it to a house that never had central cooling, which usually means ductwork and a 240 V circuit from the panel.
Most of the work is accessible to a careful DIYer: pad, drain, line set routing, thermostat wire, even the disconnect if your jurisdiction allows homeowner electrical permits. The parts that are not DIY are recovering the old refrigerant, buying and charging the new refrigerant, and in many states, the warranty-qualifying install itself. Plan the job around that split and you will save real money without voiding the equipment warranty.
Step 1: Size the system with a Manual J calculation
Do not copy the tonnage off the old unit. Houses change: new windows, attic insulation, a finished basement, a bigger family room. The old unit was often oversized to begin with.
A Manual J calculation (the ACCA standard every permit office recognizes) uses your square footage, window area and orientation, insulation values, air leakage, climate zone and occupancy to produce a cooling load in BTU per hour. Divide by 12,000 to get tons. A tight 2,000 sq ft house in Ohio might calculate at 2.5 tons. The same floor plan in Phoenix with big west windows could land at 4 tons.
A contractor should run this for you and show you the output, not quote “about a ton per 500 square feet.” Online Manual J tools cost $10 to $50 for a homeowner version and take about an hour of measuring. If a quote comes with no load calculation, that is the first red flag.
Oversizing is the most common installation mistake and it is expensive. A unit that is a ton too big cools the air fast, shuts off before it pulls the humidity down, and leaves the house clammy at 72°F. It also short cycles, which wears out the compressor and contactor years early.
Pick the efficiency and the refrigerant
Federal minimums have been SEER2-based since January 2023: 13.4 SEER2 in the North, 14.3 SEER2 in the South and Southwest for systems under 45,000 BTU. Anything sold new today meets that. Going from 14.3 to 16 SEER2 typically adds $800 to $1,500 and pays back in 5 to 8 years in a hot climate, longer in a mild one.
New equipment built since January 1, 2025 uses low-GWP refrigerants, R-454B or R-32, instead of R-410A. That matters for three reasons. The refrigerants are A2L (mildly flammable), so the installer needs A2L-rated recovery gear and must follow the brazing precautions. Your indoor coil will likely include a leak sensor that can shut the blower on, which adds a wire. And R-454B went through supply shortages in 2025, so ask the contractor to confirm the refrigerant is on their truck before scheduling, not on backorder.
Match the coil to the condenser
A condenser and coil are rated as a pair in the AHRI directory. An unmatched coil can drop you below the rated SEER2, trip the TXV into hunting, and void the parts warranty. Every quote should list both model numbers and the AHRI reference number. Check it yourself; the AHRI lookup is free and takes a minute.
Step 2: Get quotes, pull permits, schedule the install
Get three quotes. Each should be line-itemed: condenser model, coil model, line set (new or reused), filter drier, pad, disconnect, drain components, thermostat, permit fees and labor hours. A quote that says “3-ton system installed, $7,900” tells you nothing about what gets reused.
Realistic 2025 installed pricing for a changeout looks like this:
| System | Typical installed cost | Notes |
|---|---|---|
| 2-ton, 14.3 SEER2 condenser + coil | $4,500-$7,000 | Smaller homes, reuse furnace and ducts |
| 3-ton, 14.3 to 16 SEER2 condenser + coil | $5,500-$9,500 | Most common residential size |
| 4-ton, 16 to 18 SEER2 two-stage | $8,000-$12,000 | Larger homes, better humidity control |
| Add new air handler or furnace | +$2,500-$5,500 | Full system swap |
| Add new ductwork, 1,800 sq ft house | +$3,000-$8,000 | Converts the job to 2 to 3 days |
| New 240 V circuit from panel | +$400-$1,200 | More if the panel is full or far |
Labor is roughly 35 to 45 percent of the total. Equipment bought online runs $2,000 to $3,500 for a matched 3-ton pair, which is why self-installs look tempting. Most manufacturers only honor the 10-year parts warranty if a licensed contractor installs and registers the system, so factor that in.
Permits
Nearly every US jurisdiction requires a mechanical permit for replacing a condenser, and an electrical permit if the disconnect, whip or circuit changes. Fees run $75 to $400. The contractor normally pulls them. If you are doing the prep yourself, ask the building department whether homeowner permits are allowed for your own residence; many allow mechanical and electrical for owner-occupied homes, some do not.
The inspection is usually one visit at the end. The inspector checks the disconnect location and working clearance, breaker size against the nameplate, drain trap and float switch, pad level, line set support, clearances, and the condenser’s strap-down in wind zones.
Scheduling
Spring and fall book 1 to 2 weeks out and sometimes come with off-season pricing. Late June through August can run 2 to 4 weeks, and emergency changeouts in July carry a premium. If the old unit still limps along, schedule in April or October.
Clear the work area before the crew arrives: 4 ft around the condenser, a path to the attic hatch or furnace closet, and anything stored on top of the air handler. That alone saves an hour of billable time.
Step 3: Recover the old refrigerant and remove the old unit
The old charge has to be recovered into a tank, not vented. The Clean Air Act makes venting illegal, with EPA fines that run into the tens of thousands per violation. This is the first task that requires an EPA 608 certified person, and it takes 20 to 45 minutes.
The tech connects a recovery machine to the service ports, pulls the system down to the required vacuum level (usually 0 psig for small systems, lower for larger ones), and weighs the tank. R-410A reclaimed from your old unit goes back to a reclaimer; the tech pays a small per-pound fee or gets a credit, which should not show up on your bill as a large line.
With the system empty, the crew:
- Kills power at the breaker and disconnect, then tests dead at the contactor lugs.
- Removes the whip and low-voltage wires from the condenser.
- Cuts the line set at the service valves with a tubing cutter (not a saw, which leaves copper chips in the line).
- Unbolts or lifts the condenser off the pad. A 3-ton unit weighs 150 to 250 lb, so this is a two-person lift or a hand truck.
- Indoors, cuts the drain line and the line set at the coil, removes the coil cabinet screws, and slides the old coil out of the plenum.
Old evaporator coils live inside a sheet-metal plenum above the furnace or in the air handler cabinet. Expect rust, a bent drain pan, and a mat of dust on the fins. If the plenum is rusted through or undersized, this is the moment to replace it, not after the new coil is sealed in.
Pro tip
Before the old condenser comes off the pad, photograph the thermostat wire colors at the contactor and the breaker size at the panel. Then measure the old line set run and note whether it has any kinks or old brazed repairs. A reused line set with a kink will starve the new coil and look like a low charge later.
Reuse or replace the line set?
Replace it when you can. Old mineral-oil residue from an R-22 system is incompatible with POE oil in a modern compressor, and flushing a line set rarely gets all of it. Any line set smaller than the new unit’s spec (a 3/4 in suction line on a 4-ton that calls for 7/8 in) has to go. A new 25 ft line set costs $80 to $180 and takes an hour to run on an accessible route.
Reuse is reasonable when the existing set is the correct size, the old system was R-410A, the run is buried in a finished wall, and the tech triple-flushes it with a line set flush kit and nitrogen. Get that flush on the invoice.
Step 4: Set the pad and the condenser
The condenser needs a level, stable base that keeps it out of mulch, snow and standing water. The standard is a 3 in thick composite pad on 4 in of compacted gravel, sized at least 2 in larger than the unit footprint on every side. Concrete works too but weighs 150 lb or more and cracks if the ground heaves. Prefabricated plastic or composite pads cost $40 to $120.
Set the pad:
- Dig out 4 in and level the bottom with a 4 ft level.
- Add 3/4 in crushed stone and tamp it.
- Set the pad and check level in both directions. Out of level by more than 1/4 in over 3 ft lets oil pool on one side of the compressor sump.
- In snow country, raise the whole thing on a stand so the unit base sits at least 12 in above grade, or above the average snow depth, whichever is higher.
If the spot floods when it rains, deal with that now. A short perimeter trench with perforated pipe, essentially a small “french drain” along the house side of the pad, keeps the base plate out of water that otherwise rusts the bottom panel in a few seasons.
Clearances and placement
Follow the installation manual, not a rule of thumb, because the numbers vary by brand. Typical requirements are 12 in minimum from a wall on the coil sides, 24 in preferred, 60 in clear above the fan discharge, and 24 to 36 in of service clearance at the side with the access panel and service valves. Two condensers side by side need 24 in between them so one does not pull the other’s hot discharge air.
Keep the unit away from dryer vents (lint plugs the coil in one season), bedroom windows if noise matters, and sprinkler heads that spray the coil with hard water. Shorter line set runs are better; most manufacturers rate the factory charge for 15 ft and allow up to 50 to 75 ft with charge adjustments. Vertical rise over 20 to 25 ft usually needs an oil trap or a smaller suction line.
Set the condenser on the pad with two people, line it up so the service valves face the direction the line set will arrive from, and secure it with the hurricane straps or anchor clips the manual specifies. Coastal and high-wind zones inspect for this. The unit should sit flat with no rocking; shim composite pads with pressure-treated shims, not scraps.
Step 5: Install the evaporator coil and condensate drain
The indoor coil mounts in the supply plenum above an upflow furnace, below a downflow furnace, or inside the air handler cabinet. Cased coils (in their own sheet-metal box) are the norm because they seal to the plenum with a flange and drop in with 8 to 12 sheet-metal screws. Uncased coils go inside an existing plenum and need a custom sheet-metal drain pan support, which takes more time and leaks more often.
Install sequence:
- Set the coil so the airflow arrow matches direction (upflow or downflow). Many coils are convertible, with a pan that flips.
- Confirm the coil is level side to side so condensate runs to the drain tap, not the far corner.
- Seal every plenum joint with mastic or UL 181 foil tape. Cloth duct tape fails in two summers.
- Make sure the coil’s airflow rating matches the blower: roughly 350 to 400 CFM per ton. A 3-ton coil on a furnace blower that only moves 900 CFM will ice up.
Coils today usually ship with a factory-installed TXV sized for the refrigerant. If a TXV is field-installed, the sensing bulb clamps to the suction line at the 4 or 8 o’clock position, never on the bottom where oil pools, and gets wrapped in insulation. The bulb sits on a horizontal section of straight pipe within a few inches of the coil outlet.
The drain line
Condensate drain problems cause more water damage than refrigerant leaks ever will. The coil makes 5 to 20 gallons of water a day in humid weather. Get this part right:
- Use 3/4 in PVC, never smaller, from the primary drain tap.
- Install a P-trap right at the coil. On a draw-through coil (blower pulling air through), the trap depth needs to exceed the negative static pressure, so 2 to 3 in of trap seal is standard. Without a trap, the blower sucks air up the drain and the pan overflows.
- Slope the run at 1/4 in per foot to the drain point.
- Add a vent tee after the trap if the run is over 15 ft, so the line can drain without gurgling.
- Add a cleanout tee with a cap at the coil for annual vinegar flushing.
- Terminate outdoors, to a floor drain, or to a condensate pump. Do not tie into a plumbing drain without an air gap or an approved indirect connection.
If the air handler is in an attic or above a finished ceiling, code (IRC M1411.3.1 or your local equivalent) requires an auxiliary drain pan at least 1.5 in deep and 3 in larger than the unit, with either a separate secondary drain line to a visible location or a float switch that kills the system on overflow. Install the float switch anyway. A $25 switch beats a $3,000 drywall repair. Wire it in series with the Y wire or the R wire per the switch instructions.
Attic and crawl space installs put the coil in the worst environment possible for condensation. A sealed, conditioned crawl is far kinder to an air handler, so if you are already down there running line set over bare dirt, a “crawl space vapor barrier” is a cheap upgrade that cuts coil sweating and rust on the cabinet.
Step 6: Run and braze the line set
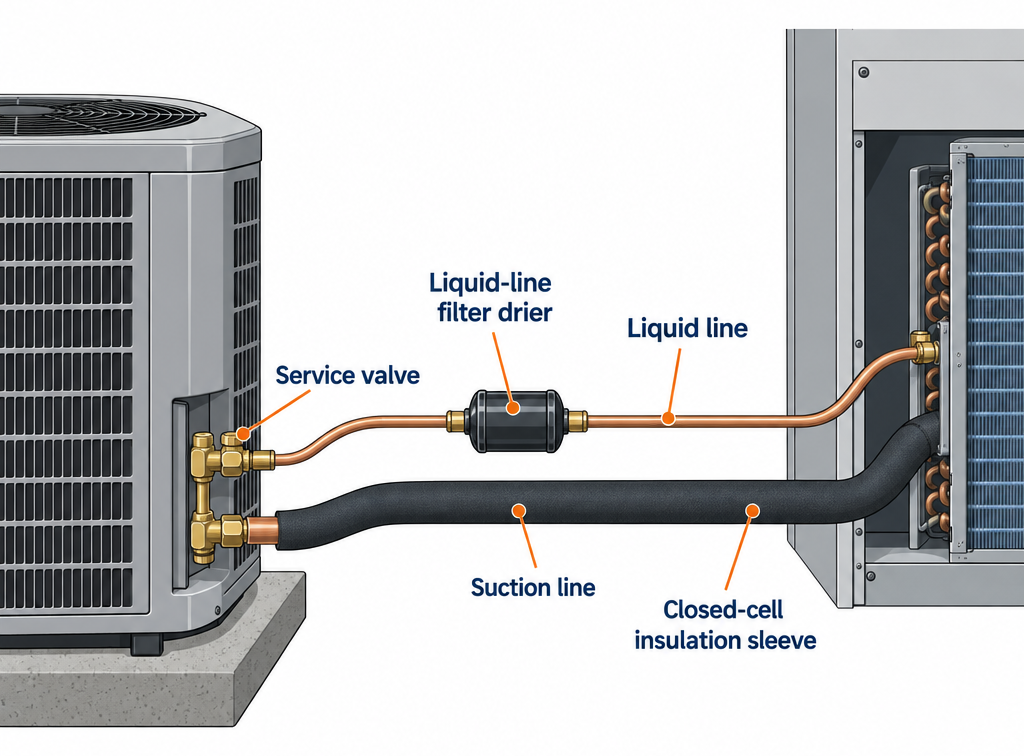
The line set is two copper tubes: the small liquid line (3/8 in for most residential units) and the larger insulated suction line (3/4 in for 2 to 3 tons, 7/8 in for 3.5 to 5 tons). Confirm sizes in the install manual; the wrong suction size changes the refrigerant velocity and kills oil return.
Routing
Plan the route from coil to condenser with the fewest bends and no kinks. Copper line set bends by hand to a gentle radius; anything tighter needs a tubing bender. Run it:
- Through the rim joist or wall with a 2 to 2.5 in hole, then seal the penetration with a wall sleeve and silicone or duct seal, not spray foam, which traps moisture against the copper.
- Supported every 4 to 6 ft with cushioned clamps or hangers. Unsupported line set vibrates and wears through its insulation at every contact point.
- Sloped slightly back toward the condenser on the suction line where possible, so oil drains to the compressor.
- Kept at least 6 in from hot flue pipes and away from any place it can get stepped on.
The suction line gets insulated the whole length, including in the attic and any exposed outdoor section, with 3/4 in wall closed-cell foam. The liquid line is usually bare indoors but should be insulated where it runs through a hot attic, since a warm liquid line reduces capacity. Outdoors, cover both in a line set cover or UV-rated wrap; bare foam crumbles in two or three summers of sun.
Prepping the copper
Cut with a tubing cutter, then ream the inside edge with a deburring tool. Burrs cause turbulence and shed copper chips into the TXV. Keep the line ends capped or taped until the moment you braze. Fit the joints: the line set slides into the stub on the coil and into the service valve on the condenser. Some stubs need a swage (expanding the tube end) so the line nests inside; a hand swaging tool does this in a minute.
Slide the filter drier into the liquid line near the condenser (or indoors near the coil for a heat pump bi-flow drier) with the arrow pointing toward the indoor coil. Many condensers now ship with a drier already installed; if so, do not add a second one.
Brazing
Brazing is where an install is made or broken. The process:
- Remove the Schrader cores from both service ports with a core removal tool. Heat destroys the seals.
- Open the service valve caps and confirm both valves are fully closed (front-seated) so the factory charge stays in the condenser.
- Wrap the service valves and the TXV with a wet rag or wrap-around heat block to protect the internal seals.
- Flow dry nitrogen through the lines at 2 to 5 cfh (a few psi on the regulator) during every braze. Nitrogen displaces oxygen so the inside of the copper does not form black oxide scale, which breaks loose and clogs the TXV screen. This single step separates a 15-year system from a 5-year one.
- Heat the joint evenly with an oxy-acetylene or air-acetylene torch until the copper is dull cherry red, then feed 15% silver phosphorus-copper rod (Sil-Fos 15 or equivalent). Copper to copper needs no flux. Copper to brass (some service valves and driers) needs 45% silver rod and flux.
- Let the joint cool naturally. Quenching cracks the braze.
Four joints on a typical changeout: two at the coil, two at the condenser. Add two more per drier. A clean braze shows a smooth silver fillet all the way around with no pinholes or dull, grainy spots.
With A2L refrigerants, braze only with the system fully nitrogen-purged and no refrigerant in the lines. Never braze on a charged line, which was always bad practice and is now a fire hazard.
Pro tip
Pull the Schrader cores and leave the core removal tools on the ports for the rest of the job. You braze without cooking the seals, pressure test and evacuate through a full-bore opening instead of a pinhole, and the vacuum pull takes a third of the time. Reinstall the cores (hand snug, then a quarter turn) right before charging.
Step 7: Wire the disconnect, whip and thermostat
The condenser runs on a dedicated 240 V circuit. The nameplate tells you everything: Minimum Circuit Ampacity (MCA) sets the wire size, and Maximum Overcurrent Protection (MOCP) sets the breaker. A 3-ton unit typically shows MCA 18 to 22 A and MOCP 30 to 35 A, which means 10 AWG copper and a 30 A two-pole breaker. Breakers for AC can be larger than the wire’s normal rating because the compressor is a motor load (NEC Article 440), but the breaker must never exceed the MOCP on the plate.
The disconnect
Code requires a disconnect within sight of the condenser, no more than 50 ft away and readily accessible (NEC 440.14). Mount it on the wall at eye level with 30 in of width and 36 in of depth clear in front of it (NEC 110.26). Non-fused pull-out disconnects (60 A rated, $15 to $30) are fine when the breaker at the panel provides the overcurrent protection. Use a fused disconnect only if the MOCP is smaller than the existing breaker and you cannot change the breaker.
Run the branch circuit in the method your jurisdiction allows: UF cable where exposed outdoors is usually not permitted, so expect THWN conductors in PVC or EMT conduit from the house to the disconnect box.
The whip
From the disconnect to the condenser, use a liquid-tight flexible metal conduit whip, 6 ft maximum, with conductors sized to the circuit. Pre-made whips in 10 AWG cost $25 to $40. Connect at the condenser to the contactor line terminals (L1, L2) and the ground lug. Torque the lugs to the spec on the contactor, usually 20 to 35 in-lb; loose lugs are the number one cause of melted contactors.
A GFCI-protected 120 V service receptacle is required within 25 ft of the condenser (NEC 210.63) so a tech can plug in a vacuum pump and recovery machine. If one is not there, this is the time to add it.
Low voltage
Run 18/5 thermostat wire from the air handler control board to the condenser. The condenser needs only Y (compressor call) and C (common), and for a heat pump O/B as well. Connect to the contactor coil terminals or the control board per the wiring diagram. Twist the connections under wire nuts or use the spade terminals supplied; do not leave them wrapped around a screw.
Indoors, the thermostat connects R (24 V power), C (common), Y (cool), G (fan) and W (heat) at the control board. Modern thermostats need the C wire for power. If the old thermostat cable is 4-conductor and lacks C, run a new 18/5 now; it takes 30 minutes while everything is open and saves a second visit. Set the thermostat’s equipment type (single-stage AC with gas furnace, heat pump with aux heat, etc.) in its setup menu before you call for cooling.
Wire the condensate float switch in series on the Y wire (or R, depending on the switch). Wire the A2L refrigerant leak sensor, if your coil has one, to the control board exactly as the diagram shows; it typically forces the blower on and locks out the compressor if it trips.
Step 8: Pressure test and leak check
Never evacuate a system without pressure testing first. A vacuum pump cannot find a leak; it just pulls until the micron gauge stalls.
- Connect the nitrogen regulator to the suction service port through the core removal tool.
- Pressurize the line set and coil (not the condenser, which is isolated behind closed valves) to the manufacturer’s test pressure. Most techs test at 300 to 400 psi for R-410A and the new A2L refrigerants, and some manuals allow up to the low-side design pressure on the nameplate.
- Let it sit 15 to 30 minutes minimum, longer is better. Record the start pressure and the temperature.
- Zero drop means a tight system. A drop of a few psi with no temperature change means a leak.
- Brush soap bubble solution on every braze joint and flare. Bubbles grow at the leak.
A leak at a braze means cutting it out, cleaning, and re-brazing. Do not try to braze over a leaking joint under pressure, and do not use leak sealant additives in a new system.
Some installers add a trace of refrigerant to the nitrogen so an electronic leak detector can sniff joints. With A2L refrigerants, confirm your detector is rated for them.
Step 9: Pull a vacuum to 500 microns
Evacuation removes air and, more importantly, moisture. Moisture reacts with POE oil to form acid that eats compressor windings. The target is 500 microns or lower, measured with a digital micron gauge at the system, not at the pump.
Setup for a fast, clean pull:
- Use 1/4 in or better yet 3/8 in evacuation hoses with the Schrader cores removed. Standard gauge-manifold hoses with cores in place can triple the time.
- Connect the vacuum pump to one port and the micron gauge to the other, so the gauge reads the system rather than the hose.
- Change the pump oil before the job. Milky oil is saturated with moisture and will not pull below 1,000 microns.
A dry 25 ft line set and coil will drop below 500 microns in 20 to 45 minutes. A reused or damp line set can take 2 hours or more. If the gauge stalls at 1,500 to 3,000 microns, there is moisture boiling off. Break the vacuum with nitrogen to about 5 psi, hold it 10 minutes to absorb moisture, release it, and pull again. Two or three nitrogen sweeps usually fix a wet system.
Then run the decay test. Valve off the pump and watch the gauge for 10 to 15 minutes:
- Holds under 1,000 microns with a slow rise that levels off: dry and tight. Proceed.
- Rises steadily and keeps climbing past 2,000 to 5,000: a leak. Go back to Step 8.
- Rises quickly to 1,500 to 2,500 then stops: moisture. More nitrogen sweeps and more pump time.
Pass the decay test before any refrigerant enters the lines. An installer who skips the micron gauge and “pulls for 20 minutes and calls it good” has not evacuated the system.
Step 10: Release the charge, add refrigerant and commission
With the system tight and dry, reinstall the Schrader cores, then open the service valves. Remove the valve caps, back out the hex stem of the liquid line valve fully counterclockwise with an Allen wrench, then do the suction valve. You will hear the factory charge rush into the lines. Torque the stem caps back on (they are the primary seal, usually 8 to 14 ft-lb; the manual lists it).
Adjust the charge for line length
The factory charge is sized for a short line set, typically 15 ft. Longer runs need refrigerant added at the rate on the nameplate or in the manual, commonly about 0.6 oz per foot for a 3/8 in liquid line with R-410A. R-454B and R-32 systems list their own rate. Weigh the additional charge in on a scale, liquid-feed into the suction side slowly with the compressor running, never as a liquid slug.
Start and verify
Set the thermostat to cool, 5°F below room temperature, and let the system run 15 to 20 minutes before measuring. Then take the commissioning numbers a good installer writes on the invoice:
| Measurement | Target | What it tells you |
|---|---|---|
| Subcooling (TXV coil) | 8-14°F, per nameplate | Charge level; low means undercharged, high means over |
| Superheat (fixed orifice coil) | Per manufacturer chart, often 10-20°F | Charge level on piston systems |
| Temperature split across coil | 16-22°F | Airflow and capacity |
| Total external static pressure | Under the blower rating, usually 0.5 in w.c. | Duct restriction; high static means ducts or filter are choking the system |
| Supply CFM | 350-400 per ton | Airflow |
| Compressor amps | Below RLA on nameplate | Compressor health and charge |
| Condenser fan amps | Below FLA on nameplate | Fan motor health |
| Liquid line pressure and temperature | Steady, no fluctuation | TXV working correctly |
Dial the charge in on subcooling, not on “beer can cold” suction lines or a pressure-only reading. Each manufacturer prints the target subcooling on the condenser’s rating plate.
Check the condensate drain by pouring a cup of water into the coil pan and watching it exit the outdoor termination. Trip the float switch by lifting its float and confirm the system shuts down.
Finish by:
- Tightening the condenser panels and installing the grommet where the line set enters the cabinet.
- Insulating any exposed suction line including the last inch at the service valve.
- Sealing the wall penetration.
- Installing a new filter and setting the blower speed tap or ECM setting to the tonnage.
- Registering the equipment with the manufacturer within the window (often 60 to 90 days) to get the full 10-year parts warranty instead of the default 5.
- Scheduling the inspection.
Pro tip
Ask for a copy of the commissioning sheet with subcooling, static pressure and temperature split filled in and signed. If the system misbehaves in year three, those baseline numbers tell the next tech in five minutes whether it lost charge, lost airflow or never ran right. Contractors who commission properly are glad to hand it over.
What you can legally do yourself, and what you cannot
The homeowner share of an “install an ac unit” project is bigger than most people think. You can:
- Run the Manual J, pick the equipment, and buy it (equipment sales have no license requirement in most states).
- Build the pad, set the condenser, and mount the disconnect.
- Run the branch circuit and whip if your jurisdiction issues homeowner electrical permits.
- Run the thermostat wire, install the thermostat, run and insulate the line set, and install the drain, trap, pan and float switch.
- Braze, pressure test and evacuate, if you own the tools and nitrogen (nitrogen needs no certification).
You cannot legally buy refrigerant or recover the old charge without EPA 608 certification. The exam costs $25 to $150; only Type I (small appliances) can be taken open book online, while Type II requires a proctored, closed-book exam, so a motivated DIYer can still get it, but the recovery machine, tank, scale, micron gauge and vacuum pump add up to $800 to $1,500 even at budget tier.
Several states (Texas, Florida, Massachusetts and others) require an HVAC contractor license to install equipment for compensation, and some require it even for homeowner installs on permitted work. Check before buying a condenser online. And remember the warranty: most manufacturers reduce or deny parts coverage without a licensed installer on record, and a compressor out of warranty costs $1,500 to $3,400 to replace for a typical 2.5 to 3 ton unit, and up to $4,650 for larger or more complex jobs.
The most common hybrid approach is to do everything through Step 7 yourself, then hire an EPA-certified tech for a half day to recover, braze, test, evacuate and charge. That visit typically runs $400 to $900 and gets you a commissioned system.
If you meant a window or mini-split unit
The phrase “install a air conditioner unit” covers three very different jobs. A window unit takes 30 to 60 minutes: level it with a slight outward tilt of about 1/4 in so condensate drains out, support it with the included bracket or an L-bracket rated for its weight (60 to 100 lb for 10,000 to 14,000 BTU), extend the side accordion panels, and seal the gap above the sash with foam. Plug into a dedicated 15 or 20 A outlet; units over 12,000 BTU often need a 20 A circuit and a few need 240 V.
A ductless mini-split is closer to the central job described here. The indoor head mounts on a bracket, a 3 in hole carries the line set, drain and wire outdoors, the outdoor unit sits on a pad or wall bracket, and the lines connect with flare fittings torqued to spec instead of brazing. It still needs an evacuation to 500 microns and, if the line set exceeds the pre-charged length, weighed-in refrigerant, so the same 608 rules apply. Pre-charged “DIY” mini-split kits with quick-connect fittings skip the vacuum and charge; they work, with a small efficiency penalty from the fittings.
Troubleshooting a new installation
Most problems in the first week trace back to one of the steps above. Use this table before calling the installer back, and if the system is simply not responding at all, our guide to fixing an “air conditioner” that isn’t working covers the thermostat, breaker and float switch checks in order.
| Symptom | Likely cause | Fix |
|---|---|---|
| Runs 5-8 minutes, shuts off, repeats | Oversized unit, or thermostat too close to a supply register | Verify Manual J; move or relocate thermostat; two-stage or variable speed if replacing |
| Ice on the suction line or coil | Low airflow (dirty filter, closed registers, wrong blower speed) or undercharge | Check static pressure and filter first; then subcooling |
| Water on the floor or ceiling stain | No trap, trap too shallow, drain not sloped, missing float switch | Add proper P-trap, reslope at 1/4 in per foot, install float switch |
| Warm air at vents, condenser running | Reversed or missing Y wire, TXV stuck, charge not released (service valves still closed) | Confirm both valve stems fully open; check Y at the contactor coil for 24 V |
| Condenser hums, fan runs, no cooling | Compressor not starting: contactor pitted, capacitor failed, locked rotor | Test capacitor µF against rating; check contactor; hard-start kit as last resort |
| Breaker trips on start | Breaker below MOCP, loose lugs, or wrong wire size | Match breaker to nameplate MOCP; torque lugs; verify wire gauge |
| House cools but feels humid | Oversized, or blower set too high | Lower blower CFM toward 350 per ton; check dehumidify mode on thermostat |
| High electric bill right away | Low charge, dirty or recirculating condenser, high static | Check subcooling, clearances, static pressure |
| Loud buzzing at condenser | Loose panel, line set vibrating against cabinet or wall | Add rubber isolators and cushioned clamps |
| TXV hunting, pressures swing | Oxidation in lines from brazing without nitrogen, or bulb poorly mounted | Replace drier, correct bulb position and insulation; severe cases need TXV replacement |
The first spring after installation is also the time to start the routine on our “air conditioning” maintenance checklist: new filter, clear the drain with vinegar, hose the condenser coil from the inside out, and confirm the temperature split is still in the 16 to 22°F range.
When to call a pro
Call a licensed HVAC contractor for anything involving recovery or charging of refrigerant, a brazed joint that fails a pressure test twice, a micron gauge that will not drop below 1,000 after nitrogen sweeps, or a compressor that trips on amps above RLA. Call a licensed electrician if the panel has no space for a new two-pole breaker, the service is 100 A or less and already loaded, or the run from panel to condenser exceeds 100 ft and needs a voltage-drop calculation. Call a structural or roofing pro before setting any condenser on a roof or deck.
FAQ
How expensive is it to install an AC unit?
A central AC changeout (new condenser and matched coil, reusing the furnace and ducts) typically costs $4,500 to $8,500 installed in 2025 for standard-efficiency equipment, rising to around $11,500 for high-efficiency 16+ SEER2 systems, with a 3-ton condenser and coil usually landing at $4,500 to $8,300. Equipment alone runs roughly $1,150 to $4,800 for a matched pair depending on size and efficiency, with a standard 3-ton pair commonly $2,000 to $3,500; labor, line set, pad, electrical, drain components and permits make up the rest. Adding an air handler runs $1,500 to $4,200 more, and new ductwork $2,400 to $7,500. A window unit costs $250 to $700 with no installation labor, and a single-zone mini-split lands at $2,500 to $5,000 installed.
Can I install an AC unit by myself?
You can do most of it: sizing, pad, condenser placement, line set routing and insulation, drain and float switch, thermostat wiring, and often the disconnect and circuit with a homeowner electrical permit. You cannot legally recover old refrigerant or buy and charge new refrigerant without EPA Section 608 certification, and most manufacturers only honor the full parts warranty with a licensed installer on record. The practical DIY path is to finish everything up to the brazing and hire a certified tech for a half-day to recover, braze, pressure test, evacuate and charge, usually $400 to $900.
How to install an AC unit step by step?
Size it with a Manual J load calculation. Choose an AHRI-matched condenser and coil, pull the mechanical and electrical permits, and schedule. On install day: recover the old refrigerant, remove the old condenser and coil, set a level 3 in pad with the manual’s clearances, mount the new coil in the plenum with a trapped 3/4 in PVC drain and float switch, run and braze the line set with nitrogen flowing, wire the disconnect and whip to the nameplate MCA and MOCP plus the 18/5 thermostat cable, pressure test with nitrogen at 300 to 400 psi, pull a vacuum to 500 microns and pass a decay test, open the service valves, weigh in any extra charge for line length, then commission on subcooling, temperature split and static pressure before the inspection.
How long does it take to install an AC unit?
A changeout takes a two-person crew 4 to 8 hours. A full system swap with a new air handler runs 6 to 10 hours. A new installation with ductwork is 2 to 3 days. The planning phase before that (load calc, three quotes, permit) usually takes one to two weeks, longer in peak summer when crews are booked out.
Do I need a permit to replace my AC condenser?
Almost always, yes. Replacing the condenser is a mechanical permit in nearly every US jurisdiction, and changing the disconnect, whip or circuit adds an electrical permit. Fees run $75 to $400. Unpermitted work surfaces at resale and can void insurance coverage for a related fire or water claim, so insist that the contractor pulls it and that the final inspection is on the invoice.
Should I replace the furnace or air handler at the same time?
If the furnace is more than 15 years old, has a PSC blower motor, or cannot move 350 to 400 CFM per ton of the new AC, replacing both at once saves a second labor visit and gets you a matched ECM blower that the new coil needs. If the furnace is under 10 years old with a variable-speed blower and the coil fits the plenum, keep it.