
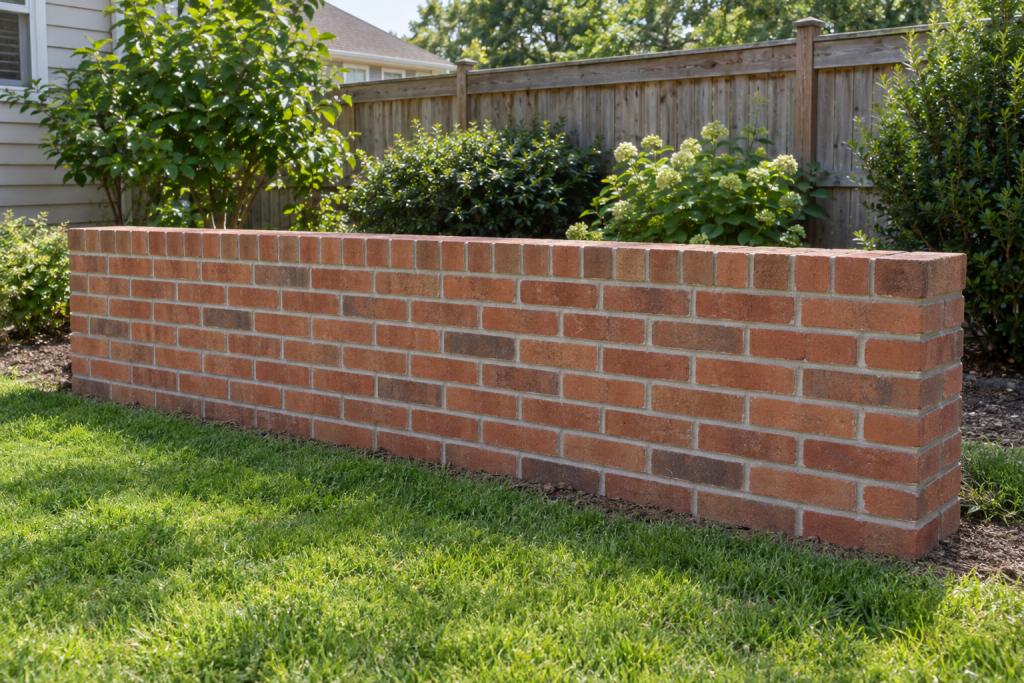
To lay bricks with mortar, you spread a 3/8-inch bed of Type N mortar on a level footing, butter one end of each brick, press it into place against a string line, then tool the joints once they firm up. Build the two ends first, run a line between them, and fill the middle course by course. A first-timer can finish a 10-foot by 3-foot garden wall in a weekend.
Quick steps: lay a brick wall with mortar
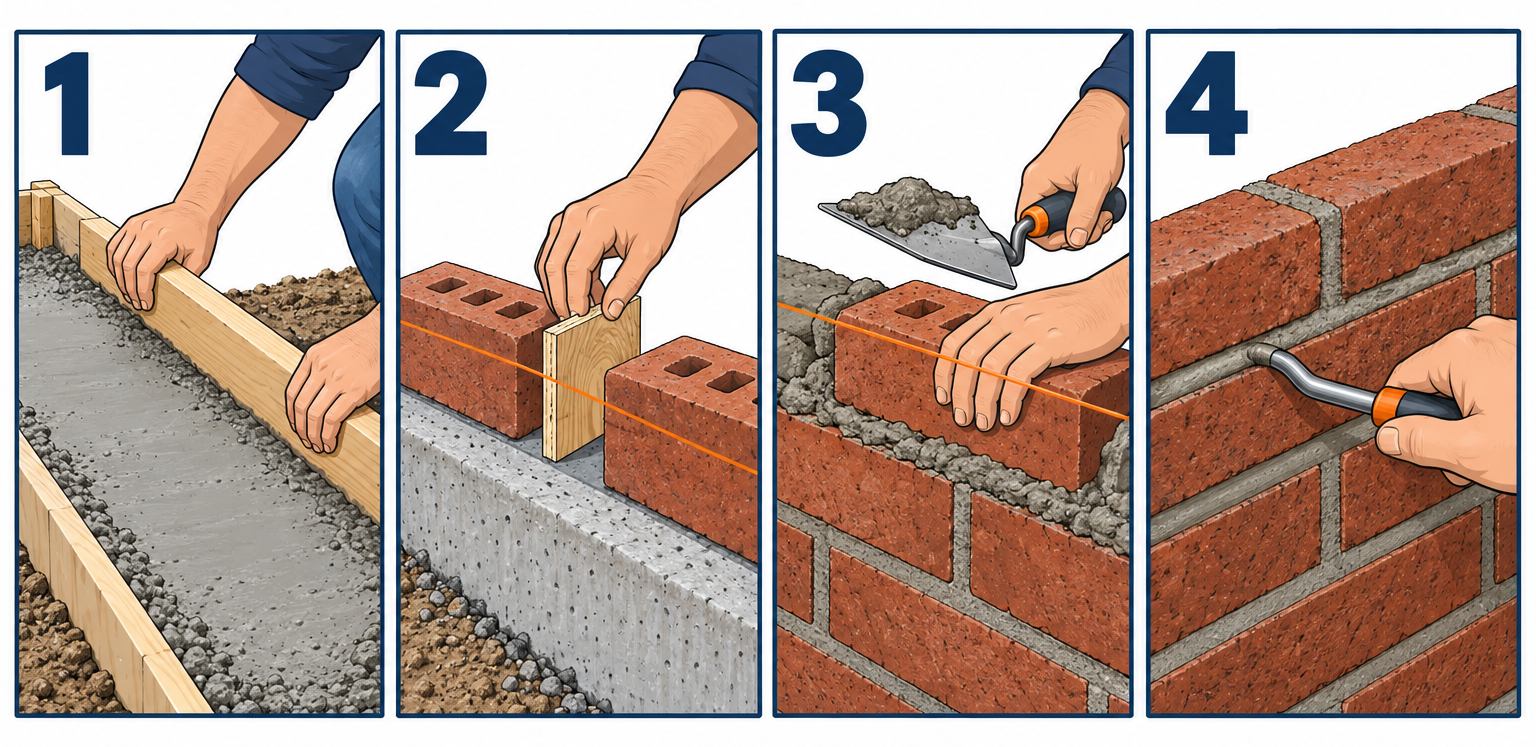
- Pour or verify a level concrete footing and let it cure 3 days.
- Dry-lay the first course with 3/8-inch gaps and mark every joint on the footing.
- Mix mortar to a stiff, peanut-butter consistency in batches you can use in 2 hours.
- Lay the first course in a full mortar bed, checking level and alignment brick by brick.
- Build the two ends (leads) 4 or 5 courses high, stepping each course back half a brick.
- Stretch a mason’s line between the leads and fill each course to the line.
- Tool the joints when the mortar is thumbprint hard, then brush off crumbs.
- Keep the wall damp for 3 days and leave it unloaded for a week.
Tools and materials
- Brick trowel (10-inch London or Philadelphia pattern)
- Pointing trowel (5-inch)
- 4-foot spirit level and a 2-foot torpedo level
- Mason’s line, two line blocks, and a line pin
- Brick jointer (3/8-inch convex sled runner)
- Brick hammer and a 4-inch brick set chisel
- Angle grinder with 4-1/2-inch diamond blade (for clean cuts)
- Mortar board or hawk, mixing tub or wheelbarrow, mortar hoe
- 25-foot tape, chalk line, framing square, pencil
- Stiff bristle brush and a soft brush
- Modular bricks (3-5/8 x 2-1/4 x 7-5/8 inches), about 7 per square foot plus 5 percent waste
- Type N mortar mix, 80-pound bags (one bag per 35-40 bricks)
- Clean water, a 5-gallon bucket, and a measuring container
- Nitrile-coated gloves, safety glasses, knee pads
Calculators for this job
Safety first
Wet mortar is caustic (pH around 12 to 13) and will burn skin after an hour of contact, so wear gloves and rinse splashes immediately. Wear safety glasses and a dust mask whenever you cut or chisel brick, and never use a grinder without the guard.
Picking the right mortar before you start
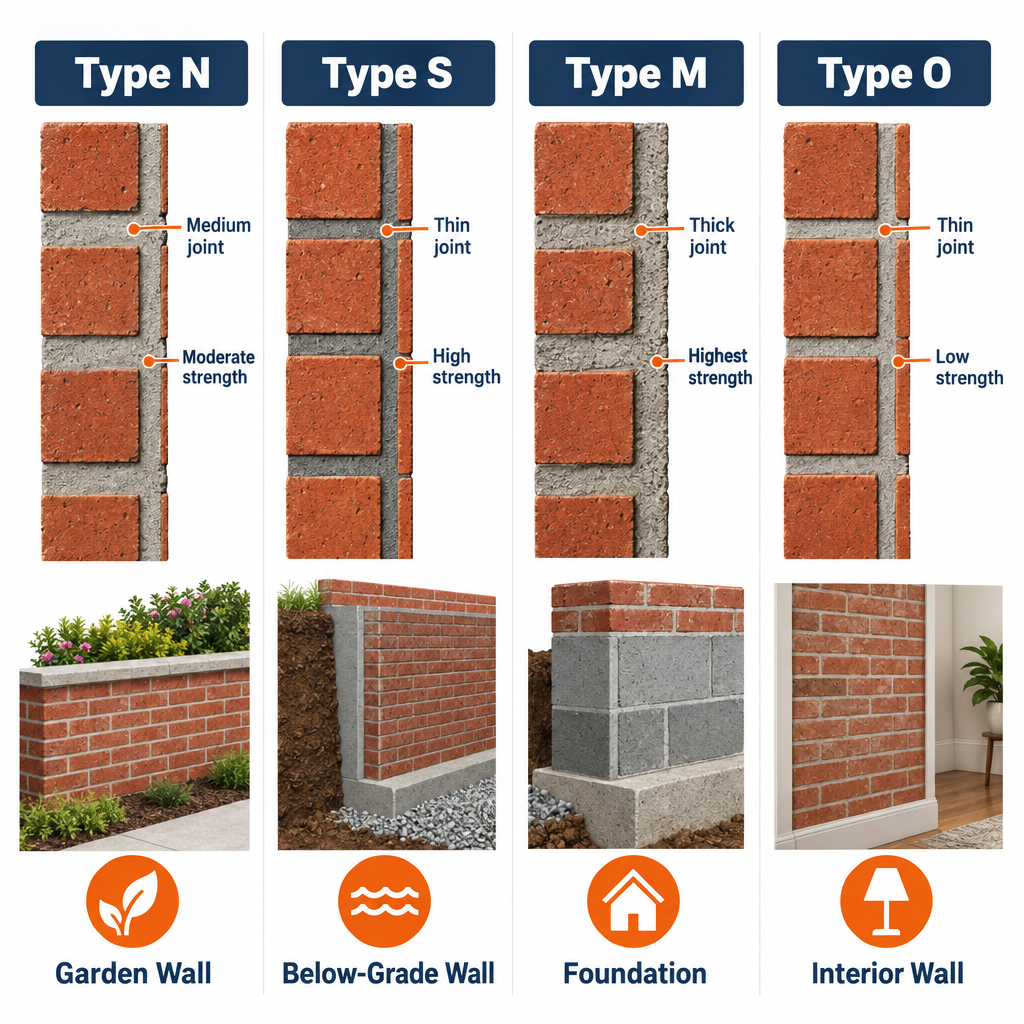
The mortar you buy matters more than the brick you buy. Too strong a mix cracks the brick instead of the joint when the wall moves, and too weak a mix crumbles in a freeze-thaw climate.
| Mortar type | Compressive strength (28 days) | Mix by volume (cement : lime : sand) | Use it for |
|---|---|---|---|
| Type N | 750 psi | 1 : 1 : 6 | Above-grade exterior walls, garden walls, chimneys, veneer. The default for homeowners. |
| Type S | 1,800 psi | 1 : 1/2 : 4-1/2 | Below-grade work, retaining walls, planters, high-wind areas, anything in constant contact with soil. |
| Type M | 2,500 psi | 1 : 1/4 : 3-3/4 | Foundations and heavy loads. Too hard for most brick. |
| Type O | 350 psi | 1 : 2 : 9 | Interior non-load-bearing walls and repointing soft pre-1930s brick. |
For a freestanding garden wall, a mailbox pier, or a planter above grade, buy bagged Type N mortar mix. It is sold pre-blended with sand, so you only add water. If any part of the wall holds back soil, step up to Type S. Bags run $8 to $14 each at Home Depot and Lowe’s, and one 80-pound bag lays roughly 37 standard bricks with 3/8-inch joints.
Mortar color is the other decision to make now, because you cannot change it later. Mortar joints cover close to 20 percent of the wall face, which is a significant share of what the eye sees.
| Mortar color | How it’s made | Effect on the overall look | Cost over standard gray |
|---|---|---|---|
| Gray | Standard Portland cement, local sand | The classic choice. Red brick reads as traditional, even a little rustic. | None |
| White | White Portland cement with white silica sand | Makes lighter brick and white brick look like one surface. Popular on modern and farmhouse-style homes. | About 30-50 percent more |
| Buff or tan | Iron oxide pigment in gray or white base | Warms the wall and hides sand color variation. Blends with natural stone. | $15-25 per bag of pigment |
| Black or charcoal | Carbon black or black iron oxide pigment | Creates sharp contrast that makes each brick a design element. Trending on exterior accent walls. | $20-30 per bag of pigment |
If you add pigment yourself, keep it under 10 percent of the cement weight (and under 2 percent for carbon black) or the mortar loses strength. Measure the pigment by weight for every batch so the color stays consistent across the whole wall.
Step 1: Pour or check the footing
Every mortar wall needs a concrete footing. Brick on dirt or on gravel heaves the first winter and the joints crack apart.
For a single-wythe wall (one brick thick, 3-5/8 inches), dig a trench twice the wall width and at least as deep as the wall is wide. In practice that means 16 inches wide and 8 inches thick. In frost climates the bottom of the footing has to sit below the local frost line, which can be 12 inches in Georgia and 48 inches in Minnesota. Your building department will tell you the number.
Set two pieces of #4 rebar lengthwise on 2-inch dobie blocks. Pour the concrete, screed it flat with a 2×4, and check it with your 4-foot level in both directions. A footing that is off by 1/4 inch in 4 feet will fight you on every course. Let it cure 3 days before you lay brick.
If water collects where the wall will sit, deal with it now. A gravel-filled trench or a short french drain along the back of the footing stops the saturated soil that pushes garden walls over.
Step 2: Dry-lay and mark the first course
Snap a chalk line on the footing for the face of the wall. Set the first course out dry with a 3/8-inch spacer between every brick. A 3/8-inch piece of plywood works, and so does the shank of a 3/8-inch drill bit.
Modular bricks are made for this: one brick plus one joint equals 8 inches. A 10-foot wall takes exactly 15 bricks per course, and running bond starts every other course with a half brick. Adjust the overall length of the wall now, in full or half-brick increments, so you never have to cut odd slivers.
Mark the end of every brick on the footing with a pencil. These marks are your head joint positions for the first course, and the first course sets up everything above it.
Step 3: Mix mortar
Pour an 80-pound bag into the tub, make a well in the middle, and add about a gallon of water. Pull dry mix into the water with the hoe, then add water a cup at a time until the mortar looks like stiff peanut butter.
The test: load the trowel, turn it sideways, and the mortar should hang on for a second before dropping. If it slides straight off, it is too wet. Cut a furrow through it with the trowel edge and the walls of the furrow should stand without slumping.
Mix only what you can lay in about 2 hours. If a batch stiffens from evaporation during that window, you can add a splash of water and remix once. After 2-1/2 hours, dump it. Mortar that has started to set and gets re-wetted bonds poorly, and that is where hairline joint cracks come from.
Let the mortar sit 5 minutes after mixing, then give it a final turn. This “slaking” makes it noticeably creamier on the trowel.
Pro tip
Before you mix, drip a quarter-sized puddle of water on a brick. If it soaks in within 60 seconds, your bricks are thirsty and will pull water out of the mortar before it can cure. Hose down the pallet an hour before you start and let the surface dry so the bricks are damp inside but not slick.
Step 4: Lay the first course
Throw a bed of mortar about 1 inch thick and one brick wide along 3 or 4 feet of footing. Drag the trowel point down the middle to make a shallow furrow. The furrow lets the brick squeeze mortar out evenly in both directions when you press it down.
Butter the end of the first brick: scoop a wedge of mortar on the trowel, swipe it onto the brick end, then pinch the four edges so it holds its shape. Set the brick on the bed, buttered end against the previous brick, and push it down and sideways until the top sits 2-1/4 inches plus one 3/8-inch joint above the footing. Mortar should ooze out of the bed and head joints. Slice the squeeze-out off with the trowel edge and throw it back on the board.
Check every brick in this course three ways. Tap the brick with the trowel handle until the torpedo level reads level across the width. Set the 4-foot level along the length to catch high bricks. Hold the level or a straightedge against the face to keep it on the chalk line. Tap with the butt of the handle, never the blade, and never pick a brick back up once it has been pressed. If one goes wrong, pull it, scrape it clean, and relay it in fresh mortar.
Step 5: Build the leads
A lead is a stepped stack of brick at each end of the wall. You build both leads 4 or 5 courses high, then fill between them. This is how pros keep a wall straight without checking every brick with a level.
Start the second course at each end with a half brick (a “bat”). Cut it by scoring all four sides with the brick set chisel and a sharp hammer blow, or run a line with the grinder and snap it. Each course of the lead steps back half a brick, so a 5-course lead looks like a staircase.
Hold the 4-foot level diagonally across the stepped corners of the lead. Every brick corner should touch the level. Then plumb the end of the lead with the level held vertically. Measure course height from the footing: course 1 at 2-5/8 inches, course 2 at 5-5/16, course 3 at 8. Three courses to 8 inches is the number to remember. If you are an eighth off at course 3, fatten or thin the next bed joint slightly to get back on gauge.
Pro tip
Make a story pole from a straight 1×2. Mark it every 2-5/8 inches with a square line, label the courses, and stand it on the footing against each lead. It is faster and more accurate than a tape measure, and it keeps both leads at identical heights.
Step 6: Run the line and fill the courses
Hook a line block on each lead at the top edge of the next course, and pull the mason’s line tight enough that it does not sag or vibrate. The line should sit 1/16 inch off the brick face. Lay every brick in the course so its top front edge just kisses the line without touching it. Pushing a brick into the line bows the wall.
Work from both ends toward the middle. The last brick in each course is the closure brick: butter both ends of it and both ends of the gap, then slide it straight down. If the closure gap is less than a full brick, your head joints have grown. Keep them at a consistent 3/8 inch by eye and check a random one with the spacer every few bricks.
Keep the trowel moving. Spread bed mortar for 3 or 4 bricks at a time, no more, so it does not skin over before the brick lands. In hot sun that skin forms in under 5 minutes.
Move the line up one course, lay the course, and repeat until you reach the top of the leads. Then build the leads up another 4 or 5 courses and continue. For a top cap, finish with a course of bricks turned on edge (a rowlock course) or a soldier course, which also sheds water better than a flat top.
Step 7: Tool the joints
Mortar is ready to tool when it is thumbprint hard: press your thumb into a joint and it leaves a clear print without mortar sticking to your skin. In mild weather that is 30 to 60 minutes after laying. In 90°F sun it can be 15 minutes, so tool in sections.
Run the convex jointer along the head joints first, then the bed joints, pressing firmly so the tool compacts the mortar into a slight concave curve. The concave profile is the most weather-resistant joint and the most common on homes. A V-joint looks crisper and more formal. Avoid raked joints on an exterior wall in a freeze climate because they hold water on the ledge.
When the mortar burrs along the joint edges have dried for about an hour, brush them off with the stiff brush in a diagonal motion. Brushing too early smears mortar across the brick face, and that smear is what gives new walls the dirty gray haze you see on sloppy jobs.
Step 8: Clean and cure
Mist the wall with a hose two or three times a day for 3 days, and cover it with plastic if the sun is strong. Mortar reaches most of its strength in a week and full strength at 28 days. Do not set anything heavy on the wall or backfill against it for at least 7 days.
Mortar smears that survived the brushing come off after 7 days with a masonry cleaner. On standard red or gray brick, a 1:10 solution of muriatic acid in water works, applied to a pre-wetted wall and rinsed within 5 minutes. Never use acid on white, lighter, or buff brick, or on any brick with a manganese black finish, because it leaves permanent green and brown stains. Use a proprietary brick cleaner such as Sure Klean 600 for those, and test a hidden spot first.
Troubleshooting
| Symptom | Likely cause | Fix |
|---|---|---|
| Bricks keep sinking below the line | Mortar too wet, or bed too thick | Stiffen the batch with dry mix; throw a thinner bed and furrow it |
| Head joints fall out when you set the brick | Brick end not buttered with enough pressure, or brick too dry | Pinch the mortar edges onto the brick before setting; dampen the bricks |
| Wall is off gauge at course 3 | Inconsistent bed joint thickness | Measure from footing each course; thin or thicken joints by 1/16 inch at a time |
| Course bows outward in the middle | Bricks pushed into the line | Pull the bowed bricks, relay 1/16 inch back from the line |
| Hairline cracks through joints after a week | Retempered or old mortar, or wall dried too fast | Rake out to 3/4 inch and repoint; mist new work for 3 days |
| White powder on the face in a month | Efflorescence from salts in brick or sand | Dry brush, then scrub with water; it usually stops after the first season |
| Mortar stiffens on the board in 20 minutes | Hot brick, hot sun, wind | Shade the board, mist the brick, mix half batches |
| Whole wall leans | Footing settled or out of level | Stop. A leaning masonry wall has to come down and the footing redone |
Where the job stops being DIY
A freestanding garden wall under 3 feet, a planter, or a mailbox pier is a fair first project. Several variations are not.
When to call a pro
Call a licensed mason or a structural engineer if the wall will be taller than 4 feet, will retain soil higher than 2 feet, or will carry any load from a structure. Brick veneer on a house also needs flashing, weep holes every 33 inches, and corrugated wall ties on 16-inch centers, and most jurisdictions require a permit and inspection for it. Anything attached to a chimney flue belongs to a certified chimney professional.
Even a short wall needs a permit in some cities once it passes 3 or 4 feet, and most require one for any retaining wall over 4 feet measured from the bottom of the footing. A 10-minute call to the building department before you dig saves you from tearing out finished work.
FAQ
How many bricks and bags of mortar do I need?
Figure 7 modular bricks per square foot of single-wythe wall with 3/8-inch joints, and add 5 percent for breakage and cuts. A 10-foot by 3-foot wall is 30 square feet, so about 215 bricks. Divide bricks by 37 to get 80-pound bags of mortar mix, so 6 bags for that wall. Common red brick runs $0.35 to $0.90 each depending on your region and the color variety you choose.
Can I lay bricks with mortar in cold weather?
Not below 40°F without cold-weather measures. Mortar that freezes before it cures turns to powder. Below 40°F you have to heat the water and sand, keep the materials above 40°F, and cover the finished work with insulated blankets. For a weekend project, wait for a warmer stretch.
Should I soak bricks before laying them?
Only if they are highly absorbent. Do the water-drop test from Step 3. Most modern extruded bricks need no wetting, while salvaged and many handmade bricks drink water fast and should be hosed down an hour ahead. Never lay a brick that is dripping wet, because it floats on the mortar and will not bond.
What is the difference between mortar and concrete?
Mortar is cement, lime, and fine sand, designed to be sticky and slightly flexible so it bonds brick and absorbs small movements. Concrete adds gravel for compressive strength and is not sticky enough to hold a vertical head joint. Never substitute one for the other, and do not use thinset or construction adhesive on structural brick.
Why does my mortar look a different gray on different days?
Water content and curing speed change the shade. A wetter batch dries lighter, and joints that dry fast in sun come out lighter than joints that cure slowly in shade. Measure water for every batch, tool at the same thumbprint-hard stage, and mist the whole wall evenly so the color stays uniform.