
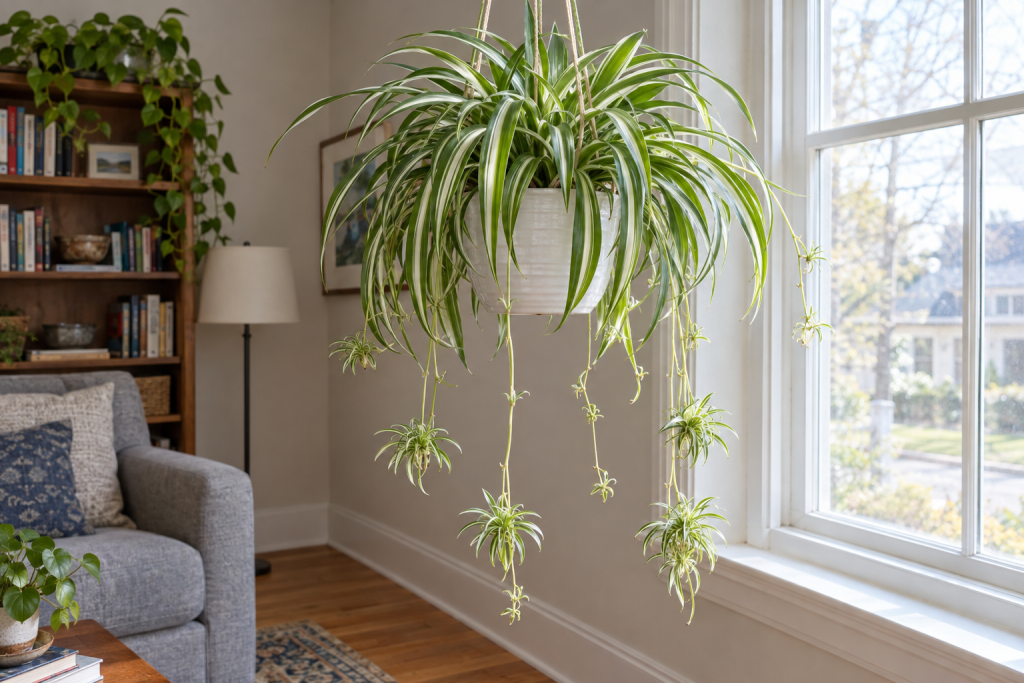
A spider plant (Chlorophytum comosum, also sold as airplane plant or ribbon plant) stays healthy with bright indirect light, water whenever the top inch of soil dries, and a half-strength feed once a month in spring and summer. Get those three things right and you will have a full hanging basket in a season, plus a steady supply of plantlets to pot up or give away.
Quick steps: keep a spider plant thriving
- Hang or set it 3-6 feet from an east or north window, out of direct afternoon sun.
- Pot in a fast-draining houseplant mix in a container with drainage holes.
- Water when the top 1 inch of soil is dry; use rainwater, distilled or filtered water.
- Feed a balanced liquid fertilizer at half strength every 4-6 weeks, spring to early fall.
- Keep the room at 60-80°F and away from heat vents and drafts.
- Snip brown tips, wipe dust off the leaves, and repot every 1-2 years.
- Root the babies (spiderettes) in water or soil to make new plants.
Tools and materials
- Spider plant (4-inch starter, $5-10, or 8-inch hanging basket, $15-25)
- Pot with drainage holes, 1-2 inches wider than the root ball
- Indoor potting mix (peat or coir based) plus a handful of perlite
- Balanced liquid houseplant fertilizer (10-10-10 or 20-20-20)
- Watering can with a narrow spout
- Clean scissors or pruning snips
- Distilled or rainwater (1 gallon jug, $1-2)
- Swag hook rated 25 lb and a toggle anchor if hanging from drywall
Calculators for this job
Safety first
A wet 10-inch hanging basket weighs 8-12 lb. Screw the hook into a ceiling joist or use a toggle anchor rated for the load, never a bare drywall screw. Keep fertilizer concentrate off skin and away from kids and pets.
Step 1: Give it bright, indirect light
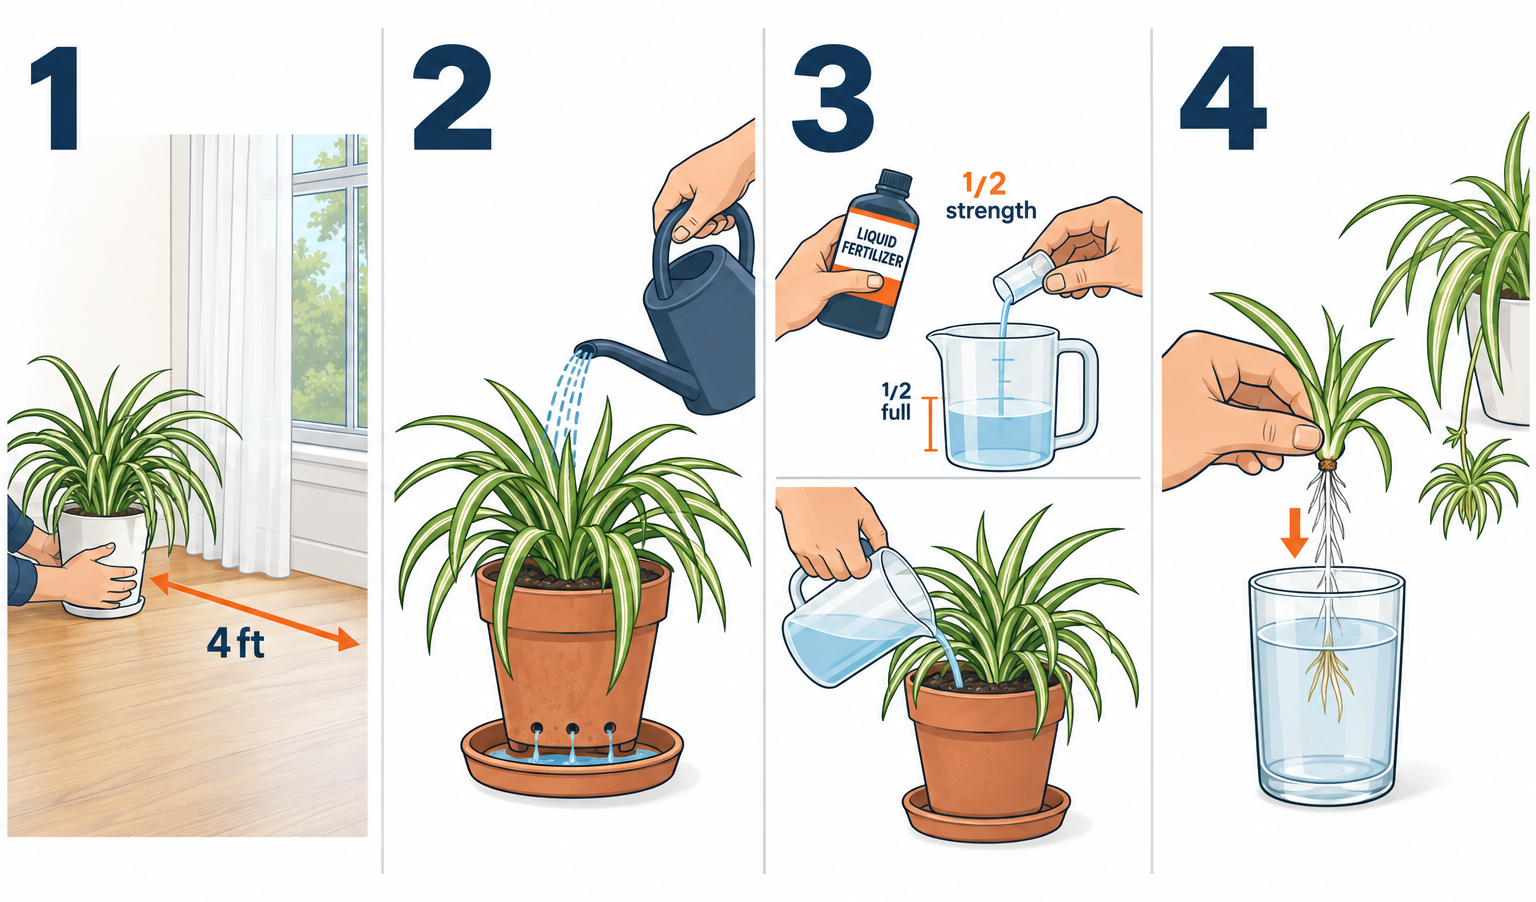
Spider plants grow wild under tree canopies in southern Africa, so they want plenty of light but not a direct beam. An east window is ideal. A north window works for the plain green species form. South or west windows are fine if the plant sits 4-6 feet back or behind a sheer curtain.
Direct afternoon sun bleaches the leaves pale and burns tan patches into them within a few days. Too little light does the opposite: variegated types like ‘Vittatum’ lose their white center stripe and the whole plant turns dull green and floppy.
Variegated cultivars need more light than solid green ones to hold their stripes. If your plant is in a dim corner and the leaves have gone uniformly green, move it closer to a window and new growth will come in striped again.
Rotate the pot a quarter turn each time you water. Spider plants lean hard toward light, and a hanging basket that never rotates ends up lopsided with all the foliage on one side.
| Condition | Target | Signs you are off |
|---|---|---|
| Light | Bright indirect, 6+ hours | Pale or scorched leaves (too much); faded stripes, leggy growth (too little) |
| Temperature | 60-80°F day, no lower than 50°F | Limp leaves and brown edges after a cold draft |
| Humidity | 40-60% | Crispy brown tips in dry winter air |
| Water | Top 1 inch dry between waterings | Yellow lower leaves and mushy base (too much); wilting and curling (too little) |
| Soil pH | 6.0-7.0 | Slow growth and yellowing in very alkaline mix |
Step 2: Pot it in fast-draining soil
Any bagged indoor potting mix works as long as it drains fast. Mix in about one part perlite to four parts potting mix. The thick white tuberous roots store water, and they rot quickly in a heavy or soggy mix.
The pot must have drainage holes. Decorative cachepots with no holes are fine as a sleeve, but lift the inner nursery pot out to water it and let it drain before putting it back. Standing water in the bottom of a sleeve pot is the most common reason a spider plant rots.
Choose a pot only 1-2 inches wider than the current root ball. Spider plants produce more plantlets when they are slightly root-bound, and a pot that is too big holds wet soil around the roots for too long.
Hanging baskets suit this plant better than tabletop pots because the runners can trail 2-3 feet. A plastic liner inside a wire or coir basket keeps the soil from drying out in a single afternoon.
Pro tip
Set a coffee filter or a square of landscape fabric over the drainage holes before adding soil. Water passes through, but the perlite and fine mix stop falling out onto your floor every time you water a hanging basket.
Step 3: Water the right way and the right water
Push your finger into the soil. When the top inch feels dry, water slowly until it runs out of the drainage holes, then empty the saucer after 15 minutes. In a warm room that usually means once a week in spring and summer and every 10-14 days in winter.
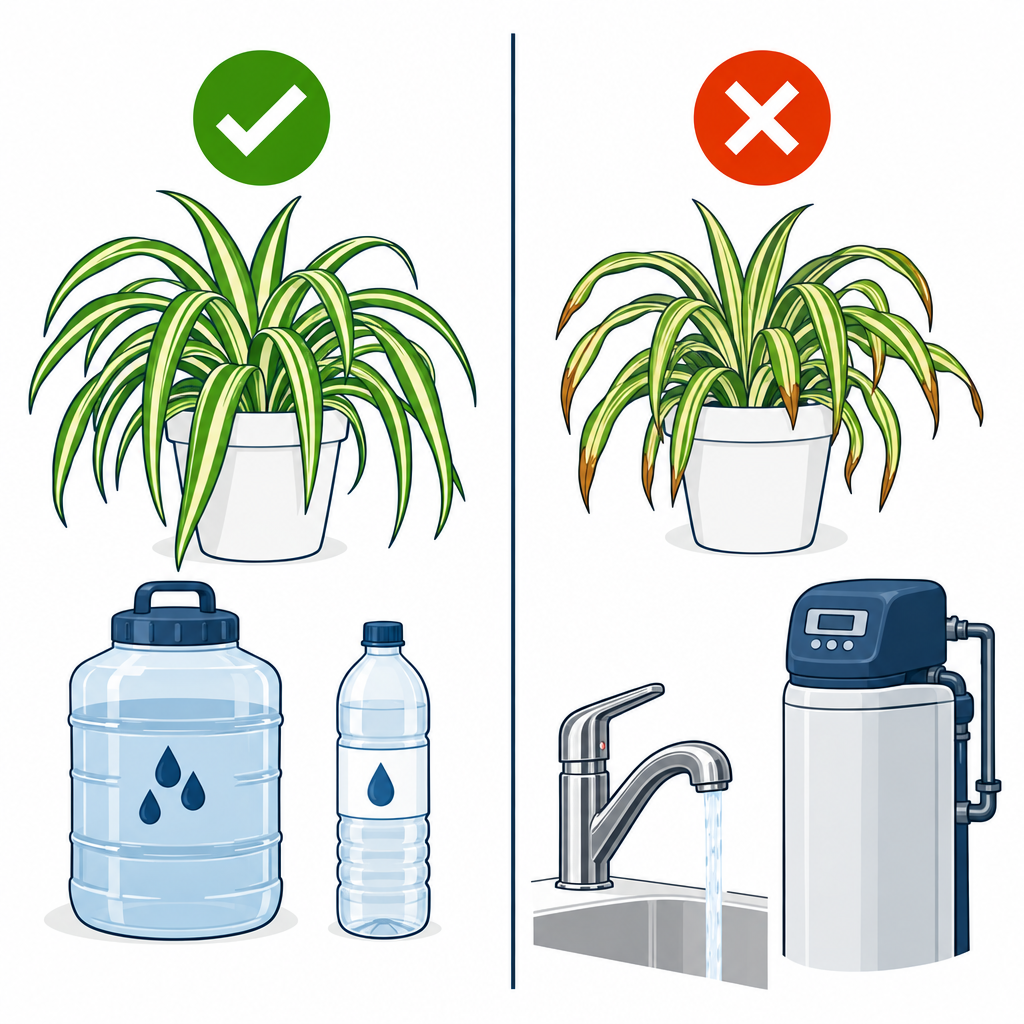
The water itself matters more for spider plants than almost any other houseplant. The leaves are sensitive to fluoride and chlorine, and both show up as brown, dry leaf tips. Chlorine will gas off if you let tap water sit uncovered overnight, but fluoride does not. If your municipal water is fluoridated and your tips keep browning, switch to rainwater, distilled water, or water from a reverse osmosis filter.
Softened water is worse than straight tap water. Water softeners swap hardness minerals for sodium, and sodium builds up in the soil and burns roots.
Every 3 months, flush the pot. Set it in the sink and run room-temperature water through the soil for a full minute. That rinses out fertilizer salts and fluoride before they reach the concentration that scorches the leaves.
Underwatering shows as leaves that fold lengthwise, go pale, and curl at the ends. The plant bounces back within a day of a deep soak. Overwatering is harder to recover from. Lower leaves yellow, the center of the crown turns soft and brown, and the soil smells sour.
Step 4: Feed lightly, and not in winter
Spider plants are light feeders. Too much fertilizer causes brown tips just as reliably as bad water does, and it also suppresses plantlet production.
Use a balanced liquid houseplant fertilizer, something like 10-10-10 or 20-20-20, mixed at half the label rate. Apply it every 4-6 weeks from March through September. Stop feeding entirely from October through February when growth slows and the plant cannot use the nutrients.
Skip fertilizers with added fluoride, and do not use superphosphate, which contains fluoride as a contaminant. A slow-release pellet fertilizer scratched into the top inch of soil in spring is a fine alternative if you forget liquid feeds.
If you have just repotted into fresh mix, wait 6-8 weeks before fertilizing. Most bagged mixes already contain a starter charge.
Step 5: Manage temperature, humidity and airflow
The comfortable range is 65-75°F, which is any normal living room. Spider plants tolerate dips to 50°F for short periods, but a night on a cold windowsill below 45°F leaves the foliage limp and translucent.
Keep the plant away from heat registers, radiators and fireplaces. Hot dry air pulls moisture out of the thin leaves faster than the roots can replace it, and you get crispy tips within a week.
Do not hang a basket directly under a ceiling fan either. Constant airflow has the same drying effect as a heater, and it tips the basket.
Normal household humidity of 40-60% is fine. In winter, when forced-air heat drops indoor humidity into the 20s, group plants together or run a small humidifier nearby. Misting makes you feel better but raises humidity for only a few minutes, so do not count on it.
Outdoors, spider plants survive year-round in USDA zones 9 through 11. Anywhere colder, treat them as a summer patio plant in bright shade and bring them in before nights drop under 50°F. Check for pests before they come inside.
Step 6: Trim, clean and repot
Brown tips are cosmetic once the cause is fixed. Trim them with clean scissors, cutting at an angle to match the natural leaf point so the cut is less obvious. Remove any fully yellow or brown leaves at the base.
Wipe dust off the leaves every month or two with a damp cloth. Dust blocks light and gives spider mites a place to hide. A shower in lukewarm water does the same job faster for a big plant.
Repot every 1-2 years in spring. The signs it is time: roots pushing through the drainage holes, the root ball lifting the plant up out of the pot, or water running straight through without soaking in. Tip the plant out, loosen the outer roots, trim any black mushy ones, and move up one pot size with fresh mix.
A badly root-bound spider plant can be divided instead. Slice the clump into two or three sections with a clean knife, each with its own crown and roots, and pot them separately. Water well and keep them out of direct sun for two weeks.
Step 7: Propagate the spiderettes
A mature, slightly root-bound plant sends out long pale stems in spring and summer. Each carries small white star-shaped flowers followed by miniature plants, the “spiders” or “airplanes” that give the plant both common names. Once a plantlet shows small nubs or roots at its base, it is ready.
| Method | How | Roots in | Success rate |
|---|---|---|---|
| Water rooting | Snip plantlet, sit base in a jar with leaves above water, change water every 3 days | 7-14 days | High |
| Direct to soil | Snip plantlet with root nubs, press into moist mix in a 2-3 inch pot, keep moist and shaded | 2-3 weeks | High if kept moist |
| Pin while attached | Set a small pot beside the parent, pin the plantlet onto the soil with a bent paperclip, cut the runner after 3-4 weeks | 3-4 weeks | Highest, no wilting |
| Division | Split a mature clump at repotting, each piece with crown and roots | Immediate | High |
Water-rooted babies should move to soil once roots are about 1 inch long. Longer water roots struggle to adapt to potting mix. Water new plants only when the top inch of soil is dry, the same routine as the parent, since overwatering is the most common killer of young spider plants.
Pro tip
If your plant refuses to make babies, it is usually too young, in too big a pot, or getting too much nitrogen. Plants also need a stretch of shorter days to trigger flowering. Leave it in a room where lights go off at dark through fall and it typically throws runners the next spring.
Which spider plant cultivar to buy
All of these share the same care. The differences are leaf color, leaf shape and size.
| Cultivar | Look | Mature spread | Notes |
|---|---|---|---|
| Species (plain green) | Solid green, slightly wider leaves | 18-24 in | Most shade-tolerant, most vigorous |
| ‘Vittatum’ | White center stripe, green edges | 18-24 in | The classic hanging-basket form |
| ‘Variegatum’ (also ‘Reverse’) | Green center, white edges | 18-24 in | Holds color well in bright rooms |
| ‘Bonnie’ | Curly, twisted variegated leaves | 10-14 in | Compact, good for small spaces |
| ‘Hawaiian’ | Champagne stripe on new leaves that fades to green | 12-18 in | Multicolored look on one plant |
| ‘Ocean’ | Short cream-edged leaves | 8-12 in | Tabletop size, slower runner production |
| ‘Zebra’ | Bright yellow edges on short leaves | 10-14 in | Stripes fade in low light |
Troubleshooting
| Symptom | Likely cause | Fix |
|---|---|---|
| Brown, dry leaf tips | Fluoride or chlorine in water, salt buildup, dry air | Switch to rainwater or distilled, flush the pot, trim tips |
| Pale, washed-out or scorched leaves | Too much direct sun | Move 4-6 feet from the window or add a sheer curtain |
| Stripes fading to plain green | Too little light | Move to an east window; new growth returns variegated |
| Yellow lower leaves, soft brown crown | Overwatering or no drainage | Unpot, cut off mushy roots, repot in dry fresh mix, water less |
| Leaves folded, curled, limp | Underwatering | Soak thoroughly; recovers within a day |
| No babies after a year | Pot too large, too much fertilizer, too young | Let it get root-bound, feed at half strength, be patient |
| Fine webbing, speckled leaves | Spider mites | Shower the plant, spray insecticidal soap weekly for 3 weeks |
| White cottony clumps at leaf bases | Mealybugs | Dab with rubbing alcohol on a cotton swab, repeat weekly |
| Tiny flies around the soil | Fungus gnats from constantly wet mix | Let the top 2 inches dry, use yellow sticky traps |
| Cat chewing the leaves | Cats like the grassy texture | Hang it higher; the plant is non-toxic but can cause mild upset |
When to call a pro
A spider plant never needs a professional. The one exception is the ceiling: if you cannot find a joist for a heavy basket or the hook has pulled out and cracked the drywall, a handyman can set a proper anchor and patch the ceiling in about an hour. Hanging a plant from the ceiling is otherwise a simple DIY job that takes around an hour and under $50 in materials.
FAQ
What are the downsides of having a spider plant?
Brown tips are the main complaint, and they come from tap water fluoride and salt buildup more than anything you did wrong. The plant also outgrows its pot fast, so expect to repot or divide every year or two. Cats love to chew the grassy leaves, and while the plant is non-toxic, a cat that eats a lot can vomit. Finally, a mature plant with a dozen runners takes up real space, so plan for a hanging basket rather than a shelf.
Are coffee grounds good for spider plants?
Not directly on the soil. Fresh grounds are acidic, compact into a crust that blocks water, and can grow mold indoors. If you want to use them, add them to a compost pile first, or steep a tablespoon in a quart of water, strain, and use that as a very weak feed once a month during the growing season. A balanced liquid fertilizer at half strength is simpler and more predictable.
Where is the best place to put your spider plant?
A hanging basket 3-6 feet from an east-facing window is the best spot in most homes. It gets gentle morning light, no harsh afternoon sun, and the runners can trail freely. Bathrooms with a window are also good because the humidity helps prevent tip browning. Avoid spots next to heat vents, radiators or exterior doors that let in cold drafts.
What makes a spider plant happy?
Bright indirect light, a pot that is slightly snug, water only when the top inch is dry, and rainwater or distilled water instead of fluoridated tap. Feed lightly from March to September and skip feeding in winter. A happy spider plant shows it with glossy striped leaves, thick white roots filling the pot, and runners loaded with plantlets every summer.
Why is it called an airplane plant?
The plantlets dangle from long runners and look like tiny airplanes, or spiders, hanging in the air. Both common names refer to the same species, Chlorophytum comosum. Some garden centers also sell it as ribbon plant or St. Bernard’s lily.
Is the spider plant safe for cats and dogs?
Yes. The ASPCA lists Chlorophytum comosum as non-toxic to cats, dogs and horses. Cats are drawn to the leaves and chewing can cause mild stomach upset, so hang the basket out of reach if your cat is a persistent grazer.