
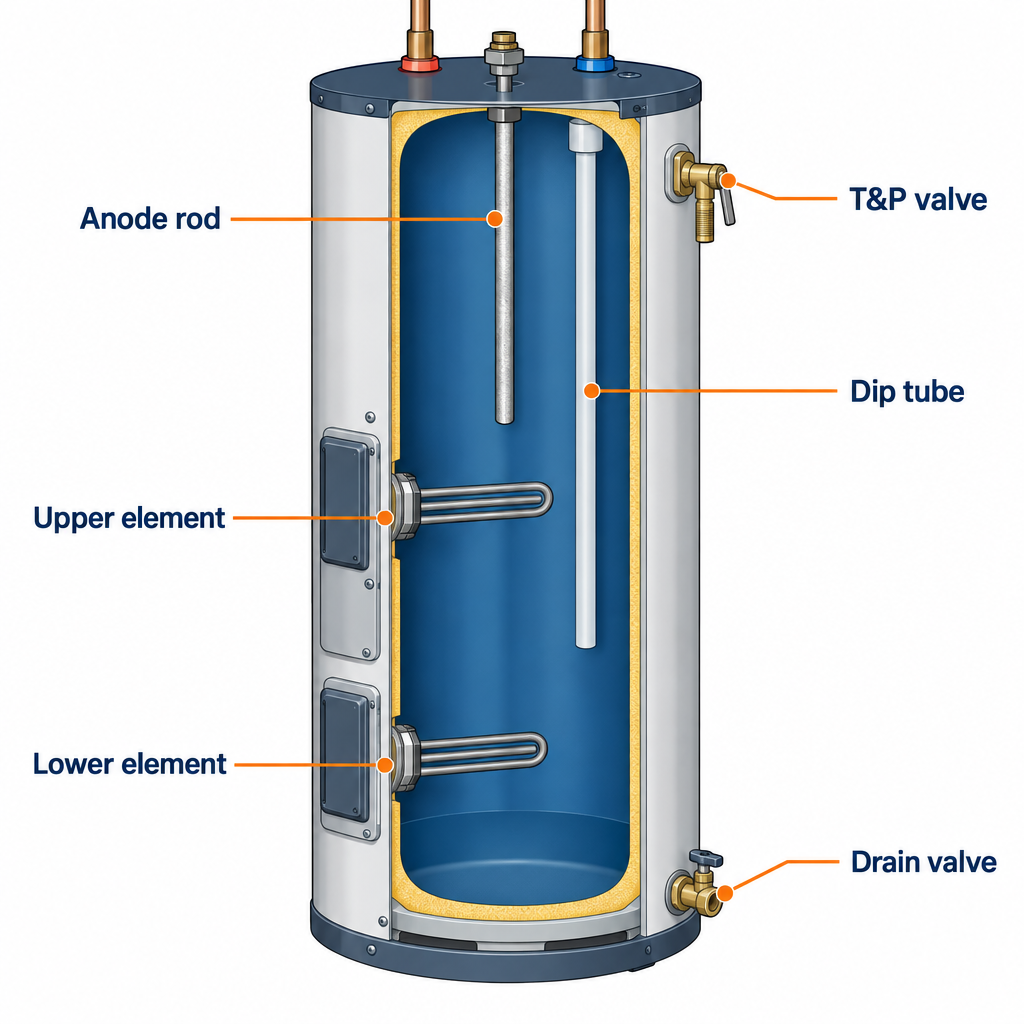
Most water heater repair jobs come down to six parts: a heating element, a thermostat, a thermocouple, a T&P relief valve, an anode rod or a drain valve. Each one costs under $60 and swaps out in an hour or two with a multimeter, a socket set and a garden hose. A leaking tank body cannot be repaired and means replacement, while leaks from valves, fittings and gaskets can be fixed, so the first job is telling the difference.
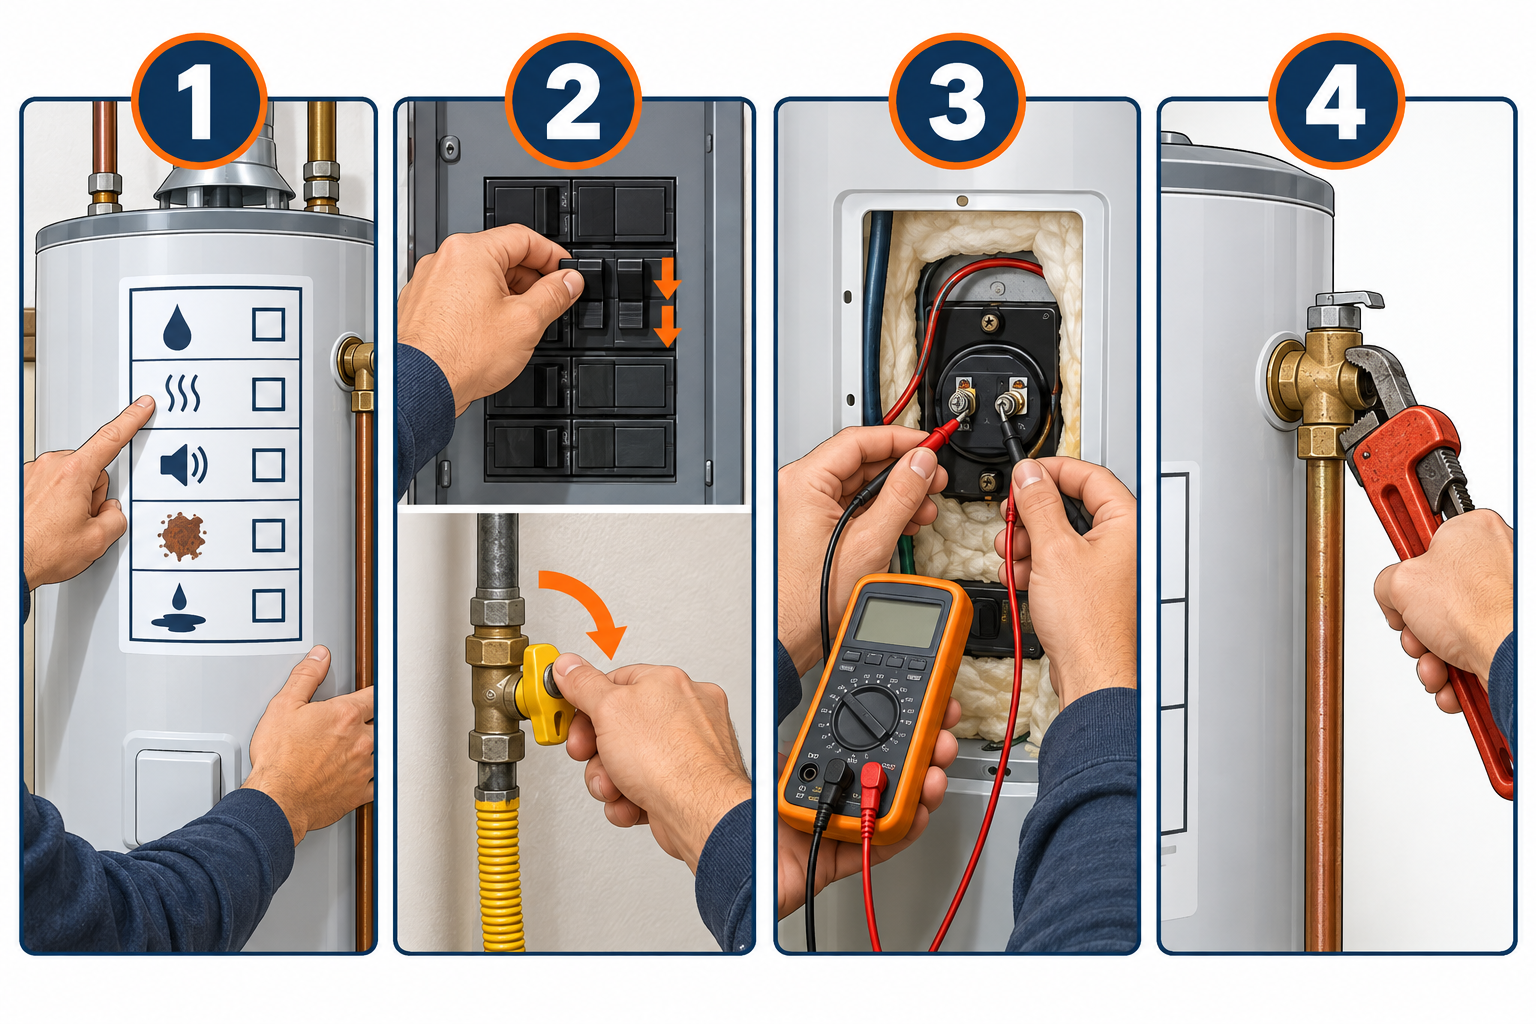
Quick steps: diagnose and repair a water heater
- Match your symptom to the part (no hot water, lukewarm, noise, smell, leak).
- Shut off the breaker or gas valve and close the cold inlet.
- Press the red reset button on an electric unit and check the pilot on a gas unit.
- Test elements and thermostats with a multimeter, or test the thermocouple for 25-30 mV.
- Drain and flush the tank if it rumbles or pops.
- Replace the T&P valve, anode rod or drain valve if it leaks or smells.
- Refill fully, bleed air at a hot faucet, then restore power or relight.
- Check for drips after 30 minutes and again the next morning.
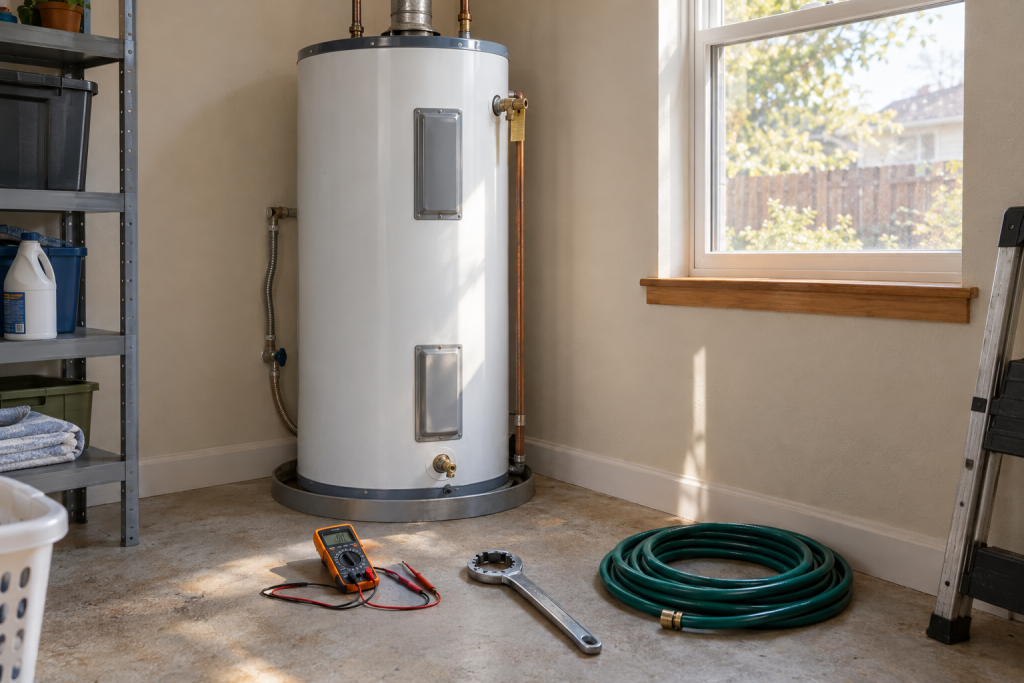
Tools and materials
- Digital multimeter with continuity and millivolt settings
- Non-contact voltage tester
- 1-1/2 inch element wrench or socket
- 1-1/16 inch socket and 1/2 inch drive breaker bar (anode rod)
- Pipe wrench and 10 inch adjustable wrench
- Garden hose, 25 ft minimum
- Flathead and Phillips screwdrivers
- PTFE tape and pipe thread sealant
- Replacement element (match wattage: 3800, 4500 or 5500 W)
- Replacement thermostat (upper or lower, same brand style)
- Thermocouple, 24 inch universal ($10-20)
- 3/4 inch T&P valve rated 150 psi and 210°F
- 3/4 inch NPT magnesium or aluminum-zinc anode rod, 44 inch or segmented
- 3/4 inch brass ball valve drain replacement
- Bucket, towels, flashlight
Safety first
Electric heaters run on 240 volts. Turn off the double-pole breaker, then confirm zero volts at both thermostat terminals with a tester before touching anything. On gas units, turn the control to OFF and shut the gas cock. Tank water sits at 120-140°F and will scald; let it cool or run a hot faucet for 15 minutes before draining.
Step 1: Match the symptom to the part
Every water heater problem announces itself in one of five ways. Pin down which one you have before you pick up a tool, because the fix for each is different and most of them are cheap.
No hot water at all points to the power side. On an electric unit that means the breaker, the high-limit reset or the upper element. On a gas unit it means the pilot, the thermocouple or the gas control valve.
Lukewarm water or water that runs out in half a shower points to the lower element on electric models, a broken dip tube on either type, or two inches of sediment stealing tank capacity. A new washing machine with a hot cycle or a bigger family can also just outrun a 40-gallon tank, so rule out demand before you blame the heater.
Rumbling, popping or kettle-like sounds are sediment. Water trapped under the mineral layer flashes to steam and hammers the tank bottom.
A rotten egg smell from hot taps only is a reaction between sulfate bacteria and the magnesium anode rod. If both hot and cold smell, the problem is your well or supply, not the heater.
Water on the floor comes from the T&P valve, the drain valve, the inlet and outlet fittings, an element gasket or the tank itself. Only the last one ends the heater’s life.
Check the age while you are at it. The serial number on the rating plate encodes the manufacture date, and every manufacturer publishes a decoder. A tank-type unit older than 10 years with a leak or a failed gas valve is usually a replacement candidate, which we cover near the end.
Step 2: Shut off power, gas and water
For electric heaters, find the 30-amp double-pole breaker (two handles tied together) and flip it off. Pull the upper access panel on the tank, fold back the insulation and the plastic safety cover, and hold a non-contact tester against each wire on the thermostat. No beep means you are safe. A beep means you opened the wrong breaker.
For gas heaters, turn the knob on the gas control valve to OFF, not just PILOT. If you will be draining the tank, also close the gas shutoff on the supply pipe, the quarter-turn lever a foot or two from the valve.
The cold water inlet is the pipe on the right in most installations, marked with a blue ring or a “C” on the tank top. Close its valve. If it is an old gate valve that spins forever and does nothing, shut off the main house valve instead and plan to replace that gate valve with a 3/4 inch ball valve while you are here.
Open a hot faucet somewhere in the house. This breaks the vacuum so the tank can drain and keeps pressure from building while you work.
Step 3: No hot water on an electric heater
Start with the two things that cost nothing. Check the breaker; a tripped double-pole breaker often sits in the middle, not fully off. Then find the red reset button on the upper thermostat behind the top access panel and press it firmly until it clicks.
That button is the high-limit cutoff, and it trips when tank water passes roughly 170°F. A single trip after a power surge is normal. If it trips again within a day, something is overheating the tank: a stuck thermostat, a grounded element or a loose wire arcing at a terminal. Do not just keep resetting it.
Test the elements
With the breaker confirmed off, disconnect the two wires from the upper element. Set your multimeter to ohms and touch one probe to each element screw terminal.
A good 4500-watt element reads 12 to 13 ohms. A 3800-watt element reads about 15 ohms, and a 5500-watt element about 10.5 ohms. An open reading (OL or infinite) means the element has burned through and needs replacing. Now touch one probe to a terminal and the other to the element’s metal flange. Any reading at all here means the element is shorted to ground, which is the usual cause of a repeatedly tripping reset button.
Repeat on the lower element behind the bottom panel. The lower element does most of the work in a two-element tank, so it fails first and produces the “runs out fast” complaint rather than “no hot water.”
Replace a bad element
Drain the tank to below the element you are replacing. For the upper element that is only a few gallons; for the lower you need the whole tank empty, which takes 20 to 40 minutes through a garden hose. Open the T&P valve lever to let air in.
Fit a 1-1/2 inch element wrench over the hex and turn counterclockwise. Expect it to be stiff. A screw-in element comes straight out; a flange-type element has four bolts instead. Match the replacement exactly to the old one in wattage and style, because a 5500-watt element on a circuit wired for 4500 can overheat the wire.
Wipe the tank opening clean, seat the new rubber gasket, thread the element in by hand, and tighten it snug plus about a quarter turn. Reconnect the wires, close the drain, open the cold inlet, and leave a hot faucet open until it runs a steady stream with no sputtering. Only then restore the breaker. Powering a dry element burns it out in seconds.
Pro tip
Buy low-watt-density elements, sometimes sold as “lime life” or fold-back elements. They spread the same wattage over twice the surface area, run cooler and last far longer in hard water. They cost $5 to $10 more than a standard element.
Test the thermostats
If both elements test fine, the thermostats are next. The upper thermostat is a transfer switch: it heats the top of the tank first, then sends power down to the lower thermostat. If it fails, nothing below it works.
With power on and a full tank, set the meter to AC volts. You should see about 240 volts across the two top terminals where the supply lands. Then turn the upper thermostat dial all the way up. With the tank cool you should read 240 volts across the upper element terminals. If you have supply voltage but nothing at the element, the thermostat is dead.
Replacement thermostats run $15 to $30 and clip into a spring bracket against the tank wall. They need to sit flat against bare steel to sense temperature correctly. Transfer the wires one at a time so you do not mix them up, and set both dials to 120°F when finished.
Step 4: No hot water on a gas heater
Look through the sight glass in the burner door at the bottom. If you see a small blue pilot flame, the pilot is fine and the problem is upstream in the gas valve or thermostat. If you see nothing, relight it.
Relight the pilot
Turn the control knob to PILOT, press and hold it, and click the piezo igniter button until the pilot catches. Keep holding the knob for 60 seconds, then release. If the pilot stays lit, turn the knob to ON and set the temperature dial.
If the pilot dies the moment you release the knob, the thermocouple is not producing enough voltage to hold the gas valve’s safety magnet open. That is the single most common gas heater failure and a $20 to $30 fix.
Test and replace the thermocouple
The thermocouple is the thin copper rod sitting in the pilot flame, connected by a small copper tube to a brass nut on the gas valve. Unscrew that nut with a 7/16 inch wrench. Set your meter to DC millivolts, clip one probe to the tube tip and the other to the tube body, then hold the pilot button and light the pilot. A healthy thermocouple produces 25 to 30 millivolts after a minute. Under about 20, replace it.
Pull the burner assembly out through the access door. On units built after 2003 with a sealed combustion chamber, there are two screws and a gasket. Unclip the old thermocouple from the pilot bracket, clip in the universal 24 inch replacement, route the tube the same way, and thread the nut finger-tight plus a quarter turn. Overtightening cracks the fitting.
While the burner is out, vacuum the flame arrestor screen under the tank. Lint, pet hair and dust choke this screen and starve the burner of air, which also kills pilots and causes a yellow, lazy flame. Gas heaters in laundry rooms are especially prone to this; keep the floor around the unit clean and keep your clothes dryer vent sealed so lint stays out of the room.
When the gas valve is the problem
If the pilot holds but the main burner never fires, check the dial setting first, then watch the status light on an electronic gas valve. Honeywell and White-Rodgers valves blink error codes that are printed on the label. A consistent fault code for the gas valve itself, or a valve that clicks but passes no gas, means a new valve. The part costs $100 to $250 and installation requires breaking the gas union. That is a job for a licensed plumber in most jurisdictions, and on a heater over 8 years old the money is better put toward replacement.
Pro tip
Before replacing a gas valve, pull the thermopile wires (on newer “millivolt” valves there is a thermopile instead of a thermocouple) and test it under load. It should read 400 to 750 millivolts open circuit. A weak thermopile mimics a dead gas valve and costs $20 instead of $200.
Step 5: Flush sediment for rumbling, popping and slow recovery
Sediment is dissolved calcium and magnesium that drops out of solution when water heats. In hard water areas a tank can collect an inch a year. The layer insulates the burner or lower element from the water, so the heater runs longer, wastes fuel, overheats the steel and makes the popping noise everyone asks about.
With the power or gas off and the cold inlet closed, screw a garden hose onto the drain valve at the tank bottom and run it to a floor drain, a driveway or a utility sink. The water will be hot and will kill grass, so pick a route.
Open the T&P lever to vent the tank, then open the drain valve. A full 50-gallon tank takes 20 to 40 minutes to empty. Once it stops, close the T&P lever, open the cold inlet for 30 seconds to stir the bottom, then let it drain again. Repeat until the water runs clear into a bucket. Badly scaled tanks can take five or six cycles.
Plastic drain valves clog with sediment and rarely seal again once opened. If yours dribbles after closing, or barely flows, swap it for a 3/4 inch brass ball valve with a hose thread adapter. Wrap the threads with PTFE tape and tighten with a pipe wrench. This is the single most useful upgrade on any tank heater because it makes the next flush a 10-minute job.
Refill with a hot faucet open until it runs steady. Then restore power. If the tank still rumbles after a thorough flush, the sediment has hardened into a crust that will not drain, and the fix is a chemical descaler or acceptance that the tank is on borrowed time.
A water softener system upstream stops this entirely, though it also speeds up anode rod consumption, which brings us to Step 7.
Step 6: Replace a leaking or weeping T&P valve
The temperature and pressure relief valve sits on the top or upper side of the tank with a 3/4 inch discharge pipe running to within 6 inches of the floor. It opens at 150 psi or 210°F to keep the tank from rupturing. Water dripping from the end of that pipe means one of three things.
The valve may be worn. After years of mineral deposits the seat no longer closes fully. Lift the lever for two seconds and let it snap back; if it keeps dripping afterward, replace it.
Your house pressure may be too high. Screw a $10 pressure gauge onto an outdoor spigot. Anything over 80 psi needs a pressure reducing valve on the main, and the dripping T&P is doing its job.
Thermal expansion may be the cause. Water expands about 2 percent when heated from 50°F to 120°F. In a house with a check valve, PRV or backflow preventer on the main, that expansion has nowhere to go and pressure spikes every heating cycle. The fix is a 2-gallon expansion tank on the cold inlet, pre-charged to match house pressure. Most codes have required one on closed systems for years, and a plumber will install it for $150 to $300.
To replace the valve itself, drain about 10 gallons so the water level sits below the valve. Unscrew the discharge pipe, then back the old valve out with a pipe wrench. Wrap the new valve’s threads with four turns of PTFE tape plus a smear of thread sealant, thread it in and tighten until the discharge port points down. Reattach the pipe. Never cap or plug a T&P valve; that is how tanks launch through roofs.
Step 7: Replace the anode rod for rotten egg smell or rusty water
The anode rod is a 3/4 inch threaded steel core coated in magnesium or aluminum, hanging from the top of the tank. It corrodes so the steel tank does not. Once it is eaten down to bare wire, the tank starts rusting from inside, and you have about two years before it leaks. Checking it every one to three years and replacing it every three to five years at $20 to $50 is, along with an annual flush, the maintenance that actually extends tank life.
Find the hex head on the tank top, usually under a plastic cap and sometimes hidden under the foam insulation. On some models the anode is built into the hot outlet nipple instead. Drain 5 gallons so you are not fighting water pressure.
Fit a 1-1/16 inch socket on a breaker bar. The rod will be seized. Have a helper brace the tank so it does not twist on its pipes, and pull steadily. An impact driver helps if the rod will not budge. If you have less than 44 inches of clearance above the tank, buy a segmented rod that bends in sections.
Wrap the new rod’s threads with PTFE tape, leaving the top two threads bare so the rod stays electrically connected to the tank. Thread it in and tighten firmly.
For a sulfur smell, switch from magnesium to an aluminum-zinc rod. The zinc shuts down the bacteria reaction. Before installing it, kill the existing colony by pouring 2 pints of 3 percent hydrogen peroxide into the tank through the anode port, refilling, and letting it sit for two hours before flushing. A powered titanium anode, around $60 to $150, eliminates both the smell and the replacement schedule and is the right call on softened water, where a standard rod can be gone in 18 months.
Pro tip
When you buy a new water heater, pull the factory anode and replace it with a powered anode on day one. The factory rod on a budget tank is often half-length. Tanks with a 12-year warranty are frequently the same tank with a longer anode, which tells you how much that one part matters.
Step 8: Track down leaks
Dry the entire heater with a towel, then tape a paper towel under each suspect spot and wait 30 minutes. Leaks always show lower than their source, so start at the top and work down.
Water around the top fittings means a failed connection at the cold inlet or hot outlet. Flexible copper or stainless connectors have a rubber washer that hardens; replace the connector. Threaded nipples need PTFE tape and sealant. Use dielectric nipples between copper and steel to stop galvanic corrosion.
Water from the T&P discharge pipe means Step 6. Water at the drain valve means a new brass valve from Step 5.
Water at an element on an electric unit means the gasket. Drain below the element, unscrew it, clean the flange face and install a new gasket; they come with every new element or cost $3 alone. On a gas heater, water trickling out of the burner compartment that is not condensation is a tank leak.
Water appearing from under the outer jacket with nothing above it wet, or rust streaks weeping through the jacket seams, means the inner tank has rusted through. No sealant, no epoxy, no repair holds on a pressurized steel tank. Shut off the water, drain it and plan replacement. If it is on an upper floor, do this today.
One caveat: new gas heaters sweat. A cold tank fills, the burner fires and condensation forms on the cold steel, dripping onto the burner and hissing. This stops after the first heat cycle. It can also happen on any gas unit when a large draw of cold water enters the tank in winter. If the puddle disappears after an hour of heating, it was condensation.
Three smaller fixes worth knowing
Broken dip tube
The dip tube is the plastic pipe that carries incoming cold water to the bottom of the tank. When it cracks or crumbles, cold water short-circuits straight to the hot outlet and you get lukewarm water from a tank that is actually hot. The tell-tale sign is small white plastic flakes clogging faucet aerators and shower heads.
Shut off the water, unscrew the cold inlet nipple, pull the old tube with needle-nose pliers and drop in a new one, around $10 to $20. A curved dip tube that swirls incoming water helps keep sediment suspended for the next flush.
Thermostat setting
Water hotter than 120°F scalds a child in seconds and accelerates sediment and anode loss. Lower than 120°F lets Legionella bacteria multiply in the tank. Set electric thermostats (both of them) to 120°F and gas dials to the “hot” or 120 mark. If you need more capacity for a big family, raising to 130°F adds effective volume, but add a thermostatic mixing valve at the outlet to deliver 120°F to the taps.
Pilot keeps going out with a good thermocouple
If the thermocouple tests fine but the pilot still dies, look for drafts across the burner, a dirty pilot orifice (clean it with compressed air, never a wire), a clogged flame arrestor screen, or a flue problem. Hold a match near the draft hood at the top of a gas heater; the flame should pull toward the hood. If it blows away from the hood, exhaust is spilling into the room, and that is a carbon monoxide problem that needs a plumber or HVAC tech now.
What water heater repair costs
Parts are cheap. Labor is where the money goes, and most plumbers charge a flat diagnostic fee of $75 to $150 that is credited toward the repair. The figures below reflect typical residential pricing around the country; expect higher in major metro areas and lower in rural ones.
| Repair | DIY parts cost | Pro cost (parts and labor) |
|---|---|---|
| Reset high-limit / relight pilot | $0 | $75-150 |
| Thermocouple | $10-20 | $100-250 |
| Heating element | $15-40 | $150-350 |
| Thermostat (electric) | $15-30 | $150-300 |
| Sediment flush | $0-15 | $100-200 |
| T&P relief valve | $15-30 | $150-300 |
| Drain valve (brass) | $10-20 | $100-200 |
| Anode rod | $20-50 | $200-400 |
| Powered anode | $100-200 | $300-500 |
| Dip tube | $10-20 | $150-250 |
| Expansion tank | $40-80 | $150-350 |
| Gas control valve | $100-250 | $300-600 |
| Tankless descaling | $20-40 | $150-300 |
| New 40-50 gallon tank, installed | n/a | $1,200-3,000 |
| New gas tankless, installed | n/a | $2,500-5,000+ |
Across all repair types, a professional water heater repair most commonly lands between $200 and $900, with a typical call around $500 to $600. Emergency and weekend service adds 50 to 100 percent.
Repair or replace?
Use three numbers: age, repair cost and replacement cost.
A tank-type heater lasts 8 to 12 years on average, longer with anode replacements and regular flushing. Tankless units run 20 years or more with annual descaling.
If the heater is under 8 years old and the repair is under $500, repair it. If it is over 10 years old and the repair tops $400, or if the tank itself leaks at any age, replace it. In between, the 50 percent rule works: skip the repair if it costs more than half of a new installed unit.
Two more things tip the scale toward replacement. A unit that has already needed two repairs in a year will need a third. And a 10-year-old heater is often an old-style tank that is noticeably less efficient than a current model, so a replacement pays back part of its cost in gas or electric bills.
Check your warranty before paying anyone. Most tanks carry a 6, 9 or 12 year warranty on the tank and 1 to 6 years on parts. Manufacturers typically ship replacement elements, thermostats and gas valves free within the parts window if you call with the serial number, though you pay labor.
Troubleshooting guide
| Symptom | Likely cause | Fix |
|---|---|---|
| No hot water, electric | Tripped breaker or high-limit reset | Reset breaker, press red button; if it trips again test elements for ground fault |
| No hot water, electric, reset holds | Failed upper element or upper thermostat | Ohm-test element (12-13 Ω for 4500 W); voltage-test thermostat; replace |
| Hot water runs out quickly, electric | Failed lower element or lower thermostat | Ohm-test lower element; replace |
| Hot water runs out quickly, either type | Broken dip tube, heavy sediment or undersized tank | Check aerators for plastic bits; flush tank; consider a larger tank or tankless |
| No hot water, gas, pilot out | Pilot blew out or weak thermocouple | Relight; if it will not hold, test thermocouple for 25-30 mV and replace |
| Pilot lit, burner will not fire | Thermostat set low, failed thermopile or gas valve | Raise dial; read status light codes; test thermopile; call plumber for valve |
| Burner flame yellow and lazy | Clogged flame arrestor screen or dirty burner | Vacuum screen and burner; check flue draft |
| Rumbling, popping, hissing | Sediment layer on tank bottom | Drain and flush until clear; install brass drain valve |
| High-pitched whine, electric | Scale on element | Replace with low-watt-density element; flush |
| Rotten egg smell, hot water only | Bacteria reacting with magnesium anode | Peroxide treatment; switch to aluminum-zinc or powered anode |
| Rust-colored hot water | Spent anode rod or rusting tank | Replace anode; if it persists, tank is failing |
| Drip from T&P discharge pipe | Worn valve, high pressure or thermal expansion | Test and replace valve; check pressure; install expansion tank |
| Water at base, gas unit, stops after heating | Condensation on cold tank | None needed |
| Water at base, steady, no source above | Inner tank rusted through | Replace heater |
| Water hotter than dial setting, electric | Stuck thermostat or grounded element | Replace thermostat; test element to ground |
| Reset button trips daily | Shorted element or failed thermostat | Test element to flange; replace faulty part |
| Tankless shows error code, cold water | Scale, flow sensor or gas supply | Descale with vinegar for 45 minutes; check gas pressure with pro |
When to call a pro
Call a licensed plumber for any gas valve or gas line work, any tank replacement (most areas require a permit and a code-compliant T&P discharge, expansion tank and seismic strapping), any flue or draft problem, and any electric heater that trips the breaker rather than the reset button. If the main breaker or wiring at the panel is the issue, that is an electrician. If water is pouring from the tank, shut off the cold inlet and the power or gas first, then call.
FAQ
What is the average cost to repair a water heater?
A professional repair most often runs $200 to $900, with the typical call around $500 to $600 for a part replacement plus labor. Common jobs sit at the low end: a thermocouple or heating element replacement is usually $150 to $350 installed. A gas control valve pushes toward $600. The parts themselves are mostly cheap, with thermocouples at $20 to $30, heating elements at $15 to $60 and anode rods at $20 to $75, though thermostats can range from $20 to $400 and the gas valve is the big exception, so a homeowner with a multimeter and a socket set can handle most repairs for the price of the part.
Is it worth it to repair a hot water heater?
Yes if the unit is under 8 years old, the tank does not leak and the repair costs less than half of a new installed heater. A $150 element on a 5-year-old tank is an easy yes. A $500 gas valve on an 11-year-old tank is not, because the tank itself is near the end of its 8 to 12 year life and the next failure will be the one you cannot fix. Any leak from the tank body itself means replacement regardless of age.
What is the most common problem with the water heater?
Sediment buildup is the most common problem on every type of tank heater and the root cause behind several others: noise, slow recovery, burned-out lower elements and premature tank failure. The most common single part failure is the thermocouple on gas units and the lower heating element on electric units. Both are under $40 and take about an hour to replace. Flushing the tank once a year and replacing the anode rod every three to five years prevents most of the rest.
Do you call a plumber to fix a hot water heater?
Call a plumber for gas valve replacement, gas line work, venting problems, tank replacement and anything that needs a permit. Elements, thermostats, thermocouples, T&P valves, anode rods, drain valves and flushing are all within reach of a careful homeowner. If the problem is on the electrical side at the panel, or the breaker trips repeatedly even with the heater disconnected, call an electrician instead. For a tankless unit under warranty, call the manufacturer’s authorized service tech, since an unauthorized repair can void coverage.
How long should a water heater last?
A standard tank-type water heater lasts 8 to 12 years. Units with a replaced anode rod and annual flushing regularly reach 15 years or more. Tankless heaters last 20 years or longer with annual descaling, especially on softened water. Hard water, high house pressure without an expansion tank, and a thermostat set above 130°F all shorten the lifespan.
Can I flush my water heater without turning it off?
No. Running an electric element dry burns it out in seconds, and firing a gas burner under an empty tank can crack the glass lining. Turn the breaker off or set the gas valve to PILOT or OFF before draining, and do not restore power until the tank is full and a hot faucet runs a steady stream with no air.