
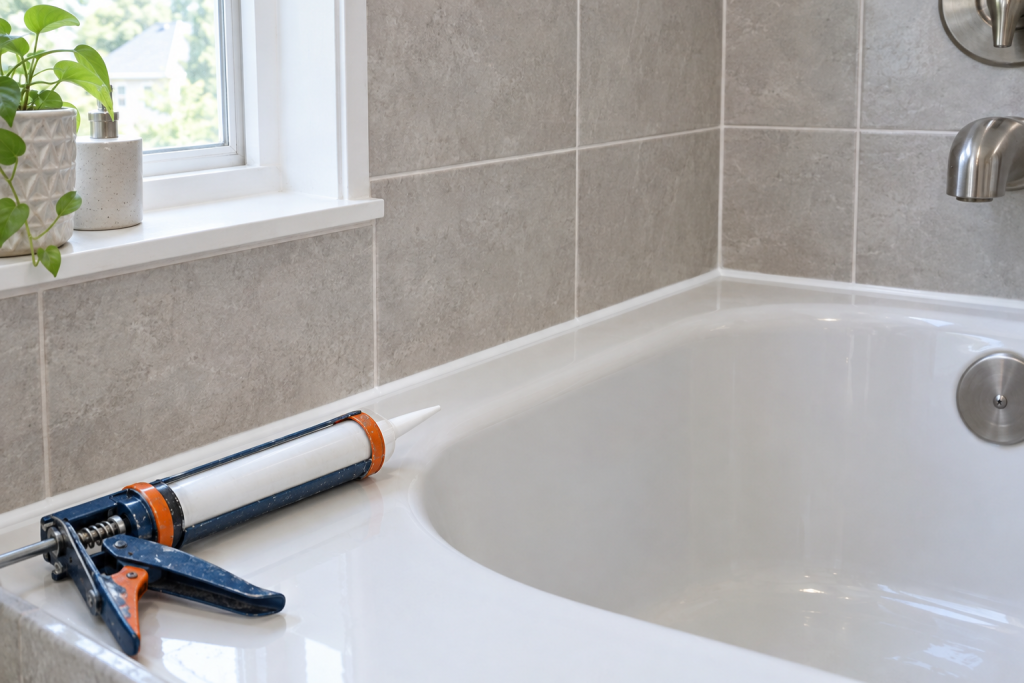
A caulking gun works best when you cut the nozzle small, load the tube square, and pull the gun along the joint at a steady walking pace while squeezing lightly. Release the pressure plate the instant you stop, and the tube won’t keep oozing. Below we rank the seven guns we actually reach for, then walk through the job from nozzle to cleanup.
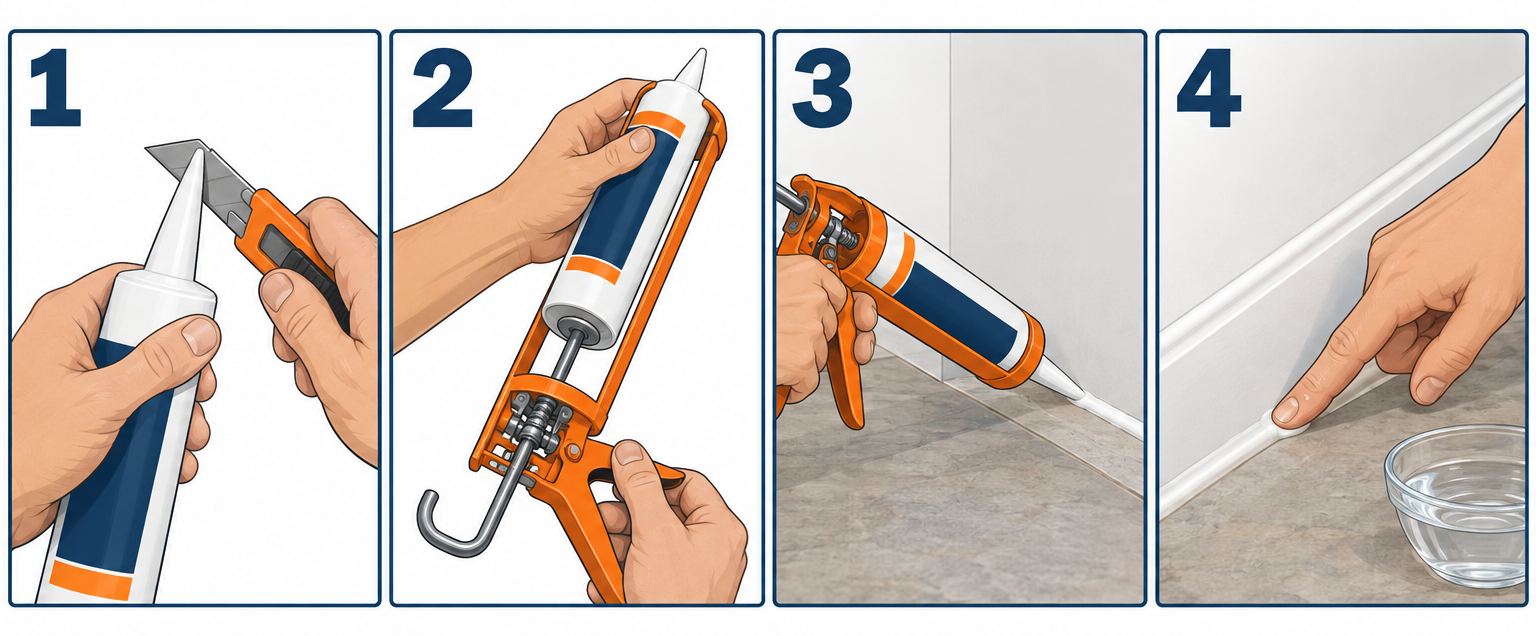
Quick steps: run a clean bead with a caulking gun
- Scrape out old caulk and wipe the joint dry.
- Cut the nozzle at 45 degrees, opening just smaller than the gap.
- Puncture the inner foil seal with the rod or a long nail.
- Pull the rod back, drop the tube in, push the rod snug.
- Squeeze until caulk reaches the tip, then wipe the tip.
- Pull the gun along the joint at a steady pace with light pressure.
- Hit the release and lift away before the bead tails off.
- Tool the bead within 5 minutes, then let it cure.
Tools and materials
- Caulking gun (10 oz / 1/10 gallon, smooth rod preferred)
- Caulk matched to the job (acrylic latex, silicone or polyurethane, 10 oz tube)
- Utility knife or the gun’s built-in spout cutter
- Long nail, awl or the gun’s seal puncture pin
- Painter’s tape (1 inch) for straight lines on tile and trim
- Caulk removal tool or 5-in-1 painter’s tool
- Spray bottle with water and a drop of dish soap
- Lint-free rags, paper towels, denatured alcohol for prep
- Caulk finishing tool or a wet fingertip
Calculators for this job
Safety first
Open windows and run a fan when using silicone or polyurethane, both off-gas solvents while curing. Wear nitrile gloves with polyurethane, it bonds to skin and takes mineral spirits to remove. Cut nozzles away from your hand with a sharp blade.
The 7 best caulking guns we’ve used
We’ve burned through a lot of bargain guns on trim, tubs and siding. These are the ones that kept working, ranked by how often we grab them. Prices are typical US retail and move around, so treat them as ballpark.
1. Newborn 930-GTD Drip-Free Smooth Rod (best overall)
This is the gun most finish carpenters and painters carry. The smooth rod runs quietly and releases pressure the instant you let go of the trigger, which is what “drip-free” really means. A 10:1 thrust ratio pushes acrylic latex and most silicone with two fingers.
The frame rotates a full 360 degrees, so you can turn the tube to follow an inside corner without twisting your wrist. It includes a ladder hook, a spout cutter in the handle and a seal puncture pin that folds out of the way. Figure $18 to $25.
2. Newborn 250 Smooth-Rod Revolving Frame (best bang for the buck)
An 18:1 thrust ratio and the same revolving frame as the 930, minus a few conveniences. The 250 is the gun we hand to anyone who says their cheap ratchet gun drips. At roughly $12 to $18 it’s about twice the price of a bargain-bin gun and lasts ten times longer.
The zinc-alloy handle and trigger don’t flex, so the bead stays even on long runs. You’ll need your own knife for the nozzle.
3. Albion B26 B-Line (best for thick sealants)
Albion builds dispensing guns for commercial glaziers, and the B26 is their 10 oz manual model with a 26:1 thrust ratio. That ratio means each squeeze moves the rod a shorter distance but with far more force, so polyurethane, cold silicone and construction adhesive flow without hand cramps.
The trade-off is slower output on thin latex, because a full squeeze pushes less material. Expect $25 to $35. If you caulk exterior joints with urethane every fall, this is the one.
4. Dripless ETS2000 Ergo Composite (best ergonomic)
Dripless molds the ETS2000 from a glass-filled composite that weighs less than steel-frame guns and never rusts in a wet truck. The 12:1 thrust ratio and a wider, padded trigger make it the most comfortable manual gun we’ve used for a full day of baseboard.
It has a ladder hook, seal punch and spout cutter built in. It runs about $20 to $28.
5. Milwaukee M18 10 oz Caulk and Adhesive Gun, 2641-20 (best cordless)
Once you dispense a case of subfloor adhesive by hand, a cordless gun pays for itself in one weekend. The M18 version has a speed dial so you can set a slow flow for trim and crank it up for adhesives, and it stops dispensing and backs off the moment you release the trigger.
It’s heavier than a manual gun, about 4.9 pounds bare and around 6 pounds with a battery, and the tool-only price lands near $299. Milwaukee sells the same platform in quart and sausage-pack versions if you run 28 oz tubes.
6. Milwaukee M12 10 oz Caulk and Adhesive Gun, 2441-20 (best compact cordless)
The M12 is lighter and cheaper, roughly $179 to $199 tool-only, and shares the variable speed and anti-drip behavior. It has less pushing force than the M18, so it can bog down on thick cold urethane. For a homeowner who already owns M12 batteries and caulks a lot of windows, it’s the sweet spot.
7. Basic ratchet-rod skeleton gun (best for a one-off job)
Every hardware store sells a stamped-steel ratchet gun for $5 to $10, usually under a house brand label. The notched rod and roughly 6:1 thrust ratio get the job done on a single bathtub. The downsides are real: the ratchet clicks loudly, it won’t release pressure until you flip the plate, and the frame bends if you lean on it. Buy one for a single job, then upgrade.
Quick comparison
| Gun | Type | Thrust ratio | Tube size | Weight class | Typical price |
|---|---|---|---|---|---|
| Newborn 930-GTD | Manual, smooth rod | 10:1 | 10 oz | Light | $18-25 |
| Newborn 250 | Manual, smooth rod | 18:1 | 10 oz | Light | $12-18 |
| Albion B26 B-Line | Manual, smooth rod | 26:1 | 10 oz | Light | $25-35 |
| Dripless ETS2000 | Manual, composite | 12:1 | 10 oz | Very light | $20-28 |
| Milwaukee M18 2641-20 | Cordless, 18V | Variable speed | 10 oz | Heavy (~6 lb with battery) | ~$299 tool-only |
| Milwaukee M12 2441-20 | Cordless, 12V | Variable speed | 10 oz | Medium | $179-199 tool-only |
| Skeleton ratchet gun | Manual, ratchet rod | ~6:1 | 10 oz | Light | $5-10 |
How to choose a caulking gun
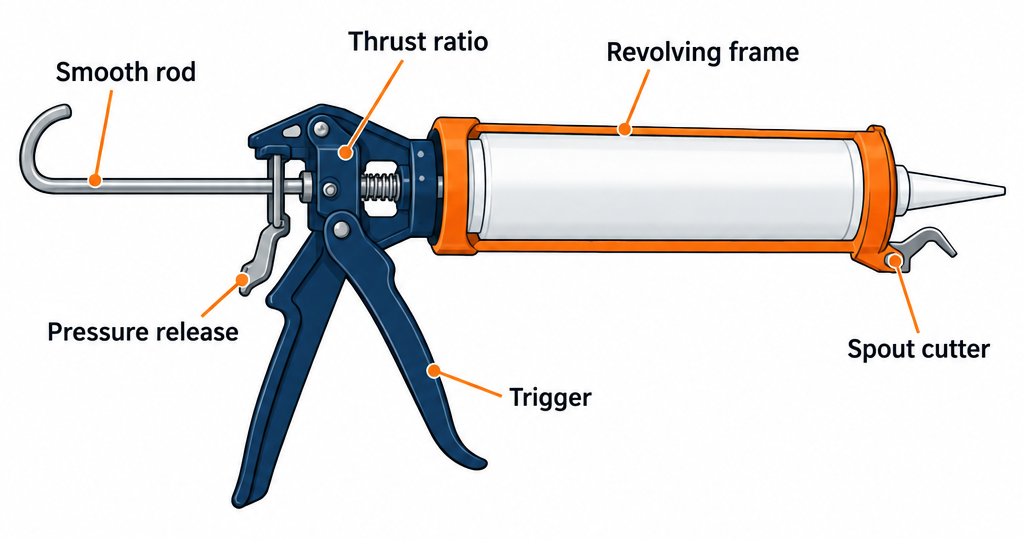
Four things separate a gun you’ll keep from one you’ll throw across the garage.
Rod type. A smooth rod with a friction plate releases pressure when you let go of the trigger. A ratchet rod holds pressure until you flip the plate, which is why cheap guns drip. Buy smooth rod.
Thrust ratio. This is how far the rod advances relative to trigger travel. A 6:1 gun needs a hard squeeze on silicone. A 10:1 to 12:1 gun handles everything a homeowner buys. Go 18:1 or higher only if you run polyurethane or construction adhesive regularly.
Frame style. Skeleton frames are open and let you see the tube; they’re lighter and fine for 10 oz cartridges. A full barrel (the “sealing compound dispensing gun” style used for commercial sealants) supports sausage packs and bulk material. Quart guns take 28 to 29 oz tubes of adhesive and roofing sealant.
Extras. A revolving frame, built-in spout cutter and seal punch are worth a few dollars. A ladder hook matters more than you’d think when you’re caulking second-story window trim.
Step 1: Pick the caulk and prep the joint
Match the sealant to the surface before you touch the gun. Acrylic latex is for painted interior trim. Silicone is for tubs, tile and anywhere water sits. Polyurethane is for exterior joints that move, like siding butt joints and sill plates.
| Caulk type | Where to use it | Paintable | Cleanup | Skin / paint-ready | Full cure |
|---|---|---|---|---|---|
| Acrylic latex (DAP Alex Plus) | Trim, baseboard, crown, drywall cracks | Yes | Water | About 30 min to 2 hr | Several days |
| Siliconized acrylic | Kitchen backsplash, window interiors | Yes | Water | 30 min to 2 hr | Several days |
| 100% silicone (GE Advanced Silicone) | Tubs, showers, sinks, exterior glass | No | Mineral spirits | Tack-free in 30-60 min | About 24 hr |
| Polyurethane (Sikaflex 1a, Loctite PL) | Exterior siding, concrete joints, masonry | Yes | Mineral spirits | Skins in a few hours | 1-7 days depending on humidity |
Scrape old caulk out completely with a 5-in-1 tool or a dedicated caulk remover. Silicone leaves an invisible film that new caulk won’t stick to, so wipe the joint with denatured alcohol on a rag. Let it dry fully. On a tub, fill it with water before caulking so the joint is at its widest.
For a crisp line on tile or dark trim, lay painter’s tape on both sides of the joint, leaving a gap the width of the bead you want.
Step 2: Cut the nozzle
Cut the plastic nozzle at a 45-degree angle. The opening should be slightly smaller than the joint; you can always run a second pass, but a fat bead makes a mess you have to wipe off.
Most 10 oz nozzles are tapered, so where you cut sets the bead width. Use the chart below and measure your joint first if you’re unsure how to read a measuring tape for small fractions.
| Joint width | Cut nozzle about | Typical job |
|---|---|---|
| 1/16 to 1/8 inch | 1/4 inch from the tip | Trim to wall, backsplash seams |
| 3/16 inch | 3/8 inch from the tip | Tub to tile, window stops |
| 1/4 inch | 1/2 inch from the tip | Siding joints, exterior trim |
| 3/8 inch or wider | 5/8 inch or more, plus backer rod | Concrete expansion joints, wide gaps |
Pro tip
Cut the nozzle with the gun’s spout cutter or a fresh utility blade and trim the plastic burr off the opening with your fingernail. That burr drags through the bead and leaves a ragged edge that no amount of tooling fixes.
Any gap wider than 3/8 inch needs foam backer rod pushed in first. Caulk alone sags out of a deep joint and cracks as it cures.
Step 3: Puncture the inner seal
Every cartridge has a foil or plastic seal at the base of the nozzle. Push a long nail, awl or the gun’s fold-out puncture pin down through the nozzle until it breaks through. Wiggle it to open the hole fully.
If you skip this, the first squeeze builds pressure with no outlet and the back plug can blow out, dumping caulk in the frame. We’ve cleaned up that mess more than once.
Step 4: Load the tube
Press the release plate (the small tab near the handle) and pull the rod all the way back. Set the nozzle end into the front hoop of the frame first, then drop the back of the tube into the cradle. Push the rod forward by hand until the plunger seats against the tube’s plastic piston.
Check that the tube sits straight. A crooked cartridge binds the rod and the bead stutters. On a revolving-frame gun, spin the frame so the nozzle cut faces the direction you’ll pull.
Step 5: Prime the gun
Squeeze the trigger slowly until caulk just appears at the nozzle tip. That’s usually three to five pulls on a 10:1 gun. Wipe the tip with a rag so you start with a clean nozzle instead of a blob.
On a ratchet gun, this is also where you learn how far each click advances the rod. On a cordless gun, set the speed dial low for trim, roughly the second or third notch, and bump it up only for adhesives.
Step 6: Run the bead
Hold the gun at about 45 degrees to the joint with the angled nozzle cut flat against both surfaces. Start at a corner. Squeeze with steady light pressure and pull the gun toward you at a smooth, even speed, about the pace of writing your name.
Pulling the gun lets the nozzle edge spread the caulk into the joint and gives you a clean line. Pushing forces more material into a deep gap, and some pros push on exterior joints, but it’s harder to keep neat. For most homeowner work, pull.
Keep the bead moving. Pausing while squeezing dumps a lump. If you need to adjust your grip, release the trigger first. Aim to fill the joint so caulk touches both sides with a slight concave surface, not a round pillow sitting on top.
Pro tip
Run joints in sections you can tool in under five minutes, roughly 4 to 6 feet of latex or 3 feet of silicone. Silicone skins fast, and once it skins your finger drags the surface instead of smoothing it. Caulk, tool, then move on.
On a kitchen, the gap between crown molding and the ceiling, or between a filler strip and the wall, is exactly the joint a bead of latex caulk hides. It’s one of the cheapest tricks for making custom cabinets ikea style look built in.
Step 7: Release pressure and stop clean
The moment you reach the end of the run, press the release plate (or let go of the trigger on a smooth-rod or cordless gun) and twist the nozzle away from the joint as you lift. On a ratchet gun, flip the plate and pull the rod back an eighth of an inch.
Set the gun down nozzle-up on a rag. Even a drip-free gun will leak a little as the tube relaxes.
Step 8: Tool the bead
Within a few minutes, smooth the bead so it bonds to both surfaces and sheds water. For latex, a damp fingertip works. For silicone, mist the bead and your finger with soapy water first so the caulk doesn’t stick to you and pull out of the joint.
Draw your finger or a plastic finishing tool along the bead in one pass with light pressure. Wipe excess on a paper towel every foot or so. If you taped the joint, pull the tape immediately after tooling, lifting it away from the bead at a 45-degree angle.
Then leave it alone. Don’t paint latex before the time on the tube, and keep showers dry for 24 hours after silicone.
Step 9: Clean up and store the gun
Pull the tube out, wipe the plunger and rod with a rag, and either cap the nozzle or push a screw or wire nail into the opening. A capped tube of latex keeps for weeks; silicone often cures in the nozzle and needs the plug drilled out next time.
Wipe silicone off the gun with mineral spirits before it cures. Dried polyurethane on a rod is permanent, so clean that one right away. Store the gun with the rod pulled back and the release plate relaxed so the spring doesn’t take a set.
Other dispensing guns you may run into
A few jobs call for something other than a standard 10 oz cartridge gun.
Foam sealant guns. Products like Great Stuff Pro and the FST-250 style canisters screw onto a dedicated foam gun with a metering trigger. These are for filling around window frames and rim joists, not for caulk, and the gun must stay charged with foam or cleaner between uses or it clogs permanently.
Quart guns. Subfloor adhesive and roofing sealant come in 28 to 29 oz tubes. A quart gun has a longer frame and usually a higher thrust ratio. Cordless versions earn their keep here.
Sausage and bulk guns. Commercial sealant ships in 20 oz foil sausages or bulk pails. The full-barrel guns from Albion and Cox take a nozzle on the front and a plunger with a sealing cup on the back. Overkill for a house, but worth knowing if you borrow one.
Self-leveling concrete sealant. Driveway and garage expansion joints take a polyurethane that flows flat on its own. Use a standard gun, backer rod, and wait at least 24 hours before you apply a concrete sealer over the slab.
Troubleshooting
| Symptom | Likely cause | Fix |
|---|---|---|
| Caulk keeps oozing after you stop | Ratchet rod holding pressure, or tube still compressed | Flip the release plate and pull the rod back slightly; upgrade to a smooth-rod gun |
| Nothing comes out and the trigger is hard | Inner seal not punctured, or nozzle cured shut | Run a nail down the nozzle; drill out a cured plug with a 1/8 inch bit |
| Bead is lumpy and uneven | Inconsistent squeeze or speed, or a burr on the nozzle | Keep the gun moving at one pace; recut the nozzle clean |
| Caulk sags out of the joint | Gap too wide for the bead | Add backer rod and run a second pass after the first skins |
| Back plug blew out into the frame | Seal not punctured or clogged nozzle | Scoop it out, clean the rod, start a new tube with the seal fully open |
| Silicone won’t stick | Old silicone residue or soap film | Scrape to bare surface, wipe with denatured alcohol, let dry |
| Tooled bead pulls out of the joint | Finger too dry for silicone, or caulk already skinned | Use soapy water and tool within 3 minutes |
| Latex bead cracks within weeks | Joint moves more than latex can stretch | Recaulk with a siliconized or elastomeric product |
When to call a pro
Call a glazier if the failed caulk is a structural glazing seal on a large window or storefront, and a licensed roofer if you’re sealing around flashing, vents or a chimney on a steep roof. Mold behind tub caulk that returns within a month usually means water is getting in from a failed grout line or a leaking valve, and that’s a plumber and tile setter job, not more caulk.
FAQ
Why does my caulking gun keep dripping?
Nearly always because it’s a ratchet-rod gun. The notched rod holds pressure on the tube until you physically flip the release plate. A smooth-rod gun like the Newborn 930-GTD drops pressure as soon as you release the trigger. Also check that the tube isn’t cracked at the back, which lets caulk squeeze past the piston.
Do I pull or push the caulking gun?
Pull it for almost everything. Pulling lets the angled nozzle smooth the bead as you go and keeps the material in the joint. Push only on deep exterior joints where you need to pack sealant in, and plan to tool it heavily afterward.
Is a cordless caulking gun worth it for a homeowner?
Only if you dispense a lot of thick material. For a tub, a few windows and baseboard, a $20 manual gun is faster to grab and easier to control. If you’re gluing down a subfloor, building a deck with construction adhesive, or caulking a whole house’s siding, the Milwaukee M12 or M18 saves your hands and gives a steadier bead.
How big should I cut the caulk tube tip?
Slightly smaller than the joint. For typical trim gaps of 1/8 inch, cut about 1/4 inch from the tip at a 45-degree angle. Measure the widest part of the joint first and err small; a thin bead you add to looks better than a fat one you have to wipe off.
Can I reuse a half-used tube of caulk?
Yes. Push a 2-inch screw or a wire nail into the nozzle, or wrap the tip in tape, and store it upright. Latex keeps for a month or more. Silicone and polyurethane cure inside the nozzle, so expect to drill or cut past the plug, and the material near the tip may be stiff.