
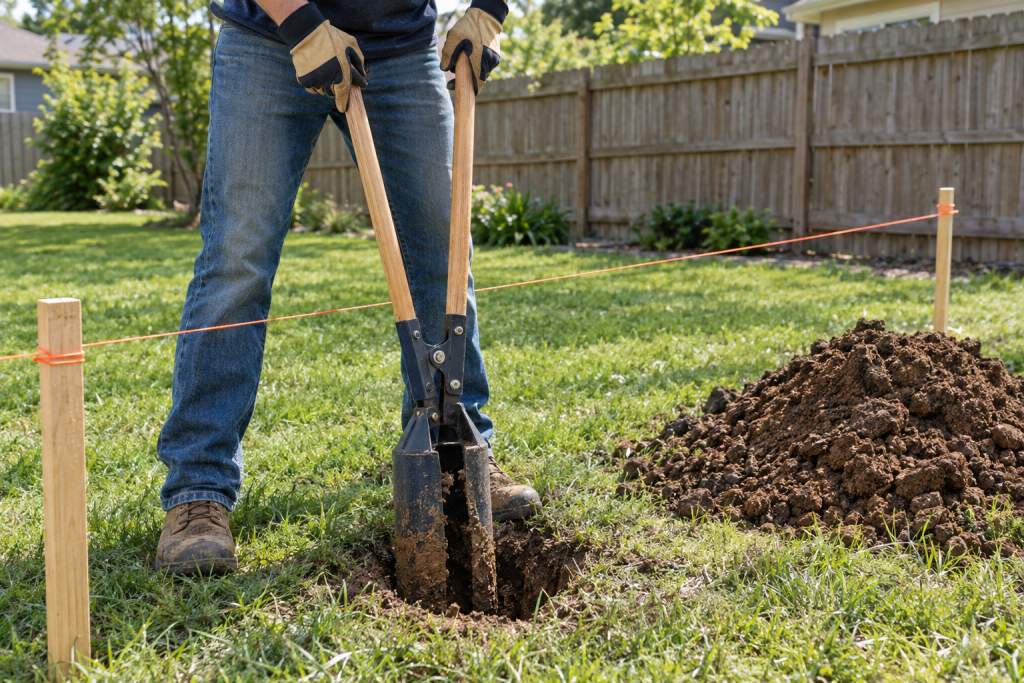
A post hole digger (the clamshell “post digger” with two long handles) digs a clean, narrow hole by driving the blades in, spreading the handles to grab the dirt, and lifting it out. Soak the ground the night before, plunge, pinch, lift, repeat, and we can get a 10-inch-wide, 36-inch-deep hole in about 15 minutes in average soil.
Quick steps: dig a post hole with a clamshell digger
- Call 811 two to three days ahead and mark the hole locations.
- Water each spot with a bucket or hose the night before.
- Cut the sod with a spade and loosen the top 6 inches.
- Drive the closed blades straight down, spread the handles, lift the dirt out.
- Keep the hole plumb and no wider than the blades.
- Break rocks and hardpan with the digging bar, then scoop the loose material.
- Check depth with a tape, flare the bottom slightly, drop in 4 inches of gravel.
Tools and materials
- Clamshell post hole digger (fiberglass or hardwood handles, 5.5-6 in. blades)
- Digging bar, 5-6 ft with a chisel end and tamper end
- Square spade for cutting sod
- 25 ft tape measure and a 4 ft level or post level
- Marking paint and wooden stakes with mason’s line
- Gloves and safety glasses
- 5 gallon bucket for spoil
- Pea gravel or 3/4 in. crushed stone, about half a bag per hole
Calculators for this job
Safety first
Call 811 before you dig; utility locates are free and marks last about 14 days. Wear gloves to prevent blisters and eye protection when striking rock with the bar. Stop immediately if you hit anything that looks like pipe, cable or conduit.
Step 1: Mark the holes and call for locates
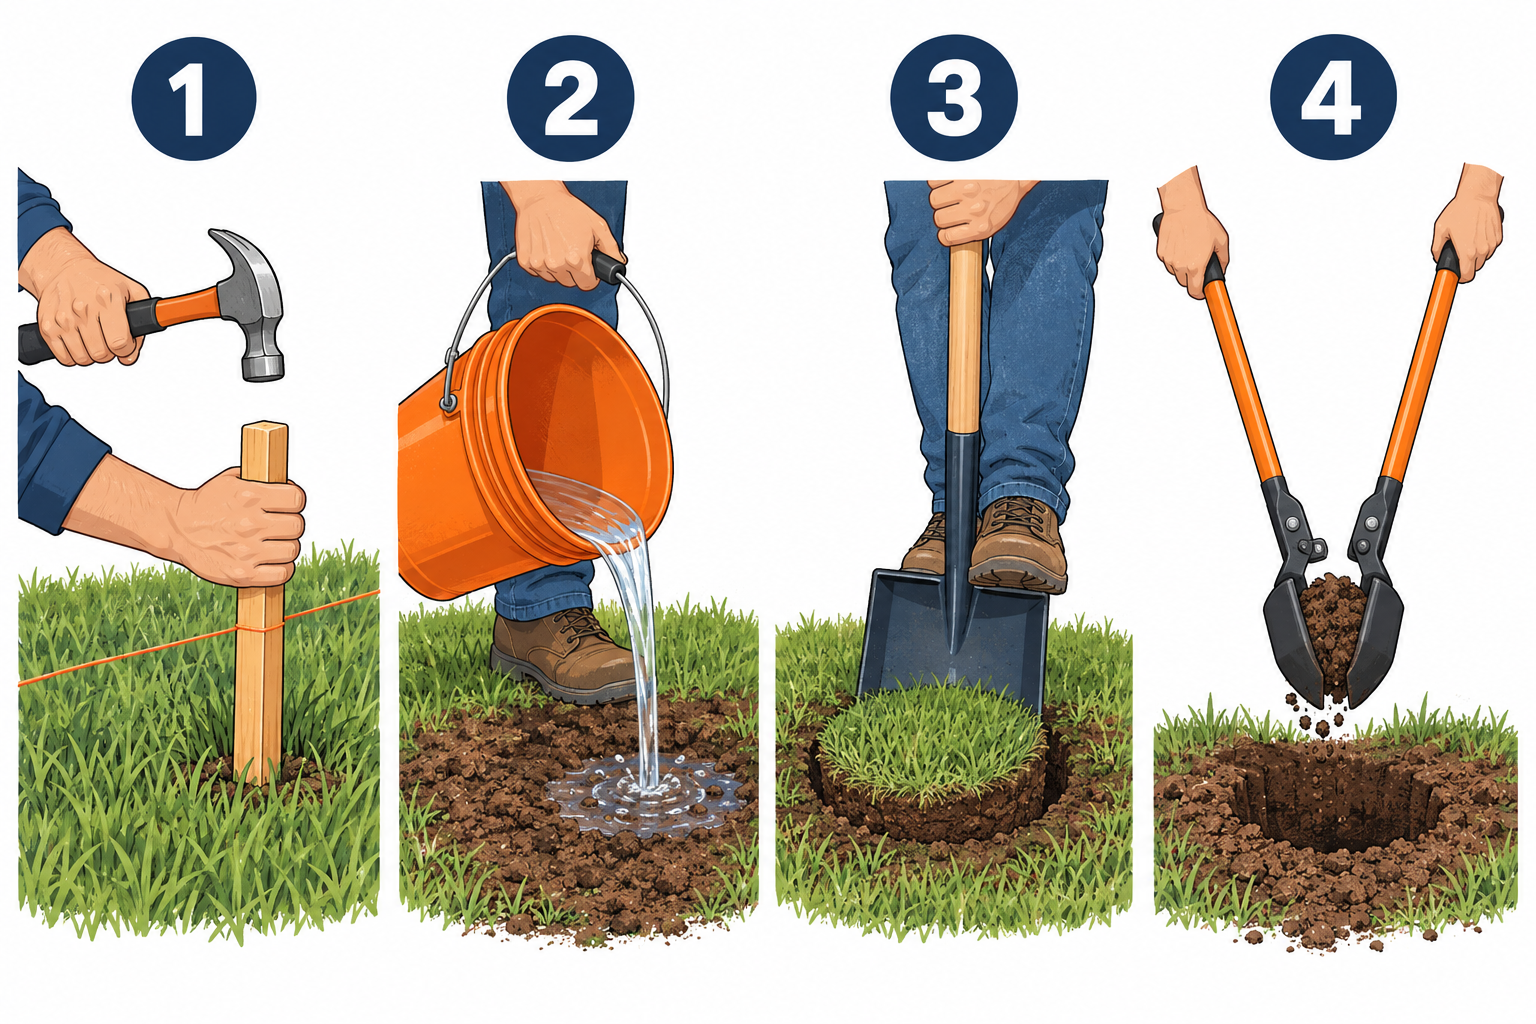
Set stakes at the corner posts and run a tight mason’s line between them. Mark post centers along the line with paint, usually 6 or 8 feet apart to match standard fence panels. Measure from center to center, not edge to edge, and double-check with the tape before you dig. If you’ve never had to read a measuring tape down to the sixteenth, now is a good time to practice, because a post that lands 2 inches off center means a panel that doesn’t fit.
Call 811 or use your state’s online portal. Most utilities mark within two to three business days, and digging without locates is illegal in every state.
Step 2: Soften the ground the night before
Dry clay is what turns a 15-minute hole into an hour. Pour 2-3 gallons of water over each marked spot in the evening and let it soak in. The goal is damp soil that holds together when squeezed, not mud. Mud sticks to the blades and refuses to drop out of the clamshell.
Pro tip
Flip a 5 gallon bucket upside down with the bottom cut out and set it over the wet spot. It keeps the water where you need it instead of running off across the lawn.
Step 3: Cut the sod and open the top
Use the square spade to cut a 10-inch circle through the grass and lift the sod out as a plug. Set it aside on a tarp and we can drop it back around the finished post. Loosen the first 6 inches with the spade so the digger has something to bite.
Step 4: Plunge, spread, lift
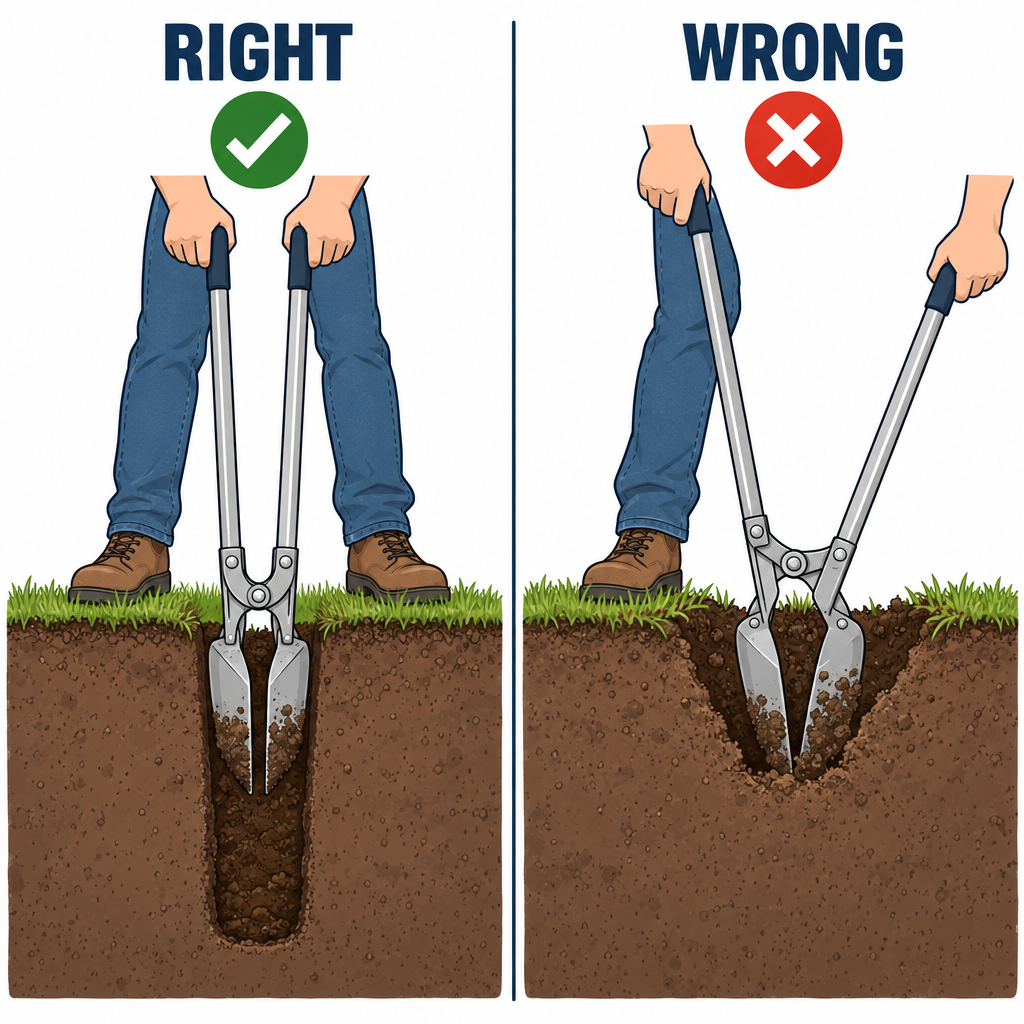
Hold the handles together so the blades close into a point. Raise the digger to chest height and drive it straight down. Then push the handles apart, which closes the blades around the loose dirt, and lift. Dump the spoil to one side, keeping it a foot or more from the hole so it doesn’t fall back in.
Keep the handles close to vertical. Every time we lean the digger to pry, the hole gets wider at the top and we burn concrete later. A 4×4 post needs a hole about 10-12 inches across. A 6×6 needs 14-16 inches. Three times the post width is the rule, and the digger’s blade width keeps us honest if we go straight down.
As the hole deepens, the handles need to spread wider to get the same bite, which is why standard diggers struggle below 3 feet. If you need 42-48 inches for a northern frost line, choose a digger with offset or angled handles, or switch to a one-person auger rental.
Step 5: Deal with rocks, roots and hardpan
When the blades stop short and ring instead of sinking, there’s a rock or a root. Use the chisel end of the digging bar to pry rocks loose or split roots, then scoop the debris with the digger. A sharp bar also shatters hardpan layers in three or four strikes. For a buried chunk of old footing or ledge rock, a rented jack hammer with a spade bit will chew through what a hand bar can’t, though a buried concrete pad is often a sign to move the post 6 inches rather than fight it.
Pro tip
Sharpen the digger blades with a flat file every few holes. A 30-second touch-up on the leading edge cuts roots that would otherwise stop you cold.
Step 6: Check depth and prep the bottom
Set the digger aside and drop the tape to the bottom. A fence post should be buried one third of its above-ground height, and the hole bottom must sit below your local frost line, which ranges from a few inches in the Gulf states to 48 inches or more in the upper Midwest. Your county building department publishes the number.
Use the digger to scrape the bottom 4 inches a little wider than the hole, creating a bell shape that resists frost heave. Tamp the bottom with the flat end of the bar and add 4 inches of gravel for drainage. Now the post is ready to set, plumb and brace.
Clamshell digger vs auger: which one to use
| Tool | Best for | Rough cost | Watch out for |
|---|---|---|---|
| Manual clamshell | 1-15 holes, tight spots, rocky soil | $35-70 to buy | Hard below 36 in. |
| Manual auger | Sandy or loamy soil, 3-4 ft depth | $40-90 to buy | Binds on roots |
| Gas one-person auger | 10-30 holes, soft soil | $60-100/day rental | Torque kickback on rocks |
| Two-person or towable auger | 30+ holes, clay | $100-250/day rental | Needs a helper and trailer |
Rental counters and big-box stores carry replacement parts like blades, pins and handles, so a cracked wooden handle is a $12 fix rather than a new tool.
Troubleshooting
| Symptom | Likely cause | Fix |
|---|---|---|
| Dirt won’t stay in the blades | Soil too dry and sandy | Add water, lift slower, tilt slightly on the way up |
| Blades clog with sticky mud | Over-watered clay | Wait a few hours, scrape blades with the bar |
| Hole keeps widening at the top | Prying on the handles | Reset, drive vertically, use the bar for leverage instead |
| Can’t reach past 30 inches | Standard parallel handles | Switch to an offset-handle digger or auger |
| Blades ring and bounce | Rock or hardpan | Break it with the chisel bar, then scoop |
| Hole fills with water | High water table | Bail, add 6 in. of gravel, set post in fast-setting concrete |
When to call a pro
Call a fence contractor or excavation company if you hit bedrock within 18 inches, if the site has a steep slope that won’t hold a straight hole, or if 811 marks a gas or electric line within 24 inches of a post location. Deck footings that carry a structure usually need an inspection, so check with your building department before you backfill.
FAQ
How deep should a post hole digger go for a 6-foot fence?
Bury 2 feet of an 8-foot post, so dig 28 inches to allow 4 inches of gravel. Go deeper if your local frost line is lower than 24 inches.
Can one person use a post hole digger alone?
Yes. The clamshell digger is a one-person tool, but it is best suited to small jobs of roughly 1-10 holes, since fatigue sets in noticeably after about 8 holes; for projects of 15-20 holes or more, rent a powered auger. Gas augers over 2 horsepower are safer with two people.
What’s the difference between a post digger and an auger?
A post digger scoops dirt with two hinged blades. An auger twists a screw into the ground and lifts dirt on the flights. Diggers handle rocks and roots better; augers are faster in clean soil.
How wide should the hole be?
Three times the width of the post. A 4×4 gets a 10-12 inch hole, which matches the spread of a standard digger’s blades.