
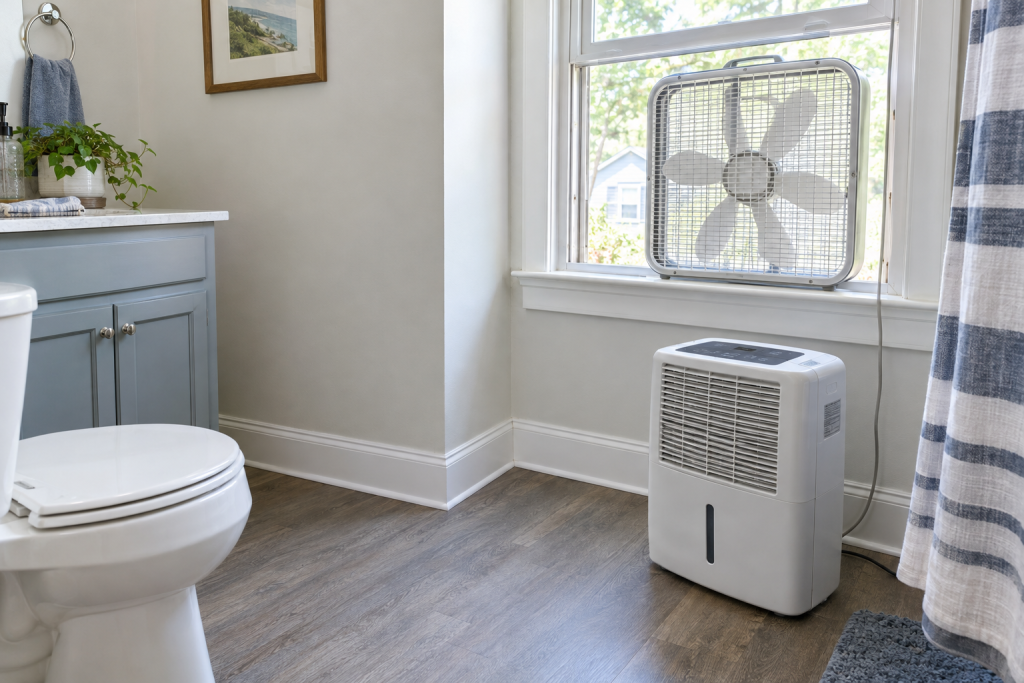
You can handle mold removal yourself when the patch covers less than about 10 square feet (roughly a 3 by 3 foot area), the water source is fixed, and the growth sits on a hard or semi-porous surface you can scrub or discard. Put on an N95, gloves and unvented goggles, scrub with detergent and water, bag anything porous, then dry the area completely and keep humidity under 60 percent so it never comes back. Anything larger, anything inside wall cavities or ducts, or anything from sewage or flood water belongs to a remediation contractor.
Quick steps: mold cleanup under 10 square feet
- Find and stop the water or moisture source before you clean anything.
- Put on an N95 respirator, nitrile gloves and goggles without vents, then open a window and run a box fan outward.
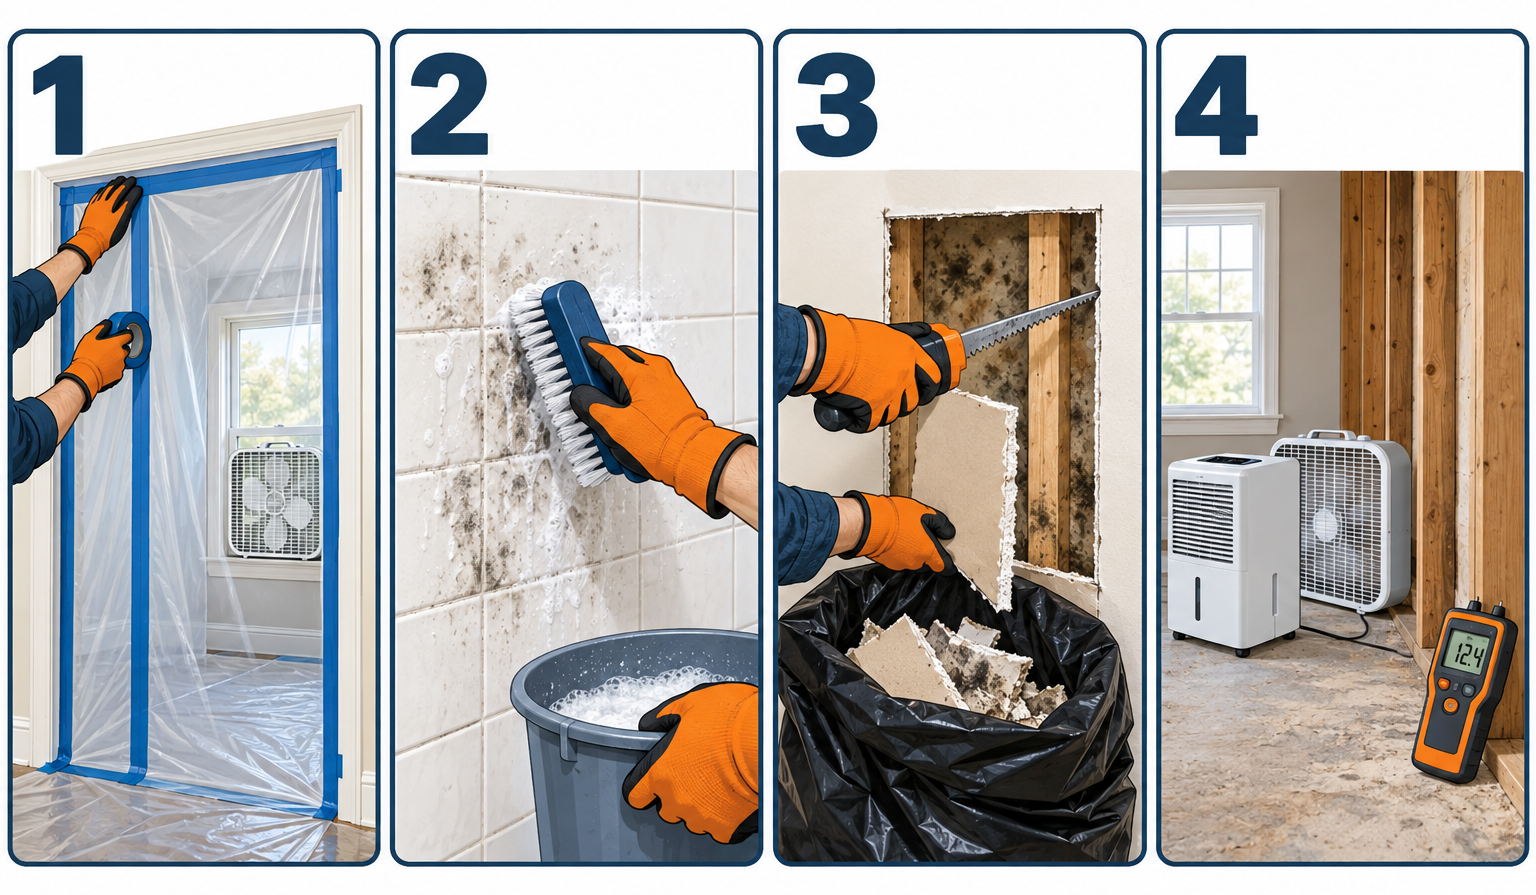
- Seal the doorway with plastic sheeting and tape so spores stay in the work area.
- Scrub hard surfaces with warm water and dish detergent, then wipe dry.
- Cut out and bag moldy drywall, insulation, carpet pad and ceiling tile; they cannot be cleaned.
- Wipe the cleaned area with white vinegar or 3 percent hydrogen peroxide and let it sit 10 minutes.
- Dry everything with fans and a dehumidifier for 24-48 hours before painting or rebuilding.
- Keep indoor humidity between 30 and 50 percent and recheck the spot in two weeks.
Tools and materials
- N95 or P100 respirator (NIOSH-approved)
- Nitrile or household rubber gloves, long cuff
- Non-vented safety goggles
- Disposable coveralls or old clothes you will wash hot
- 6 mil plastic sheeting and painter’s tape
- Box fan and a dehumidifier (rent for $25-40/day if you do not own one)
- Spray bottle, stiff nylon scrub brush, sponges, microfiber cloths
- Dish detergent, white distilled vinegar or 3 percent hydrogen peroxide
- Contractor-grade trash bags (3 mil)
- Utility knife, drywall saw, pry bar for tear-out
- Moisture meter ($25-40) to confirm materials are dry
- Mold-resistant primer for repainting
Calculators for this job
Safety first
Never mix bleach with ammonia or any acid cleaner; the gas can send you to the ER. Keep children, anyone pregnant, and anyone with asthma, allergies or a weakened immune system out of the house during cleanup. Wear the respirator from the moment you disturb the growth until the bags leave the building.
Step 1: Fix the moisture source first
Cleaning without stopping the water is wasted effort, because mold regrows on damp material within 24 to 48 hours. Walk the area and find the cause: a sweating cold water line, a leaking supply valve, a bath fan that vents into the attic, condensation on single-pane windows, or a crawlspace with no vapor barrier.
Check the less obvious culprits too. A clogged clothes dryer vent dumps warm, wet air into a laundry room every cycle, and a slow drip left behind by frozen plumbing pipes that cracked last winter can feed a basement wall for months. Run a hygrometer for a day; anything above 60 percent relative humidity will grow mold on its own without a leak.
Step 2: Gear up and contain the room
Mold removal throws spores into the air the moment a brush touches it, so set up as if you were doing a dusty demolition. Tape plastic sheeting over the doorway and any supply or return registers in the room. Open one window and set a box fan in it blowing outward so the room stays under slight negative pressure.
Put on your respirator and check the seal by covering the filters with your palms and inhaling; the mask should pull tight against your face. Goggles must be the unvented type, since vented safety glasses let spores drift straight to your eyes.
Step 3: Scrub hard and semi-porous surfaces
Mix a squirt of dish detergent into a gallon of warm water. Scrub tile, grout, painted concrete, sealed wood, metal, glass and plastic with the nylon brush until no visible growth remains, then wipe with clean water and dry with cloths. Detergent plus physical scrubbing is what actually removes mold; the stain-free appearance matters less than getting the biomass off the surface.
Bare wood framing and subfloor can usually be saved. Scrub them, let them dry, then sand lightly with 80 grit to remove any remaining discoloration and vacuum the dust with a HEPA vacuum.
Pro tip
Skip the bleach on anything porous. Bleach is 90 percent water, and the water soaks into drywall and wood while the chlorine stays on top, so the roots survive and regrow. Vinegar and peroxide penetrate better, and detergent with elbow grease beats both.
Step 4: Tear out what cannot be cleaned
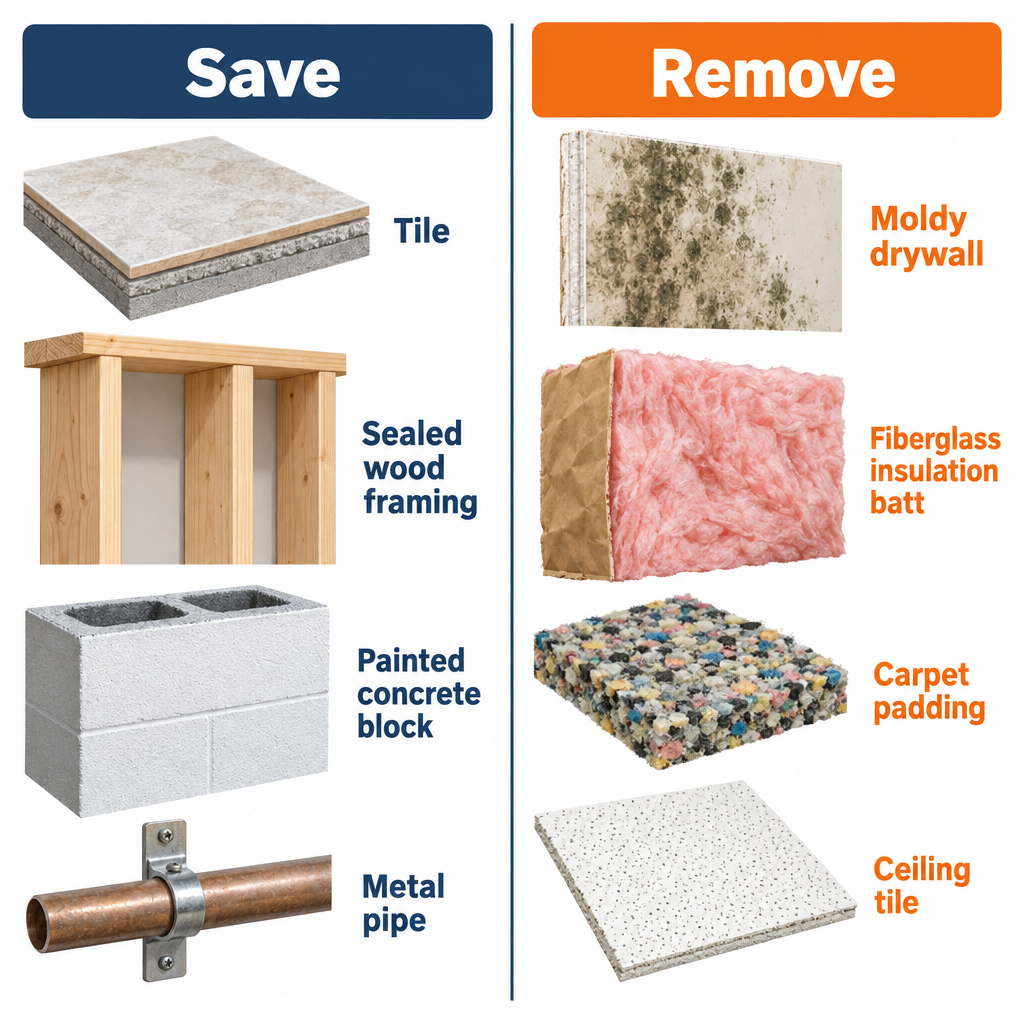
Drywall, ceiling tiles, fiberglass insulation, carpet padding, particleboard and paper-faced anything cannot be cleaned once mold grows into them. Score the drywall 12 inches past the last visible growth, cut it out with a drywall saw, and bag it before you carry it through the house. Mist the surface with water first so it sheds fewer spores when it breaks.
Carpet is a judgment call. If a small spill was caught within a day, extraction and drying can save it. If the pad underneath is moldy or the backing smells musty after drying, cut it out.
Step 5: Disinfect and dry
After scrubbing, spray the cleaned area with undiluted white vinegar or 3 percent hydrogen peroxide and let it sit 10 minutes before wiping. If you insist on bleach for a non-porous surface like tile, use no more than 1 cup per gallon of water and keep the window open.
Now dry the structure. Run the dehumidifier and fans for at least 24 to 48 hours, and check framing and subfloor with a moisture meter; wood should read under 15 percent before you close it up. Painting over damp material traps moisture and guarantees a callback to yourself.
Pro tip
Bag your coveralls, cloths and brushes with the debris. Reusing a sponge that scrubbed mold spreads spores to the next room, and the $6 you save is not worth it.
Step 6: Rebuild and prevent regrowth
Replace drywall with mold-resistant board in bathrooms and basements, prime with a mold-resistant primer, and caulk gaps where water can enter. Keep humidity between 30 and 50 percent with a dehumidifier or by running bath and kitchen fans 20 minutes after use. Inspect the spot at two weeks and again at two months; any fuzzy return means the moisture problem is still live.
Troubleshooting
| Symptom | Likely cause | Fix |
|---|---|---|
| Mold returns within weeks | Moisture source not fixed, or porous material left in place | Re-check for leaks and humidity, remove the material |
| Musty smell persists after cleaning | Growth inside the wall, under flooring or in ductwork | Open a test hole with a moisture meter; call a pro if the cavity is wet |
| Stains remain after scrubbing | Pigment left in grout or wood grain | Sand wood, regrout tile, prime and paint; stain alone is not live mold |
| Headache or dizziness during cleanup | Poor ventilation or mixed cleaners | Stop, leave the room, increase airflow, never combine products |
| Paint bubbles or peels on the patch | Painted over damp material | Strip, dry to under 15 percent moisture, reprime |
When to call a pro
Call a mold remediation contractor (look for IICRC certification) when growth exceeds 10 square feet, mold is inside HVAC ducts or wall cavities, the water came from sewage or outdoor flooding, or anyone in the house has respiratory illness. Hire a plumber or roofer first for the leak itself. Expect $500 to $3,000 for a typical room or basement, with most homeowners paying somewhere between $1,200 and $3,750.
FAQ
What actually kills mold and mildew?
Physical removal with detergent and scrubbing does most of the work. White vinegar, 3 percent hydrogen peroxide and diluted bleach all kill surface growth on hard materials, but none of them revive porous drywall or insulation, which must be thrown away.
Does homeowners insurance cover mold?
Most policies cover mold only when it results from a sudden, covered event such as a burst pipe or storm damage, and many cap the mold payout between $1,000 and $10,000. Mold from long-term leaks, humidity, neglect or outside flooding is usually excluded unless you carry a separate mold or flood policy.
What are signs of mold exposure?
Common signs are nasal congestion, sneezing, itchy eyes, coughing, wheezing and skin irritation that improve when you leave the building. People with asthma, allergies or weakened immune systems react sooner and more severely.
Is there a difference between mold removal and mold remediation?
Mold removal means physically cleaning or discarding the moldy material. Remediation is the full professional process: containment, negative air pressure, HEPA filtration, removal, drying, moisture correction and post-cleanup testing to confirm spore levels are back to normal.