
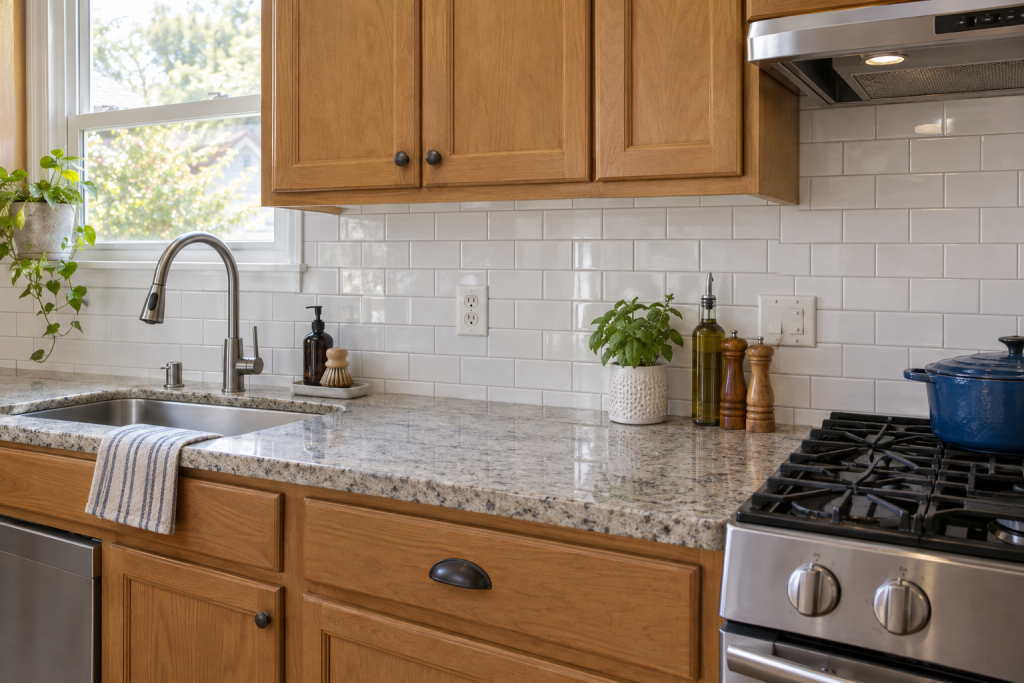
A peel and stick backsplash is the right call when the wall is smooth, the budget is under a few hundred dollars, and you want the kitchen done this weekend rather than hiring a tile setter. Our pick is a thick gel or composite tile, which looks closest to real ceramic and survives the stove zone far better than thin vinyl. Below we rank the five types, lay out the honest tradeoffs against real tile, and walk through an install that stays stuck.
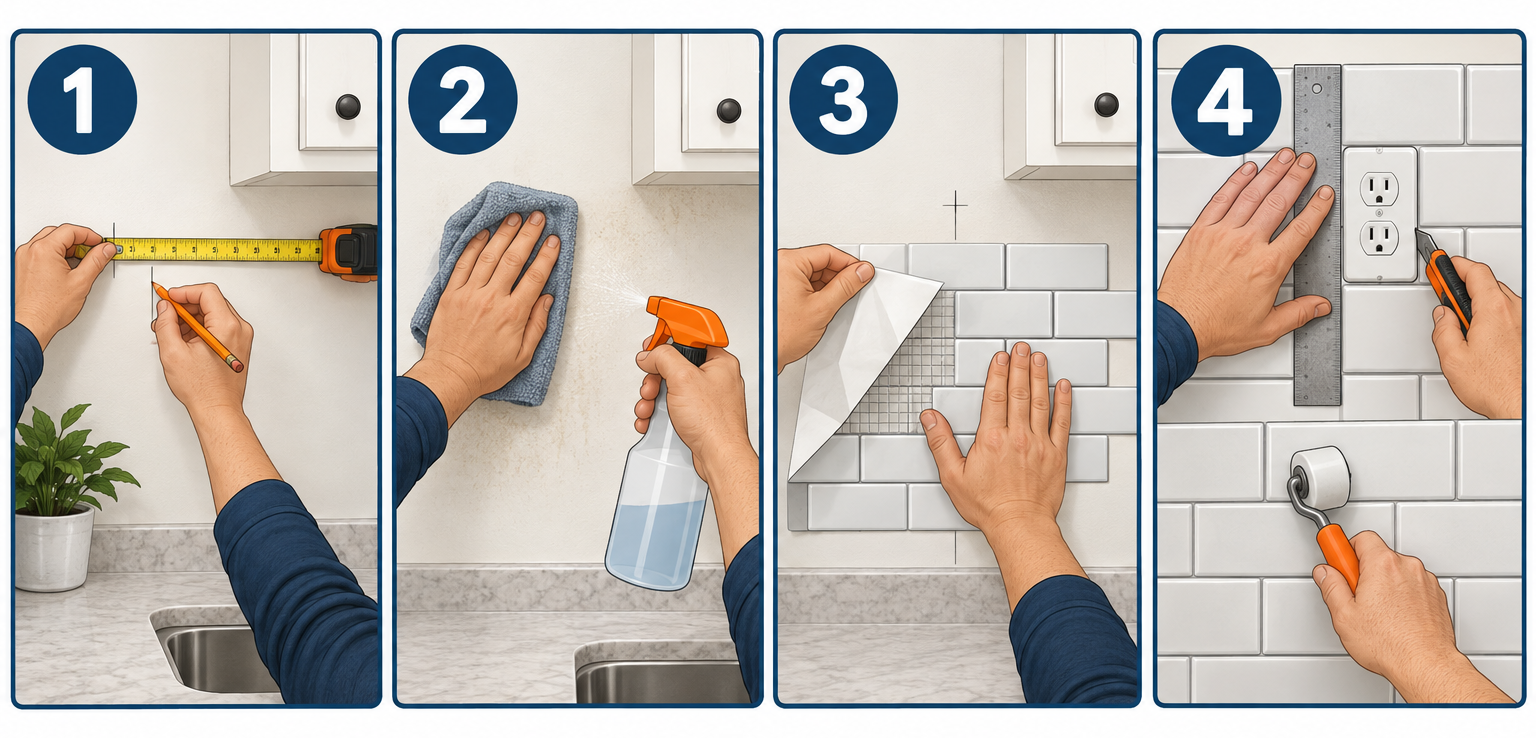
Quick steps: install a peel and stick backsplash
- Measure the wall, add 10 percent and order one extra pack.
- Kill power to backsplash outlets and remove the cover plates.
- Degrease the wall, wipe with isopropyl alcohol and let it dry fully.
- Snap a level line at the countertop and mark a center start point.
- Dry-fit the first row, then peel and press from the center outward.
- Cut around outlets and edges with a sharp utility knife.
- Roll every sheet firmly with a seam roller.
- Caulk the countertop seam and reinstall the cover plates.
Tools and materials
- Peel and stick tile sheets (enough for the square footage plus 10 percent)
- Tape measure and pencil
- 24-inch level or a laser level
- Utility knife with at least five fresh blades
- Metal straightedge or 12-inch steel ruler
- Heavy scissors (for vinyl and gel sheets)
- Seam roller or J-roller
- Degreaser (Krud Kutter or a TSP substitute)
- 70 percent isopropyl alcohol and lint-free rags
- Painter’s tape
- Clear kitchen-and-bath silicone caulk and a caulk gun
- Non-contact voltage tester
- Outlet box extenders (if the tile is thicker than 1/8 inch)
- Hair dryer (for corners and removal)
Calculators for this job
Safety first
Turn off the breaker for every outlet in the backsplash zone and confirm with a non-contact voltage tester before pulling cover plates. Keep gel and vinyl tiles the distance the package specifies from gas burners, usually a few inches, since they can soften or discolor under direct heat.
Peel and stick backsplash types at a glance
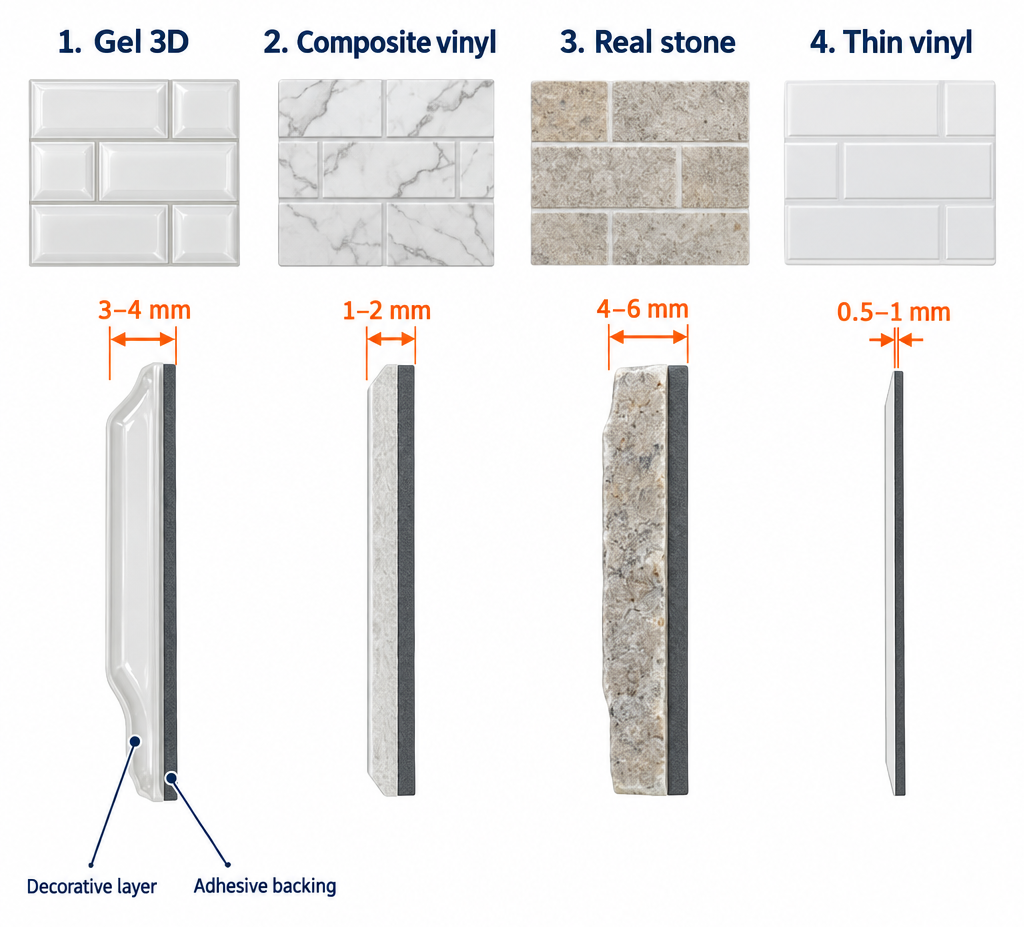
| Type | Typical cost per sq ft | Thickness | Cut with | Heat tolerance | Best for |
|---|---|---|---|---|---|
| 1. Gel (epoxy resin) 3D tiles | $7-12 | 1/8 to 3/16 in | Scissors or utility knife | Good, behind cooktop with clearance | Most kitchens, convincing look |
| 2. Composite/thick vinyl tiles | $2-5 | 1/16 to 1/8 in | Scissors or utility knife | Good | Budget kitchens, rentals |
| 3. Real stone, glass or metal | $8-20 | 1/4 in or more | Wet saw, nippers or snips | Excellent | Permanent installs, stove walls |
| 4. Thin vinyl sheets | $1-3 | Under 1/16 in | Scissors | Poor near heat | Laundry rooms, low-traffic walls |
| 5. Peel and stick wallpaper | $0.50-2 | Paper thin | Scissors | Poor | Renters, behind a bar or desk |
The 5 types of peel and stick backsplash, ranked
We ranked these on how they look at arm’s length, how they hold up behind a sink and stove, and how easy the install is for someone who has never cut a tile.
1. Gel 3D tiles (our top pick)
The gel category is what most people picture when they search for a peel and stick backsplash. Smart Tiles built the category, and several brands now sell similar epoxy resin “gel” sheets with raised, rounded tile faces. Each sheet is roughly a square foot, and the raised surface catches light the way glazed ceramic does. From three feet away, a white subway gel sheet passes for real tile.
The adhesive is thick and aggressive, so it bonds well to painted drywall and old laminate. Most gel lines have an overlap tab along two edges, which hides seams between sheets. They cut cleanly with heavy scissors. The main weakness is heat. Keep them the manufacturer’s stated distance from a gas flame and they hold up fine behind an electric or induction cooktop.
Expect to pay about $8 to $12 per sheet at big-box stores, and since each sheet covers roughly a square foot, a 30 sq ft backsplash needs 30 or more sheets and runs about $240 to $360 or a bit more after extra sheets for cuts.
2. Composite and thick vinyl tiles
Brands like Art3d and Tic Tac Tiles sell 10-packs of thick vinyl or composite sheets, often with a glossy printed face in subway, hex, brick and mosaic patterns. They are thinner than gel but far sturdier than contact paper, and the adhesive is nearly as strong. A 10-pack covers around 8 to 10 sq ft and runs $25 to $45 online.
These are the value pick. The printed face is less convincing up close than gel, especially in high-gloss white where you can see the flat surface under a raking light. Darker and busier patterns hide that better. Install is identical to gel.
3. Real stone, glass and metal peel and stick
Aspect and a few other brands bond genuine glass, honed stone or brushed metal to an adhesive backer. This is the only peel and stick backsplash that is indistinguishable from mortar-set tile, because it is real tile. Heat is a non-issue. Cleaning is the same as any glass or stone surface.
The tradeoffs are cost and cutting. Real glass and stone pieces run $8 to $20 per square foot and need a wet saw, tile nippers or aviation snips for metal. The thicker tile also means almost every outlet needs a box extender. We rank it third only because the price and tool list push it out of the easy-weekend category.
4. Thin vinyl sheets
These are the $1 to $3 per square foot sheets sold in bulk rolls or thin packs. They stick, they look fine in a laundry room or a mudroom, and they peel off without much fuss. Behind a kitchen sink or stove they curl at the edges within a year and the thin adhesive gives up when steam hits it. Skip them in the cooking zone.
5. Peel and stick wallpaper
Tile-print peel and stick wallpaper is the cheapest option and the easiest to remove. It is also paper-flat, so the “grout lines” are just ink. It works behind a coffee bar or a desk nook. We would not put it behind a cooktop, and the first splash of tomato sauce will tell you why.
How to choose the right sheet
Four things decide whether a peel and stick backsplash looks good in five years or starts curling in five months.
Wall condition first. Peel and stick needs a smooth, flat, painted surface. It will not hide orange-peel or knockdown texture, and it will telegraph every ridge. If our wall were textured, we would skim coat it with joint compound, sand, prime and paint before buying a single sheet. That is a day of “interior painting” prep, but it is the only way thin tile looks right.
Heat zone. Anything within a foot of a gas range needs a gel tile with a stated heat rating, or real glass or metal. Thin vinyl and wallpaper belong elsewhere.
Seam design. Overlap tabs or a tile pattern that bridges sheet edges (subway, brick, hex) hide seams. Large single tiles with a printed grout line at the sheet edge show every joint.
Returns and sample size. Most brands sell a single sample sheet. Order one, stick it in the darkest corner for a week, and look at it under the range hood light. Glossy white reads differently in every kitchen, and a beige or gray that looked warm online can go pink against oak cabinets.
Pro tip
Buy all the sheets from the same lot number. Printed vinyl and gel tiles vary slightly in shade between production runs, and a mismatched sheet in the middle of a white subway wall stands out like a missing tooth.
Pros of a peel and stick backsplash
Cost. A 30 sq ft kitchen backsplash in gel or composite tile costs $60 to $250 in materials. A tile setter installing ceramic subway tile on the same wall typically charges somewhere between $9 and $45 per square foot with materials, so most 30 sq ft jobs land around $550 to $1,260. That gap is the whole argument.
Speed. No thinset, no cure time, no grout, no sealing. A first-timer finishes a straight 30 sq ft wall in an afternoon, and the kitchen is usable the same night.
No mess. You cut sheets on the counter with scissors. There is no wet saw on the back porch, no bucket of grout haze, no dust.
Reversible, mostly. Renters can remove it with a hair dryer and patience. On well-primed, well-cured paint, most of it comes off clean. On fresh or unprimed paint, expect some touch-up.
Works over existing tile. If the old backsplash is flat ceramic with shallow grout lines, gel tiles go right over it. Deep grout joints need filling with a skim coat first or they will show through as a ghost grid.
Cons of peel and stick vs. real tile
Lifespan. Real tile lasts the life of the kitchen. Gel and vinyl peel and stick is a 3 to 7 year product in a working kitchen. Edges near the sink and stove go first.
Heat and grease. Resin and vinyl soften under direct heat and stain from cooking grease if it sits. You will wipe it more often than glazed ceramic, and harsh degreasers can dull a glossy face.
Resale. Buyers and inspectors can usually spot it. In a rental or a starter kitchen nobody cares. In a kitchen with “quartz countertops” and custom cabinetry, a $150 backsplash reads as unfinished. Save real tile for that situation.
Surface dependent. Textured walls, glossy oil paint, peeling paint and damp drywall all cause failures. Prep is nearly all of the job.
Seams and corners. Inside corners never look as crisp as mitered tile, and the overlap tabs add a slight thickness at each seam that shows in strong side light.
Step 1: Measure and order
Measure the height from countertop to the bottom of the upper cabinets (usually 18 inches) and the length of each wall section. Multiply for square feet, subtract nothing for outlets, and add 10 percent for cuts. Then add one more pack. A short order mid-install means a second shipment and a possible lot mismatch.
Check the wall with a 24-inch level laid flat against it in several spots. Any gap over 1/16 inch under the level is a hump or dip that will show as a shadow line. Mark those spots. Small dips get a skim of lightweight joint compound. Humps get sanded.
Decide on orientation now. Subway and brick patterns run horizontally and look best when the first row sits level on the countertop. Hex and mosaic patterns are forgiving of a countertop that is slightly out of level.
Step 2: Kill power and clear the wall
Flip the breakers for every outlet and switch in the backsplash zone. Test each receptacle with the non-contact tester, then remove the cover plates. Set the screws in a cup so they do not disappear behind the range.
Loosen the receptacle mounting screws a turn or two. That lets you slip tile edges behind the metal ears later instead of cutting a tight square around the yoke.
Pull the range forward if you can. A backsplash that ends at the cabinet line beside the stove looks unfinished; it should run behind the range to the wall.
Step 3: Clean, degrease and dry
Kitchen walls carry a film of cooking oil you cannot see. Spray degreaser on a rag, not the wall, and wipe the entire area. Rinse with a damp cloth and clean water. Follow with 70 percent isopropyl alcohol on a lint-free rag, which pulls off the last residue and flashes dry in minutes.
Let the wall sit for a few hours, or overnight if it is humid. Adhesive bonds poorly to damp drywall, and that is the number one reason sheets lift at the corners weeks later.
If the paint is fresh, wait. Latex paint needs two to four weeks to cure fully, and peel and stick applied over soft paint pulls the paint off the drywall on removal. If the paint is flaking or chalky, prime with a bonding primer, let it cure, and then proceed.
Room temperature matters. Gel adhesive is formulated for roughly 60 to 80°F. A cold garage install over a cold wall will not bond.
Pro tip
Wipe the countertop and clean the wall, then run a strip of painter’s tape along the countertop edge. It keeps adhesive off the stone and gives a clean caulk line at the end.
Step 4: Set the level line and the starting point
Countertops are rarely level over a full run, and upper cabinets are rarely parallel to them. Pick the reference the eye will see most: on most walls that is the countertop seam.
Set the level on the countertop. If it reads level, draw a pencil line 1/8 inch above the counter along the full length. If it is off, find the high point of the counter, mark 1/8 inch above it, and use the level to extend a true horizontal line across the wall. The gap under the first row will vary slightly, and the caulk bead hides it.
Then find the visual center. For the wall behind the sink, that is the sink’s centerline. For the stove wall, it is the center of the range. Mark a vertical plumb line there. Starting at the center means the cut sheets at each end are equal, which is the single biggest difference between a peel and stick job that looks professional and one that looks slapped up from a corner.
Dry-fit the first row with the backing still on. Hold sheets against the wall and check where the cuts fall at outlets and ends. If a cut lands in a sliver under an inch wide at one end, shift the whole layout half a tile so you get two wider cuts instead.
Step 5: Peel and press, center outward
Peel the backing off the first sheet, but only halfway. Fold the backing out of the way and line the exposed top edge up with your level line and center mark. Press the top edge first, then peel the rest of the backing while you smooth downward with your palm. Trapped air shows as a bubble and a weak spot.
Work outward from center in both directions, one row at a time. Butt each sheet tight to the previous one, or lap the overlap tab exactly as the package shows. A gap of even 1/32 inch between sheets shows as a dark line in a white pattern. Stagger sheet seams between rows like brickwork so no two seams line up.
After each row, go back with the seam roller and roll every square inch with real pressure. The adhesive is pressure activated. Pressing with fingers sets it; rolling bonds it. This step gets skipped more than any other and it is why edges curl.
At inside corners, run the sheet into the corner and crease it with the handle of the roller. Gel tiles bend around an inside corner cleanly if you warm them for ten seconds with a hair dryer on low. Do not try to wrap thin vinyl or real stone around a corner; cut and butt it instead.
Step 6: Cut around outlets, edges and the hood
Switch to a fresh blade every three or four cuts. A dull blade drags gel and tears vinyl, and a torn edge never looks right.
For outlets, hold the sheet in place with the backing still on and mark the box opening. Cut the opening slightly smaller than the box, about 1/8 inch inside the lines on each side. Peel and stick the sheet, then slip the tile edge behind the loosened receptacle ears. The cover plate hides the cut.
If the tile is thicker than 1/8 inch, the cover plate will sit proud of the receptacle and the receptacle face will be recessed below the tile. That is a code issue and a fire risk, since the receptacle must be flush or within 1/4 inch of the finished surface. Install plastic outlet box extenders, which cost a few dollars each, and reinstall the receptacle through the extender.
For end cuts along a cabinet edge or a window trim, measure top and bottom separately since trim is rarely plumb. Cut with the straightedge and knife on the countertop, face up, with a scrap of cardboard underneath.
Under the range hood, stop the tile where the hood ends or carry it to the wall if the hood is a slim-line model. Check the hood manufacturer’s clearance to combustibles; vinyl and resin count.
Pro tip
Cut subway and brick patterns along a grout line rather than through a tile face wherever possible. A seam that falls on a printed grout line disappears. One that splits a tile face shows from across the room.
Step 7: Caulk, reassemble and let it cure
Run a thin bead of clear kitchen-and-bath silicone along the countertop seam and any seam at a window stool or end wall. Tool it with a wet fingertip, then pull the painter’s tape while the caulk is still wet. Clear silicone shrinks and disappears; white caulk on a white tile fights the printed grout color and almost never matches.
Reinstall the receptacles and cover plates, restore power, and test each outlet.
Give the adhesive 24 to 72 hours before wiping the wall or cooking anything that splatters. Most manufacturers list a full-strength bond at 72 hours. After that, clean with warm water and a drop of dish soap on a soft cloth. Avoid abrasive pads and anything with acetone or strong solvents, which cloud the gloss.
Troubleshooting a peel and stick backsplash
| Symptom | Likely cause | Fix |
|---|---|---|
| Corners lifting after a few weeks | Wall was greasy or damp, or sheet was never rolled | Warm the corner with a hair dryer, clean behind it with alcohol, press and roll; dab of clear silicone under stubborn corners |
| Visible bubbles under a sheet | Air trapped during pressing | Prick with a pin, press air toward the hole, roll flat |
| Shadow lines along the wall | Wall humps or deep grout lines beneath | Remove the sheet, skim coat and sand the wall, reapply with a new sheet |
| Dark line between sheets | Sheets not butted tight or overlap tab misaligned | Lift the second sheet while adhesive is fresh and reset it tight; after cure, fill with a thin bead of color-matched caulk |
| Sheet softened or warped beside the stove | Too close to a gas burner | Replace that sheet with real glass or metal tile, or install a stainless panel behind the range |
| Gloss gone dull in patches | Abrasive cleaner or solvent | Nothing restores it; replace the sheet and switch to dish soap and water |
| Receptacle sunk below tile face | Thick tile with no box extender | Add outlet box extenders and reinstall the receptacle flush |
| Paint came off with the tile on removal | Paint was fresh or unprimed | Scrape, skim, prime and repaint; next time let paint cure four weeks |
Removing a peel and stick backsplash
Warm a sheet with a hair dryer on high for 20 to 30 seconds, lift a corner with a plastic putty knife, and peel slowly at a low angle. Pull too fast and the adhesive stays behind. Leftover residue comes off with a citrus adhesive remover and a plastic scraper. Expect a few hours for a full backsplash, and plan on spot priming any bare drywall before new paint or tile.
If the next step is real tile, the wall under old peel and stick is usually fine once the residue is gone. Thinset bonds to painted drywall that is clean and dull.
When to call a pro
Call a tile setter if the wall needs a skim coat over more than a few square feet, if you are tiling over a window with no trim, or if the plan is real glass or stone and you do not own a wet saw. Call an electrician if any backsplash outlet is ungrounded, lacks GFCI protection within 6 feet of the sink, or if the box is too shallow to accept an extender. Both are a one-hour visit and cheaper than redoing the wall.
FAQ
Is a peel and stick backsplash safe behind a stove?
Behind an electric or induction cooktop, yes, with a gel or composite tile. Behind a gas range, keep the tile at the manufacturer’s stated distance from the burners and consider a stainless or real glass panel directly behind the range. Thin vinyl and wallpaper do not belong behind any cooktop.
How long does peel and stick backsplash last?
In a working kitchen with proper prep, gel and composite tiles last about 3 to 7 years before edges near the sink and stove begin to lift. Real glass or stone peel and stick lasts as long as the adhesive holds, often well past a decade. In a laundry room or bar area, any type lasts longer.
Can you put peel and stick tile over existing tile?
Yes, if the old tile is flat and the grout lines are shallow. Deep grout joints telegraph through as a grid. Fill them with a skim coat of joint compound or a sanded grout float, let it cure, and clean well before applying.
Will it damage the wall when removed?
On cured, primed, properly painted drywall, removal with a hair dryer usually leaves only a little residue. On fresh paint, builder-grade flat paint or unprimed drywall, expect some paint and paper to come off, which means spot repair and repainting.
How much does a peel and stick backsplash cost compared to tile?
A typical 30 sq ft kitchen backsplash costs $60 to $250 in peel and stick gel or composite tile with no labor. The same wall in installed ceramic subway tile runs roughly $550 to $1,260 with a pro doing the work. Real glass or stone peel and stick lands in between at $250 to $600 in materials.
Does peel and stick backsplash work on textured walls?
No. It will show every bump and lift at every ridge. Skim coat the wall smooth, sand, prime and paint, then let the paint cure for several weeks before installing.