
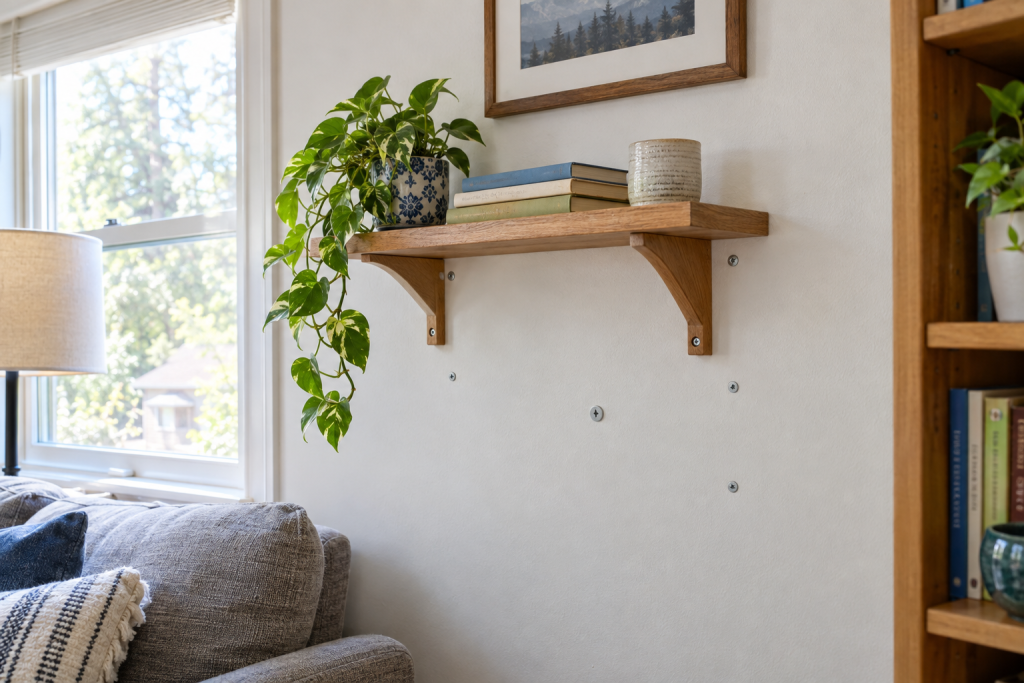
Screwing straight into drywall holds almost nothing, so you either hit a stud or you use an anchor sized for the load. For most jobs under 20 lb a self-drilling threaded anchor is the right pick, anything over 50 lb gets a toggle, and anything that gets yanked or sat on goes into a stud, no exceptions. Here’s how to choose sheetrock anchors, drill the right hole, and set each type so it never pulls out.
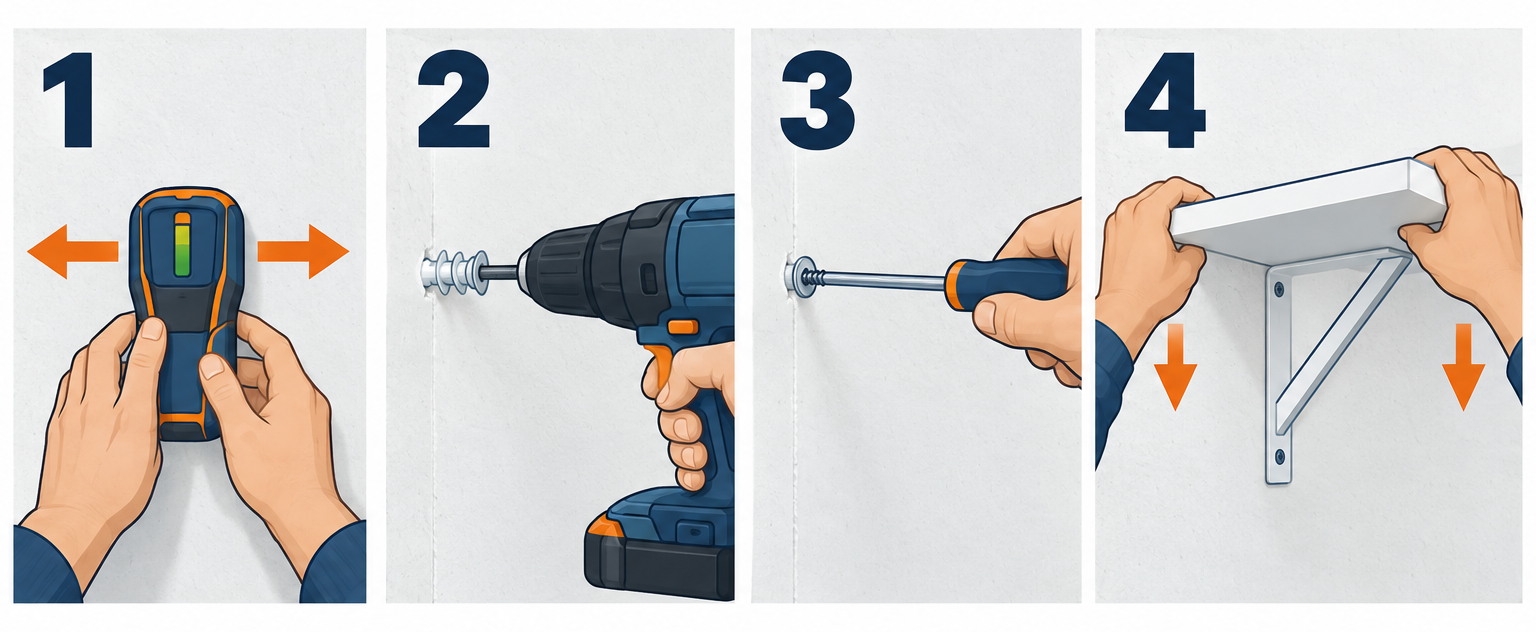
Quick steps: screw into drywall with an anchor
- Run a stud finder across the wall and use a stud if one lines up with your mounting hole.
- Weigh or estimate the item, then pick an anchor rated at least double that number.
- Check drywall thickness through an outlet cover or existing hole (1/2 in. on most walls, 5/8 in. on ceilings).
- Mark the hole with a level and keep it 6 in. away from any outlet, switch or fixture.
- Drill the hole size printed on the anchor package, stopping as soon as the bit breaks through.
- Set the anchor flush, then drive the screw until it’s snug, not cranked.
- Hang the item and pull on it hard before you trust it.
Tools and materials
- Stud finder (Zircon or Franklin ProSensor type) or a strong rare-earth magnet
- Cordless drill with a bit set (3/16 in., 1/4 in., 5/16 in., 3/8 in., 1/2 in., 5/8 in. commonly needed)
-
2 Phillips bit and a hand screwdriver for final tightening
- Torpedo level or 24 in. level
- Pencil and painter’s tape
- Anchors matched to the load: self-drilling threaded, molly, toggle, or snap toggle
-
8 x 1-1/4 in. or #8 x 1-5/8 in. screws (most anchors include them)
- Utility knife for cleaning paper burrs around the hole
Calculators for this job
Safety first
Wires and pipes sit inside the wall. Stay 6 in. clear of outlets, switches and plumbing fixtures, drill no deeper than the drywall itself, and don’t drill in the vertical line directly above or below a receptacle where the cable usually runs.
Step 1: Find a stud before you reach for an anchor
A single #8 wood screw driven 1-1/2 in. into a stud holds more than any drywall anchor you can buy, and it costs a dime. Check for one first every time, even if you expect to end up using an anchor.
Studs sit 16 in. on center in most US homes built after 1950, and 24 in. in some newer or garage walls. Measure from a corner, an outlet box (which is nailed to a stud on one side), or a window edge, and you’ll often land on one.
An electronic stud finder is the fast way. Hold it flat, press the button, slide it horizontally, and mark both edges where it lights up so you can split the difference and hit the center.
If you don’t own one, a strong neodymium magnet works on any wall. Drag it slowly across the surface and it will stick to the drywall screw heads, which only exist over framing.
Confirm before you drill a big hole. Drive a 1-1/4 in. drywall screw where you think the stud is. If it bites hard after the first 1/2 in., you’ve found wood. If it spins free, you’re in a cavity and that pilot hole becomes your anchor hole.
Pro tip
Knock on the wall with a knuckle while you move sideways. Hollow sounds dull and boomy; over a stud it goes short and solid. Use that to narrow the search before the stud finder, because finders get confused by seams, tape and metal corner bead.
Step 2: Match the anchor to the weight and the pull
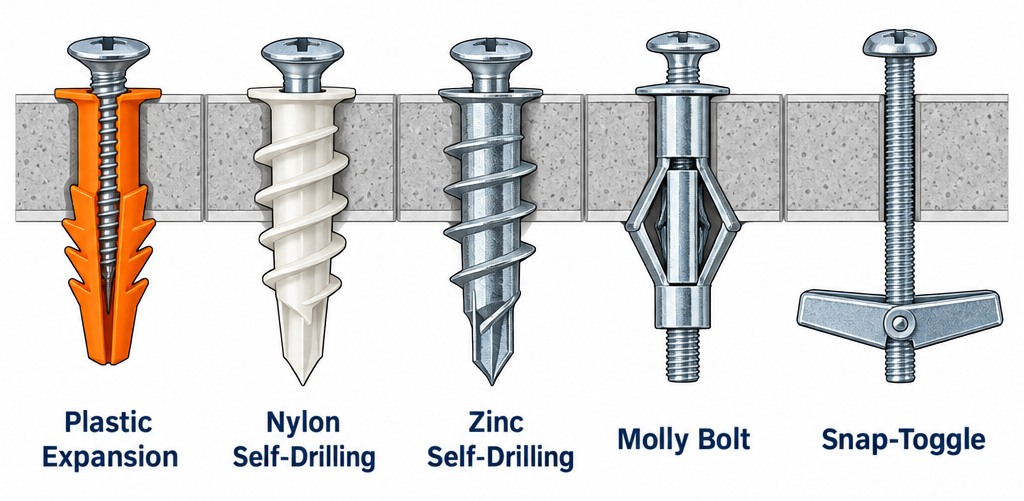
Anchors are rated two ways: shear (weight hanging straight down, like a picture) and tension (something pulling straight out of the wall, like a grab bar or the top bracket of a bookshelf). Most items create both.
Use the manufacturer’s rating as a ceiling, not a target. Those numbers come from lab tests in fresh 1/2 in. drywall with a slow, static load. Your wall has paint, maybe a patch, and a kid who swings on things. Plan for half the rating.
Here’s how the six common types stack up in standard 1/2 in. drywall.
| Anchor type | Typical rating in 1/2 in. drywall | Hole needed | Best for | Approximate cost |
|---|---|---|---|---|
| Plastic expansion (ribbed cone) | 5-20 lb, realistically 10 lb | Drilled, 3/16-1/4 in. | Smoke detectors, light switch plates, small frames | $3-6 per 50-100 |
| Self-drilling threaded, nylon | 25-50 lb | None (self-drills) | Towel bars, small shelves, curtain rods | $6-10 per 25 |
| Self-drilling threaded, zinc | 50-75 lb | None (self-drills) | Coat hooks, mirrors, medium shelves, closet rods | $8-14 per 20-25 |
| Molly bolt (hollow wall anchor) | 25-50 lb | Drilled, 5/16-7/16 in. | Toilet paper holders, grab-bar backup, items you’ll remove and rehang | $5-9 per 10-20 |
| Toggle bolt (spring wing) | 50-100 lb depending on bolt size | Drilled, 3/8-5/8 in. | Heavy mirrors, shelf brackets, curtain rods over wide windows | $6-12 per 10 |
| Snap toggle (strap toggle, Toggler SnapToggle type) | 80 lb and up, often rated well over 100 lb | Drilled, 1/2 in. | TV mounts between studs, floating shelves, cabinets, grab bars | $8-14 per 4-5 |
A few things that table can’t show.
Plastic expansion anchors are the ones that fail in every rental you’ve ever lived in. They rely on friction against gypsum, which crumbles. Use them only for things that weigh less than a paperback.
Self-drilling threaded anchors are the workhorse. The coarse thread cuts into the gypsum core across a wide area, and the zinc versions are tough enough to reuse the hole several times. Buy a box and keep it in the drawer.
Molly bolts spread a metal sleeve behind the drywall, like a toggle, but they stay in the wall when you remove the screw. That makes them the right choice for anything you’ll take down and put back, like a towel bar you’ll remove for interior painting.
Toggle bolts are strong but annoying. The hole is big, the wing has to be squeezed through, and if you ever back the bolt out, the wing drops into the wall cavity forever.
Snap toggles fix that. A metal channel goes through a 1/2 in. hole, plastic straps pull it flat against the back of the drywall, and a ring snaps off flush so the channel stays put. You can remove and reinstall the machine screw as often as you want. For anything heavy that isn’t on a stud, this is the one to buy.
Step 3: Check what your wall is actually made of
Anchor ratings assume 1/2 in. drywall. Thicker or thinner changes everything, and plaster changes the whole approach.
Pop an outlet cover and look at the edge of the drywall around the box. Standard interior walls are 1/2 in. Ceilings and garage walls shared with the house are usually 5/8 in., which is fire-rated and holds anchors slightly better. Some 1960s and older homes used 3/8 in., which holds anchors much worse. Mobile homes often have 1/4 in. or 5/16 in. panels that need the short “1/4 in. wall” molly bolts.
If the wall is hard, crumbly and has a gray or brown layer behind the white, you have plaster over wood lath or gypsum lath. Self-drilling anchors will shatter plaster. Drill a clean pilot hole with a masonry or standard twist bit at low speed, then use a toggle or snap toggle, or go straight into the lath with a wood screw.
Tile over drywall, like a bathroom wall, needs a carbide or diamond tile bit for the hole, painter’s tape over the spot to stop the bit skating, and then a toggle sized for the combined thickness.
One more check: tap the spot where you’re drilling. If it’s rock solid, you may have found a stud, a header, blocking, or a steel stud. Steel studs take self-drilling metal anchors or a toggle through a 1/2 in. hole, not wood screws.
Step 4: Mark the hole and keep it away from trouble
Hold the bracket or item against the wall, put a level on it, and mark each screw hole with a pencil. For a two-bracket shelf, measure the distance between the bracket holes and transfer it, then check both marks with the level before drilling anything.
Painter’s tape under the marks gives you a clean surface to write on and keeps the paint from chipping when the bit starts.
Now look at where the mark sits relative to anything electrical or plumbing. Cable typically runs vertically from an outlet or switch box up to the ceiling or down to the floor, and horizontally through the studs at roughly the same height as the boxes. Code requires cable passing through a stud to sit at least 1-1/4 in. back from the face, so a shallow hole in a cavity is safe. The risk is drilling deep or drilling right beside a box.
Keep 6 in. clear of boxes and fixtures. On bathroom walls, assume supply pipes run vertically behind the sink and toilet, and a vent pipe runs up from the drain.
For heavy items, think about where the load actually lands. A shelf bracket carries most of its force at the top screw, pulling out, and the bottom screw pushing in. Put your strongest anchor at the top.
Step 5: Drill the right size hole
Every anchor package prints a drill bit size. Use it exactly. A hole that’s 1/16 in. too big is the single most common reason a molly or toggle spins instead of grabbing.
| Anchor | Bit size |
|---|---|
| Plastic expansion anchor, #6 screw | 3/16 in. |
| Plastic expansion anchor, #8 screw | 1/4 in. |
| Molly bolt, 1/8 in. diameter | 5/16 in. |
| Molly bolt, 3/16 in. diameter | 3/8 in. |
| Molly bolt, 1/4 in. diameter | 7/16 in. |
| Toggle bolt, 1/8 in. | 3/8 in. |
| Toggle bolt, 3/16 in. | 1/2 in. |
| Toggle bolt, 1/4 in. | 5/8 in. |
| Snap toggle, 3/16 in. or 1/4-20 | 1/2 in. |
| Self-drilling threaded anchor | None; start with a #2 Phillips or the included driver |
Drill at medium speed with light pressure, straight into the wall, not angled. Drywall is soft and the bit breaks through fast, so ease off the trigger as soon as you feel the resistance drop. Pull the bit out while it’s still spinning to keep the hole clean.
Trim any raised paper around the hole with a utility knife. A fuzzy edge stops the anchor flange from sitting flat, and a flange that doesn’t seat is a flange that wobbles.
If the bit hits something solid at the back of the hole, stop. You’ve found a stud, blocking, a pipe or a nail plate. Back out, look in with a flashlight, and if it’s wood, switch to a wood screw. If it’s anything metal, move over 2 in.
Step 6: Set each anchor type correctly
Plastic expansion anchors
Push the anchor into the hole until the flange is flush. If it won’t go, tap it gently with a hammer; never force it with the screw. Drive the screw with a hand screwdriver for the last few turns. You’ll feel the anchor swell and lock. Stop there. One more turn strips it.
Self-drilling threaded anchors
Place the pointed tip on your mark and press firmly with a #2 Phillips in the drill at low speed. The anchor cuts its own hole and threads in. Stop when the flange is flush with the paint. If you keep turning, the threads spin a round hole and the anchor loses most of its grip.
Then drive the included screw through your bracket into the anchor. The screw expands the anchor’s split legs behind the drywall, which is where the real holding power comes from. Snug it by hand at the end.
Pro tip
If a self-drilling anchor hits a stud halfway in, don’t back it out and leave a mess. Keep driving it in. The screw inside will thread into the wood and you’ve accidentally got the strongest fastening on the wall.
Molly bolts
Push the molly through the hole until the flange sits against the drywall. Most mollies have two small barbs on the flange; tap the flange with a hammer so the barbs bite the paper and the body can’t spin. That step matters more than any other.
Now tighten the screw with a screwdriver. You’ll feel firm resistance build as the sleeve folds flat behind the wall, then a sudden release when it finishes collapsing. Stop immediately at that release. Back the screw out, put it through your bracket, and drive it back in.
A molly setting tool, which looks like a pair of pliers with a pin, does the same job in one squeeze for about $20-32 (kits with anchors included start around $22-24) and is worth it if you’re installing more than a handful.
Toggle bolts
Thread the bolt through your bracket first, then thread the spring wing onto the end, wings facing the bolt head. Squeeze the wings closed and push the whole assembly through the hole until you hear the wings snap open inside the wall.
Pull the bracket toward you so the open wings sit against the back of the drywall, and tighten the bolt while keeping that outward pull. Without the pull, the wing spins with the bolt and nothing tightens. Stop when the bracket is snug. Overtightening crushes the gypsum under the wings and weakens the anchor.
Buy toggle bolts long enough for the drywall thickness plus the bracket thickness plus about 1-1/2 in. for the wings to swing. A 3 in. bolt covers most 1/2 in. wall situations.
Snap toggles
Hold the metal channel flat against the plastic straps and slide it through the 1/2 in. hole until it’s fully inside. Pull the straps toward you so the channel lays flat against the back of the drywall, then slide the plastic cap along the straps until it sits tight against the wall surface.
Snap the straps off at the cap by bending them side to side. Now you have a threaded channel held firmly behind the wall with a flush collar in the hole. Push your bracket over it and drive the machine screw (3/16 in. or 1/4-20, depending on model) until snug.
Snap toggles are the right answer for floating shelves that land between studs, for a TV mount where only one of four bolts can reach framing, and for a grab bar in a bathroom with no blocking behind the drywall.
Step 7: Hang it, load it, and test it
Drive the screw until the bracket is tight against the wall and can’t rotate. Final turns are always by hand. A drill clutch set to a low number (3 to 5 on most cordless drills) prevents you from stripping anchors if you’d rather not switch tools.
Hang the item and then do what the weight will do to it. Pull outward on a shelf. Lean on a towel bar. Push a TV mount side to side. Any movement at all means the anchor isn’t seated, and it’s far easier to fix now than after your TV is on it.
For shelves and cabinets, load them to full weight and leave them for a day before stacking the good dishes. If a screw head starts to back out or a hairline crack appears at the flange, that anchor is on its way out and needs upgrading.
Which anchor for common household jobs
| Item | Typical weight | Recommended fastening |
|---|---|---|
| Framed picture under 10 lb | 2-10 lb | Picture hook or #6 plastic anchor |
| Mirror, 20-40 lb | 20-40 lb | Two zinc self-drilling anchors, or stud plus one |
| Towel bar, toilet paper holder | Pull-out load, low weight | Molly bolts or zinc self-drillers |
| Curtain rod, 6 ft window | 10-25 lb with drapes | Zinc self-drillers; toggles if the rod is wider than 8 ft |
| Shelf bracket, books | 30-60 lb per bracket | Stud; snap toggle if no stud |
| Floating shelf, 24-36 in. | 20-40 lb load | Studs required; snap toggles only as backup |
| TV mount, 32-55 in. | 25-60 lb plus leverage | Lag screws into studs; snap toggles for holes that miss |
| TV mount, 65 in. and up | 60-100 lb | Studs only, with 5/16 in. x 2-1/2 in. lag screws |
| Grab bar | Up to 250 lb impact load | Blocking or studs; snap toggles if blocking is impossible |
| Wall cabinet | 50-150 lb loaded | Studs, #10 x 3 in. cabinet screws, two per stud through the hanging rail |
| Ceiling fan | 15-50 lb plus motion | Fan-rated box on a joist or fan brace, never an anchor |
| Hanging plant from ceiling | 5-15 lb | Toggle or screw hook into a joist; anchors in ceiling drywall carry a fraction of wall ratings |
Ceilings deserve a separate note. The same anchor that holds 50 lb in a wall is working against gravity differently on a ceiling, and drywall is held to joists by screws every 12 in. that were never meant to carry hanging loads. Find a joist for anything over a few pounds, and use a fan-rated box for a ceiling fan, which has to resist vibration as well as weight.
Removing anchors and fixing the holes
Self-drilling anchors back out with a screwdriver, leaving a 1/2 in. hole. Plastic anchors can be pulled with needle-nose pliers, or you can push them through into the cavity if they won’t budge.
Mollies and snap toggles are designed to stay. For a molly, back the screw out, then tap the flange with a hammer and a nail set to push the whole thing into the wall. Fill the hole.
Toggle bolts leave a big hole once the bolt is out and the wing drops. For holes under 3/4 in., a spackle and a putty knife do the job in two coats. Larger holes get a self-adhesive mesh patch and joint compound feathered out 3 in. in each direction. Sand, prime, and paint.
If you’re removing a lot of hardware before a repaint, pull every anchor first, patch everything in one pass, and let the compound dry overnight before sanding. It’s far faster than patching holes as you find them.
Troubleshooting
| Symptom | Likely cause | Fix |
|---|---|---|
| Anchor spins in the hole and never tightens | Hole drilled too large, or self-driller turned past flush | Pull it, move 1 in. over, or upgrade to a snap toggle in the same enlarged hole |
| Screw won’t go into a self-drilling anchor | Anchor legs didn’t split, or wrong screw size | Use the included #8 screw; if it still binds, back out and reseat the anchor |
| Plastic anchor pushes into the wall when you drive the screw | Hole too big or anchor too short for 1/2 in. drywall | Replace with a self-driller or molly, which don’t rely on a tight hole |
| Molly bolt spins instead of collapsing | Flange barbs didn’t grip the paper | Hold the flange with pliers while tightening, or use a molly setting tool |
| Toggle bolt tightens but bracket stays loose | Wings swung open but bolt is too long | Use a shorter bolt, or add washers under the head |
| Wall crumbles around the hole | Old 3/8 in. drywall, water-damaged gypsum, or plaster | Move to a stud or use a snap toggle, which spreads load over a wide channel |
| Anchor holds, then sags after a week | Load exceeds the real rating of the anchor in that wall | Add a second anchor to share the load, or move to a stud |
| Bit hits metal 1/2 in. in | Nail plate protecting a wire or pipe, or a steel stud | Stop, move 2 in. sideways; if the whole wall is metal studs, use metal-stud anchors |
| Drywall dimples inward around a toggle | Overtightened | Back off a quarter turn; if the paper is cracked, add a large fender washer |
When to call a pro
If you need to hang something over 100 lb and can’t reach framing, you need blocking added inside the wall, which means opening drywall; a carpenter or handyman does this in a few hours. If you hit a wire or pipe while drilling, stop and call an electrician or plumber before anything else. Grab bars for someone with limited mobility should go into solid blocking, and a handyman or accessibility contractor can open the wall, add 2×8 blocking and patch it in a half day.
FAQ
Can I screw into drywall without an anchor?
Only into a stud. A screw in bare drywall holds a couple of pounds in shear and nothing in tension, and the threads chew the gypsum out the first time the item gets bumped. If you’re over a stud, a #8 wood screw driven at least 1-1/4 in. into the wood beats any anchor. Everywhere else, use one.
How much weight can sheetrock anchors hold?
In 1/2 in. drywall, plastic expansion anchors handle about 10 lb, nylon self-drillers 25 to 50, zinc self-drillers 50 to 75, mollies 25 to 50, toggle bolts 50 to 100 depending on size, and snap toggles 80 lb and up. Treat all of those as lab numbers and plan for half. Thinner drywall, ceilings, water-damaged walls and anything that gets pulled or sat on cut the real capacity further.
Are drywall anchors stronger than screws into studs?
No. A 1/4 in. lag screw sunk 2 in. into a stud will hold several hundred pounds in shear. Even the best snap toggle depends on the drywall itself, which is paper and gypsum. Anchors are for when the stud isn’t where you need it, not a replacement for framing.
Can I reuse a drywall anchor hole?
Zinc self-drilling anchors and snap toggles can take a screw in and out many times. Mollies stay in the wall and accept their screw again. Plastic anchors are one-and-done; once the screw comes out they’re usually loose. Toggle bolts lose their wing the moment you remove the bolt, so you’ll need a new one and a fresh hole or a snap toggle in the old hole.
What drill bit size do I use for drywall anchors?
Match the size printed on the package. The common ones are 3/16 in. or 1/4 in. for plastic anchors, 5/16 to 7/16 in. for mollies, 3/8 to 5/8 in. for toggle bolts, and 1/2 in. for snap toggles. Self-drilling anchors need no bit. Going even one size up is the fastest way to end up with an anchor that spins.
Do I need different anchors for plaster walls?
Yes. Self-drilling anchors crack plaster, and plastic expansion anchors can’t grip it. Drill a clean hole at low speed, then use a toggle bolt or snap toggle, or screw directly into the wood lath behind the plaster with a #8 screw if you land on a strip. For anything heavy, find the stud; plaster walls have them at the same 16 in. spacing as drywall.
Can I put a TV mount on drywall anchors?
For the bolts that miss a stud on a mount under 55 in., snap toggles are acceptable. For the mount as a whole, no. At least two lag screws need to hit framing, because a TV on an articulating arm puts a lever load on the top bolts that no drywall anchor is designed to take. Mounts over 65 in. go into studs only.