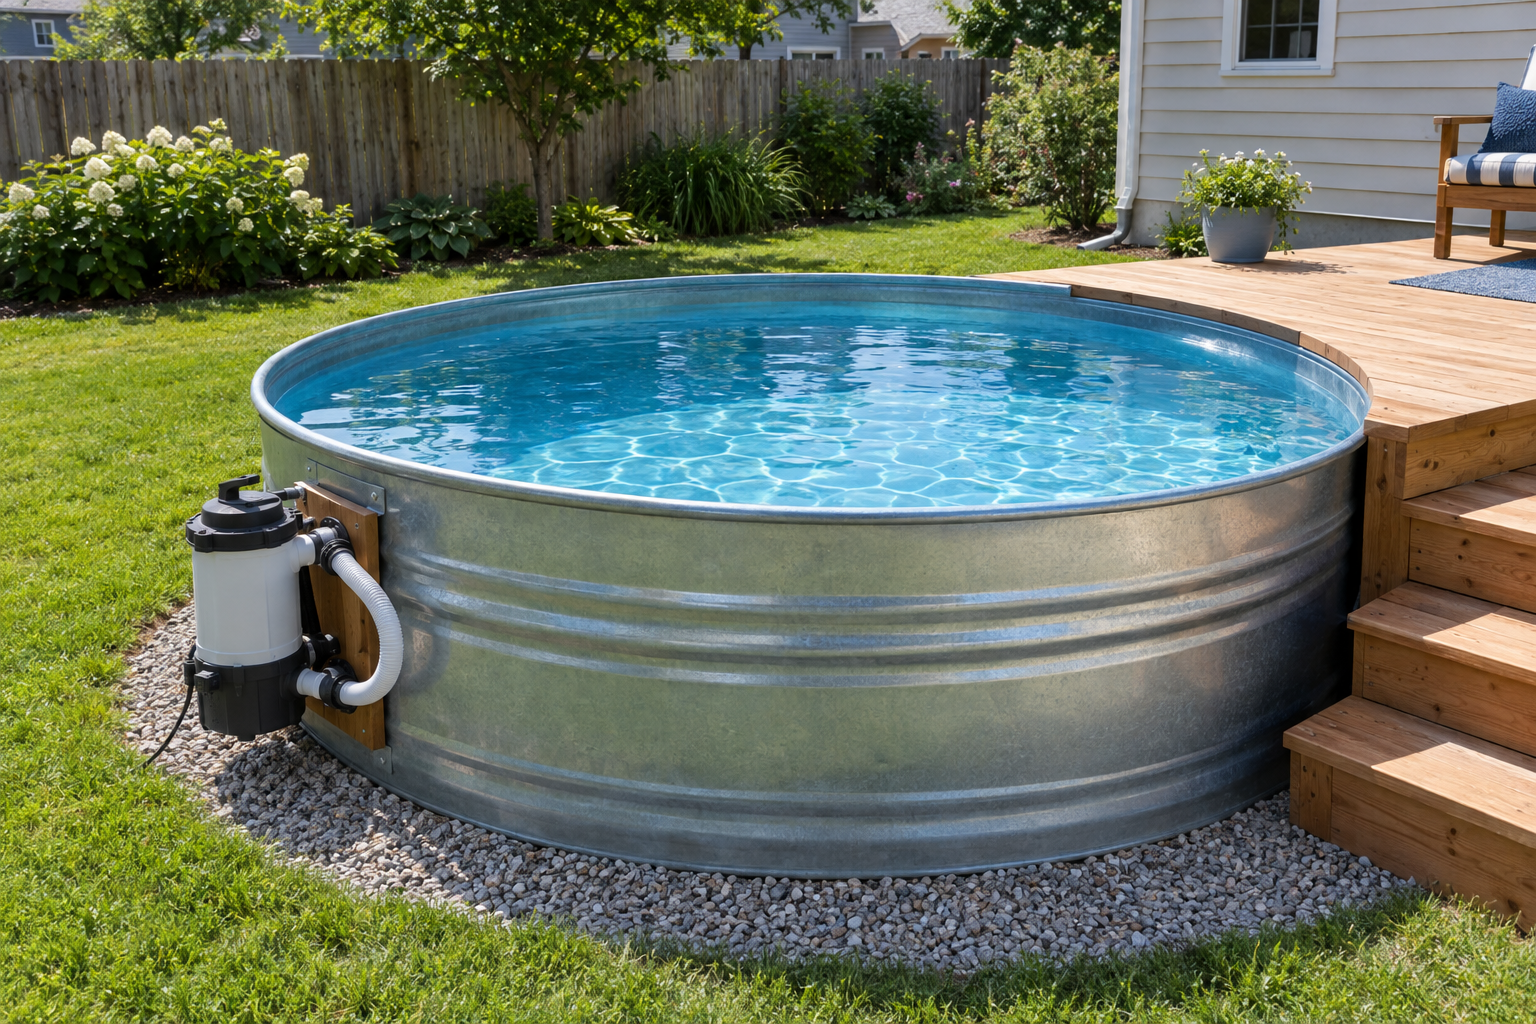
You set up a stock tank pool by leveling a compacted gravel or paver base, setting a galvanized or poly livestock tank on it, plumbing in a small cartridge filter, and filling and chlorinating the water. Most people go from bare lawn to swimming in one weekend for $900 to $2,200, depending on tank size and how you handle the base and filter.
Quick steps: stock tank pool setup
- Pick a tank size and check local pool, fence and HOA rules.
- Choose a flat, sunny spot within reach of a GFCI outlet.
- Strip sod and build a compacted base level to 1/4 inch.
- Inspect the tank seams and seal any weak spots.
- Drill two holes and install the filter fittings, or use a hang-on filter.
- Set the tank, connect the pump and fill with a hose.
- Test and balance the water, then shock it.
- Cap the hot rim, add a cover and start a weekly routine.
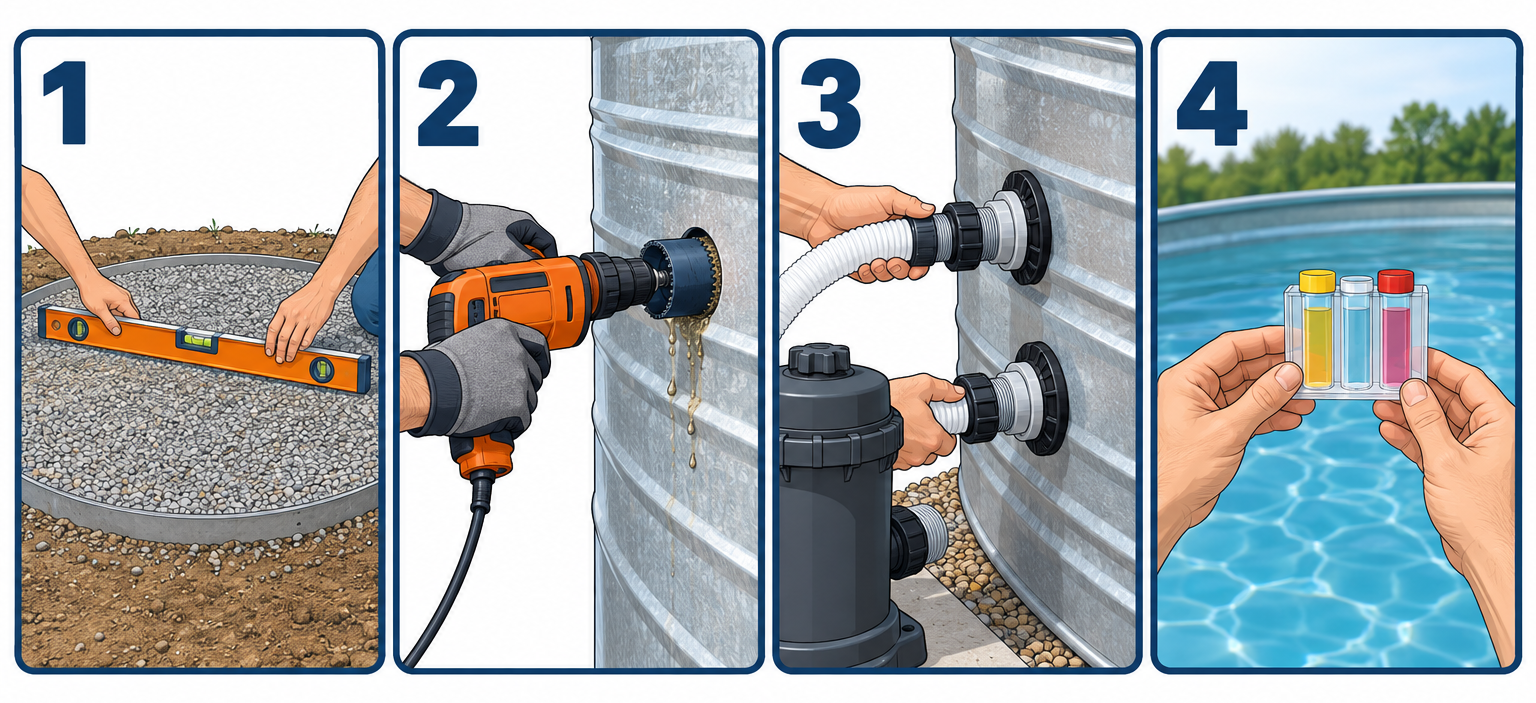
Tools and materials
- Galvanized or polyethylene stock tank (6, 8 or 10 ft round, 2 ft tall)
- Cartridge filter pump, 1,000 GPH class, with wall fittings, hoses and plunger valves
- Bi-metal hole saw sized to your filter’s wall fittings, plus a pilot bit
- Corded drill or high-torque cordless drill, cutting oil
- Round-point shovel, flat spade, steel rake
- Hand tamper or rented plate compactor
- 4 ft level and a straight 2×4 at least as long as the tank’s diameter
- Crushed stone base (3/4 inch minus), stone dust or concrete sand
- Landscape fabric
- Cold galvanizing spray and a metal file
- Silicone or pond-safe sealant for seams and fittings
- Pool test kit (FAS-DPD chlorine test preferred) or test strips
- Chlorine (liquid or granular), pH increaser and reducer, cyanuric acid
- Floating chlorine dispenser, skimmer net
- Split foam pipe insulation or pool noodles for the rim
- Pool cover or tarp sized to the tank
Calculators for this job
Safety first
Plug the pump only into a GFCI-protected outdoor receptacle with an in-use cover, at least 6 feet from the tank, and never use an extension cord. Wear safety glasses and gloves when drilling galvanized steel; the chips are razor sharp.
Step 1: Pick your tank and check the rules
A stock tank swimming pool is a farm water trough repurposed for people. The term “cowboy pool” covers the same thing. Your two decisions here are size and material, and you should make one phone call before buying.
Size
Almost every round tank used as a pool is 2 feet tall. The diameter decides how many people fit and how much the whole thing weighs. Capacity figures below are filled to the rim; in practice you’ll fill to about 20 inches, roughly 15% less.
| Tank (round, 2 ft tall) | Gallons at rim | Water weight at rim | Who it fits |
|---|---|---|---|
| 6 ft | about 420 | about 3,500 lb | 2 adults, soaking only |
| 8 ft | about 750 | about 6,300 lb | 3-4 adults, the most popular size |
| 10 ft | about 1,175 | about 9,800 lb | 4-6 adults, room to float |
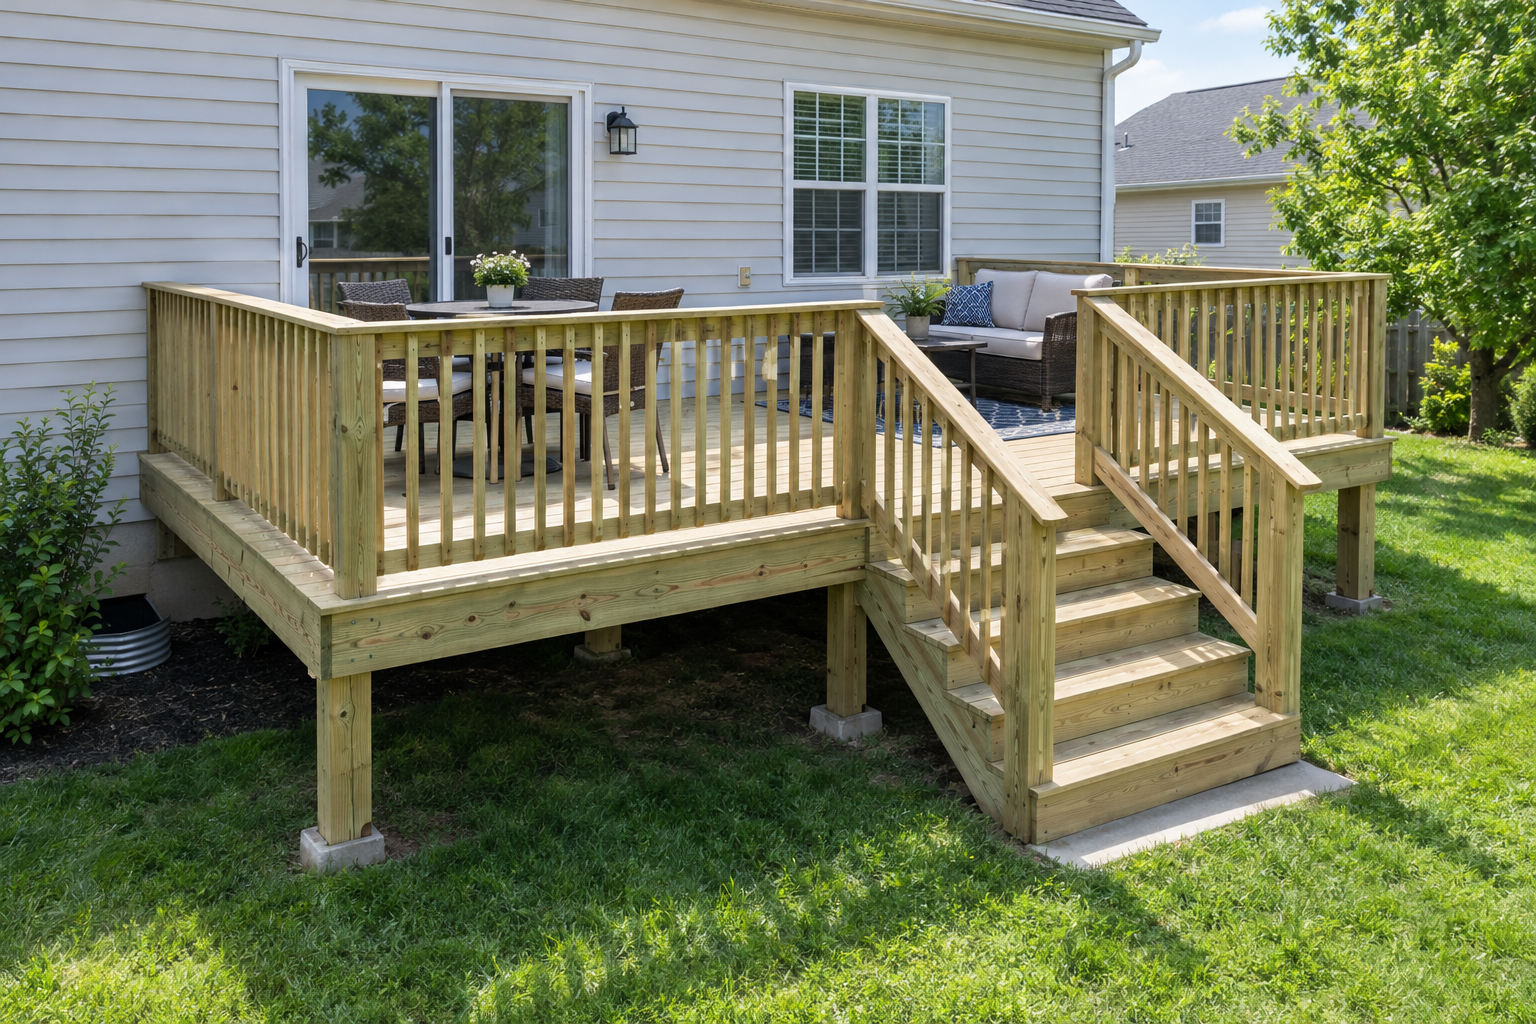
An 8 ft tank puts roughly 125 pounds per square foot on the ground once it’s full. A typical residential deck is built for around 40 to 50 pounds per square foot. That gap is why a stock tank does not go on an ordinary wood deck unless an engineer signs off on the framing. If you want the pool beside a deck, our deck guide covers framing a platform that stops at the tank’s edge instead of under it.
Galvanized or poly
Galvanized steel is the classic look. It’s rigid, easy to drill, and lasts for years if you keep chlorine moderate. It rusts at the bottom seam first, especially if chlorine tablets sit on the floor. The rim gets hot in direct sun.
Polyethylene tanks won’t rust, stay cooler to the touch, and tolerate chlorine and even salt better. They flex a little when full, so the base has to be just as flat. Drilling poly is easy, but sealing fittings against a slightly curved plastic wall takes more care.
Skip saltwater chlorine generators with galvanized tanks. Salt speeds corrosion of the zinc coating and you’ll see rust spots within a season.
The phone call
Call your building department. Many US jurisdictions follow the International Residential Code and swimming pool code, which treat any pool capable of holding more than 24 inches of water as a pool that needs a barrier. A 2-foot tank sits right at that line, and local interpretations vary. Some towns want a 4-foot fence with a self-closing gate, others want a locking cover, and some don’t care at all. Your HOA may have its own rules about visible pools. Ten minutes on the phone is cheaper than moving 6,000 pounds of water.
Tank prices at farm stores like Tractor Supply and local co-ops swing a lot by region and season. Budget roughly $400 to $1,100 for the tank alone, and buy early. Galvanized 8 ft tanks sell out by late spring in many areas.
Step 2: Choose the right spot
Walk the yard with these checks in mind:
- Level ground. Use the 2×4 and level. A slope of more than about 3 inches across the footprint means a lot of digging or a built-up base with a retaining edge.
- Sun. Six or more hours of sun warms the water noticeably. Full shade keeps it cold and lets leaves pile in.
- Power. You need a GFCI outlet within reach of the pump’s cord, with the pump itself sitting at least 6 feet from the tank wall in most setups. No outlet nearby means hiring an electrician, which typically runs $200 to $500 for a new outdoor GFCI circuit on an easy run.
- Drainage. Don’t pick the low spot where rainwater collects. Standing water under a galvanized tank will rot the bottom.
- Clearances. Stay clear of septic fields, underground lines and overhead wires. Call 811 a few days before you dig; it’s free.
- Trees. Overhanging branches mean daily skimming and more chlorine demand.
Mark a circle 1 foot wider than the tank on every side. For an 8 ft tank, that’s a 10 ft circle. Drive a stake at the center, tie a string at a 5 ft radius, and spray-paint the line.
Step 3: Build a level, compacted base
The base is where most stock tank pool failures start. A tank on uneven ground puts stress on the bottom seam, and a full tank will find any soft spot and sink into it.
Strip and dig
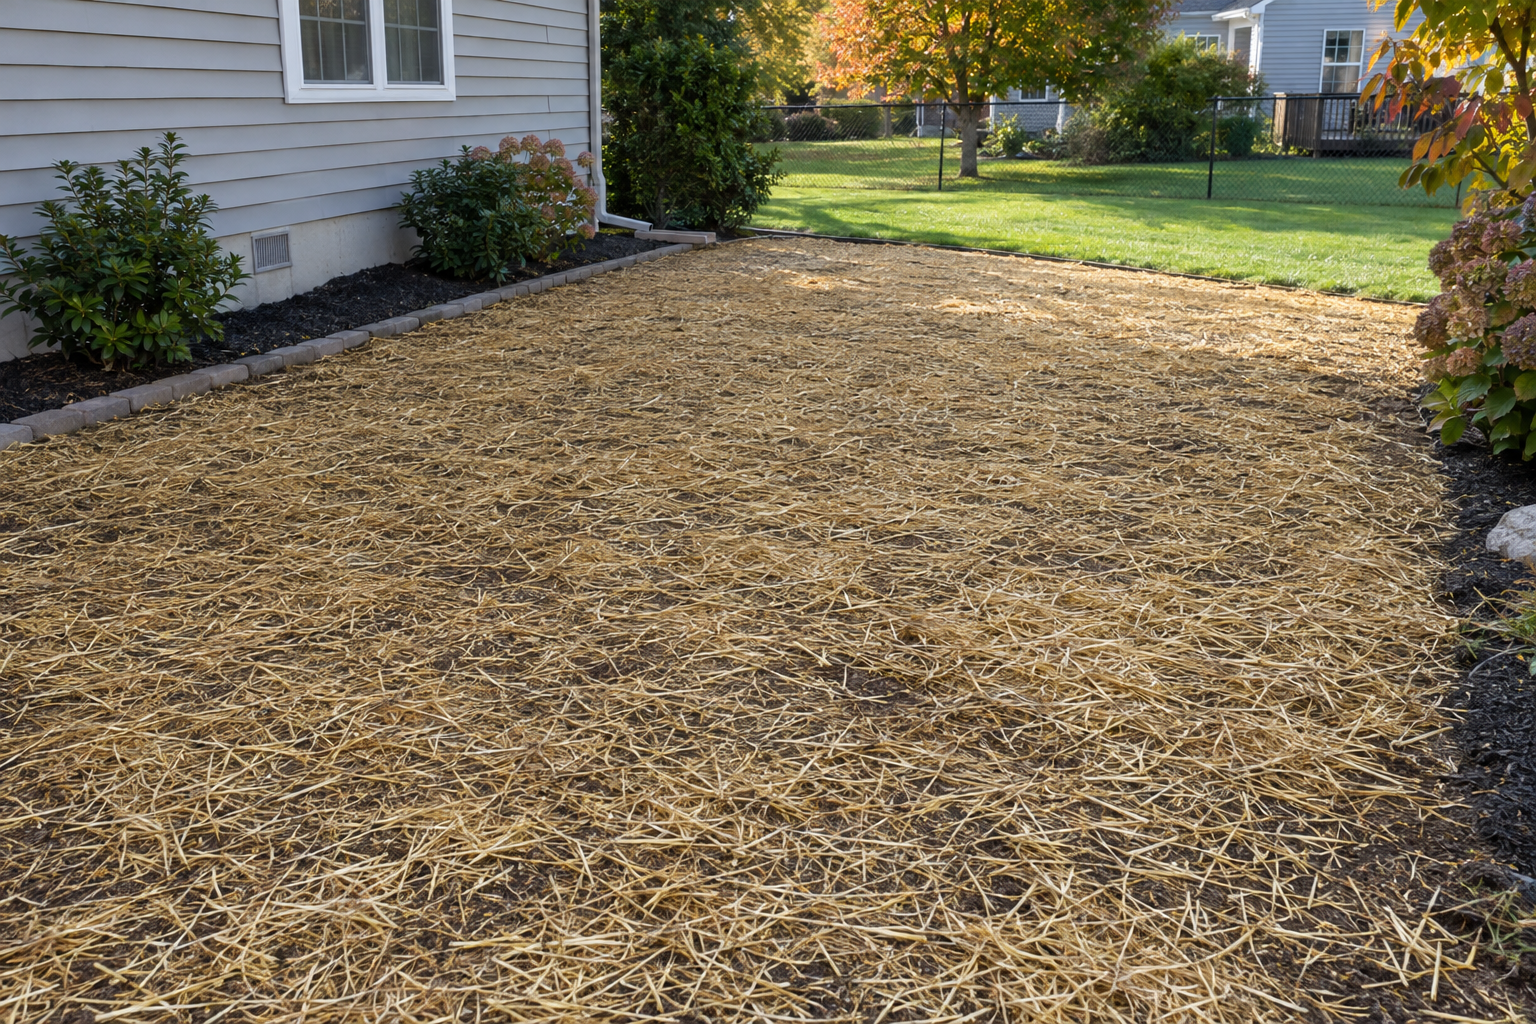
Cut the sod inside your painted circle with a flat spade and remove it. Dig down 3 to 4 inches into firm soil, removing roots and topsoil. If your yard has a gentle slope, dig the high side down rather than building the low side up; native soil you haven’t disturbed is the most stable thing you have.
Save the sod in a shady spot if you want to patch thin areas elsewhere. If you ever move the pool, you’ll need to seed the lawn in the bare circle it leaves behind.
Pick a base
| Base | Cost (8 ft tank) | Pros | Cons |
|---|---|---|---|
| Compacted crushed stone + stone dust | $100-$250 | Drains well, cheap, forgiving | Needs careful leveling |
| Pavers on compacted base | $300-$700 | Clean look, very stable, easy to level | More labor and material |
| Concrete slab | $600-$1,500 | Permanent and flat | Overkill for most, hard to remove |
| Pea gravel alone | $80-$150 | Easy to spread | Rolls and shifts under load; avoid |
Crushed stone is the best value. Pea gravel looks easy but the round stones never lock together, so the tank slowly settles unevenly.
Lay and compact
- Roll out landscape fabric across the dug area to keep weeds and soil from mixing into the stone.
- Spread 3 inches of 3/4-inch-minus crushed stone. For an 8 ft tank, that’s about 0.6 cubic yards, or roughly 30 to 35 bags of 0.5 cu ft paver base.
- Wet it lightly and compact it. A hand tamper works on a 6 ft footprint. For 8 ft and up, rent a plate compactor for about $70 to $100 a day; it does in 20 minutes what takes two hours by hand.
- Spread 1/2 to 1 inch of stone dust or concrete sand on top. Screed it flat by dragging your straight 2×4 across, checking with the level as you go.
- Check level in at least four directions across the full diameter. You want it within 1/4 inch from edge to edge.
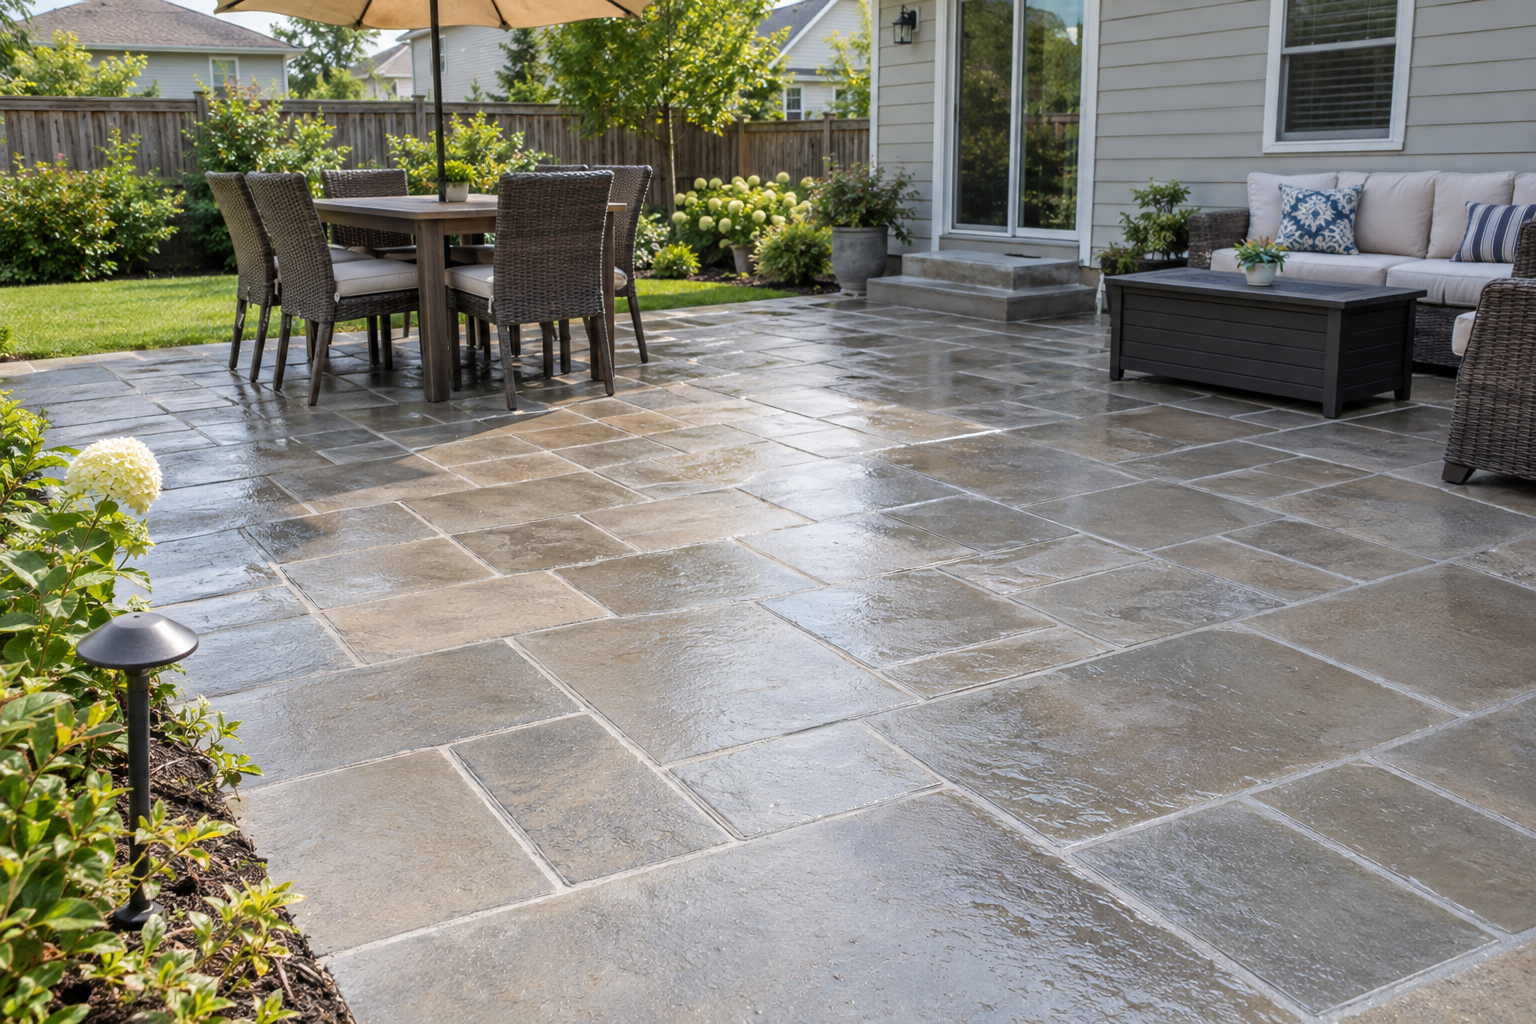
If you go with pavers, set them on the compacted stone and a 1-inch sand bed, then sweep polymeric sand into the joints so the pavers stay locked and weeds don’t push through.
Pro tip
Before screeding, run two lengths of 1-inch metal conduit across the base as rails, level them, and drag your 2×4 over them. Pull the conduit out and fill the grooves with a trowel. You’ll get a dead-flat pad on the first try.
Step 4: Inspect and seal the tank
A new galvanized tank is built to hold water for cattle, but it was never inspected for a pool’s chlorine. Spend 30 minutes on it before it goes on the base.
Flip the tank on its side and look at the bottom seam where the floor is crimped to the wall. You’re looking for gaps, dents, scratches through the zinc, or any sign of rust. Check the drain plug too; most tanks have a threaded 1-inch drain near the bottom. Wrap the plug threads with PTFE tape and snug it down by hand plus a quarter turn with a wrench.
Do a quick leak test if you can. Set the tank on the lawn temporarily, fill it 4 to 6 inches deep, and leave it overnight. Mark any spot where water seeps out.
If the seam weeps, let it dry completely, scuff the area with a wire brush, and apply a waterproof sealant rated for submersion. Many owners coat the inside seam with a rubberized liquid sealant or marine epoxy. These coatings work, but they can peel within a couple of seasons and then trap water against the steel. Coat only the seam and any bare spots rather than the whole interior. A coating that’s peeling over the entire floor is harder to fix than an untreated tank.
Poly tanks need less here. Check for molding flaws or cracks around the drain fitting, and move on.
Step 5: Install the filter (or skip the drilling)
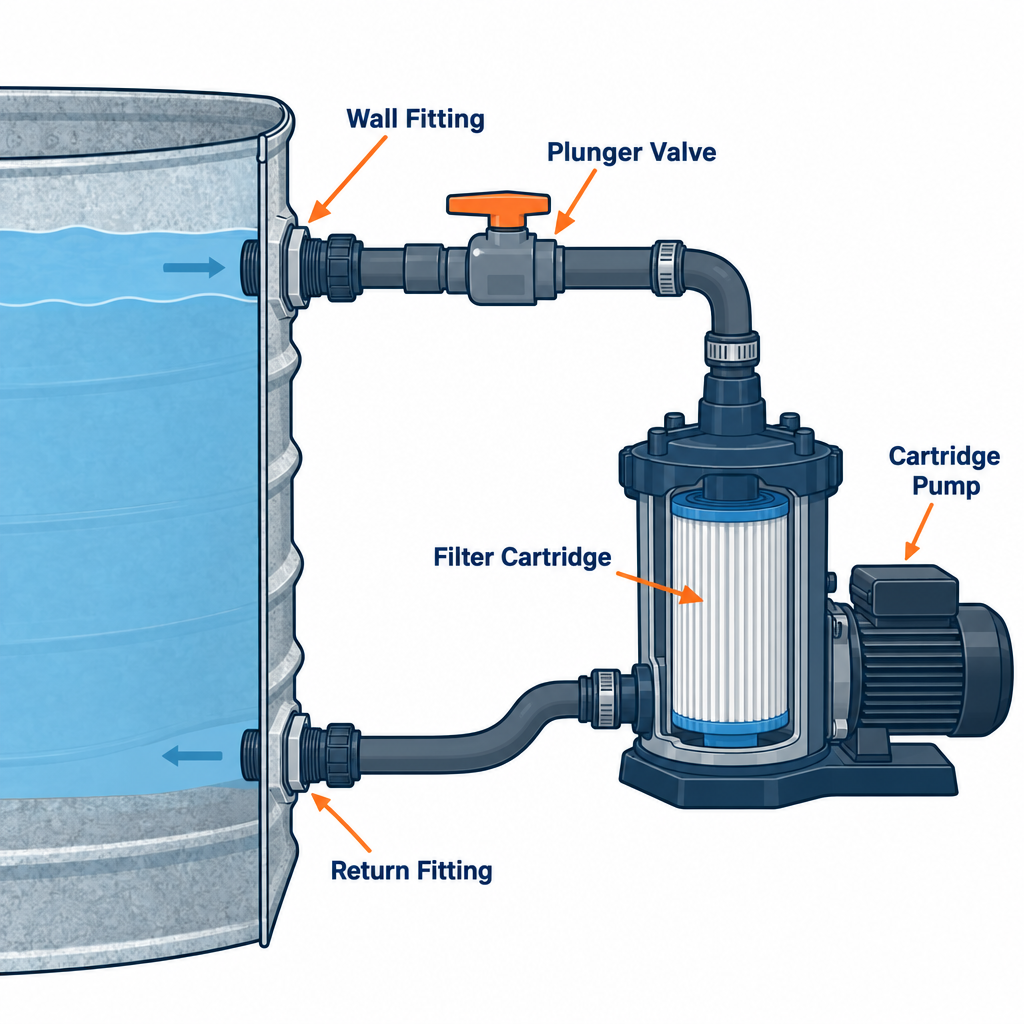
A stock tank pool without a filter turns green in a few days, even with chlorine. You have two ways to do it.
Option A: Drill-through cartridge filter (most common)
This is the setup most stock tank pool builders use: an above-ground pool cartridge filter pump in the 1,000 gallons per hour class, connected to the tank through two bulkhead-style wall fittings. One is the suction (strainer) and the other is the return jet. That size turns over 750 gallons in under an hour, which is plenty.
Lay out the holes. Pick the side of the tank closest to where the pump will sit. Mark the return hole about 6 inches below the rim and the suction hole about 10 to 12 inches below the rim. Space them at least 12 inches apart horizontally so filtered water doesn’t get sucked straight back in. Keep both holes on a flat section, not across a corrugation rib. Hold the fitting against the wall to confirm the gasket sits fully flat.
Drill. Measure the threaded shank of your fittings and use the hole saw size the filter manufacturer specifies. Start with the pilot bit, then let the hole saw cut at slow speed with a few drops of cutting oil. Galvanized steel cuts cleanly at low RPM; high speed just burns the teeth. Expect each hole to take a minute or two.
Finish the edges. File off burrs inside and out. Spray the bare metal edge with cold galvanizing compound and let it dry for about 30 minutes. Skip this and you’ll see a rust ring around each fitting by midsummer.
Install the fittings. Fit the gasket on the inside of the tank, push the threaded fitting through, and add the outer gasket and lock nut. Tighten by hand, then a bit more with a strap wrench. You want the gaskets compressed evenly, not squeezed out the sides. A thin bead of silicone around the outside edge adds insurance; let it cure for 24 hours before filling.
Add plunger valves between the fittings and the hoses. They let you shut off both lines and swap a dirty cartridge without draining a drop.
Option B: No-drill setup
If you rent or want to move the pool someday, you can skip drilling. Hang-over-the-wall filter units clip over the rim and pump water through a cartridge. Some owners run the hoses from a standard filter pump over the rim with a skimmer attachment. These setups work, but hoses over the rim kink, look messy, and lose prime when the water level drops. For a pool that stays put for years, drill it.
Pro tip
Buy two filter cartridges. Rinse one with a hose and let it dry in the sun while the other runs. Dried cartridges shed debris far better than wet ones, and they last about twice as long.
Step 6: Set the tank, connect the pump and fill
Two people can carry an empty 8 ft galvanized tank; it weighs around 150 to 200 pounds. A 10 ft tank is easier with three. Walk it to the base and set it down without dragging across the pad, which gouges the leveled surface.
Recheck level across the rim in four directions. If one side is low, lift that edge, add a little stone dust, and set it back down. Don’t shim with wood or flat stones. Those become point loads under 6,000 pounds of water.
Place the pump on a paver or small slab so it sits flat and dry, at least 6 feet from the tank wall where possible and below the waterline so it primes easily. Connect the hoses with the hose clamps snug. Leave the pump unplugged for now.
Fill with a garden hose. A standard 5/8-inch hose at normal household pressure delivers roughly 5 to 10 gallons per minute, so an 8 ft tank takes 1 to 2.5 hours. If you’re on a well, fill slowly so you don’t run the pump dry, or have water delivered by truck; a local pool water service usually charges $100 to $250 a load.
Hose water off the tap is ice cold and full of metals in some areas. On well water especially, add a metal sequestrant before you add chlorine, or the iron and copper will stain the tank brown or green.
Once the water is a couple of inches above the return fitting, open the plunger valves, check every connection for drips, and plug in the pump. Air will gurgle out of the return for a minute. Bleed the air valve on top of the filter housing until water sputters out, then close it.
Step 7: Test and balance the water
Wait for the pump to run for about an hour so the water is mixed, then test. These are the targets for a stock tank pool:
| Reading | Target | Why |
|---|---|---|
| Free chlorine | 1-3 ppm | Kills bacteria and algae; stay low with galvanized |
| pH | 7.4-7.6 | Comfortable on eyes, protects the zinc coating |
| Total alkalinity | 80-120 ppm | Keeps pH from bouncing |
| Cyanuric acid (stabilizer) | 30-50 ppm | Stops sunlight burning off chlorine |
Adjust in this order: alkalinity first, then pH, then stabilizer, then chlorine. Low pH is the enemy of a galvanized tank. Acidic water eats zinc fast, so keep pH at 7.4 or a bit above.
Before anyone gets in, shock the pool to burn off organics from the fill water. With a small volume, it doesn’t take much; a few ounces of liquid chlorine or granular shock in 750 gallons raises free chlorine by several ppm. Our guide on how to shock a pool explains dosing math by gallon. Pre-dissolve granular shock in a bucket of pool water and pour it in front of the return jet. Undissolved granules sitting on a galvanized floor will pit through the zinc in a day.
Test again in 8 to 12 hours. When free chlorine drops back to 3 ppm or less, you can swim.
Pro tip
Never drop chlorine tablets straight into a galvanized tank. Use a floating dispenser, set it to its lowest opening, and pull it out when nobody’s checking the water for a few days. A tablet that sinks and sits will leave a rust spot exactly where it landed.
Step 8: Finish the edges and start a routine
Cap the rim
The rolled rim of a galvanized tank can get hot enough in July sun to burn skin, and it’s hard on forearms. Slit foam pipe insulation or pool noodles lengthwise and press them over the edge. They cost $15 to $30 for an 8 ft tank and replace each spring.
Add access and a cover
A 2-foot wall is easy for adults to step over but awkward for kids and older guests. A small sturdy step or a pair of pavers outside the tank helps. Inside, a short pool step with a weighted base works; skip anything with sharp metal feet.
A cover does three jobs: keeps out leaves and bugs, holds heat, and keeps small kids and pets out. Use a fitted cover or a tarp with a bungee cord around the rim. Floating solar covers (bubble covers) cut evaporation and warm the water a few degrees on sunny days.
Finish the surroundings
Gravel or pavers around the tank keep grass clippings and mud out of the water. A 2-foot ring of pavers with a lounge chair turns a farm trough into a backyard feature. Plant tall grasses or a few potted shrubs on the side facing neighbors for privacy.
Weekly maintenance
- Daily: Run the pump 6 to 8 hours. Skim leaves and bugs.
- Two to three times a week: Test free chlorine and pH. Adjust as needed.
- Weekly: Rinse the filter cartridge. Wipe the waterline with a soft sponge. Shock after heavy use or a hot stretch.
- Monthly: Test alkalinity and stabilizer. Inspect the bottom seam and fittings for rust or weeping.
- Every 4 to 8 weeks: Replace the cartridge if rinsing doesn’t restore flow.
Expect to spend about $15 to $30 a month on chemicals and $10 to $25 a month on electricity for a small pump.
What a finished setup looks like
When you’re done, the tank sits dead level on a firm pad with no rocking. Water is clear enough to see the floor seam from the rim, with no smell beyond a faint chlorine note. The return jet pushes a visible current across the surface, so floating debris drifts toward the skimmer. Fittings are dry on the outside, and the pump runs quietly without sucking air. That’s a pool you can leave alone for a few days at a time.
Winterizing
In freezing climates, you need to close the pool by the first hard frost.
- Drain the tank through the bottom plug with a garden hose adapter. Let chlorine fall below 1 ppm first (stop adding chlorine and leave the cover off for a few days), then send it to the lawn or a gravel area. Many towns ban sending pool water to storm drains.
- Disconnect the pump and hoses, drain them, and store them indoors. A frozen pump housing cracks.
- Dry the tank, check the seams, and touch up any bare metal with cold galvanizing spray.
- Flip it or cover it so it doesn’t fill with snowmelt and leaves.
Some owners leave the tank full and only bring in the pump. Ice expands, but a stock tank’s open top usually lets it rise without splitting the wall. Draining is still the safer bet for galvanized tanks, because winter water sitting on the floor is when rust gets a foothold.
Troubleshooting
| Symptom | Likely cause | Fix |
|---|---|---|
| Water turns green in a few days | Chlorine too low, filter not running long enough | Shock, run pump 24 hours, brush the walls, rinse cartridge |
| Cloudy water | High pH, dirty cartridge, or too-small filter | Lower pH to 7.4-7.6, clean or replace cartridge |
| Rust spots on the floor | Tablets or granular shock sitting on the steel, low pH | Pre-dissolve shock, use a floater, raise pH; sand and seal spots |
| Drip at a wall fitting | Gasket not seated or nut loose | Drain below fitting, reseat gasket, tighten, add silicone |
| Wet ground at bottom seam | Seam leak or tank damage | Drain, dry, wire-brush, apply submersible sealant |
| Tank tilts or water line uneven | Soft spot in the base | Drain, remove tank, recompact and relevel the pad |
| Pump runs but no flow | Air lock, closed valve, clogged cartridge | Open valves, bleed the air valve, clean cartridge |
| Brown or green stains after filling | Iron or copper in well water | Add metal sequestrant, run filter, use a stain eraser |
| Itchy eyes and strong smell | Combined chlorine from sweat and sunscreen | Shock to break down chloramines |
Upgrades worth considering
Heat. A small inline electric heater or a solar heater extends the season. Some owners convert their tank into a winter hot tub with a wood-fired heater. Any wired heater must be GFCI-protected and installed by the book; a hardwired 240-volt heater is an electrician’s job.
Sand filter. A small above-ground sand filter needs cleaning far less often than a cartridge and costs about $150 to $300.
Mineral systems. Mineral cartridge systems let you run chlorine lower, around 0.5 to 1 ppm, which is easier on galvanized steel.
Deck surround. A low deck built to the rim (but not under the tank) makes a stock tank look built-in. Frame it on its own footings.
When to call a pro
Call a licensed electrician if there’s no GFCI outlet within cord reach, the outlet trips repeatedly, or you want a hardwired heater. Call a structural engineer or deck contractor before putting any tank on a deck, patio roof or second-story balcony. If the bottom seam leaks across a wide area or the floor is rusted through, replace the tank; welding or patching a galvanized floor is rarely worth the cost. Local pool companies and stock tank pool installers can handle the whole job if you’d rather pay $2,500 to $6,000 for a delivered, installed package.
FAQ
How long does a stock tank pool last?
A galvanized tank used as a pool typically lasts 5 to 10 years with steady pH and no tablets sitting on the floor. Poly tanks can last longer, since they don’t rust. The bottom seam is almost always what fails first.
Do I need a filter for a stock tank pool?
Yes. Chlorine alone can’t keep a pool clear; debris, sunscreen and algae spores need to be filtered out. Without one, water goes cloudy or green within a few days in summer heat.
Can I put a stock tank pool on a deck?
Not on a standard deck. A full 8 ft tank puts around 125 pounds per square foot on the surface, several times what most residential decks are built for. Put it on the ground, or have an engineer design a platform for it.
How warm does the water get?
In full sun, a covered stock tank often reaches the high 70s to low 80s in summer. A solar cover helps hold heat overnight. Shaded tanks stay noticeably colder.
Can I use saltwater in a stock tank as pool?
Skip saltwater with galvanized steel, which corrodes faster with salt. A poly tank handles a small saltwater chlorine generator better, but check that every fitting and the pump are salt-rated.
Is a stock tank pool cheaper than an above-ground pool?
Up front, usually not much cheaper than a basic inflatable or frame pool, but it holds up far longer and looks better. Running costs are lower than a full-size pool because you’re treating 500 to 1,200 gallons instead of 10,000 or more.