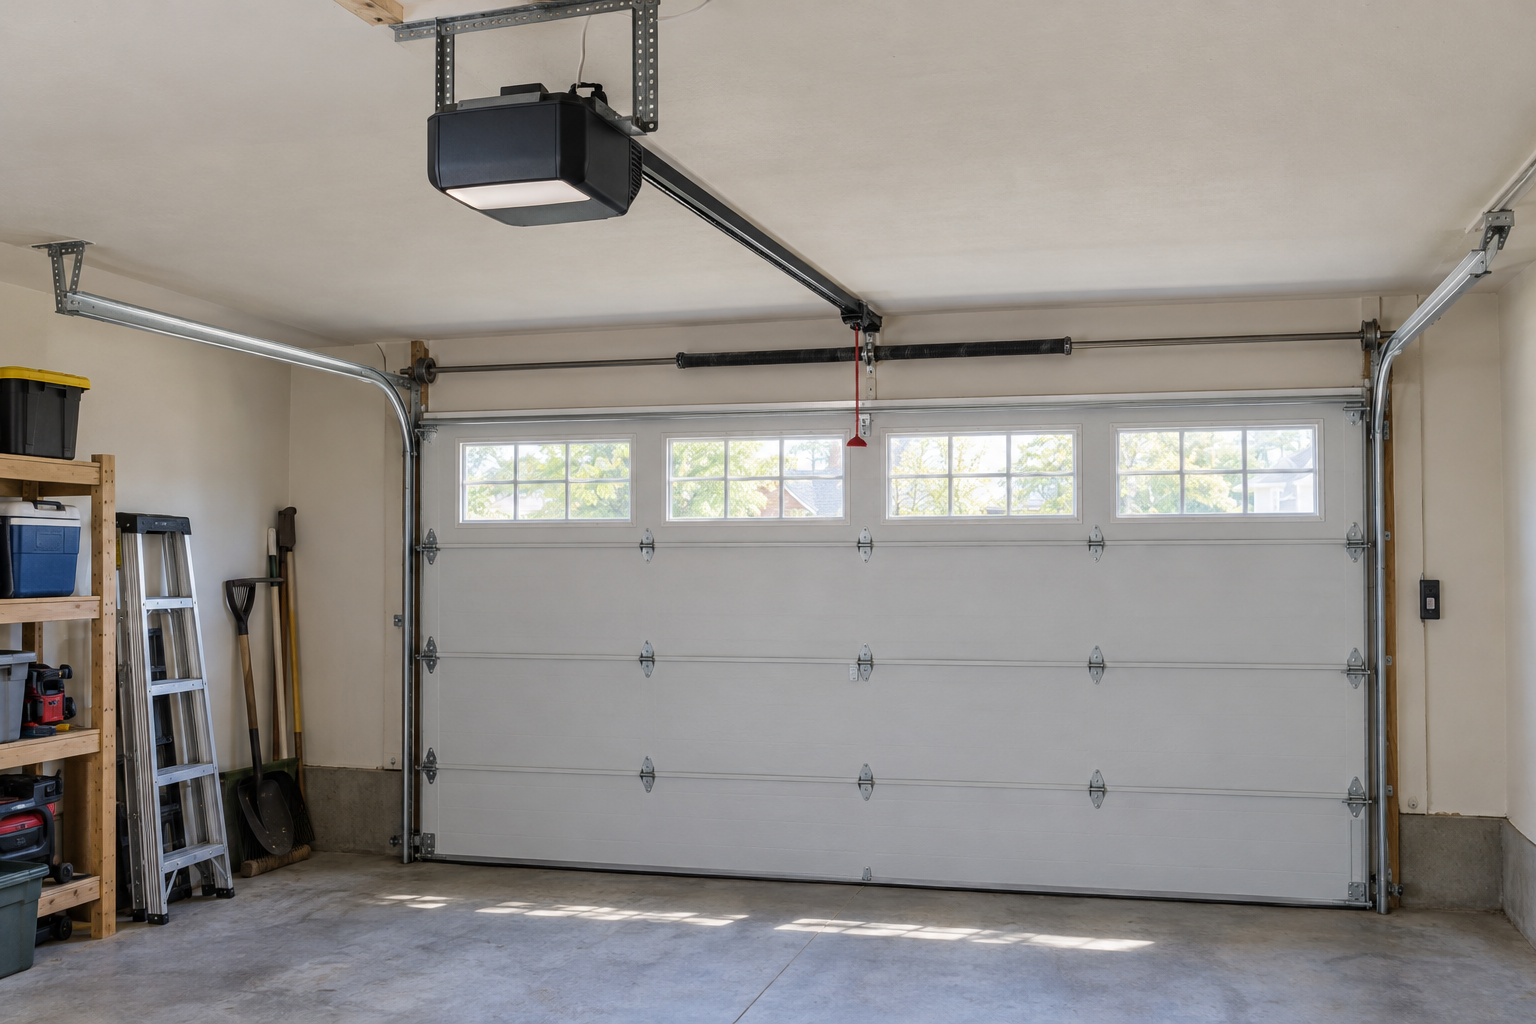
Changing a garage door opener is a half-day job for one person with a 6-foot stepladder, a drill and a socket set, and a new chain or belt drive unit runs $150 to $450 at any big box store. The sequence never changes: prove the door is balanced, strip out the old unit, assemble and hang the new rail and motor, then wire the sensors and set the travel limits. Pro installation adds roughly $150 to $350 in labor, which is money well spent only when the door itself needs spring or cable work first.
Quick steps: replace a garage door opener
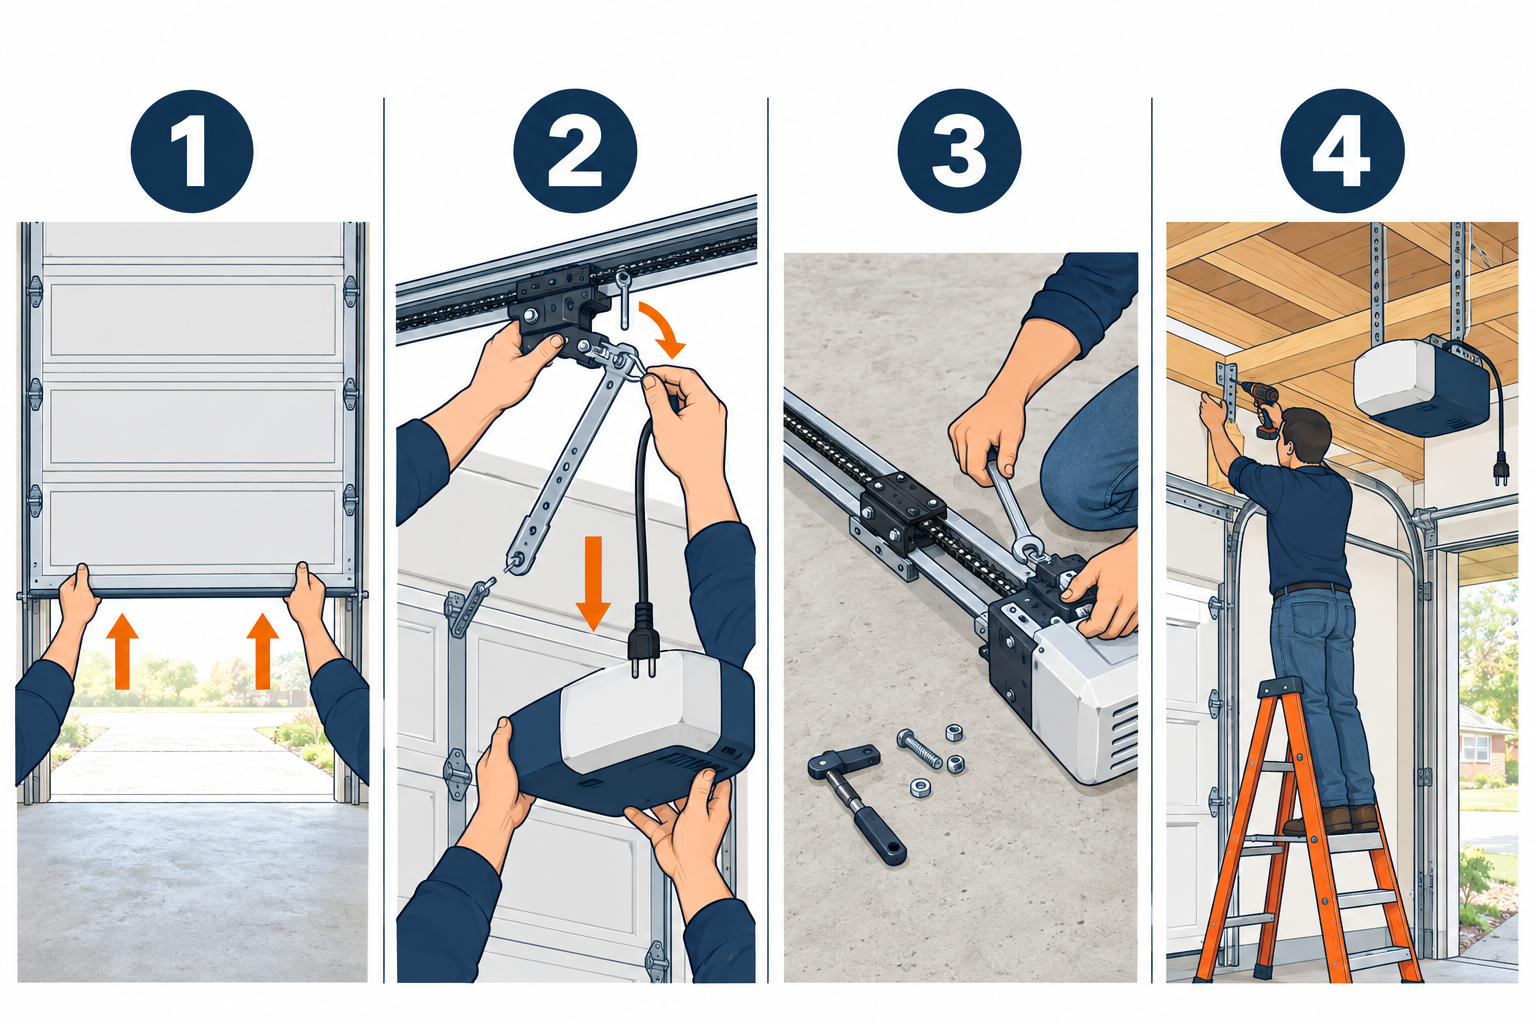
- Pull the release cord, lift the door by hand and confirm it stays put at waist height.
- Unplug the old opener, unhook the trolley arm from the door and drop the motor and rail.
- Assemble the new rail, drive and trolley on the floor, then bolt it to the motor head.
- Lag the header bracket to the wall 2 inches above the door’s highest point of travel.
- Lift the motor onto a ladder, hang it from the ceiling joists with perforated angle iron.
- Bolt the door bracket to the top panel with a reinforcement strut, then attach the arm.
- Mount the photo eyes 6 inches off the floor and run the wall button and sensor wires.
- Set up and down limits, test the 2×4 reversal, pair remotes and the keypad.
Tools and materials
- New opener kit (chain, belt or jackshaft, 1/2 HP minimum for a double steel door)
- Rail extension kit if the door is 8 feet tall
- 6-foot stepladder (two ladders speeds the motor hang)
- Cordless drill with 3/16-inch and 1/4-inch bits, plus 5/16-inch and 7/16-inch nut drivers
- Socket set and adjustable wrench (7/16 and 1/2 inch cover most hardware)
- 5/16 x 2-inch lag screws (6-8) and washers
- Perforated angle iron, 1-1/4 x 1-1/4 inch (usually two 3-foot lengths; buy more if joists run the wrong way)
- Operator reinforcement bracket or 21-gauge strut for the top door section
- 4-foot level, tape measure, pencil, pliers, wire strippers, hammer
- Insulated wire staples and 22-gauge two-conductor bell wire if the kit’s wire is short
- Safety glasses and work gloves
Calculators for this job
Safety first
Unplug the old opener before touching the trolley or wiring. Never loosen, adjust or unhook a torsion spring, its cables or the bottom brackets; those parts are under hundreds of pounds of tension and are the one part of this job that puts people in the hospital. Keep the door closed and clamp a locking pliers on the track above a roller while you work.
Chain, belt, screw or jackshaft: which opener to buy
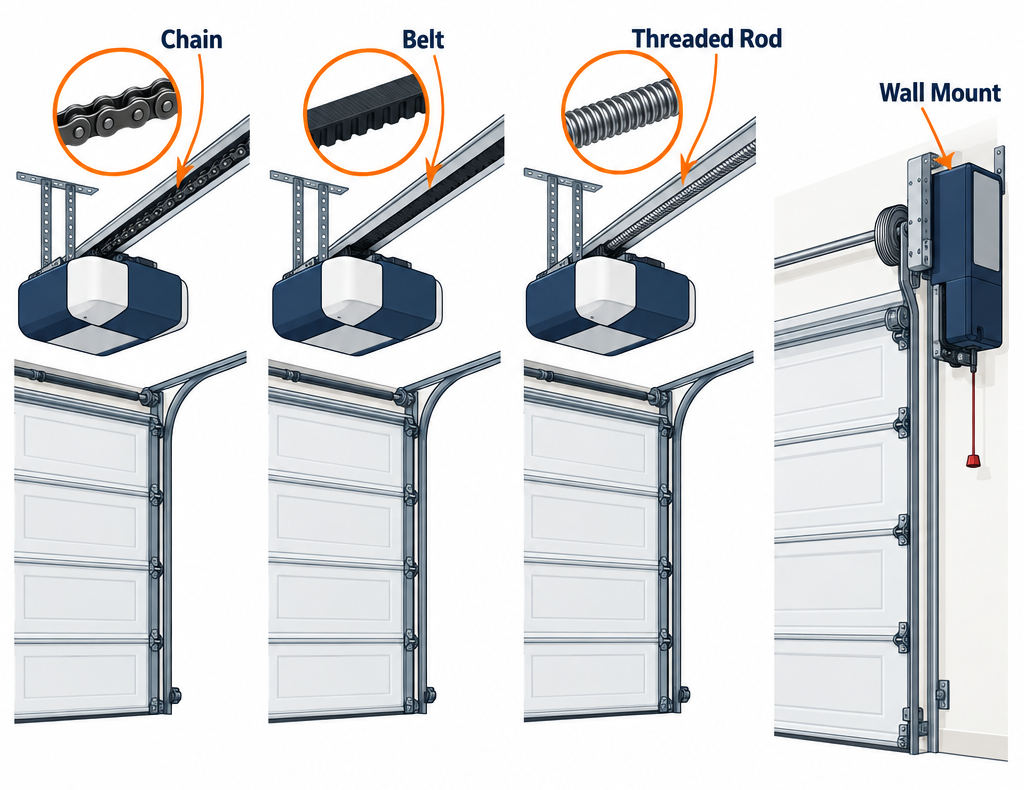
Four drive types make up almost everything on the shelf. The right pick depends on what sits above the garage, how much headroom you have, and what kind of springs the door uses.
| Drive type | Opener price | Noise | Headroom needed | Best fit |
|---|---|---|---|---|
| Chain drive | $150-$300 | Loudest | Standard (about 2 in. above door arc) | Detached garages, rentals, budget swaps |
| Belt drive | $200-$450 | Quiet | Standard | Attached garages with a bedroom above |
| Screw drive | $200-$350 | Medium | Standard | Single doors, moderate climates |
| Jackshaft (wall mount) | $450-$700 | Quietest | None on ceiling; needs 8 in. side room | Low headroom, high ceilings, torsion-spring doors only |
| Direct drive (stationary chain) | $300-$450 | Very quiet | Standard | Anyone who wants belt-level quiet with fewer wear parts |
Chain drive. The workhorse. Chamberlain, Genie and Craftsman all sell 1/2 HP chain units in the $150 to $250 range, and the chain can be tensioned or replaced in minutes. The trade-off is the rattle. If the garage shares a wall or ceiling with living space, you will hear every cycle.
Belt drive. Same layout as a chain unit, but the trolley rides on a steel-reinforced rubber belt. Noise drops to a hum, which is why belt drives dominate attached garages. Belts cost $30 to $60 more than the equivalent chain model and rarely need attention; a cracked belt after 10 years is the usual end of life.
Screw drive. Genie’s specialty. A threaded steel rod turns and moves the trolley, so there is no chain or belt to adjust. The downside shows up in extreme weather. Grease on the screw stiffens in a cold garage and thins in a hot one, so expect a slower, noisier door in January and August unless you lubricate it twice a year.
Jackshaft. Mounts on the wall beside the door and turns the torsion shaft directly. LiftMaster’s 8500W is the common residential model. There is no rail at all, which frees the ceiling for storage or a lift, and it is the only real answer for garages where a 2-inch rail clearance above the door arc does not exist. It requires a torsion spring door (not extension springs), roughly 8 inches of clear side room, and a front-mounted spring assembly. Price is the catch.
Direct drive. Sommer and Marantec build units where the motor itself travels along a fixed chain inside the rail. Only one moving part, very quiet, and a long warranty. Fewer stores stock them, so plan on ordering online.
Pick the right power rating
Horsepower ratings are the old language; many DC units now list Newtons or “HP equivalent.” Use these as a floor:
- 1/2 HP: single or double non-insulated steel doors, up to roughly 200 pounds. Covers most houses.
- 3/4 HP: insulated double doors, 8-foot doors and lightweight wood. Roughly 200 to 350 pounds.
- 1 to 1-1/4 HP: solid wood carriage doors, oversized doors and anything over 350 pounds.
More power does not fix a door that is out of balance. A properly sprung 300-pound door takes only a few pounds of effort to lift, which is why the balance test comes first.
Features worth paying for
Battery backup lets you open the door during an outage and is legally required on openers sold and installed in California under SB 969. Built-in Wi-Fi is now standard on most mid-range openers, with Chamberlain’s myQ bundled into many models and Genie’s Aladdin Connect often sold separately, and either one tells you from your phone whether you left the door open. DC motors give soft start and stop, which is easier on the door hardware. Skip the add-on camera unless you specifically want it.
Pro tip
Buy belt drive for any attached garage and chain drive for any detached one. Spend the extra $100 on battery backup if your area loses power more than once a winter, because the manual release is useless when the car is parked under the door and nobody is home.
What a garage door opener and installation costs
| Item | Typical US cost |
|---|---|
| Chain-drive opener, 1/2 HP | $150-$300 |
| Belt-drive opener, 1/2 to 3/4 HP | $200-$450 |
| Belt drive with battery backup and Wi-Fi | $250-$500 |
| Jackshaft opener | $450-$700 |
| Rail extension kit for an 8-foot door | $30-$60 |
| Perforated angle iron, lag screws, wire staples | $15-$30 |
| Reinforcement strut or operator bracket | $20-$60 |
| Pro labor, straightforward swap | $150-$350 |
| New ceiling outlet by an electrician | $150-$300 |
| Haul away of old unit | $25-$75 |
A DIY belt drive swap lands at $200 to $500 all in. The same job from a garage door company typically comes to $218 to $540 on average per Angi and HomeAdvisor, with some sources citing $350 to $800 depending on the opener, and most will finish in two to six hours. Pricing jumps when there is no outlet within 6 feet of the motor position, when the door needs a new strut, or when the technician finds a cracked spring. Expect $200 to $400 for a torsion spring replacement on top of the opener work.
Replace or repair the old one?
Openers last 10 to 15 years. Anything made before 1993 lacks photo eye sensors, which have been required under UL 325 since that year, and should be replaced regardless of condition. For newer units, a quick triage:
| Symptom | Repair cost (DIY / pro) | Replace instead when |
|---|---|---|
| Motor hums, trolley does not move | Gear and sprocket kit $20-$40 / $150-$250 | Unit is over 10 years old or the housing is cracked |
| Remotes dead, wall button works | Logic board $80-$200 / $150-$300 | Board costs more than half of a new opener |
| Door reverses with nothing in the way | Sensor realignment, free / $90-$150 | Sensors keep drifting after realignment (bent brackets) |
| Chain slaps the rail | Tension adjustment, free | Rail is bent or trolley teeth are stripped |
| Loud grinding, slow lift | Lubrication, free / $100-$150 | Motor capacitor and gears both failing on an old unit |
If the problem is intermittent and the opener is under 8 years old, troubleshoot it before buying anything; a sensor out of alignment or a stripped nylon gear explains most dead doors. Our guide to a dead “garage door opener” walks through those checks in order. When the fix list runs past $200 on a unit that is already a decade old, replace it.
Step 1: Check the door balance and hardware
Close the door, then pull the red emergency release cord straight down and back toward the motor until the trolley disconnects. Lift the door by hand to about waist height and let go. A balanced door stays where you leave it or drifts an inch or two. A door that slams down or shoots upward has spring problems, and no opener survives long hauling that load. Stop here and call a garage door company for spring adjustment; that part is not a DIY job.
While the door is up, look over the hardware. Rollers should spin freely without wobble. Lift cables should be tight with no frayed strands near the bottom brackets. Hinges should not have elongated holes. Tighten any loose hinge bolts with a 7/16-inch socket. Lower the door and clamp a locking pliers on one track just above the second roller so it cannot creep up while you work.
Measure three things and write them on the wall:
- Door height. A 7-foot door uses the standard rail; an 8-foot door needs the extension kit now, not after the rail is hung.
- Headroom. With the door fully open, measure from the top of the door (or the top of the track curve, whichever is higher) to the ceiling. You need at least 2 inches above the highest point of door travel for the rail, and the motor head needs about 3 inches below the ceiling.
- Distance from the door header to the nearest outlet. The cord on most openers is about 6 feet, and the manual will tell you not to use an extension cord.
Step 2: Remove the old opener
Unplug the opener. Disconnect the door arm from the door bracket first by pulling the clevis pin or removing the bolt, then disconnect the arm from the trolley. Pull the wall button wires and sensor wires off the terminal strip on the back of the motor head; take a phone photo before you pull anything, and leave the wires stapled in place if the new opener uses the same two-wire system (almost all do).
Unbolt the rail from the header bracket at the wall. The rail will now hang from the motor, so have a helper hold the motor or set a second ladder under it. Remove the lag screws holding the angle iron to the ceiling and lower the unit. A 1/2 HP chain unit with rail weighs 35 to 45 pounds; it is awkward more than heavy.
Pull the old header bracket off the wall unless it matches the new one exactly. Most do not. Leave the old photo eyes mounted for now if the brackets are sound; the new sensors will often bolt to the same holes.
Step 3: Assemble the rail and drive
Lay the motor head on a piece of cardboard on the floor with the rail sections in front of it. Rails come in three or four pieces that slide into each other and lock with sheet metal screws or a snap-in brace. Keep the rail straight as you join it; a sagging joint will bind the trolley.
Thread the chain or belt through the trolley and around the drive sprocket on the motor head, then around the idler pulley at the far end. On a chain unit, connect the two ends with the master link and tighten the tension nut until the chain sits about 1/4 to 1/2 inch above the base of the rail at the midpoint. Too tight and the sprocket wears; too loose and the chain slaps. Belt units use the same adjustment nut and a spring indicator that shows when tension is correct.
Bolt the rail to the motor head using the hardware in the bag, usually four 5/16-inch bolts. Double-check that the trolley slides the full length of the rail by hand before you lift anything.
Jackshaft units skip this whole step. Instead you bolt a drive coupling to the torsion shaft and mount the motor on the wall beside the spring, following the template on the box.
Step 4: Mount the header bracket
Find the center of the door opening and draw a vertical line on the wall above the door. Raise the door by hand and watch the top edge; mark the highest point it reaches, then draw a horizontal line 2 inches above that mark. The bottom of the header bracket sits on this line, centered on the vertical mark.
The bracket must bite into framing, never into drywall or a trim board alone. On most garages the header beam is directly above the door, and two 5/16 x 2-inch lag screws through the bracket into the header are plenty. Drill 3/16-inch pilot holes first. If the wall is concrete block, use 1/4-inch sleeve anchors instead. If the only wood above the door is a 1x trim board over masonry, screw a 2×6 cleat to the masonry with anchors and mount the bracket to that.
Pro tip
Before drilling, hold the bracket up with the door open and sight down the line from the bracket to where the motor will hang. If a ceiling light, a track hanger or the spring shaft sits in that line, shift the bracket an inch or two off center now. A rail can run a couple of inches off the door’s centerline without any ill effect.
Step 5: Hang the motor unit
Pin the front of the rail to the header bracket with the clevis pin and hitch clip. The rail will now hinge at the wall. Set a stepladder under the motor’s final position and lift the motor onto the top platform of the ladder so the rail runs roughly level. The rail should sit level or slope slightly downward toward the motor; it should never climb toward the ceiling.
Locate the ceiling joists with a stud finder or by looking at the nail lines in finished drywall. If joists run parallel to the rail, you will hang the motor from a single joist with a length of angle iron. If they run perpendicular, run a piece of angle iron across two joists first, then hang the motor from that. Either way, use at least two 5/16 x 2-inch lag screws per joist with pilot holes.
Cut the perforated angle iron to length with a hacksaw and bolt the vertical pieces to the motor’s mounting ears, then to the horizontal piece. Keep the drops as short as the headroom allows; a motor swinging on 18 inches of angle iron will walk the lag screws loose over a year of cycles. Check the rail with a 4-foot level across the trolley, tighten everything, then grab the motor and shake it hard. It should not move.
Plug the motor into the outlet. If there is no outlet within reach of the cord, this is the point where an electrician adds one; a new 15-amp receptacle on an existing circuit runs $100 to $350, with most jobs landing around $120 to $200.
Step 6: Attach the door bracket and arm
The door bracket mounts to the top section of the door, centered on the rail. On a steel sectional door the top section is thin 24- to 27-gauge sheet metal, and the opener pulling on it without reinforcement will crack the panel or peel the stile within a few years. Door manufacturers specify an operator reinforcement bracket or a horizontal strut, and most void the panel warranty without one.
Bolt the reinforcement bracket to the top section first with the 1/4-inch carriage bolts supplied, running from the top rail of the door down to the top hinge line. Then bolt the opener’s door bracket to it. On a wood door, use 5/16-inch lag screws straight into the stile.
Now assemble the arm. The curved section attaches to the door bracket with a clevis pin; the straight section attaches to the trolley. Overlap the two sections and bolt them together at the length that lets the trolley sit a few inches from the motor head with the door closed. Release the locking pliers from the track before you move on.
Pull the emergency release cord and hand-lift the door one more time. The trolley should ride along without binding, and the arm should not scrape the rail at the top of travel.
Step 7: Install the sensors and wiring
Photo eye sensors mount on each side of the door, facing each other across the opening, no higher than 6 inches off the floor. UL 325 sets that height, and the opener will not run without the beam. Use the supplied brackets lagged to the vertical track or the wall framing, not screwed to the track bolts themselves. Keep the lenses out of direct morning or evening sun where you can; low sun blinds the receiving eye and causes random reversals.
Run two-conductor bell wire from each sensor up to the motor head, stapling it every 2 feet with insulated staples. Do not let a staple pierce the wire. At the motor, strip 1/2 inch of insulation and connect the wires to the terminals marked on the diagram. On Chamberlain and LiftMaster units the sensor wires land on the white and grey terminals; Genie uses different colors. Follow the diagram on the motor housing, not memory.
The wall control mounts at least 5 feet above the floor, within sight of the door and out of reach of children. Run its two wires to the terminals marked for the door control. Most new units also want the wall control installed before they will accept a remote, since the control is where you press the learn button on some models.
Plug the unit in. Each sensor shows an LED; the sending eye is usually solid and the receiving eye flashes until it sees the beam. Loosen the wing nut on the receiving sensor and swing it until the light goes solid, then tighten.
Pro tip
Twist a short loop into the sensor wire right at the sensor before you staple it to the wall. A loop gives you an inch of slack for realignment later, and it means a kicked sensor pulls the loop instead of ripping the wire out of the terminal.
Step 8: Set limits, force and remotes
Reconnect the trolley by pressing the wall button or pulling the release cord toward the door until it clicks onto the carriage. Now set the travel limits. Newer Chamberlain and LiftMaster units walk you through it with up and down arrows on the motor head: hold the up arrow until the door reaches full open, press the set button, then hold the down arrow until the door seals on the floor. Genie uses a similar sequence with a program button and arrows. Older or budget models use two screw adjusters marked up and down, each turn moving travel by a few inches.
The door should stop with the bottom seal compressed against the floor, not slammed into it. If the trolley bangs the motor head on the way up, pull the up limit back.
Force settings come next. Most units set force automatically on the first few runs; older ones have two dials. The test is the same either way. Lay a 2×4 flat on the floor in the center of the opening and close the door. The door must reverse within 2 seconds of touching the board. If it stalls or keeps pushing, reduce the down force one notch and test again. Then with the door moving down, wave a hand through the sensor beam; the door must reverse immediately.
Pair the remotes by pressing the learn button on the motor head (usually under the light lens) and then a button on the remote within 30 seconds. Repeat for the keypad and for any car with a built-in HomeLink system. Set the Wi-Fi app last.
Finally, adjust the emergency release handle so it hangs no more than 6 feet off the floor, tie the cord so it cannot catch on the door, and run the door through five full cycles while you watch the chain, belt or arm for rubbing.
Troubleshooting a new installation
| Symptom | Likely cause | Fix |
|---|---|---|
| Door starts down then reverses, lights flash | Sensors misaligned or sun in the receiving eye | Loosen wing nut, realign until LED is solid; add a sun shield or swap sensor sides |
| Motor runs, door does not move | Trolley not reconnected | Pull release cord toward the door until the carriage clicks in |
| Door does not fully close, reverses off floor | Down force too low or down limit set too far | Raise down limit slightly; retest with 2×4 |
| Loud slapping from the rail | Chain too loose | Tighten tension nut until chain sits 1/4 to 1/2 inch above rail base |
| Top door panel bows outward when opening | No reinforcement strut on the top section | Install an operator reinforcement bracket; replace the panel if cracked |
| Motor swings on its mount | Angle iron drops too long or lag screws missed the joist | Shorten drops; relocate lags into solid framing |
| Door stops partway up | Up force too low, or rollers binding in a bent track | Raise up force one notch; check track alignment and roller condition |
| Remote works at 10 feet, not from the street | Antenna wire tucked inside the housing or LED bulb interference | Hang the antenna straight down; switch to a bulb rated for garage openers |
| Keypad will not pair | Wall control not yet installed, or learn button timed out | Install the wall control first; press learn again and enter the code within 30 seconds |
When to call a pro
Stop and call a garage door company if the door fails the balance test, if a spring or lift cable shows a break or fraying, if the door needs an extension-to-torsion conversion for a jackshaft, or if the top section is cracked from the old opener. Call an electrician if there is no grounded outlet within 6 feet of the motor position. None of those are opener jobs, and the spring work in particular should never be attempted without the winding bars and training.
FAQ
Can I reuse the old rail with a new motor?
No. Rails, trolleys and drive sprockets are matched to each motor head, even within the same brand. Buy the opener as a complete kit and recycle the old rail.
How do I know if I need a 1/2 HP or 3/4 HP opener?
Weigh the door. Pull the release, lift the door a few inches and slide a bathroom scale under the bottom edge with the springs doing their job. If it reads under 200 pounds, 1/2 HP is fine. Insulated doubles and wood doors usually read 200 to 350 pounds and want 3/4 HP.
My new opener is slower than the old one. Is that normal?
Usually. DC belt drives with soft start and stop take 12 to 15 seconds to open a 7-foot door, while an old AC chain unit might do it in 10. Some models have a speed setting in the app or on the motor head.
Does a new opener need a permit?
In most US jurisdictions a like-for-like opener swap does not. Adding a new outlet or circuit does require an electrical permit nearly everywhere. Call your local building department if the garage is part of a condo or HOA, since some require a licensed installer.
How long should the whole job take?
Four to six hours for a first-timer working alone, including reading the manual. With a helper and a second ladder, three hours is realistic. Jackshaft units go faster because there is no rail to assemble or hang.
Should I replace the springs at the same time?
Only if they are over 10 years old or the balance test fails. Torsion springs are rated for roughly 10,000 cycles, which is 7 to 10 years for a family that uses the door four times a day. If a spring is due, have the garage door company replace it before you hang the opener, so you are not fighting an unbalanced door during setup.