Most unbalanced load errors come from how the clothes sit in the drum. To fix one, stop the cycle, spread the wet items evenly around the drum, and restart a spin. If it keeps happening with sensible loads, the washer is out of level, the shipping bolts are still in, or the suspension is worn. The steps below run from the free 2-minute fix to the $60 part swap.
Quick steps: fix an unbalanced washer
- Pause the cycle and redistribute the wet clothes evenly.
- Reload by mixing large and small items, never one bulky piece alone.
- On a new front loader, remove the shipping bolts from the back.
- Level the washer side to side and front to back, then lock the leg nuts.
- Firm up a flexing floor or loose pedestal.
- Bounce-test the tub and replace worn suspension rods, shocks or springs.
- Clear the drain filter and cut back on detergent.
- Check for drum play or grinding that points to bad bearings.
Tools and materials
- Bubble level (24-inch is ideal, a 9-inch torpedo level works)
- Adjustable wrench or open-end wrenches (most leg jam nuts are 9/16 in or 14 mm)
- Pliers (slip-joint and needle-nose)
- Nut driver set (1/4 in and 5/16 in) and Torx bits (T20, T25)
- Stiff putty knife (for releasing top-panel clips on many top loaders)
- Flashlight
- Shallow pan and old towels (for draining a front-load pump filter)
- Anti-vibration pads ($15-40 per set of four), optional
- Replacement suspension rod kit, shock absorbers or springs for your model, if needed
- Work gloves
Safety first
Unplug the washer before you tilt it, open the cabinet or touch the drain filter, and shut off both water valves before moving it away from the wall. Front loaders weigh 150-250 lb, so get help when you tip or walk one, and never lean on a washer during spin.
How to tell what’s causing the imbalance
Start with the pattern. It tells you which step to jump to.
- Only with certain loads (towels, sheets, a comforter, a bath mat): it’s a loading problem. Steps 1 and 2.
- Every load, including small ones, since the washer was installed or moved: shipping bolts or leveling. Steps 3 and 4.
- Got gradually worse over months, with banging or a tub that sits crooked: worn suspension. Step 6.
- Clothes come out soaking wet with the error: the water never drained, so the load is heavy and lopsided. Step 7.
- Rumbling or grinding, even with an empty drum: bearings. Step 8.
Your washer may also show a code. Samsung uses UB, Ub or UE depending on the model. LG shows UE. Many Whirlpool, Maytag and GE top loaders flash a “Load unbalanced” light or message, or simply add time to the cycle and try spinning again. A machine that pauses, sloshes and retries a few times is doing its job. It’s the repeated failures that need attention.
Step 1: Stop the cycle and redistribute the load
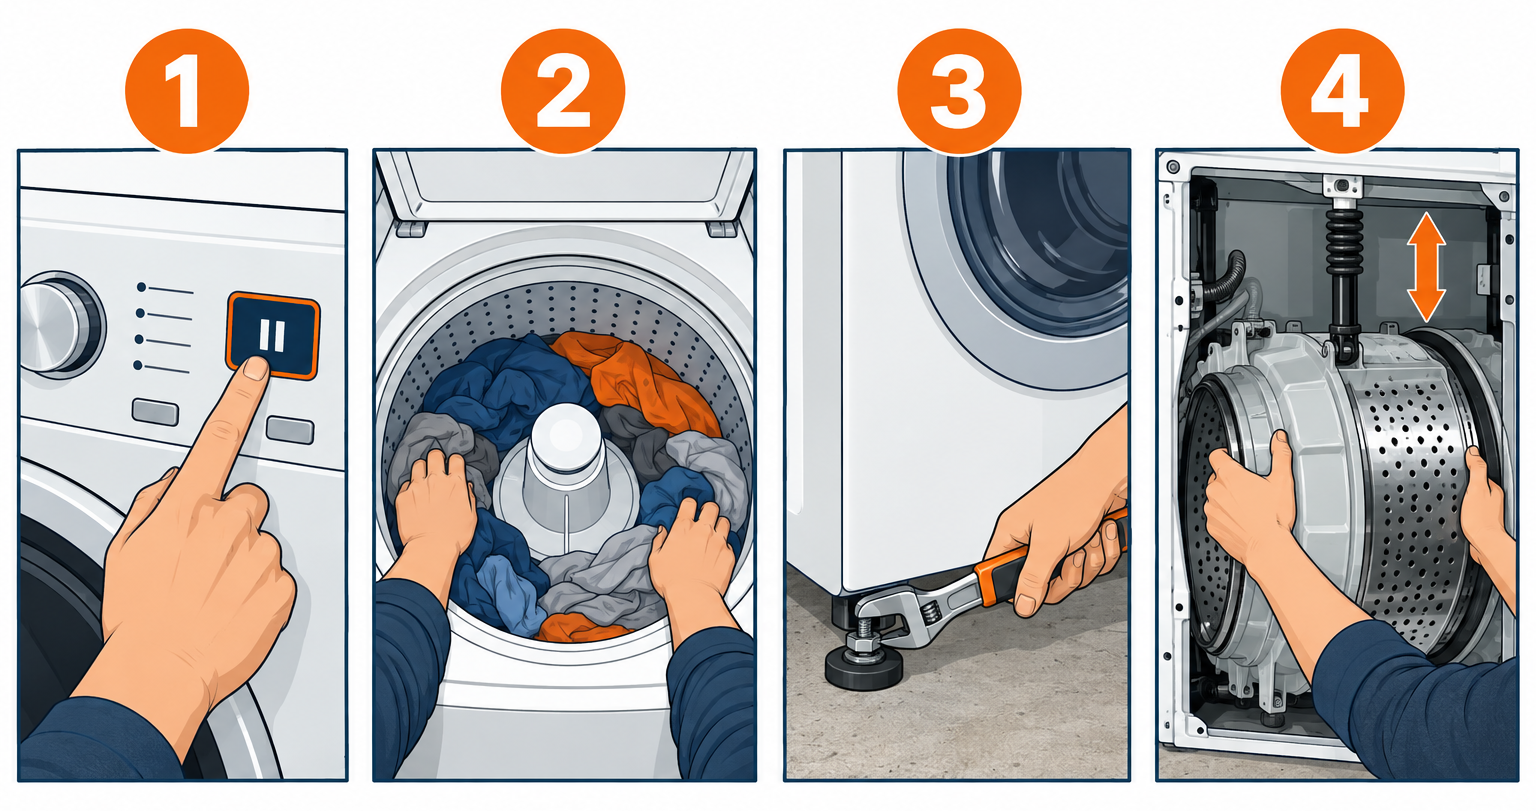
When the washer starts thumping or shows an unbalanced code mid-cycle, press Pause or Start/Pause. Don’t force the lid or door.
Top loaders unlock the lid within a few seconds of stopping. Front loaders can take 1-3 minutes to release the door lock, because they wait for the drum to stop and confirm the water level is safe.
Open it and look at the load. You’ll almost always see one of these:
- Everything has packed to one side of the drum.
- A sheet has wrapped the rest of the load into a ball.
- One heavy item (jeans, a hoodie, a bath mat) has clumped on its own.
Pull the items apart. Untwist sheets and shake out any balled-up pieces. Spread the clothes in an even ring around the drum, with the heavy items opposite each other like spokes on a wheel.
Close the lid or door and choose Rinse & Spin or Drain & Spin. There’s no need to restart the whole wash. Watch the first 60 seconds of spin. The drum should ramp up smoothly with a low, steady hum.
Pro tip
If a single bulky item is the problem, add two or three bath towels to the drum before you restart the spin. They give the washer something to counterweight against, and they cost you nothing.
Step 2: Load the washer so it balances on its own
Most repeat unbalanced loads are loading habits. Top loaders typically spin at 600 to 900 rpm and front loaders at 1,000 to 1,600 rpm, so even a few pounds of wet fabric on one side creates a lot of force. These rules prevent most of it.
Mix sizes in every load
A load of only large items, or one large item alone, can’t distribute evenly. Mix a few big pieces with medium and small ones. Two bath towels with a set of sheets and a few T-shirts balance far better than four towels on their own.
Load top loaders around the center
On a high-efficiency (HE) top loader with an impeller (the low disc at the bottom), drop items in loosely around the outside edge in a donut shape. Don’t pile everything in the middle, and don’t wrap long items around the center post on agitator models. Stay below the top row of holes in the basket or the max-fill mark.
Fill front loaders about three-quarters full
Load clothes loosely until the drum is about three-quarters full. You should be able to lay your hand flat on top of the dry load with room above it. Packing the drum tight keeps clothes from tumbling into position. A drum that’s nearly empty causes trouble too, because one wet item has nothing to balance against.
Treat the problem items differently
| Item | Why it unbalances | What to do |
|---|---|---|
| Sheets and duvet covers | They wrap around everything else | Wash one set at a time, button or zip covers closed |
| Comforters, sleeping bags | One huge, uneven mass | Use the Bulky or Bedding cycle, wash alone or with 2 towels |
| Rubber-backed bath mats | Heavy, stiff, trap water | Wash with towels, or hand wash; check your manual, many warn against these |
| Waterproof items (rain jackets, mattress pads, pet beds) | Trap water and air, then shift during spin | Use Bulky/Bedding, lower spin speed, add towels |
| Jeans and heavy hoodies | Dense when wet | Split them across loads with lighter items |
| Throw rugs | Very heavy wet weight | Shake out first, wash 1-2 at a time |
Lower the spin speed for awkward loads
Most washers let you choose Low or Medium spin. For a comforter or a load of mixed bedding, a lower spin speed makes the unbalance check much more forgiving. The clothes come out a little wetter, so you’ll add a few minutes in the dryer.
Step 3: Remove the shipping bolts (front loaders)
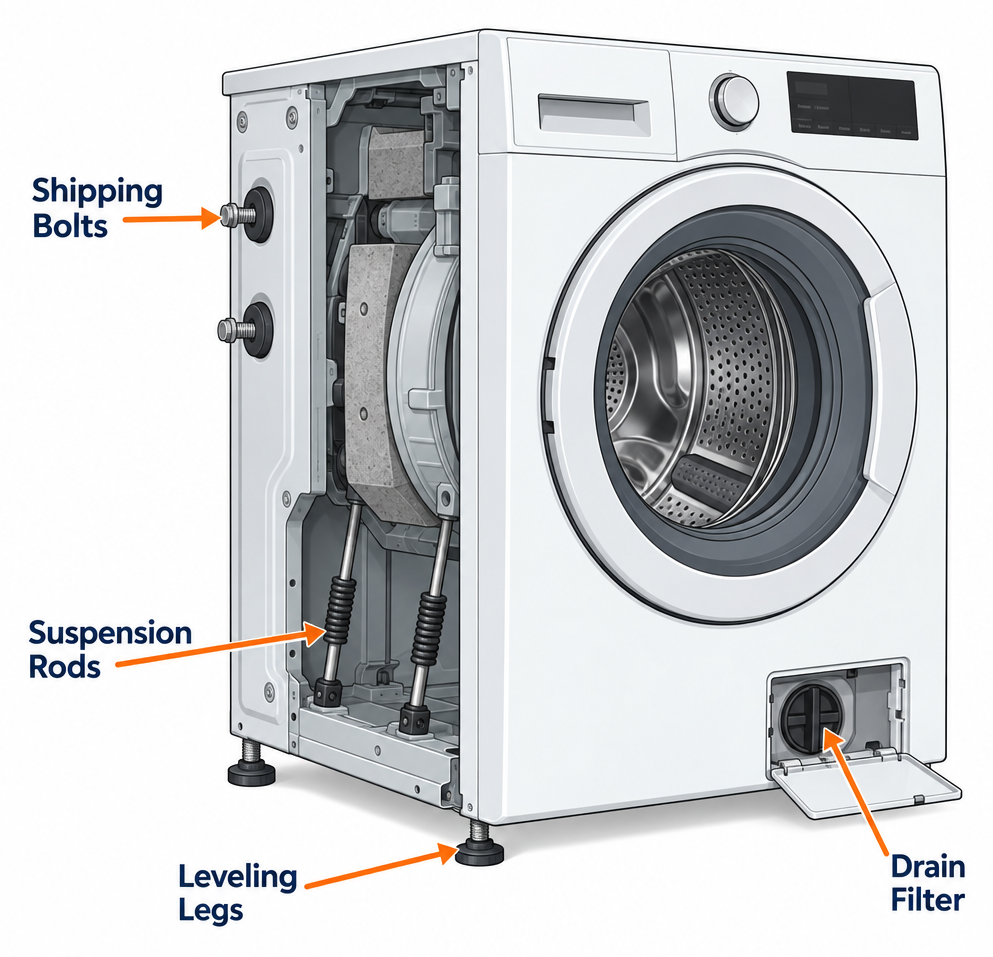
If a new or just-moved front loader shakes violently on its very first loads, check the back panel. Front loaders ship with three or four long bolts that lock the drum to the cabinet so it can’t bounce during delivery.
Here’s how to find and remove them:
- Unplug the washer and pull it out far enough to reach the back.
- Look for three or four large bolts, usually with plastic spacers, spread across the rear panel. Some have colored plastic heads.
- Loosen each bolt with the wrench size listed in your manual (often 10 mm, 13 mm or a matching adjustable wrench). Unscrew until it comes free with its spacer.
- Snap in the plastic hole caps that came in the parts bag. If you lost them, a replacement set costs a few dollars from the manufacturer’s parts site.
- Keep the bolts in a labeled bag taped to the washer or stored nearby. You’ll need them if you move.
A washer running with even one bolt still in will walk across the floor and can damage the drum mount. Top loaders don’t use these bolts, though some have a foam block or cardboard insert under the tub that installers sometimes forget. Lift the lid and check under the basket edge on a brand-new machine.
Step 4: Level the washer
An unlevel washer forces the drum to spin at an angle. The machine reads that as an unbalanced load even when the clothes are spread perfectly. This is the most common mechanical cause, and it takes about 15 minutes to fix.
Check level in both directions
Set your level on top of the washer, first side to side, then front to back. On a front loader, check across the top panel. On a top loader, check along the edge of the cabinet top with the lid closed. The bubble should sit dead center in both directions.
Now do the rock test. Press down firmly on one front corner, then the diagonal back corner. Repeat for the other pair. If the washer rocks at all, one leg isn’t carrying weight.
Adjust the front legs
- Tip the washer back slightly with a helper, or slide a scrap of 2×4 under the front edge to take weight off the legs.
- Loosen the jam nut (locknut) on each front leg by turning it toward the cabinet bottom. It may be stiff the first time.
- Turn the leg itself. Counterclockwise (viewed from above) lowers that corner of the washer by extending the leg. Clockwise raises the leg and lowers the cabinet.
- Set the washer down and recheck the level. Repeat until the bubble is centered and the rock test passes.
- Tighten each jam nut up against the cabinet bottom with your wrench. Snug it firmly. A loose jam nut lets the leg spin itself out of adjustment within a few loads.
Keep the legs as short as you can while still level. Long, extended legs make the washer more wobbly.
Reset self-leveling rear legs
Many Whirlpool and Maytag top loaders have self-adjusting rear legs. With a helper, tilt the washer forward until the back legs are about 4 inches off the floor, then set it back down. The rear legs drop and lock at the right height on their own. Do this after you’ve set the fronts, then recheck the level.
Front loaders usually have four adjustable legs. Use the same jam-nut process on all four corners.
Pro tip
After leveling, run an empty Rinse & Spin cycle and set a glass of water on top of the washer. If the water barely ripples at full speed, you’re done. If it sloshes, recheck the jam nuts, because one has usually backed off.
Step 5: Check the floor and the pedestal
A perfectly level washer can still shake if what’s under it moves. This is the cause behind a lot of “my washer is unbalanced even with careful loading” complaints.
Wood floors that flex
Laundry rooms on a second floor, or over a crawl space, often sit on a wood subfloor between joists. Stand next to the washer during spin and feel the floor. If it bounces under your feet, the floor is amplifying the drum’s movement, and the washer keeps detecting an imbalance.
Fixes that help, in order of effort:
- Move the washer closer to a wall. Floors are stiffest near load-bearing walls and over joists.
- Add a 3/4-inch plywood platform. Screw a piece of plywood larger than the washer’s footprint into the joists below. It spreads the load across more framing.
- Add bridging or a support post below. In a basement or crawl space, solid blocking between joists under the washer stiffens the floor. If you’re adding posts or sistering joists, talk to a carpenter or contractor first.
Pedestals and platforms
Drawer pedestals raise front loaders to a comfortable height, but they add another layer that can loosen. Check that the bolts joining the washer to the pedestal are tight, that the pedestal’s own feet are level, and that the drawer isn’t rattling. A homemade wooden platform should be screwed together and never just stacked.
Anti-vibration pads
Rubber anti-vibration pads ($15-40 for four) work well on tile and concrete, where the washer’s feet can slide. They won’t fix a bad suspension or an unlevel machine, and on a flexing wood floor they barely help. Use them after leveling, not instead of it.
Step 6: Test and replace the suspension
When loading, level and floor all check out, worn suspension parts are the next suspect. Suspension wear shows up gradually. The washer bangs harder each month, the tub looks crooked, or it starts failing to spin loads it used to handle.
The bounce test
Unplug the washer first.
Top loaders: Lift the lid and press down hard on one edge of the tub or basket, then let go. A healthy suspension springs back up and stops within one or two bounces. If the tub keeps bobbing, hits the cabinet, or one side sits visibly lower when empty, the suspension rods are worn. Repeat at each corner.
Front loaders: Open the door and press down firmly on the top of the drum, then release. It should rise back smoothly without bouncing or clunking. A drum that bounces repeatedly points to worn shock absorbers. A drum that sags low, or one with a loud spring “boing,” points to a stretched or broken spring.
Top loader suspension rods
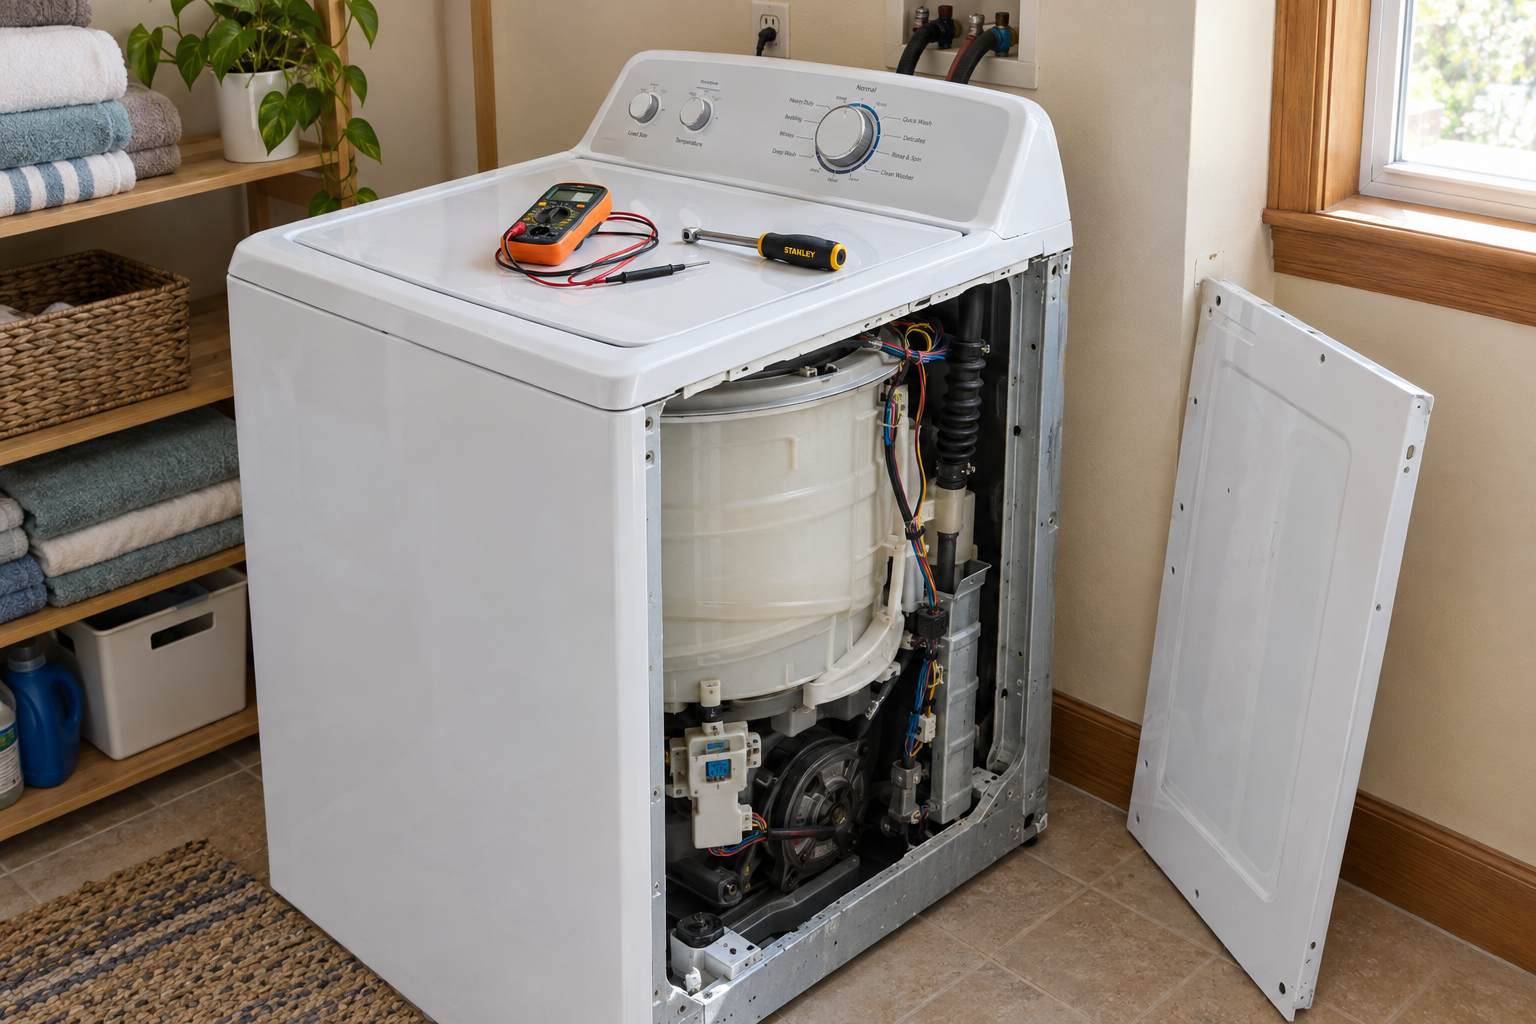
Most modern top loaders hang the tub from four suspension rods, one at each cabinet corner. Each rod has a damper or spring at the bottom where it connects to the tub. Over time the dampers lose their grease and friction, and the tub swings freely.
To replace them:
- Unplug the washer and turn off the water.
- Open the cabinet. On many Whirlpool and Maytag models, you release the top by pushing a putty knife into the gap between the top and cabinet, about 2 inches in from each front corner, to pop the clips. Other brands use screws under the control console. Check your model’s service manual.
- Lift the top up and back, and prop it against the wall.
- Lift each rod out of its socket at the top corner. Then unhook the bottom from the tub. The tub will drop slightly, which is normal.
- Hook the new rods into the tub first, then seat the tops in their corner sockets. Replace all four at once, even if only one looks bad. Mixing old and new rods creates its own imbalance.
- Lower the top, snap the clips back in, and run an empty spin to test.
A four-rod kit for most popular models costs about $30-60. Plan on 45 minutes to an hour the first time.
Front loader shocks and springs
Front loaders hang the drum from two springs at the top and damp it with two or more shock absorbers at the bottom. The shocks are held in by plastic pins or bolts.
- Unplug the washer and shut off the water.
- Get access. On some models you reach the shocks by tipping the washer back and working from underneath. On others you remove the front panel or the top. Your service manual or model number search will show which.
- For plastic pins, squeeze the tabs with needle-nose pliers and push the pin out. Some pins need a 13 mm socket to depress the clip.
- Install the new shocks with the new pins that come in the kit. Don’t reuse old pins, because they crack.
- Inspect the top springs while you’re in there. Replace any that are stretched, rusted or broken.
Shocks run about $23-65 each, springs about $6-54 each. Like top-load rods, replace shocks as a set.
Step 7: Check the drain and the detergent
This is the cause most guides skip. If your washer throws an unbalanced error and the clothes come out dripping, the real problem is water that never drained. Waterlogged clothes are heavier and slosh around, so the washer can’t balance them.
Clear a clogged drain pump filter (front loaders)
Most front loaders have a small access door on the bottom front corner.
- Unplug the washer.
- Lay towels on the floor and set a shallow pan in place.
- If there’s a small drain hose next to the filter, pull it out, remove its cap and let the water empty into the pan first. Expect several cups or more if the washer didn’t drain.
- Unscrew the filter slowly, counterclockwise. Pull out lint, hair ties, coins and socks.
- Rinse the filter, check that the impeller behind it spins freely, then screw it back in hand tight.
Do this every one to three months and you’ll head off a lot of spin problems. Top loaders usually don’t have an accessible filter, so check the drain hose behind the machine for kinks instead, and make sure it isn’t pushed too far down the standpipe.
Cut back the detergent
Too much detergent creates excess suds that cushion the drum and stop it from reaching speed. Many machines detect over-sudsing and refuse to spin, which looks a lot like an unbalanced load. Samsung models may display Sd or 5d, and LG models show Sud.
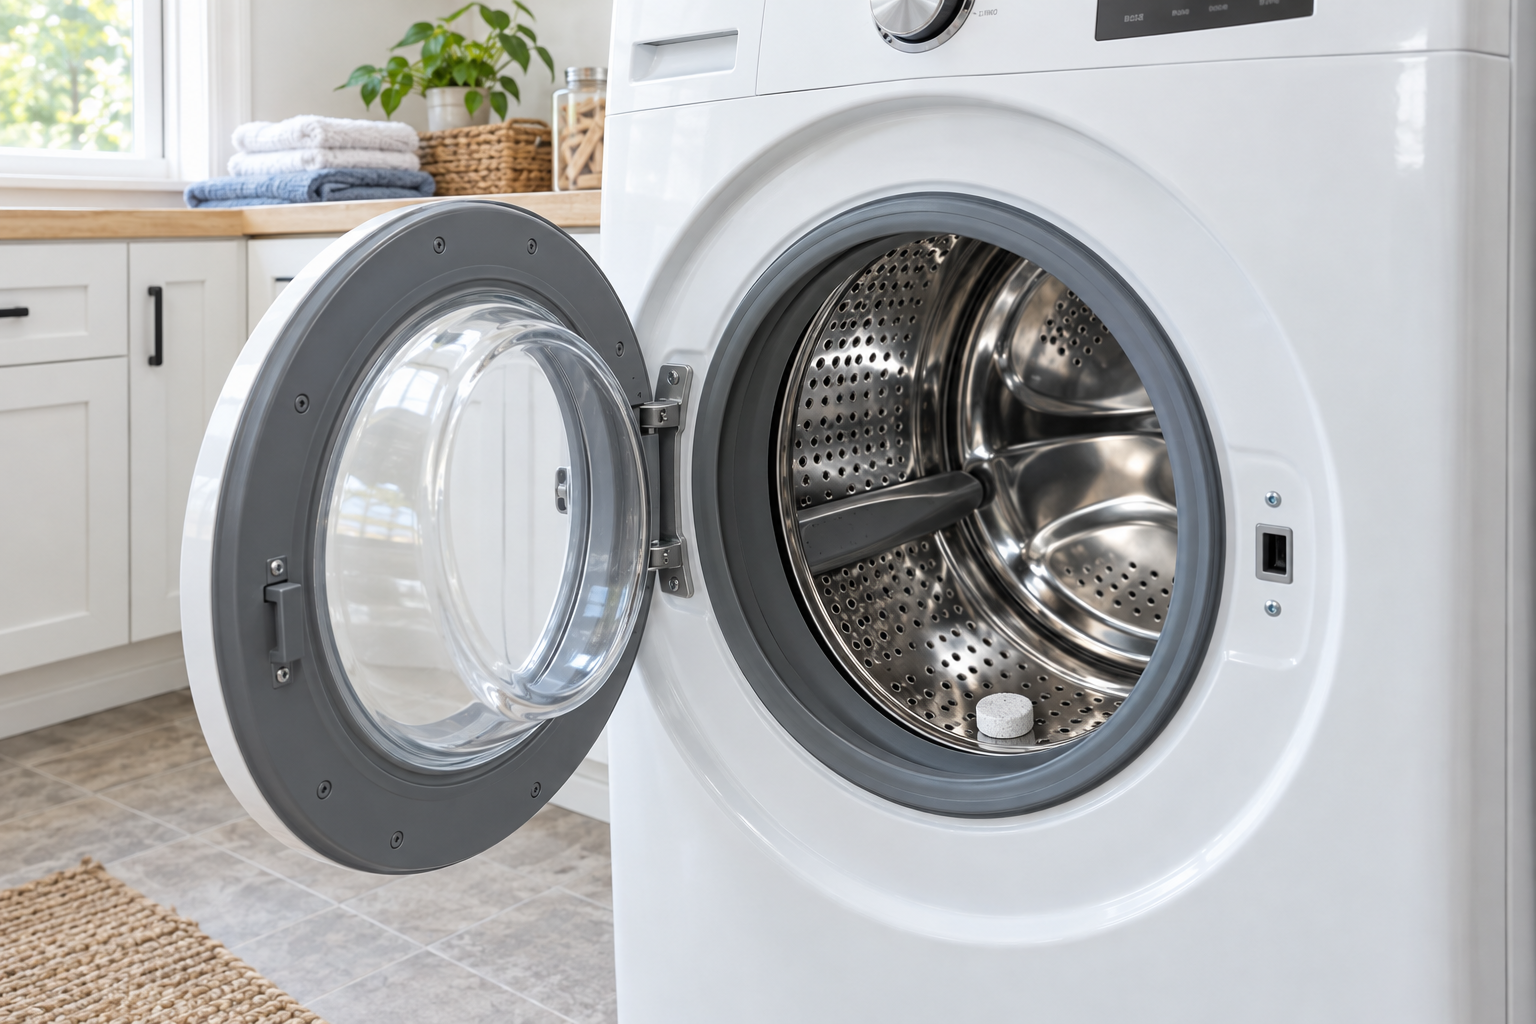
Use only HE detergent in an HE washer, and use less than the cap suggests. For a normal load in soft water, 1-2 tablespoons of concentrated liquid is plenty. Pods are pre-measured, so don’t add two to a regular load. If you suspect years of residue buildup, a monthly cleaning cycle with affresh washer cleaner or a similar tablet keeps the drum and sump clear. Our guide on how to clean a washing machine covers the full routine.
Step 8: Check for bearing failure and other internal faults
If the washer shakes or reports unbalanced loads with a nearly empty drum, and the steps above didn’t help, look at the drum bearings.
Signs of worn bearings:
- A rumbling or roaring noise that gets louder as spin speed rises
- Grinding or scraping when you turn the empty drum by hand
- On front loaders, the drum moves up and down or side to side when you grab the top edge and rock it (more than about 1/8 inch of play is bad)
- Rust-colored streaks running down the back of the outer tub, or brown stains on clothes
Bearing replacement is a full teardown. On most front loaders the outer tub must be split or replaced, and many tubs are sealed units. Parts often run $50-150, but labor makes this a $400-800 repair from a technician. On a washer more than 8-10 years old, replacement usually makes more financial sense.
A few other internal faults can trigger the error:
- Broken spider arm (front loaders): the aluminum bracket on the back of the drum corrodes and cracks. The drum wobbles badly and may scrape. Usually a replace-the-washer repair.
- Leaking balance ring (top loaders): the liquid-filled ring at the top of the basket keeps it stable. A cracked ring leaks and loses its balancing effect.
- Faulty speed sensor or control board: some machines detect imbalance by reading motor speed or current. A failing sensor can report imbalance that isn’t there. Try a reset first: unplug the washer for 5 minutes, plug it back in and run an empty Rinse & Spin.
For other faults you might find while the cabinet is open, such as leaks, door lock problems or a washer that won’t fill, our guide to fixing a washing machine and its most common problems walks through them.
What a fixed washer looks like
When the job is done, a mixed load spins up to full speed within a couple of minutes without pausing to retry. You’ll feel a light, steady vibration through the cabinet, but the washer won’t walk, bang or thump. Clothes come out evenly damp, not dripping. An empty Rinse & Spin cycle should be close to silent apart from motor hum.
Troubleshooting
| Symptom | Likely cause | Fix |
|---|---|---|
| Unbalanced error only with towels, sheets or bedding | Load bunching or wrapping | Mix item sizes, wash one sheet set at a time, use Bulky cycle |
| Violent shaking on the first loads after install | Shipping bolts still in | Remove bolts from the back, install hole caps |
| Washer walks across the floor | Unlevel or loose leg jam nuts | Level all four corners, tighten jam nuts |
| Shakes only upstairs or over a crawl space | Floor flex | Move near a wall, add plywood platform or blocking |
| Tub sits crooked or bounces more than twice | Worn suspension rods (top load) | Replace all four rods as a kit |
| Front-load drum bounces or clunks when pressed | Worn shocks or broken spring | Replace shocks as a pair, check springs |
| Clothes dripping wet with unbalanced error | Drain clog or kinked hose | Clean pump filter, straighten drain hose |
| Won’t spin, lots of suds, Sud or Sd code | Too much detergent | Run a rinse, use less HE detergent |
| Rumbling or roaring that rises with spin speed | Worn drum bearings | Get a repair quote or replace the washer |
| Error with an empty drum, no noise or play | Sensor or control fault | Unplug for 5 minutes, then call a technician if it returns |
When to call a pro
Call an appliance repair technician if the drum has side-to-side play, you hear grinding or roaring during spin, you see rust streaks behind the drum, or the error appears with an empty washer after leveling and a reset. Expect a $100-200 service call fee, which many shops credit toward the repair. If the floor visibly flexes or sags under the washer, have a carpenter or contractor look at the framing before you add posts or cut into joists.
FAQ
Can an unbalanced load damage my washing machine?
Yes, if it happens often. Repeated hard shaking wears out suspension rods, shocks and drum bearings early. It can also crack a front loader’s spider arm and loosen the cabinet. One out-of-balance load won’t hurt anything. A washer that bangs every week needs one of the fixes above.
Why does my washer say unbalanced with a small load?
Small loads are actually harder to balance. One or two heavy wet items have nothing to counterweight them. Add a few towels, or wait until you have a fuller mixed load. If an empty or tiny load still fails, check level and suspension.
How do I clear a Samsung UB or LG UE code?
Pause the washer, wait for the door to unlock, and spread the clothes evenly around the drum. Then run Rinse & Spin. If the code returns with a well-mixed load, check leveling, the shipping bolts on a new machine, and the drain filter.
How do I wash a comforter without an unbalanced load?
Use the Bulky or Bedding cycle and select a lower spin speed. Load the comforter loosely. In a top loader, arrange it around the impeller instead of stuffing it in the center. Adding two towels helps balance it. A king comforter that fills the drum completely should go to a laundromat’s large-capacity machine.
Do anti-vibration pads fix an unbalanced washer?
They reduce noise and stop sliding on hard floors. They don’t correct poor loading, an unlevel washer or worn suspension. Level the machine first and use pads as a finishing touch.
Is it worth replacing the suspension on an old washer?
Usually, yes. A suspension rod kit or set of shocks costs $20-60 and an hour of your time, which is cheap compared with a new washer. Bearing failure is different. On a machine older than 8-10 years, a bearing job often costs more than the washer is worth.