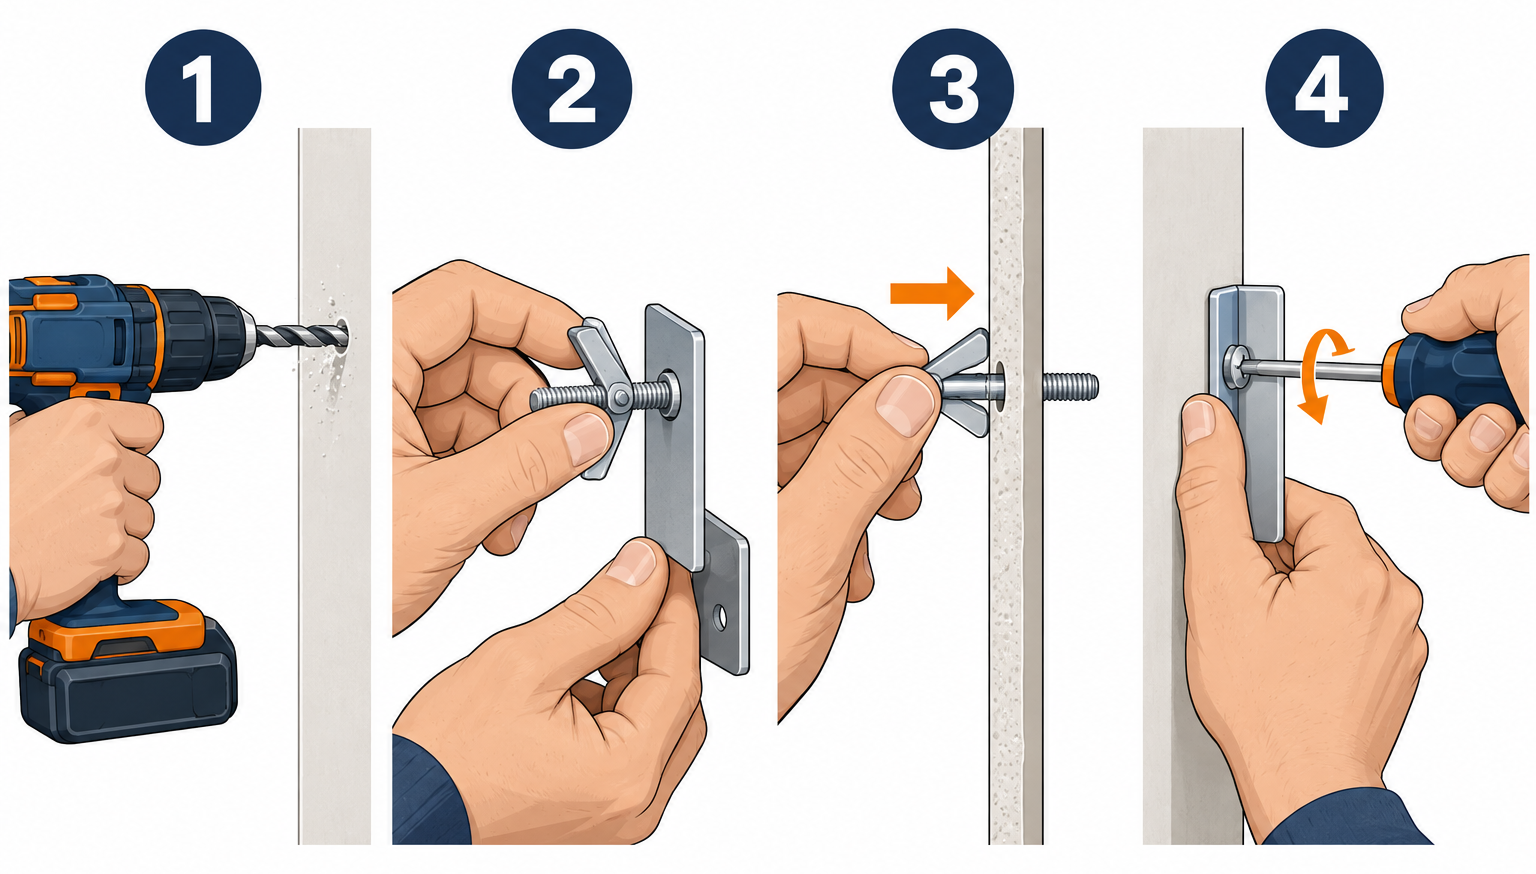
To install toggle bolts, drill a hole big enough for the folded wings, thread the bolt through your fixture, push the wings through the wall, pull back so they open against the inside face, and tighten until snug. Toggle bolts are the strongest common anchor for hollow drywall, plaster and hollow block when you can’t hit a stud. Get the hole size and bolt length right and the rest takes five minutes.
Quick steps: install a toggle bolt
- Check the wall for studs, wires and pipes, then mark your spot.
- Drill the hole size listed for your bolt diameter.
- Pass the bolt through the fixture, then spin the wings onto the end.
- Fold the wings flat and push them through the hole.
- Pull the fixture toward you so the wings open and bite the back of the wall.
- Tighten until snug, then stop.
Tools and materials
- Toggle bolts (diameter and length matched to load and wall)
- Drill/driver with spade bit or twist bit (3/8″ to 1-1/4″, see chart)
- Stud finder with AC wire detection
- Tape measure, pencil and 24″ level
- #2 Phillips or slotted screwdriver
- Safety glasses
- Spackle and putty knife for mistakes
Calculators for this job
Safety first
Scan for live wires and plumbing before you drill, and avoid the zone directly above and below outlets and switches. Wear safety glasses, especially drilling overhead into ceilings.
Which Toggle Bolt Do You Need?
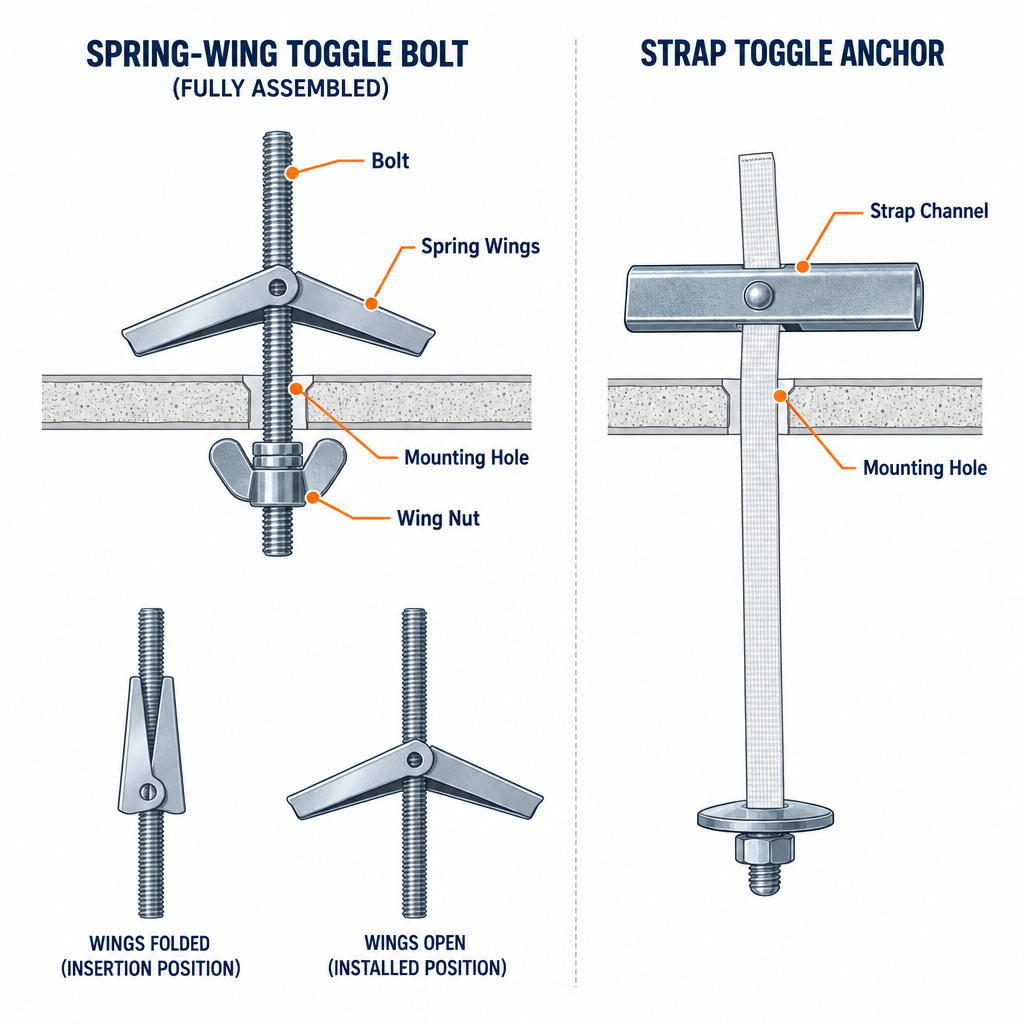
A traditional toggle bolt is a machine screw with a spring-loaded steel wing nut on the end. The wings fold flat to pass through the hole, then spring open behind the wall. Strap toggles like the Toggler SnapToggle use a solid steel channel held by plastic straps instead. They need a smaller hole and let you remove the bolt without losing the anchor.
| Anchor type | Hole size | Bolt removable? | Best for |
|---|---|---|---|
| Spring-wing toggle bolt | Large (3/8″ to 1-1/4″) | No, wings drop into the wall | Shelves, cabinets, mirrors, hollow block |
| Strap toggle (SnapToggle BB) | 1/2″ for a 1/4″-20 bolt | Yes | TVs, grab-bar backing, anything you’ll take down |
| Molly (hollow-wall) bolt | Small (about 1/4″-3/8″) | Yes | Medium loads, cleaner look |
| Plastic expansion anchor | Small | Screw only | Pictures, light hooks |
If you’re hanging something heavy and you might remove it later, buy strap toggles. For a permanent heavy shelf on a budget, spring-wing toggle bolts are fine.
Toggle bolt size and hole chart
The hole has to be big enough for the folded wings, which is much larger than the bolt. These are the standard sizes for spring-wing toggles. Always confirm against the package, since a few brands differ by 1/16″.
| Bolt diameter | Drill bit size | Typical use |
|---|---|---|
| 1/8″ | 3/8″ | Light shelves, towel bars, framed art |
| 3/16″ | 1/2″ | Medium shelves, curtain rods |
| 1/4″ | 5/8″ | Cabinets, heavy mirrors, shelf standards |
| 5/16″ | 7/8″ | Heavy fixtures in block or thick plaster |
| 3/8″ | 7/8″ | Heavy loads in hollow block |
| 1/2″ | 1-1/4″ | Commercial and masonry work |
For most home drywall jobs, 3/16″ and 1/4″ toggle bolts cover everything you’ll hang.
Holding power: drywall is the weak link
Drywall fails before a steel toggle does. The gypsum crushes or the paper face tears. Package ratings are usually ultimate loads, the point of failure, so divide by four for a safe working load. That 4:1 safety factor is standard practice across anchor manufacturers.
Spread heavy items across several toggles. Four 1/4″ toggles on a 30-inch shelf share the load far better than two.
Step 1: Check the Wall and Mark Your Holes
Run a stud finder across the area first. If a stud lands where you need a fastener, use a wood screw there instead. A stud always beats an anchor.
Next, check cavity depth. The wings on a 1/4″ toggle open to roughly 2 inches wide and need room to swing. A standard 2×4 wall has a 3-1/2″ cavity, which is plenty. Drywall on 3/4″ furring strips over concrete does not have enough room, and the wings will jam half-open.
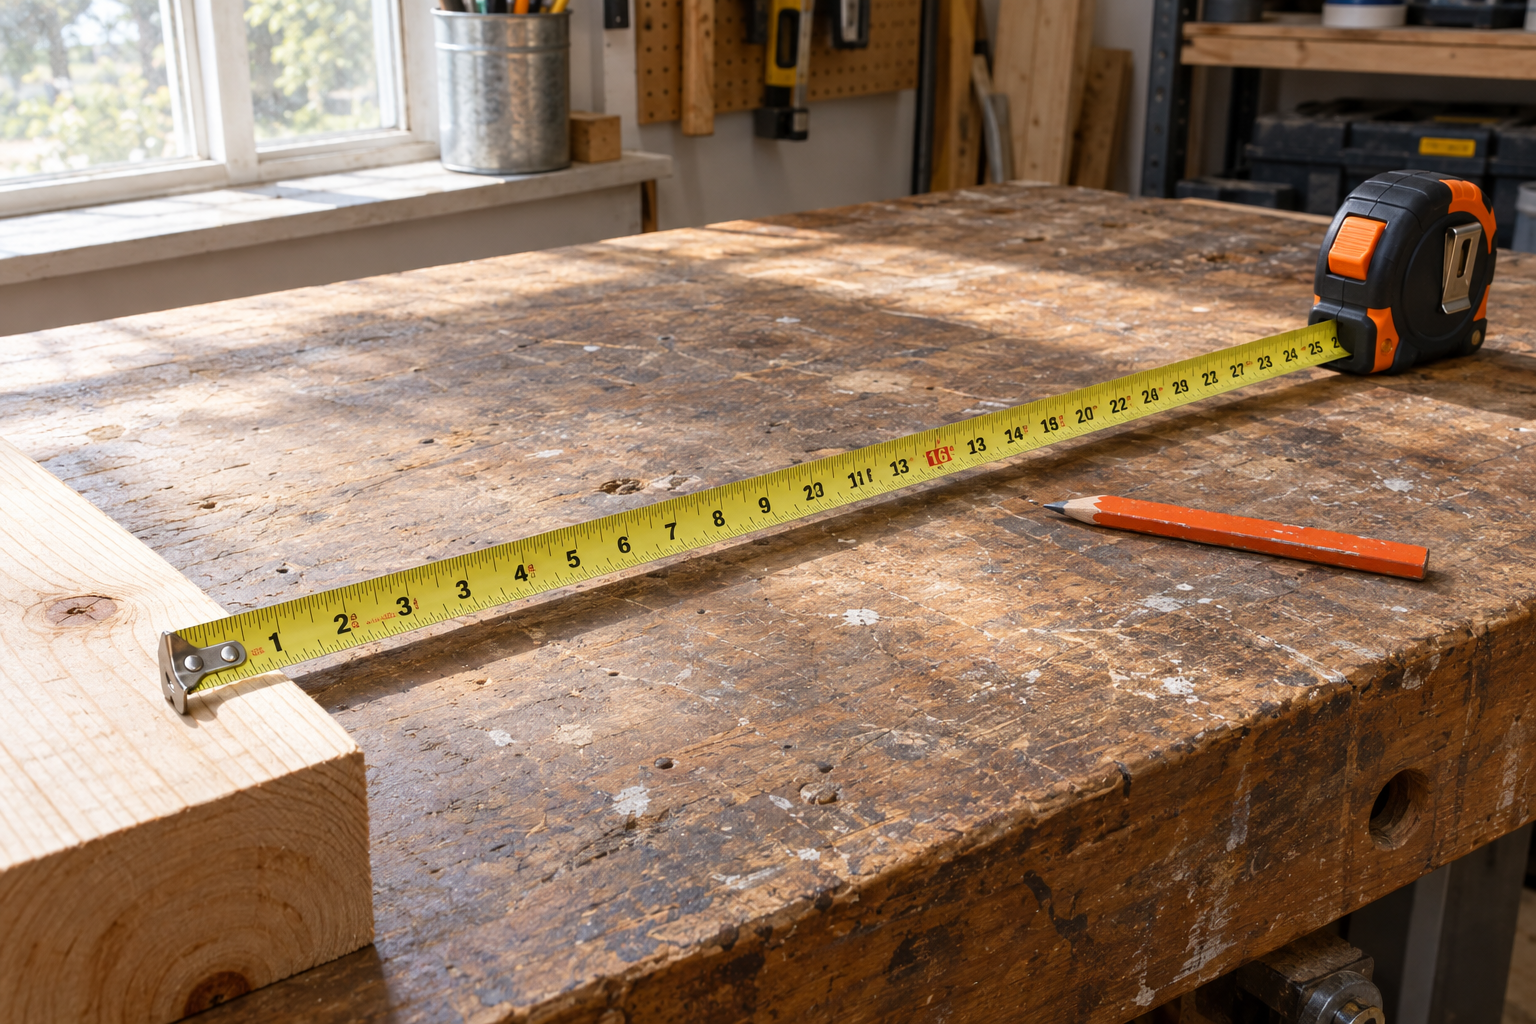
Hold the fixture against the wall, level it, and mark through its mounting holes. If you need precise spacing, take time to read a tape measure correctly to the 1/16″ marks. Toggle holes are too large to fudge later.
Step 2: Drill the Hole
Drill straight in, perpendicular to the wall. A 5/8″ or larger hole in drywall is best made with a standard high-speed steel twist bit or a hole saw. Let the bit do the work so the paper face on the back doesn’t blow out.
Stop as soon as you break through. Push a bent wire or finger into the hole to confirm there’s nothing behind it: no stud edge, no insulation batt packed tight, no pipe.
Pro tip
Drill one hole and test-fit the toggle before drilling the rest. If the wings hang up on a stud edge or blocking, you’ve only made one hole to patch.
Step 3: Thread the Bolt Through the Fixture First
This is the step people get wrong. Once the wings are inside the wall, you can’t take them off. If you install the toggle and then try to hang your shelf, there’s no way to get the bolt through the bracket.
So put the bolt through the fixture’s mounting hole first. Then spin the wing nut onto the end of the bolt, with the wings angled back toward the bolt head. Thread it on about 1/4″ to 1/2″, just enough to hold firmly.
Bolt length matters too. You need enough length for the fixture thickness plus wall thickness, plus about 1 inch so the wings fully clear the back of the wall before they open. A 1/4″ x 3″ toggle suits most brackets on 1/2″ drywall.
Step 4: Push the Wings Through
Pinch the wings flat against the bolt and push them into the hole. You’ll feel and often hear a snap as they spring open inside the cavity.
If you’re working with a heavy item, have a helper hold it. You’ll be pushing the whole fixture toward the wall as the wings go in.
Step 5: Pull Back and Tighten
Pull the fixture or bolt head toward you. This seats the open wings flat against the inside of the drywall. Keep that outward tension while you start turning the bolt; without it, the wings just spin in the cavity.
Tighten with a screwdriver until the fixture is snug against the wall and doesn’t move. Then stop. Over-tightening pulls the wings into the gypsum and crushes it, which cuts holding power sharply.
If you use a drill, set the clutch low, around 3-5 on most drivers, and finish by hand.
Pro tip
On a multi-bolt bracket, leave every toggle a little loose until all are in. Then level the fixture and tighten them evenly in a cross pattern.
Installing a Strap Toggle (SnapToggle Style)
Strap toggles take a slightly different routine, but they’re easier once you’ve done one.
- Drill the hole size printed on the package (1/2″ for the SnapToggle BB).
- Slide the metal channel flat into the hole, holding the plastic straps.
- Pull the straps toward you so the channel sits flat against the back of the wall.
- Slide the plastic cap along the straps until it’s flush with the wall surface.
- Snap the straps off at the cap by bending them side to side.
- Mount the fixture with the included 1/4″-20 bolt.
Because the channel stays in place, you can remove and reinstall the bolt as often as you like.
Using Toggle Bolts in Other Materials
Plaster and lath: Toggles work, but drill slowly with a masonry bit to keep the plaster from cracking. The lath gaps behind the plaster sometimes block the wings, so test-fit first.
Hollow concrete block: Drill into the hollow core, not the solid web, with a masonry bit and hammer drill. A 3/8″ toggle in block holds serious weight. Solid concrete needs sleeve or wedge anchors instead.
Paneled walls: On thin paneling or board and batten walls, check whether there’s drywall or open framing behind before you choose bolt length.
Ceilings: Toggles are fine for hanging plants or light fixtures under the box rating. Never hang a ceiling fan from toggles. Fans need a fan-rated box fastened to framing.
Toggle Bolt Costs
| Item | Typical US price |
|---|---|
| 1/8″ or 3/16″ spring toggle | $0.50-1.25 each in packs |
| 1/4″ x 3″ spring toggle | $1-2 each |
| Strap toggle, 1/4″-20 (SnapToggle BB) | $1.50-3 each |
| 5/8″ or 7/8″ spade bit | $4-8 |
| Spackle, 8 oz tub | $5-8 |
Bulk boxes of 25 or 50 bring the per-bolt price down noticeably.
Troubleshooting
| Symptom | Likely cause | Fix |
|---|---|---|
| Bolt spins and won’t tighten | Wings spinning in the cavity | Pull outward hard while turning; use a strap toggle if it persists |
| Wings won’t open | Cavity too shallow or hitting insulation, stud or pipe | Move over a few inches; use a shorter-wing anchor on furring strips |
| Wings won’t fit through the hole | Hole drilled too small | Enlarge to the size on the package |
| Fixture loose after tightening | Hole too large or drywall crushed | Patch and redrill 2-3″ away |
| Fixture won’t mount after toggle is in | Bolt wasn’t threaded through fixture first | Push the toggle into the wall, patch, start over |
| Drywall cracking around hole | Over-tightened or too close to an edge | Keep 2″ from edges and joints; tighten only to snug |
To patch a failed hole, fill with spackle in two thin coats, sand and repaint. Larger holes over 1″ need a self-adhesive mesh patch first. Save wood filler for wood trim and paneling; it doesn’t sand flush on drywall.
When to call a pro
Call a handyman or carpenter if your item is over about 100 lb, sits at head height over people (heavy mirrors, cabinets), or needs to hold dynamic loads like a grab bar. Those should go into studs or added blocking. Call an electrician if you hit a wire or need a new box for a ceiling fixture.
FAQ
How much weight can a toggle bolt hold?
It depends on bolt size and the wall, because drywall fails first. Read the package rating, which is usually an ultimate load, and design for one quarter of it. Spreading weight across several toggles is safer than relying on one big bolt.
Can you reuse a toggle bolt?
A traditional spring-wing toggle can’t be removed without the wings falling into the wall. Strap toggles like the SnapToggle let you remove and reinstall the bolt as often as needed.
What size hole do I drill for a 1/4″ toggle bolt?
Drill a 5/8″ hole for a standard 1/4″ spring-wing toggle bolt. A 1/4″-20 strap toggle needs only a 1/2″ hole.
Are toggle bolts better than molly bolts?
For heavy loads in drywall, yes. A toggle spreads force over a wider area of the back of the wall. Molly bolts need a smaller hole and allow bolt removal, so they suit medium loads where appearance matters.
Can I use toggle bolts in a ceiling?
Yes, for light fixtures and hanging plants within the anchor’s rating. Never use them for ceiling fans, which need a fan-rated box fastened directly to framing.