Wood filler fixes nail holes, gouges, splits and chewed corners in three moves: pack it in a little proud, let it cure, sand it flush. The hard part is picking the right filler for the job, because the one that sands beautifully on painted trim will show up as a gray blotch under stain. Below I rank the seven fillers I actually keep on the shelf, then walk through the fill from prep to finish.
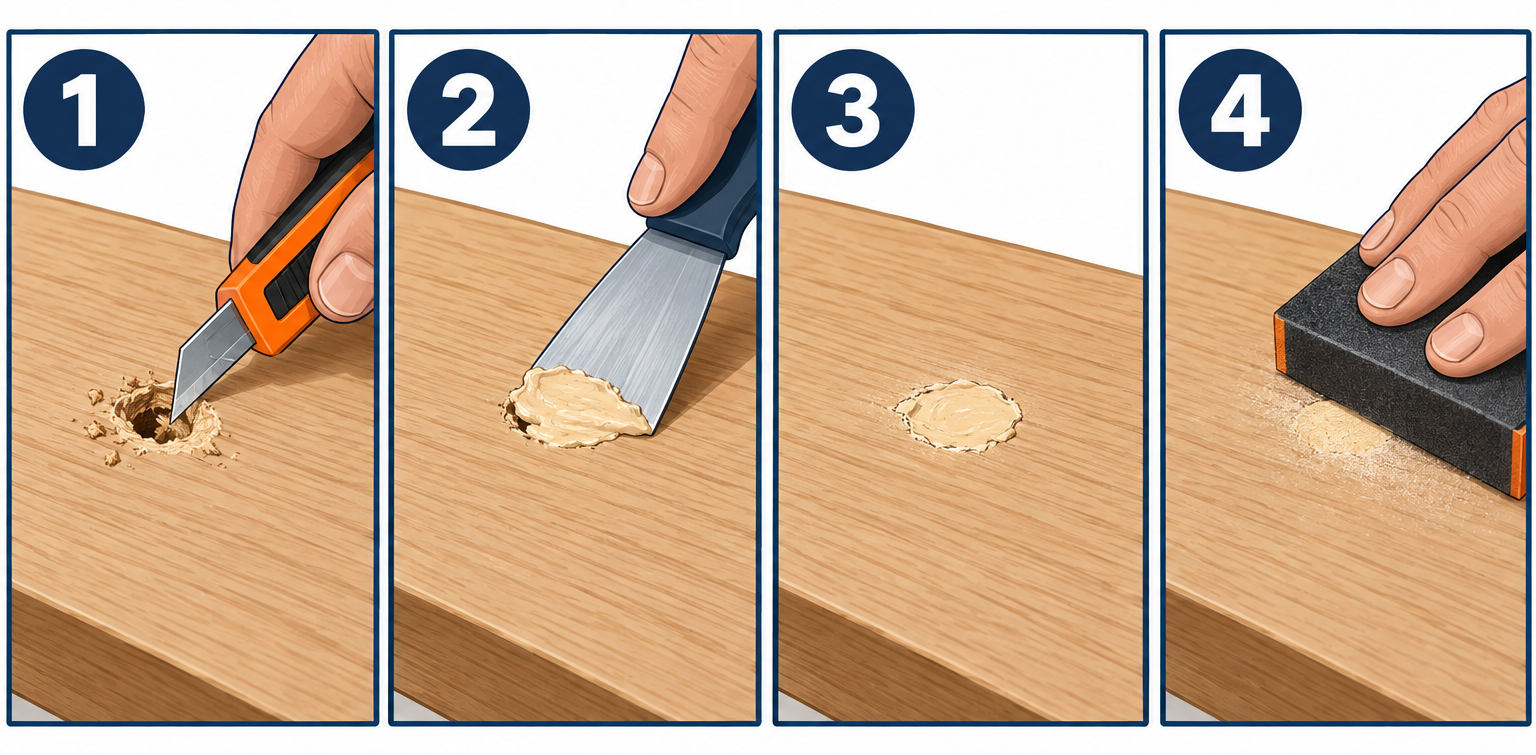
Quick steps: fill a hole in wood
- Dig out loose fibers and dust with a utility knife and vacuum.
- Pick the filler by finish: two-part for structural, water-based for stain, putty for painted trim.
- Press filler in with a putty knife, overfilling by about 1/16 inch.
- Build deep holes in layers no thicker than 1/4 inch.
- Let it cure fully, then sand flush with 120 then 180 grit.
- Prime or stain, and spot-fill any pinholes that show.
Tools and materials
- Wood filler (see the ranked list for which type)
- Flexible putty knife (1.5 inch) and a stiff 3 inch knife
- Utility knife or 1/4 inch chisel
- Sanding block with 120, 180 and 220 grit paper
- Shop vacuum or tack cloth
- Blue painter’s tape
- Nitrile gloves and a scrap of cardboard or plastic for mixing two-part filler
- Primer or stain to match the surrounding wood
Calculators for this job
Safety first
Solvent fillers (DAP Plastic Wood, Famowood Original) and polyester fillers (Bondo) give off strong fumes, so open a window or work outside. Wear nitrile gloves with epoxy and polyester, and a dust mask when sanding any filler.
The 7 wood fillers, ranked
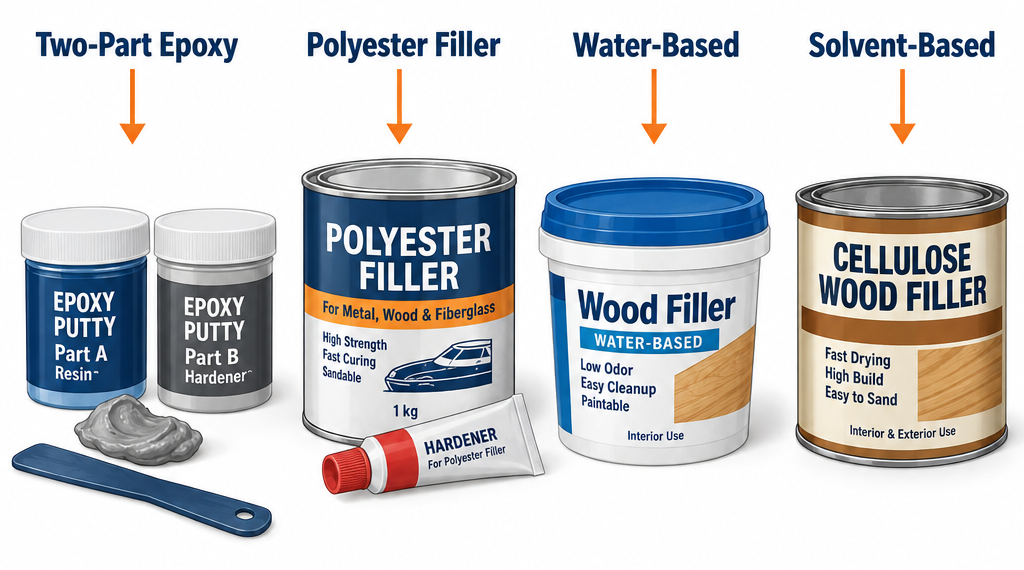
I rank these on how well they hold, how they sand, and how they take a finish. The order assumes you want one filler that covers most jobs. Specialty picks are called out as such.
1. Bondo Wood Filler (best overall for painted repairs)
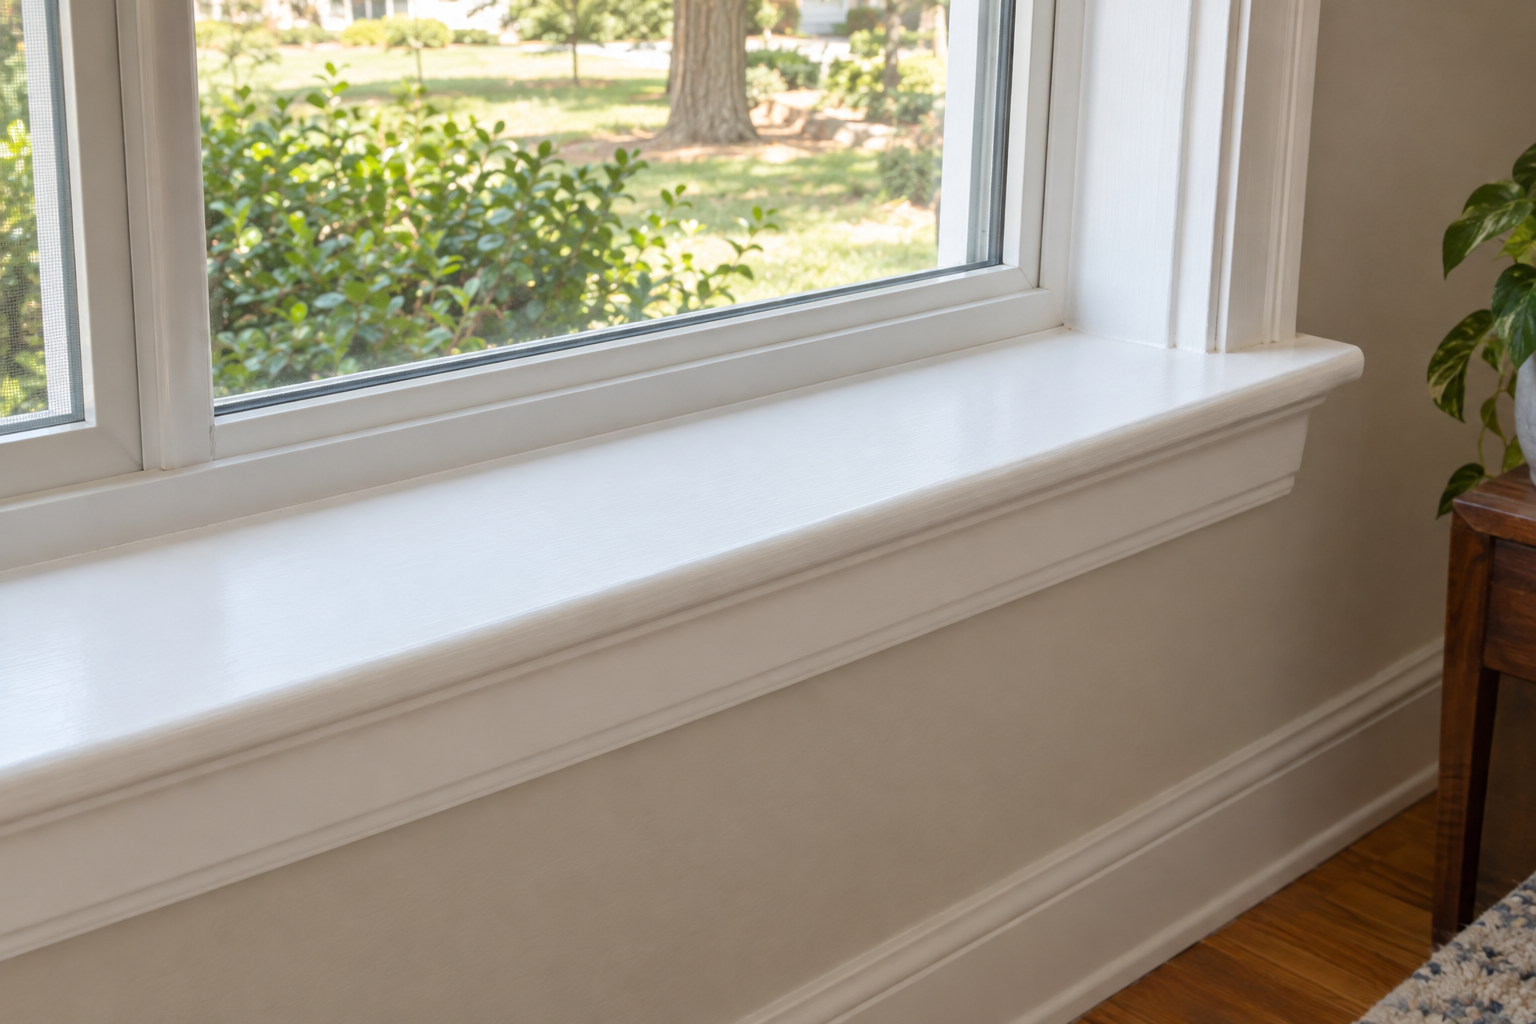
This is the two-part polyester filler from 3M, the same chemistry as auto body filler, but it mixes to a medium brown rather than body-shop gray. You squeeze a ribbon of cream hardener into a scoop of filler, mix on scrap cardboard, and you have around 15 minutes before it kicks. It is sandable in 25 to 30 minutes, it does not shrink, and it bonds hard enough to rebuild a missing corner on a window sill.
Downsides: it will not take stain, it smells like a body shop, and once mixed you cannot save it. A quart runs about $18-25 and lasts years if you keep the lid tight and the hardener tube capped.
2. Minwax High Performance Wood Filler (same job, smaller can)
Also a two-part polyester, also mixed with a cream hardener. I rate it a notch below Bondo only because the can sizes are smaller and the price per ounce is higher. Performance is close to identical. It fills rotted sills, stripped screw holes and broken chair rungs, and it sands with a sharp edge that paints well. If your hardware store stocks this and not Bondo, buy it without hesitation.
3. Timbermate Wood Filler (best under stain)
Timbermate is a water-based filler that comes in wood tones like maple, oak, walnut and cherry. The trick is that it can be thinned with water and rewetted after it dries in the tub, so a container does not turn into a brick after one use. It takes stain better than any other off-the-shelf filler I have tried, though “better” still means a visible patch on a large fill. For nail holes in stained trim it is the one I grab. Figure $10-15 for a small tub.
4. DAP Plastic Wood (best solvent-based all-rounder)
The original Plastic Wood is a cellulose filler in a solvent base. It dries hard, sands clean and accepts paint or a light stain. It cures faster than water-based fillers and shrinks less, but it has a sharp smell and skins over in the can quickly. I use it for interior and exterior trim repairs up to about 1/4 inch deep. The newer Plastic Wood-X with DryDex goes on pink and turns natural when it is ready to sand, which solves the most common beginner mistake of sanding too early. A 16 ounce tub is around $8-12.
5. Minwax Stainable Wood Filler and Elmer’s Carpenter’s Wood Filler (budget water-based)
I group these together because they behave the same. Both are latex fillers that clean up with water, sand easily, and work fine for nail holes and small dents on wood you plan to paint. Both shrink noticeably on anything deeper than 1/8 inch, so you will usually need a second coat. The word “stainable” on the label is optimistic. Stain soaks in unevenly and the patch reads lighter or darker than the wood around it. Under paint, they are hard to beat for $6-10.
6. Abatron LiquidWood and WoodEpox (best for rot)
This is a two-product system from Abatron. LiquidWood is a thin two-part epoxy that you brush or inject into punky wood to harden it. WoodEpox is a two-part epoxy putty, mixed 1:1 by hand, that fills the void. It cures overnight into something you can drill, carve, plane and screw into. I use it on rotted window sashes, porch columns and door bottoms where replacement is expensive. A starter kit costs $40-60, which is the only reason it is not higher on the list. For a nail hole it is overkill.
7. MH Ready Patch (best for painted trim and spackle-type fills)
Ready Patch is a hard-setting spackling and patching compound built on a modified alkyd resin that straddles the line between drywall compound and wood filler. It fills shallow dents and nail holes on painted trim, dries with almost no shrinkage, sands to a feathered edge, and primes without flashing. It is not strong enough for corners or anything structural, and it will not take stain at all. For a room full of painted base and casing, it is faster than any wood-specific filler. Expect $10-15 for a pint.
Honorable mentions
Sawdust mixed with wood glue is the old woodworker’s filler. Mix fine sanding dust from the same board with yellow glue to a stiff paste. It matches color better than anything in a can, but the glue seals the wood so stain will not penetrate the patch. Use it only on pieces you plan to oil or clear coat.
Minwax Wood Putty, Mohawk fill sticks and similar colored putties never fully harden. They are for small nail holes in wood that is already finished, pushed in with a fingertip after the stain and topcoat are on. Do not confuse them with filler. Putty under paint or finish will bleed through.
Austin’s Glazier’s Putty and window glazing compounds are not wood fillers either. They stay flexible and are meant to bed glass. Painters sometimes use them on exterior trim, but they take days to skin and do not sand.
Quick-reference comparison
| Filler | Type | Sand after | Max depth per coat | Takes stain? | Exterior? | Approx. price |
|---|---|---|---|---|---|---|
| Bondo Wood Filler | Two-part polyester | 25-30 min | Unlimited (build in layers) | No | Yes | $18-25 / quart |
| Minwax High Performance | Two-part polyester | 15-30 min | Unlimited | No | Yes | $12-18 / 12 oz |
| Timbermate | Water-based | 30 min to 2 hr | 1/4 inch | Best of the group | Interior only | $10-15 / 8 oz |
| DAP Plastic Wood | Solvent cellulose | 15 min to 2 hr | 1/4 inch | Light stain only | Yes | $8-12 / 16 oz |
| Minwax Stainable / Elmer’s | Water-based latex | 15 min to 2 hr | 1/8 inch | Poorly | Elmer’s exterior version only | $6-10 / 16 oz |
| Abatron WoodEpox | Two-part epoxy | Overnight | Unlimited | No | Yes | $40-60 / kit |
| MH Ready Patch | Modified alkyd spackle | 1-2 hr | 1/4 inch | No | Yes, primed | $10-15 / pint |
How I choose a filler
Three questions settle it every time.
What finish is going on top? Paint hides everything, so pick by strength and sanding. Stain hides nothing, so pick Timbermate or sawdust and glue, and keep the patches tiny. Clear finish on bare wood is the hardest case, and honestly a dutchman patch of real wood beats any filler there.
How big is the hole? Nail holes and dents under 1/8 inch: any water-based filler or Ready Patch. Screw holes, chips and gouges to about 1/2 inch: Bondo or Plastic Wood. Missing corners, rot, or anything that has to hold a screw: polyester or epoxy.
Is it outside? Water-based fillers soften and pop out after a few freeze-thaw cycles. Use polyester, epoxy or a solvent filler, and paint over it.
My top pick for a homeowner buying one can is Bondo Wood Filler. Most repairs around a house are on painted trim, doors and sills, and it handles all of them plus exterior work. Add a tub of Timbermate for stained woodwork and you are covered.
Pro tip
Pair the filler with the gap. Wood filler is for holes in the wood itself. The crack where trim meets a wall or where two pieces of trim meet at a miter will open and close with the seasons, and filler there cracks within a year. Run paintable caulk in those joints with a caulking gun and save the filler for holes.
Step 1: Clean out the hole
Filler bonds to solid wood, not to dust, paint flakes or crushed fibers. Scrape the hole with the corner of a utility knife or a 1/4 inch chisel until you see clean wood on every surface. For a dent from a dropped hammer, try a damp cloth and a household iron on the spot first. Steam often raises the crushed fibers most of the way and you end up filling a far shallower void.
Vacuum the dust out, then wipe with a dry cloth. If the surrounding wood is painted and the paint edge is loose, feather it with 120 grit so the filler does not sit on a ledge that will crack later.
For stripped screw holes in a door hinge or cabinet, the hole needs to be bigger than you think. Drill it out to 1/4 inch so the filler has mass to grip, or you will strip the screw again.
For rot, probe with an awl. Soft, brown, crumbly wood has to come out until the awl stops sinking. Dig it out, let the area dry a couple of days, then consolidate with LiquidWood before filling. Filling over wet rot just hides it until the paint bubbles.
Step 2: Mix or stir the filler
Water-based and solvent fillers come ready to use. Stir them with a stick if liquid has separated on top. If a solvent filler has thickened, DAP and Famowood sell thinners for their products; acetone works in a pinch but go easy, a few drops at a time.
Two-part polyester needs mixing right before use. Scoop a golf-ball amount onto cardboard, add a ribbon of hardener in the proportion the can shows, and fold it together with the putty knife until the color is uniform with no streaks. Streaks mean soft spots that never cure. Mix only what you can apply in 10 minutes.
Epoxy putty like WoodEpox is mixed by hand in equal parts until the two colors blend to one. Wear gloves. The mixed putty is stiff, like modeling clay, and you shape it in place rather than spreading it.
Step 3: Press it in and overfill slightly
Load the flexible putty knife and push the filler into the hole at a low angle, forcing it against the back and sides so no air is trapped. Then come back with a second pass at a steeper angle to level it. Leave the filler sitting about 1/16 inch proud of the surface. Every filler except the two-parts and epoxy shrinks a little as it dries, and even those are easier to sand down than to fill again.
Deep holes get layers. Anything deeper than 1/4 inch in water-based or solvent filler goes in two or three lifts, each one allowed to dry before the next. Polyester can go thicker in one shot, but a 1/2 inch slab of Bondo generates heat as it cures and can crack, so I still layer it.
For a missing corner or edge, tape a scrap of melamine or a piece of flat wood wrapped in packing tape against one face to act as a form. Pack filler against it and pull the form once the filler sets. You get one perfect face and only have to shape the other.
Pro tip
Work the final pass of filler with the knife wet. A damp putty knife on water-based filler, or a knife wiped with acetone on solvent filler, leaves a near-glass surface and cuts sanding time in half. A wet fingertip does the same on tiny nail holes.
Wipe the excess off surrounding bare wood immediately. Smeared water-based filler dries in the grain and blocks stain, and you will not see it until the stain goes on.
Step 4: Let it cure all the way
This is where most repairs go wrong. The surface of a water-based filler skins in 15 minutes and feels dry, but a 1/4 inch fill is still soft underneath for hours. Sand it early and the paper gums up and the patch tears out. Labels give times, but I use these rules:
- Water-based, under 1/8 inch: 1 hour at room temperature.
- Water-based, 1/8 to 1/4 inch: overnight.
- Solvent (Plastic Wood): 30 minutes for shallow, 4 hours for deep.
- Polyester (Bondo, Minwax HP): 30 minutes, longer if the shop is below 60°F.
- Epoxy (WoodEpox): overnight, 24 hours if cold.
Cold slows everything. Filler on an exterior sill at 45°F can take two days to harden. Color-change fillers like Plastic Wood-X take the guessing out, which is why I recommend them to anyone doing this for the first time.
Step 5: Sand it flush
Wrap 120 grit around a flat block, not your fingers. Fingers follow the patch and dish it. Sand with the grain in long strokes that extend past the patch on both sides, and stop as soon as the filler is level with the wood. Then switch to 180 grit to remove the scratches, and 220 if the wood is getting a clear finish.
Run your hand over it with your eyes closed. A ridge you cannot see will show under paint. Then hold a flashlight at a low angle across the surface. Pinholes and low spots jump out in raking light. Fill those with a thin skim coat, let it dry, and sand again. Two thin coats always beat one thick one.
On profiled trim, cut a sanding block to match the profile, or use a folded piece of paper and work carefully so you do not round over the edges. Bondo and Plastic Wood can be shaped with a sharp chisel or a file before final sanding, which is faster on curves.
Step 6: Prime, stain or finish
Under paint, spot-prime every patch. Filler soaks up paint at a different rate than wood and will flash through two topcoats if you skip this. A shellac-based primer like Zinsser BIN seals solvent and polyester fillers and dries in under an hour.
Under stain, test first. Stain a scrap of the same wood with a filled spot and look at it dry. If the patch is lighter, a touch of gel stain on the patch alone after the main coat will usually blend it. If it is darker, you cannot fix it; sand the patch out and use a lighter filler tone.
If the piece is getting a clear finish and the patch is still obvious, this is where I stop fighting filler and switch to colored wax sticks over the finished surface, or to a glued wood plug for anything bigger than a brad hole.
Pro tip
When filling a run of nail holes on stained trim, use two tones of Timbermate. Match the lighter grain color for most holes and the darker tone for holes that fall in dark grain lines. Single-tone fills in a two-tone wood are what make patches visible from across the room.
Filling specific jobs
Nail holes in painted trim: Ready Patch or any water-based filler on a fingertip, wipe, sand with 180 after an hour, prime.
Stripped hinge screws: Drill to 1/4 inch, pack with Bondo or glue in a 1/4 inch dowel, let cure, drill a pilot hole and reinstall the screw.
Seams on flat-pack cabinet panels: If you are making custom cabinets ikea style, with filler panels and added trim, water-based filler bridges the small seams fine, but the joint where panel meets panel wants caulk.
Checks and cracks in a tabletop: Epoxy tinted with black or brown dye, poured in and sanded flush, looks intentional. Filler in a long crack looks like a repair.
Rotted sill nosing: Dig, dry, LiquidWood, WoodEpox, shape, sand, prime with oil primer, two coats of exterior paint.
Large voids in exterior trim: Fill in wood that has lost more than half its thickness with a new piece scarfed in. Filler on that scale costs more than the lumber and fails sooner.
Troubleshooting
| Symptom | Likely cause | Fix |
|---|---|---|
| Filler cracked or sank below the surface | Too thick a layer, or water-based used on a deep hole | Rake it out, refill in 1/4 inch lifts, or switch to polyester |
| Patch popped out of a screw hole | Water-based filler holding a screw | Drill out, refill with Bondo or a glued dowel |
| Sandpaper gums up and tears the patch | Sanding before full cure | Let it sit overnight and sand again |
| Patch shows light or gray under stain | Wrong filler type or filler smeared outside the hole | Sand to bare wood, use Timbermate, wipe excess immediately |
| Bondo stayed soft or rubbery | Not enough hardener or poor mix | Scrape it all out, remix with full ribbon of hardener and no streaks |
| Filler flashes through paint | No primer over the patch | Spot-prime with shellac primer, repaint |
| Exterior patch fails after one winter | Water-based filler outdoors or filled over damp wood | Replace with epoxy or polyester, dry wood first |
| Filler hardened in the container | Lid left loose, solvent evaporated | Thin solvent fillers with a few drops of acetone, rewet Timbermate, discard latex fillers |
When to call a pro
Rot that goes more than an inch into a sill, a joist end, a porch post or a door frame is structural, and filler will not restore its strength. Call a carpenter to sister or replace the member. Anything involving lead paint on pre-1978 trim needs lead-safe prep, and window frames with rot behind the glass are a job for a window or glazing contractor.
FAQ
What is the difference between wood filler and wood putty?
Wood filler hardens and is used on bare wood before finishing, then sanded and painted or stained. Wood putty stays soft and is pressed into small holes after the finish is on. Putty under paint bleeds; filler on a finished surface will not match.
Can wood filler be stained?
Only partially. No filler takes stain like real wood because it has no grain and absorbs at a different rate. Timbermate and sawdust-and-glue come closest for small holes. For big patches on stained wood, plan on paint or a real wood patch.
How deep can I fill in one coat?
Water-based and solvent fillers: about 1/4 inch, and 1/8 inch for the budget latex types. Two-part polyester and epoxy can go deeper, but I still build Bondo in layers to avoid heat cracking.
Will wood filler hold a screw?
Two-part polyester and epoxy will. Water-based and solvent fillers crumble under a screw. For hinges and hardware, a glued hardwood dowel is stronger than any filler.
Can I use wood filler outside?
Use polyester, epoxy or a solvent filler, prime it, and paint it. Interior water-based fillers absorb water and fall out after a few seasons.
How long does wood filler last in the can?
Water-based latex fillers last about a year once opened before they dry out. Solvent fillers evaporate faster but can be thinned. Timbermate can be rewetted indefinitely. Bondo and WoodEpox keep for years as long as the two parts stay sealed and separate.