Tiling a floor comes down to a rigid subfloor, a square layout, mortar combed in one direction, and the patience to wait 24 hours before you grout. A first-timer can tile a 40 square foot bathroom over a weekend and have it looking like a paid job, as long as the prep underneath is right. Here is the whole process the way I do it, including what to do over wooden floorboards and how floor tile meets wall tile.
Quick steps: tiling floor tiles
- Pull the baseboards and the old flooring, then check the subfloor for flex and flatness.
- Add 1/4 inch cement board or an uncoupling membrane over plywood; prime bare concrete.
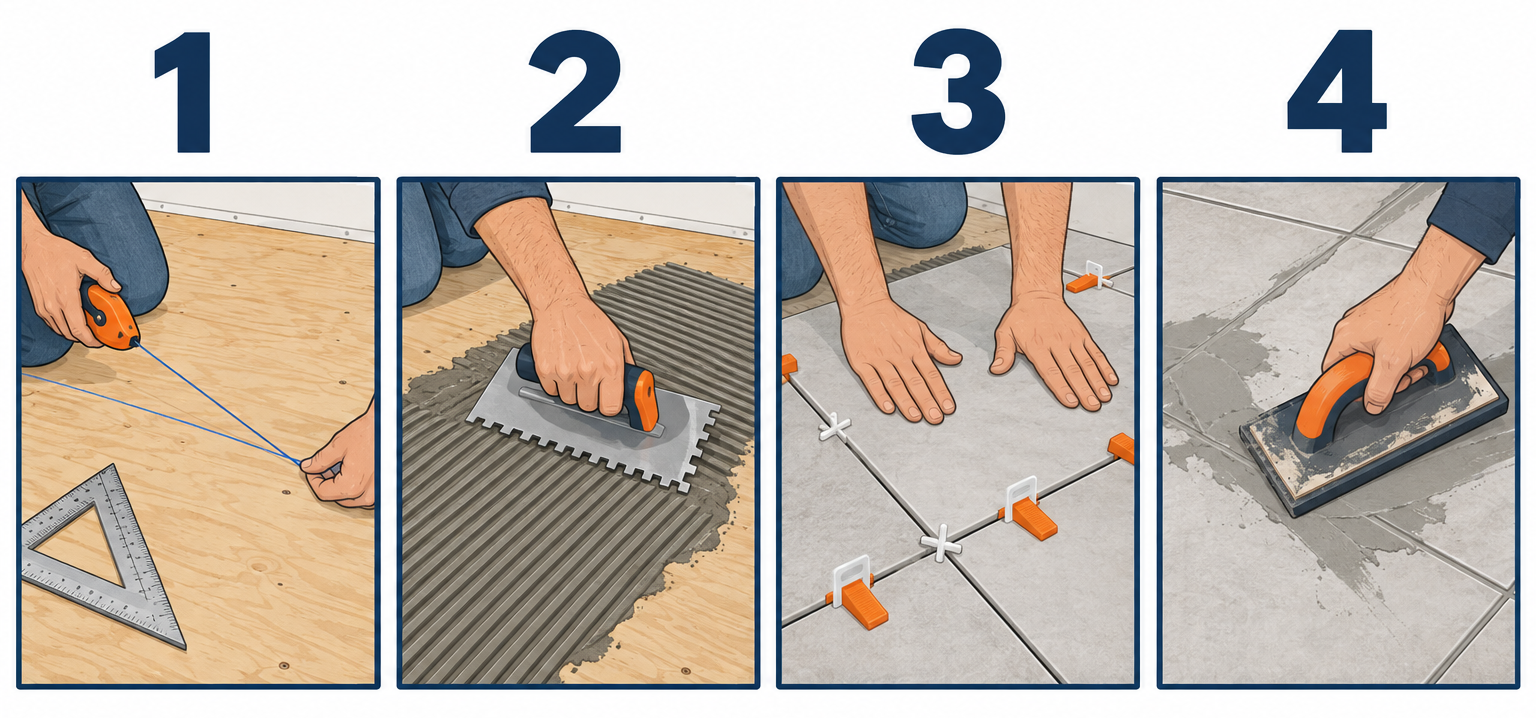
- Snap two square reference lines through the room using the 3-4-5 rule.
- Dry lay a row each way and shift the lines so no cut is narrower than half a tile.
- Mix modified thinset, comb it in straight lines, and set the full tiles with spacers.
- Cut the edge pieces on a wet saw or snap cutter and set them last.
- Wait 24 hours, pull the spacers, and grout with a rubber float at 45 degrees.
- Sponge the haze, caulk the perimeter, seal the grout after 72 hours.
Tools and materials
- Tile (order 10 to 15 percent extra for cuts and breakage)
- Polymer-modified thinset mortar, ANSI A118.4 (one 50 lb bag per 60-90 sq ft, depending on trowel)
- 1/4 inch cement backer board, or an uncoupling membrane like Schluter Ditra, plus backer board screws
- Alkali-resistant mesh tape for backer board seams
- Square-notch trowel: 1/4 x 1/4 inch for tile under 8 inches, 1/4 x 3/8 inch for 12 inch tile, 1/2 x 1/2 inch for 15 inch and larger
- Tile spacers (1/8 inch is the safe default; 1/16 inch for rectified porcelain)
- Tile leveling clips and wedges for tile 12 inches or longer
- Snap cutter for ceramic; wet tile saw (rental, $40-70 a day) for porcelain, stone and L-cuts
- Tile nippers and a 4-1/2 inch angle grinder with a diamond blade for curves and toilet flanges
- Chalk line, 4 foot level, framing square, tape measure, pencil
- 5 gallon buckets, mixing paddle on a corded drill, margin trowel
- Sanded grout for joints 1/8 inch and wider, unsanded for narrower; rubber grout float; large sponge
- 100 percent silicone caulk matched to the grout color for the perimeter and tub joints
- Penetrating grout sealer
- Knee pads, nitrile gloves, safety glasses, N95 dust mask
Calculators for this job
Safety first
Wet saws throw water and grit, so wear safety glasses and plug the saw into a GFCI outlet. Dry-cutting tile or backer board puts out silica dust; cut outside with an N95 on. Wet thinset and grout are caustic enough to crack skin after an hour, so wear nitrile gloves.
Step 1: Strip the room and check the subfloor
Everything that goes wrong with floor tile starts under it. Cracked grout lines, hollow-sounding tiles and tiles that pop loose a year later almost always trace back to a subfloor that flexes or an old finish that was never removed. I spend more time on this step than on setting tile, and I would tell you to do the same.
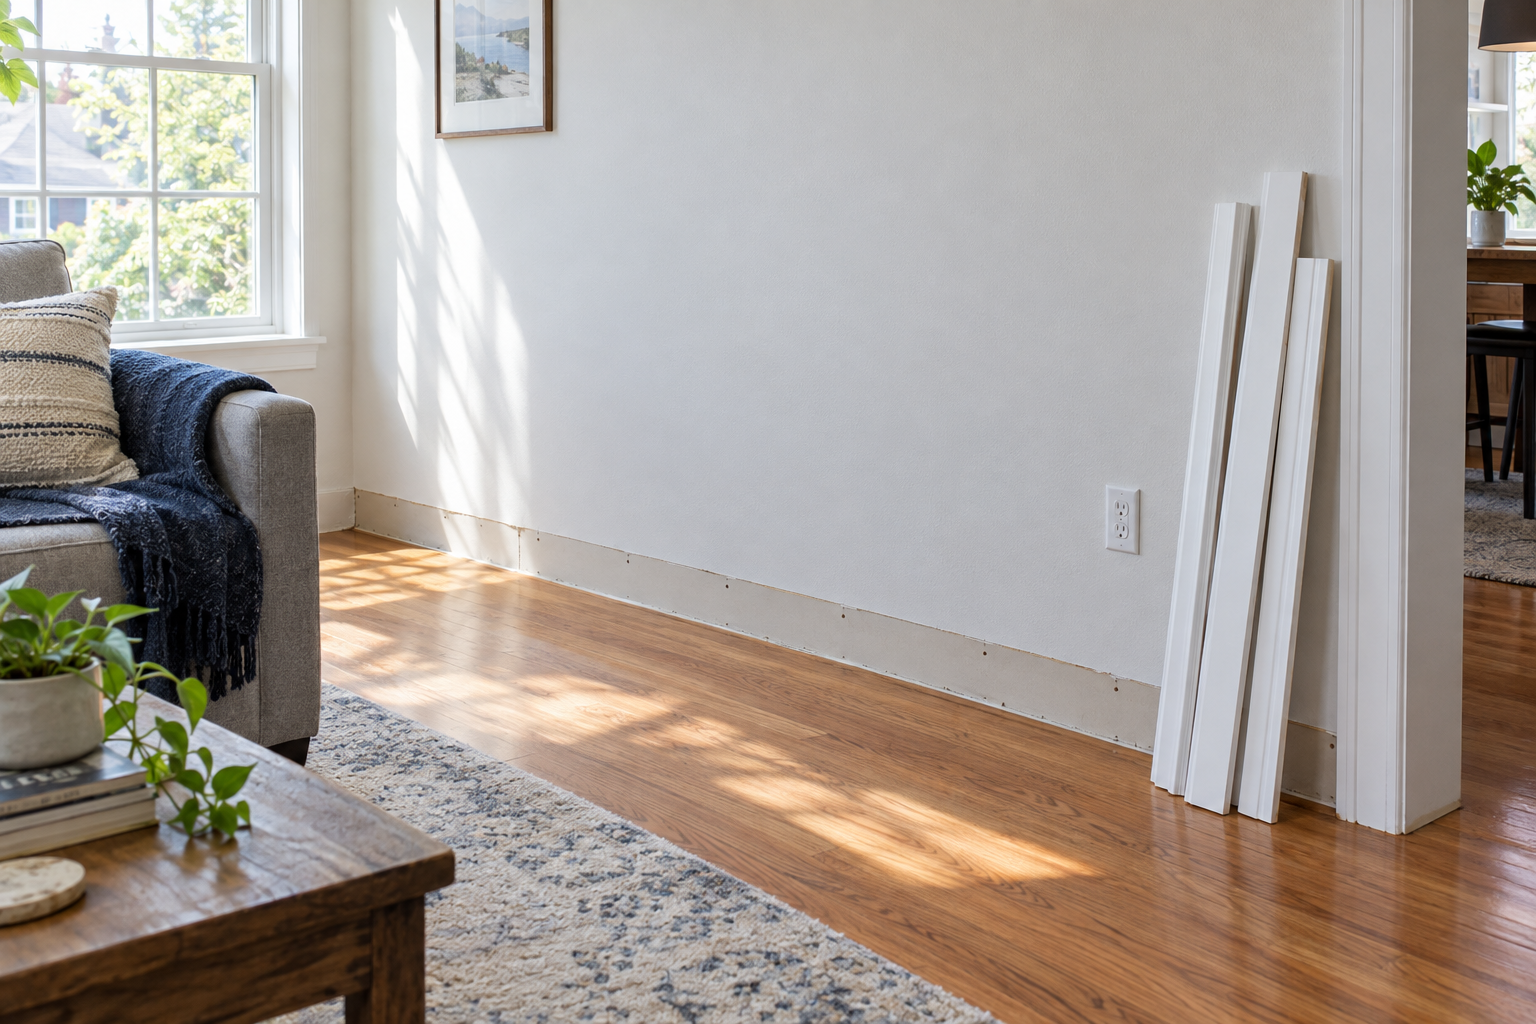
Pull the baseboards first so the tile can run under them and the new quarter-round hides the cut edge. Score the caulk line with a utility knife and work a flat pry bar behind a wide putty knife so you remove the molding without damage to the drywall. Number the backs of the pieces with a marker as they come off.
Remove the old floor completely. Sheet vinyl peels up in strips, laminate and engineered wood come apart at the clicks, and old ceramic comes up with a 3 inch floor scraper or an SDS rotary hammer with a chisel bit. If you find a 1 to 2 inch thick mortar bed under old tile in a pre-1970s bathroom, that is a jack hammer job and a dumpster job, not a pry bar job.
Wood subfloors and tiling floorboards
Plywood or OSB needs to be at least 5/8 inch thick (sold as 19/32) over joists spaced 16 inches on center, and I prefer 3/4 inch. Walk the room and feel for bounce. If a 2 foot level set across the joists rocks or a framing hammer dropped from waist height makes the far corner shudder, the floor deflects too much. The industry rule is deflection no worse than 1/360 of the span for ceramic and porcelain, and 1/720 for natural stone. For a 12 foot joist span that means the floor cannot sag more than 0.4 inch under load.
Tiling floorboards is where most first-timers go wrong. Solid plank floorboards, 1×6 pine with gaps between boards, move independently and will crack any tile set directly on them. The fix is to screw the boards down tight to the joists with 2-1/2 inch deck screws, then lay 1/2 inch exterior-grade plywood over them with the seams staggered and screwed every 6 inches along the edges and 8 inches in the field. Only then does backer board or membrane go on top. The floor comes up about 3/4 inch overall, so plan the transition at doorways now.
Fasten any loose plywood you keep with 1-5/8 inch screws into the joists, not nails. Nails are what let a subfloor squeak and creep. Set a straightedge across the floor in several directions and mark high spots and dips with a crayon. The tolerance is 1/4 inch in 10 feet for tile under 15 inches on a side, and 1/8 inch in 10 feet for large-format tile. Low spots get filled with patching compound; high spots get sanded down with a belt sander and 40 grit paper.
Concrete slabs
Concrete only needs to be clean, flat and free of anything that stops mortar bonding. Scrape paint, carpet glue and cutback adhesive with a floor scraper, then test for moisture by taping a 2 foot square of plastic sheeting to the slab for 24 hours. Condensation under the plastic means you need a moisture barrier membrane before tile. Cracks wider than 1/8 inch call for a crack isolation membrane across them, otherwise the crack telegraphs through the tile within a year or two.
Dips deeper than 1/4 inch over 10 feet get self-leveling underlayment. A 50 lb bag covers roughly 25 square feet at 1/4 inch thick and sets hard enough to tile in a few hours, but prime the slab first with the primer the same manufacturer sells or it will not bond.
Step 2: Lay backer board or an uncoupling membrane
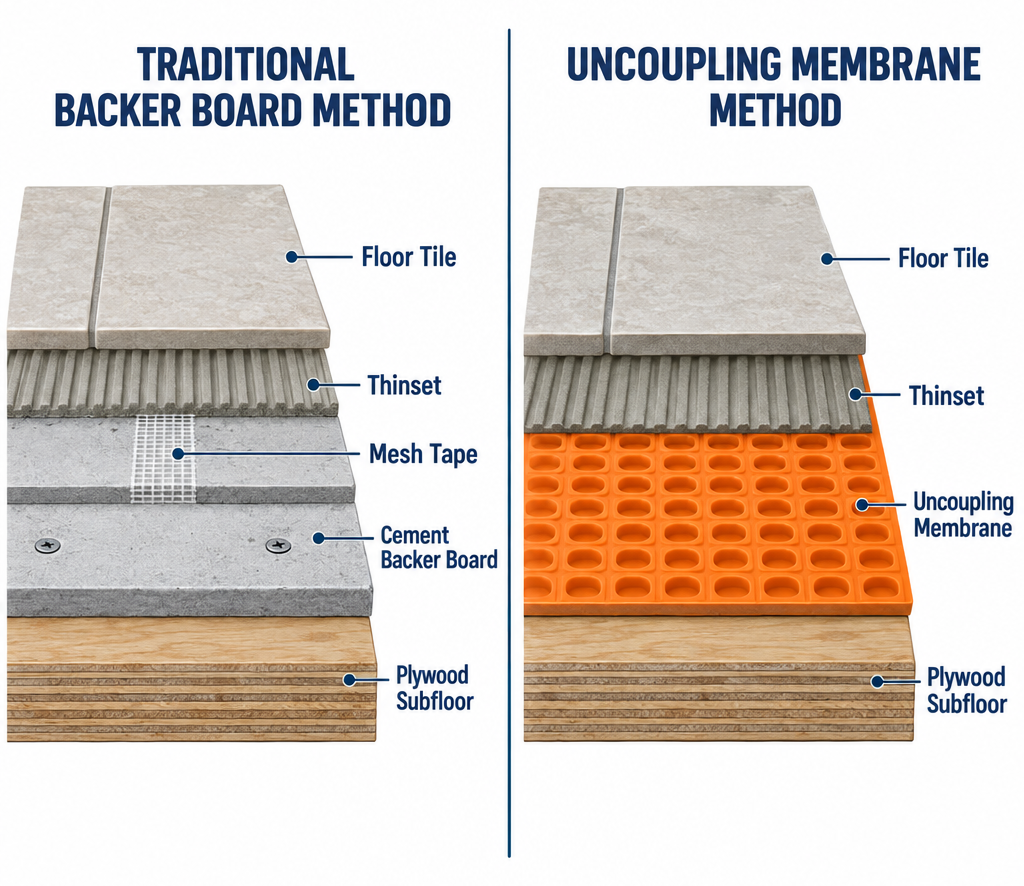
Tile never goes straight onto plywood. The wood swells and shrinks with humidity, and the tile does not, so the bond shears. You need a layer between them, and you have two good choices.
Cement backer board (1/4 inch for floors, sheets of 3×5 feet at roughly $12-15 each) is the traditional route. Spread unmodified thinset on the plywood with a 1/4 x 1/4 inch square-notch trowel, lay the board into it, and drive backer board screws every 8 inches in the field and along the edges, keeping fasteners 2 inches back from the corners. Leave 1/8 inch gaps between sheets and 1/4 inch at the walls, stagger the joints so four corners never meet, and offset the board seams from the plywood seams underneath. Tape the joints with alkali-resistant mesh tape and skim them with thinset, then let it set overnight.
An uncoupling membrane like Schluter Ditra runs about $2 a square foot, which is more than cement board, but it is 1/8 inch thin, it cuts with a utility knife, and it goes down in an afternoon with no screws and no dust. Spread thinset on the plywood with a 1/4 x 3/16 inch V-notch trowel, roll the membrane fleece-side down into the mortar, and press it with a wood float or a grout float until the mortar fully wets the fleece. Peel back a corner to check. Butt the sheets edge to edge and the floor is ready for tile as soon as you can walk on it without shifting the membrane.
One rule that trips people up with Ditra: the manufacturer wants unmodified thinset to set porcelain on the membrane, because modified mortar cannot dry properly between two non-absorbent layers. Over cement board I use modified thinset everywhere. Read the bag.
Pro tip
Before the backer board goes down, cut a strip of the actual tile and set it in a doorway with the backer board and a 1/4 inch of mortar stacked under it. That shows you the finished height so you can order the right transition strip now, instead of discovering the tile sits 1/2 inch above the hallway carpet after grout day.
Step 3: Snap square reference lines with the 3-4-5 rule
Walls are never square, so I never measure layout off a wall. Instead I create two perfectly square lines in the middle of the room and lay the tile to those.
Find the center of the longest wall and the center of the opposite wall and snap a chalk line between them. Now mark a point on that line about 3 feet from one end. Measure 3 feet along the line from that point and mark it. Hold the tape at the first point and swing a 4 foot arc roughly perpendicular to the line. Then hold the tape at the 3 foot mark and swing a 5 foot arc. Where the two arcs cross is a point exactly 90 degrees from your first line. Snap a second chalk line through the first point and that intersection. That is the 3-4-5 rule, and in a big room I use 6-8-10 for less error.
Check it with a framing square at the intersection. If a tile set in each quadrant of the crossing lines up with both lines, you are square. Spray the chalk with hairspray or cheap clear lacquer so the lines survive when you start spreading mortar.
Dry lay a row each way and move the lines
Set a row of tiles with spacers along each chalk line, from the intersection out to the walls, without any mortar. You are looking at two things: what size cut ends up at each wall, and where the pattern lands at the doorway and in front of the tub or vanity.
Any cut narrower than half a tile at a visible wall looks wrong, and slivers under 2 inches are almost impossible to cut cleanly. If the dry lay leaves a 2 inch strip against the far wall, shift the whole layout by half a tile so you get a 5 inch cut on one side and a 7 inch cut on the other. Move the chalk line, not the tile.
When tiling floor tiles in a bathroom, I give priority to the doorway and the view from the hallway. A full tile centered in the door opening, or a grout line dead center, reads as a deliberate design. Full tiles in front of the tub matter more than what happens behind the toilet.
For 12×24 porcelain planks, run the long dimension down the long axis of the room and offset each row by one-third, not one-half. Large tiles have a slight bow in the middle, and a 50 percent offset puts the high center of one tile next to the low end of the next, which creates lippage you can feel with bare feet. The Tile Council of North America says the same thing for any tile longer than 15 inches.
Step 4: Mix thinset to the right consistency
Thinset mortar has a pot life of roughly 2 to 3 hours after mixing, and it hits the trash after that, so I mix half a bag at a time until I know my pace. Pour the measured water into a clean 5 gallon bucket first, then add powder while running a mixing paddle on a corded 1/2 inch drill at low speed. The bag gives a water ratio, usually around 5 to 6 quarts per 50 lb, but the test is feel. Properly mixed thinset holds a trowel ridge without slumping, and a glob on the margin trowel held sideways stays put for a count of three.
Let it slake for 5 to 10 minutes, then remix without adding water. Skipping the slake is why beginner mortar goes stiff after 40 minutes. Never add water to mortar that has started to stiffen; that breaks the polymer bond and you end up with tiles that sound hollow when you tap them next year.
Match the trowel to the tile. The ridges collapse to about half their height when the tile is pressed in, so a 1/4 x 3/8 inch notch gives roughly 3/16 inch of mortar under a 12 inch tile, which is about right. Large-format porcelain, meaning anything 15 inches or more on one side, needs a 1/2 x 1/2 inch notch plus a thin skim of mortar on the back of each tile. Expect a 50 lb bag to cover about 80 square feet with the 1/4 x 3/8 trowel, and closer to 45 square feet with the 1/2 inch trowel and back-buttering.
Step 5: Set the full tiles first
Start at the intersection of the chalk lines and work one quadrant at a time, filling the field tiles and leaving every cut piece for later. Spread mortar for about 8 square feet, which is roughly six 12 inch tiles, so the mortar never skins over before you cover it.
Scoop mortar onto the floor with the flat side of the trowel and key it into the surface with firm pressure to get a bond, then flip to the notched side held at about 45 degrees and comb it in straight parallel lines. Not swirls. Straight ridges let air escape sideways when the tile goes in; swirls trap air pockets that become voids under the tile. Comb the ridges in the direction of the short side of the tile.
Set each tile about 1/4 inch off its final position and slide it into place perpendicular to the ridges while pressing down. That motion collapses the ridges into each other. Give it a few taps with a rubber mallet or the heel of your hand and drop the spacers in. I use two spacers per side, standing up near the corners, not flat in the intersection where they get buried in mortar.
Check your mortar coverage on the first tile and every few tiles after. Lift one straight up and look at the back. You want at least 80 percent coverage with no bare corners in a dry room, and 95 percent in a bathroom or anywhere the floor gets wet. Bare spots mean the mortar is too stiff, the trowel is too small, or the mortar skinned over before you set the tile. Touch the combed mortar with a finger: if it does not transfer wet mortar to your skin, scrape it up and recomb fresh.
Pro tip
On 12 inch and larger tile I use leveling clips and wedges on every joint. They cost about $25 for a bag of 200 clips and a set of 100 reusable wedges, and they do more for a flat floor than any amount of checking with a straightedge. Snap the clip bases off with a sideways kick after the mortar cures the next morning.
Lay a 4 foot level across every few rows in both directions and across the diagonal. Lippage, the height difference between adjacent tiles, should stay under 1/32 inch, which is about the thickness of a credit card. A low tile comes up and gets more mortar; a high tile gets tapped down or, if it has already set up, pulled and reset. Twenty minutes into the cure is too late to adjust anything, so check each small section before you move on.
Keep the joints clean as you go. Mortar that squeezes up between tiles has to come out before it cures or there will be no room for grout. A spacer, a pencil, or a damp sponge all work, and ten seconds now saves an hour with a grout saw later.
Plan your exit. The last full tiles should be the ones nearest the door, so you can back out of the room without stepping on fresh work. Then leave it alone for the night.
Step 6: Cut and set the edge tiles
The next day the field tiles will hold your weight, so you can kneel on them to measure the cuts. Measure each cut individually, because the walls wander. I set a full tile directly on top of the last set tile, then place a second full tile against the wall overlapping it, leaving a spacer’s width at the wall. The line where the top tile ends on the lower tile is your cut mark, and it is already allowing for the grout joint.
Ceramic wall and floor tile up to about 12 inches cuts on a snap cutter in a few seconds. Score once, firmly, from one edge to the other in a single pass, then press the breaker foot. Porcelain is harder and denser, and most snap cutters either skate on the glaze or break it unevenly, so porcelain and natural stone go on the wet saw.
Set the wet saw on a plywood scrap outside or in the garage, fill the tray so the pump keeps a steady stream on the blade, and feed the tile slowly without forcing it. A 10 inch wet saw rents for about $50 a day and will handle 24 inch planks on the diagonal. L-shaped cuts around a doorjamb get two straight passes with the saw and then a snap to finish, or a plunge with an angle grinder.
Curved cuts around a toilet flange come out with a 4-1/2 inch angle grinder and a continuous-rim diamond blade. Mark the arc with a paper template, cut a series of straight relief cuts up to the line, then nibble the fingers off with tile nippers. The flange cut is hidden under the toilet, so it only needs to stay within about 1/4 inch of the pipe. The finished tile should sit level with or just below the top of the flange; if the old flange is now buried, add a flange extender ring rather than stacking wax rings.
Set the cuts the same as the field, with the cut edge toward the wall. Back-butter small pieces instead of trying to comb mortar into a 3 inch strip along the wall. Leave a 1/4 inch gap at every wall, tub, cabinet and doorway. That gap gets flexible caulk, not grout, and it lets the floor move without cracking.
Step 7: Grout the joints
Give the mortar 24 hours before you grout. Some rapid-setting thinsets allow grouting in 4 to 6 hours, but the bag will say so; regular mortar that gets grouted too early traps moisture and can show as blotchy, uneven grout color weeks later.
Pull all the spacers and vacuum the joints. Scrape out any mortar that sits higher than half the tile thickness with a grout saw or a utility knife. Check for hollow tiles now by tapping across the floor with a screwdriver handle; a hollow sound means a void under the tile, and this is your last cheap chance to lift and reset one.
Pick the grout by joint width. Sanded grout for 1/8 inch joints and wider, unsanded for joints narrower than 1/8 inch, because the sand will not pack into a tight joint and scratches polished tile. A 25 lb bag of sanded grout runs $12-25 and covers somewhere around 105-115 square feet of 12 inch tile with 1/8 inch joints, though coverage varies a lot by brand and tile thickness, so check the chart on the bag. Mix it to the texture of smooth peanut butter, let it slake 10 minutes, remix, and only mix as much as you can place in 30 to 40 minutes.
Dump a pile of grout on the floor and work it across the tile with a rubber float held at about 45 degrees, pushing diagonally across the joints so the edge of the float does not dip into them and pull grout back out. Pack every joint from two directions. Then hold the float at nearly 90 degrees and scrape the excess off the tile surface diagonally.
Work in sections of about 10 square feet. After 15 to 30 minutes, when the grout in the joints is firm to a fingertip but the film on the tile still smears, start the first wipe with a sponge wrung almost dry. Wipe in light circles to shape the joints, rinse the sponge in clean water every two or three passes, and change the water when it looks like milk. Too much water in the sponge pulls the pigment out of the joints and leaves them pale and weak. The last pass is a single straight diagonal wipe with a clean, damp sponge.
A light haze will show once the floor dries. Buff it off with a dry microfiber cloth after 2 to 3 hours. If it is still there the next day, a grout haze remover (or a 1-to-1 vinegar and water wipe on ceramic and porcelain, never on stone) takes care of it.
Pro tip
For a bathroom floor that will see a lot of water and cleaning, a pre-mixed urethane or a two-part epoxy grout costs two to three times as much as cement grout but never needs sealing and never stains. The trade-off is a shorter working time and a more careful cleanup, so practice on a hidden closet floor first.
Step 8: Caulk, seal and finish the edges
Stay off the floor for 24 hours, keep furniture and the toilet off it for 72. Then run 100 percent silicone caulk along every perimeter joint, the tub and shower base, and against cabinets. Grout companies sell caulk tinted to match their grout colors, which makes the transition invisible. Tool the bead with a wet finger and wipe the excess before it skins.
Cement-based grout needs a penetrating sealer about 72 hours after grouting, once it has cured enough to accept it. Brush or roll it on, let it dwell per the label, then wipe the excess off the tile within 10 minutes so it does not leave a film. One quart covers a typical bathroom twice over.
Reinstall the baseboards at their original height and add shoe molding or quarter-round to cover the 1/4 inch caulk gap. If the room is getting interior painting as part of the remodel, paint the walls and trim now, before the toilet and vanity go back, so you can cut in without working around fixtures.
Install the transition strip at the doorway. A Schluter-style metal profile sets in the mortar under the edge tile and works best when it goes in at Step 6, but a surface-mounted reducer screwed to the subfloor works after the fact. Set the toilet with a new wax ring sized for the extended flange, and the room is done.
Tile and wall: which goes first
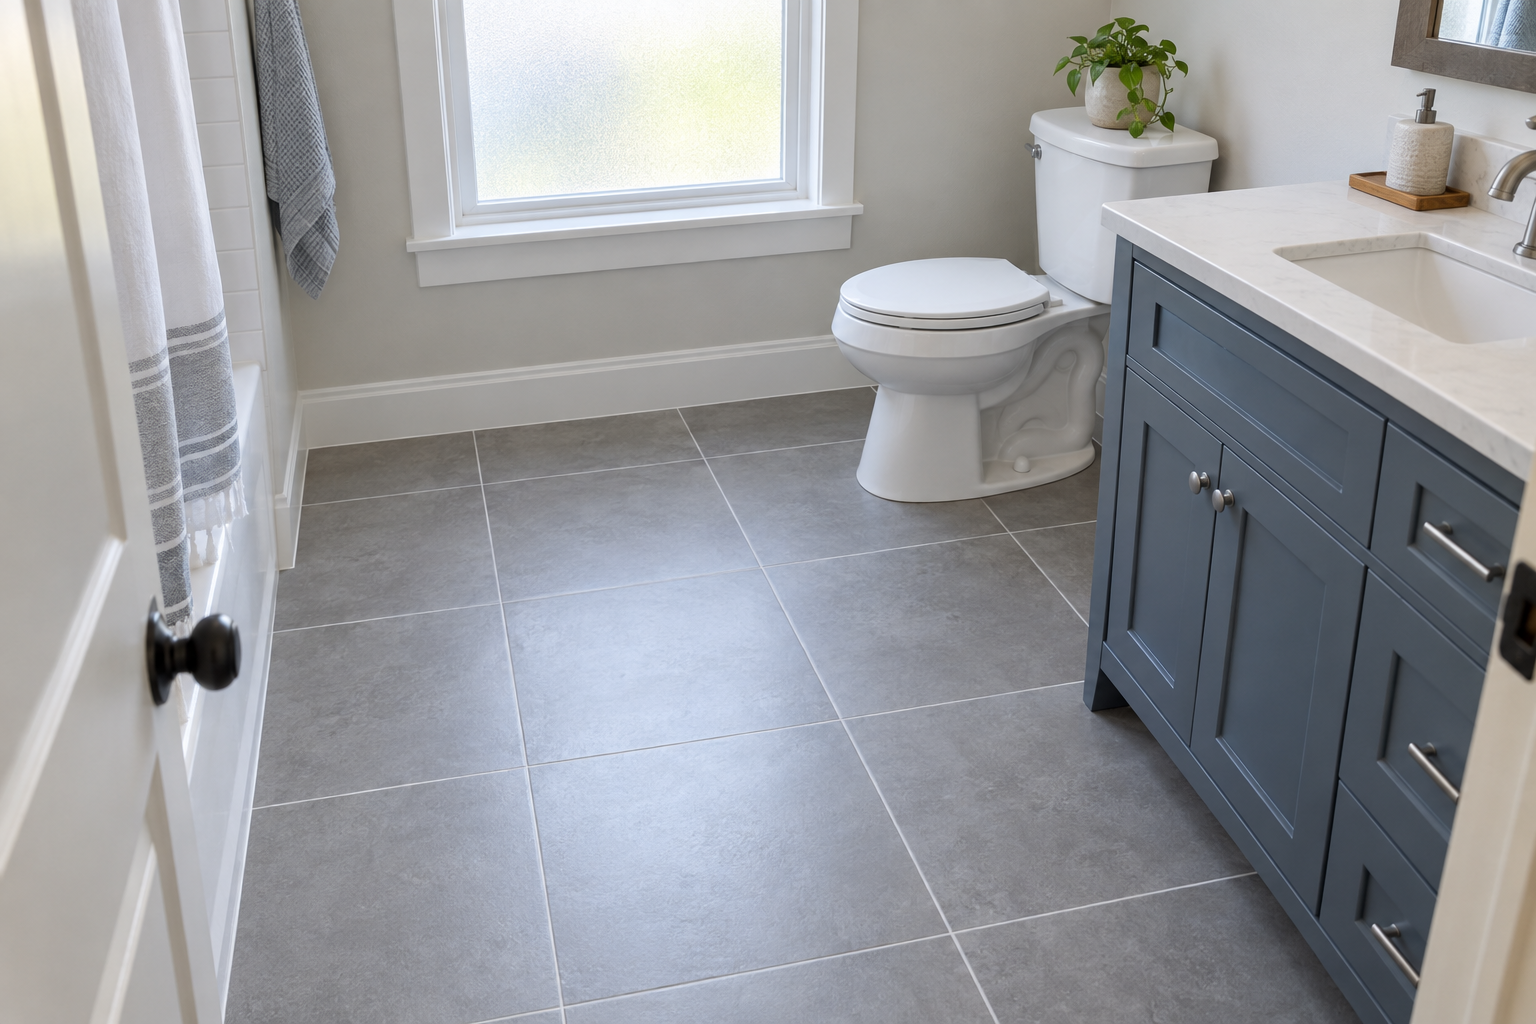
In a bathroom with a tiled floor and a tiled tub surround, I tile the walls first but leave off the bottom row, then tile the floor, then set the last row of wall tile so it sits 1/8 inch above the finished floor. That keeps the wall tile from telegraphing any unevenness in the floor and keeps grout, dropped tools and wet saw grit off a finished floor. The joint where they meet gets silicone caulk, not grout, because the two planes move independently.
In a room where the wall tile is only a wainscot or a backsplash, or where the floor is already in, the order does not matter much. Tile the floor first and run the wall tile down to it with the same caulked gap. The one thing I never do is grout the floor-to-wall corner. A grouted inside corner cracks within the first year every time.
Wall tile uses the same thinset and the same 3-4-5 squaring, but the layout starts from a level line one tile height above the tub or floor, not from the floor itself, because tubs are rarely level. Spacers do double duty holding tile up against gravity, and I use a ledger board screwed to the studs to carry the second row while the first row cures. Wall tile over drywall in a dry area is fine; in a shower it needs cement board and a waterproofing membrane behind it.
Costs for a 40 square foot bathroom
| Item | Typical cost |
|---|---|
| Porcelain tile, 12×24, mid-grade, 46 sq ft including waste | $140-320 |
| Modified thinset, one 50 lb bag | $20-35 |
| Cement board, three 3×5 sheets plus screws and tape | $45-60 |
| Uncoupling membrane instead of cement board, 54 sq ft roll | $100-130 |
| Sanded grout, 25 lb bag, plus matching caulk | $25-45 |
| Grout sealer, 1 quart | $20-30 |
| Spacers, leveling clips, sponges, buckets | $40-60 |
| Wet saw rental, 1 day | $40-70 |
| Transition strip and flange extender | $20-40 |
| DIY total | $350-700 |
| Professional installation, labor only | $400-1,000 |
Add 2 to 4 days of your time, most of which is cure time.
Troubleshooting
| Symptom | Likely cause | Fix |
|---|---|---|
| Tile sounds hollow when tapped | Voids under tile from skinned-over mortar or swirled trowel ridges | Lift and reset before grouting if possible; after grouting, leave it unless it cracks or lifts |
| Edges of adjacent tiles sit at different heights | Uneven mortar, bowed large-format tile, no leveling clips | Pull and reset high or low tiles while mortar is wet; use a 1/3 offset and leveling clips on tile over 12 inches |
| Grout cracks along the joints within weeks | Subfloor flex, or no movement joint at walls | Check deflection; if floor bounces, the tile needs to come up and the subfloor stiffened. If only perimeter grout cracked, cut it out and replace with silicone |
| Grout lines look pale or chalky | Too much water in the sponge, or grouted before mortar cured | Stain or re-dye grout with a grout colorant; next time wring the sponge nearly dry |
| Grout crumbles out of joints | Grout mixed too wet, or too dry, or washed out during cleanup | Rake out crumbling sections with a grout saw and regrout |
| Cloudy film on the tile surface | Grout haze buffed too late | Grout haze remover for cement grout; epoxy haze needs the manufacturer’s remover within 24 hours |
| Last row against the wall is a sliver | Layout started from a wall instead of centered lines | Nothing to do after the fact; next time dry lay and shift the chalk line by half a tile |
| Cut tile chips along the edge | Dull or wrong blade, feeding the saw too fast, snapping porcelain on a cutter | Fresh continuous-rim diamond blade, slow feed, cut porcelain on a wet saw with the glazed side up |
| Tile cracks in a line across the floor | Crack in the slab or a plywood seam telegraphing through, no isolation membrane | Replace the cracked tiles and bed the new ones on a crack isolation membrane strip |
| Lippage you feel underfoot but cannot see | Subfloor not flat within 1/8 inch in 10 feet | Floor patch or self-leveler before tiling; after tiling, only a full tear-out fixes it |
When to call a pro
If the floor bounces when you walk it, the joists sag, or you find water-rotted subfloor around a toilet or tub, you need a carpenter to fix the structure before any tile goes down. Natural stone, mosaics in a shower pan, heated floor mats wired to a thermostat, or any room over 150 square feet of large-format tile are jobs where a licensed tile setter earns the money. Electrical floor heat needs an electrician for the circuit and, in most jurisdictions, a permit.
FAQ
What should you put down before tiling a floor?
Over a wood subfloor, put down 1/4 inch cement backer board set in thinset and screwed every 8 inches, or an uncoupling membrane like Ditra bonded with thinset. Either one goes over at least 5/8 inch plywood, and solid floorboards need an extra layer of 1/2 inch plywood screwed down first. Over concrete, put down nothing except a crack isolation membrane across any cracks and a moisture barrier if the plastic-sheet test shows dampness.
What is the 3/4/5 rule for tiling?
The 3-4-5 rule is a way to lay out a perfect right angle using a tape measure. Pick a reference point on your first chalk line and measure 3 feet along that line from it. Then measure 4 feet from the same reference point along your second line, and check that the diagonal between the two endpoints is exactly 5 feet. A triangle with sides of 3, 4 and 5 always has a 90 degree corner, so when the diagonal reads 5 feet the second line is square to the first. Use 6-8-10 or 9-12-15 in larger rooms for better accuracy.
When tiling a floor, where do I start?
Start in the center of the room, at the intersection of two squared chalk lines, and work outward toward the walls one quadrant at a time. Never start along a wall, because walls are rarely square or straight and the error grows with every row. Before mixing mortar, dry lay a row each direction and shift the lines so the cuts at the walls are at least half a tile wide and a full tile or a grout line sits centered in the doorway.
When tiling, do you tile the floor or the walls first?
In a tub or shower area, tile the walls first but leave off the bottom row, then tile the floor, then finish the bottom row of wall tile so it sits just above the floor. That protects the floor from falling tools and grout mess and hides any slight unevenness. For a backsplash or a wainscot in a dry room, tile the floor first and run the walls down to it. Either way, the joint between floor and wall gets silicone caulk, never grout.
How long before I can walk on a newly tiled floor?
Walk gently on it to grout after 24 hours. Stay off it for another 24 hours after grouting, and keep heavy furniture, appliances and the toilet off for 72 hours total so the mortar and grout reach most of their strength. Rapid-set products shorten this, but the bag will say so.
Can I tile over existing ceramic tile?
You can if the old tile is solidly bonded with no hollow spots, the floor is flat, and the added 3/8 to 1/2 inch of height works at the doorways and under the toilet flange. Scuff the glaze with 60 grit, wash it, prime with a bonding primer made for tile-over-tile, and set the new floor in a modified thinset rated for that use. I still prefer to remove old tile, because any failure in the old floor becomes a failure in the new one.