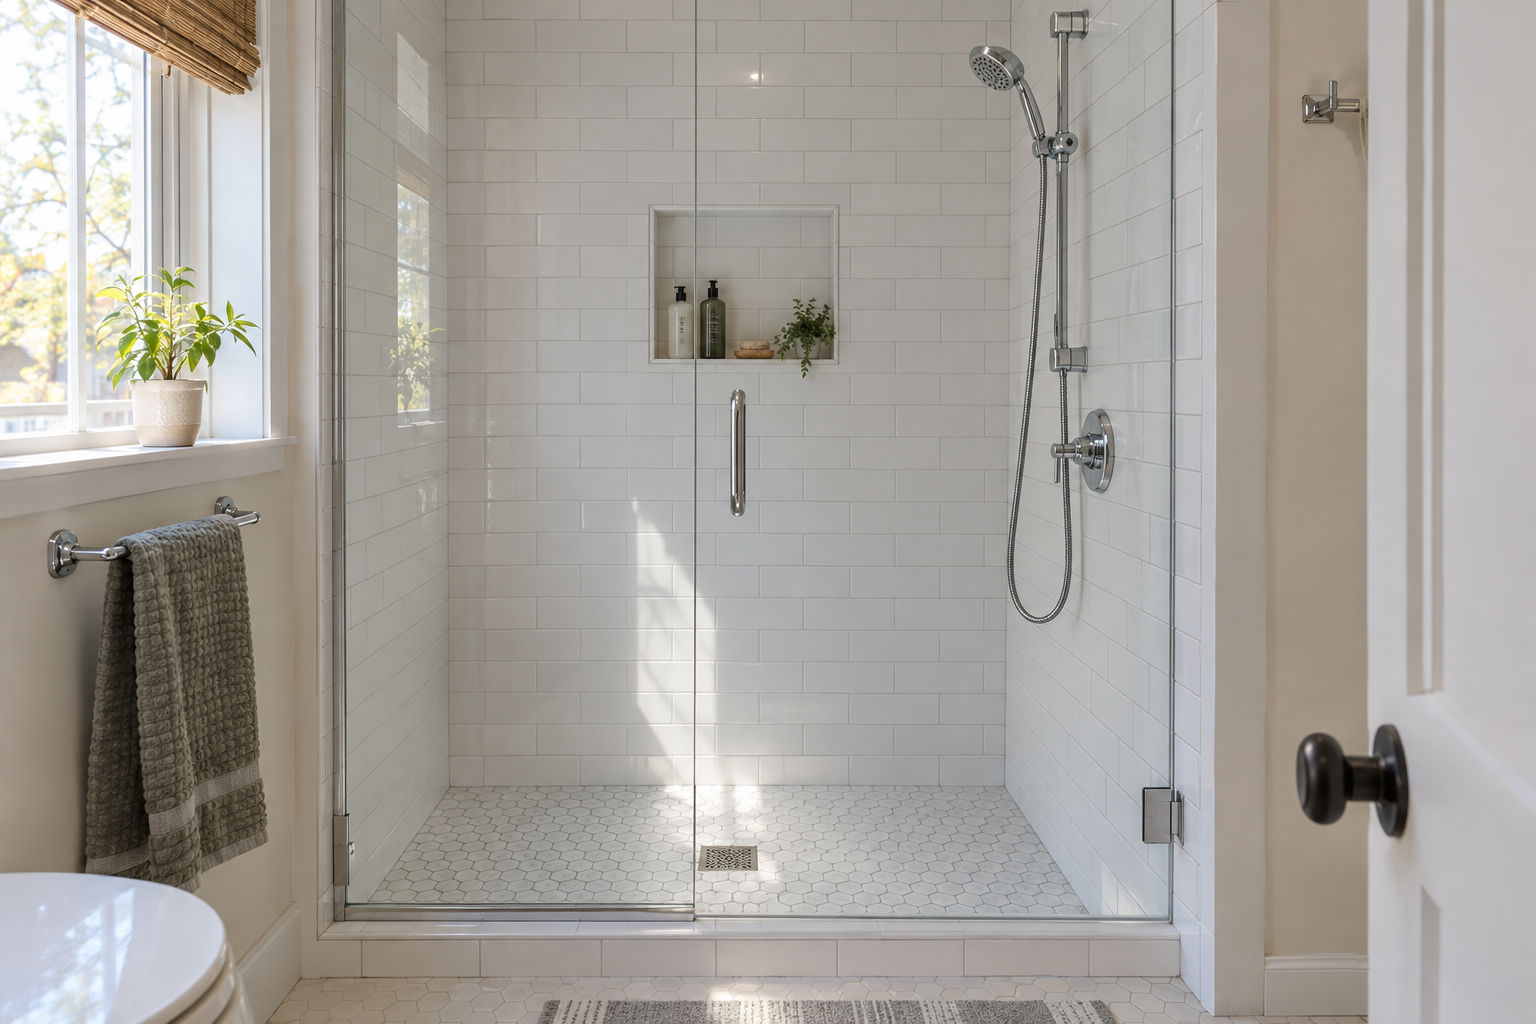
For most bathrooms, the right choice is an alcove shower with a pressure-balance or thermostatic valve and a handheld on a slide bar. It fits the standard 60-inch tub space, costs the least to install, and suits most users. Choose a curbless walk-in if you are planning for aging or mobility needs, a corner unit if floor space is tight, and a steam shower or tiled wet room only if your budget, framing and electrical service can support them.
Quick steps: choosing a shower
- Measure the footprint, ceiling height and the narrowest door on the path in.
- Test water pressure and write down your water heater’s size and type.
- Pick the enclosure type that fits the space and the people using it.
- Choose a pressure-balance, thermostatic or digital valve.
- Choose the head, handheld and any body sprays, staying within your flow budget.
- Pick base, wall and door materials that match your cleaning tolerance.
- Price it two ways, as a DIY kit and as a pro install, and check permit rules.
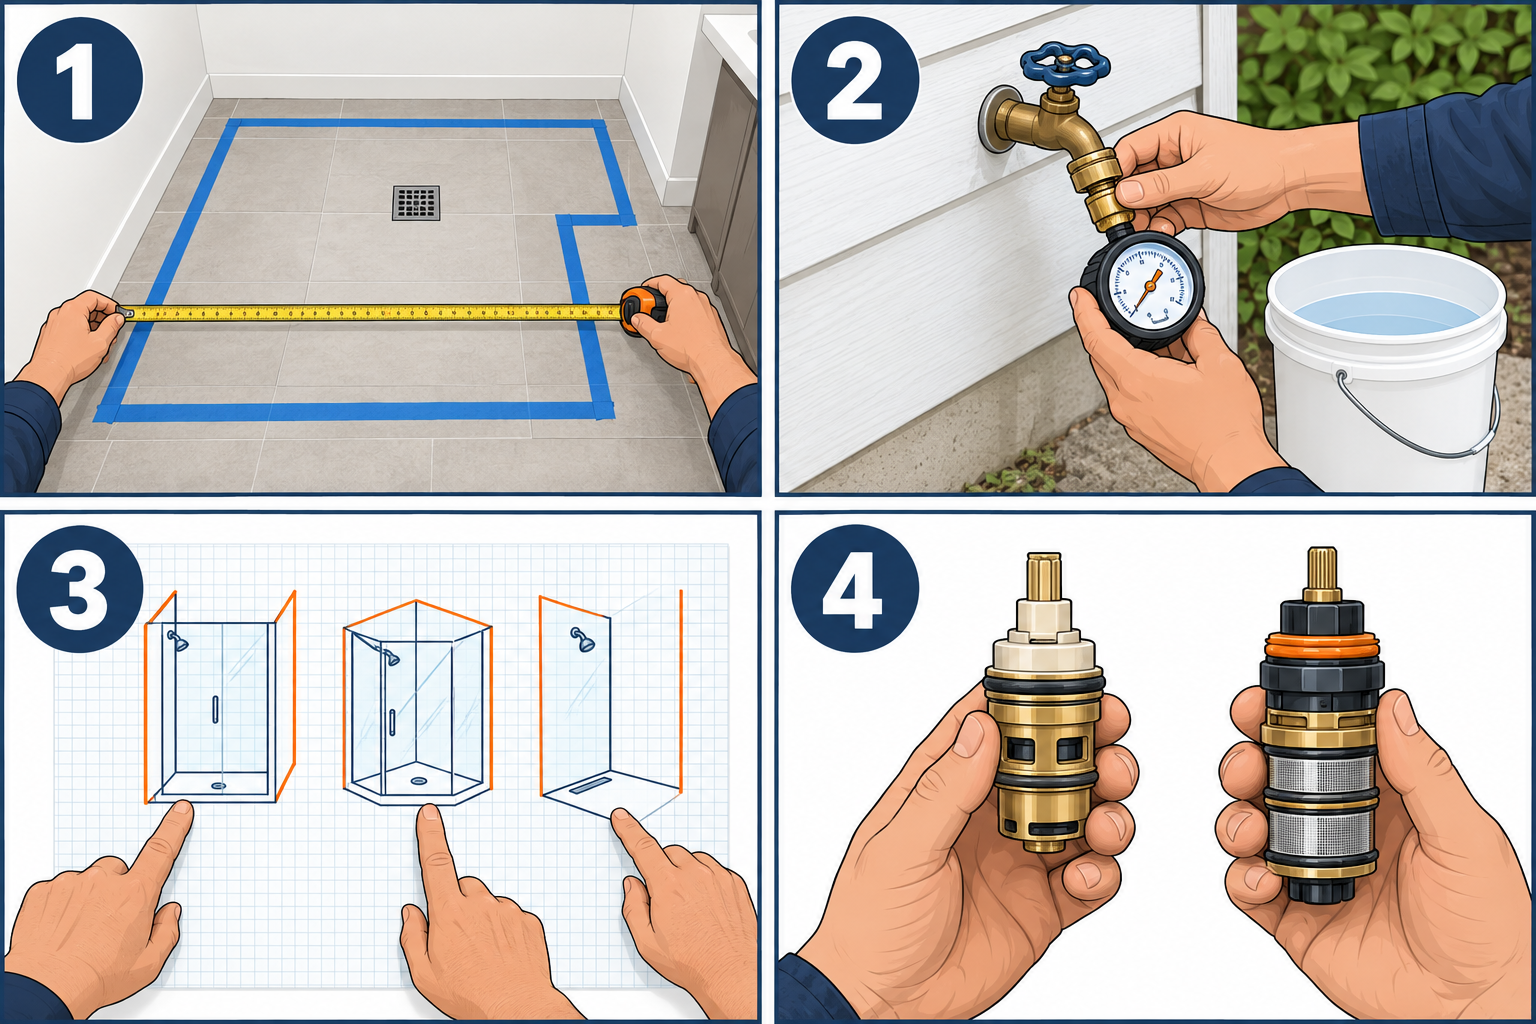
Tools and materials
- 25-ft tape measure
- 4-ft level
- Water pressure gauge with 3/4-inch hose thread ($10-15)
- 1-gallon bucket and a phone stopwatch for a flow test
- Stud finder
- Flashlight for checking the access panel and the water heater label
- Painter’s tape for marking the shower footprint on the floor
- Graph paper or a free room-planning app
Calculators for this job
Safety first
Planning is safe, but demolition is not. Shut off water at the main before you open a wall. Wear a P100 respirator and eye protection when you remove tile and mortar. In homes built before 1978, test old paint for lead, and test old tile adhesive or flooring for asbestos before you disturb them. Steam generators and digital valves need dedicated circuits installed by a licensed electrician.
The 7 types of showers compared
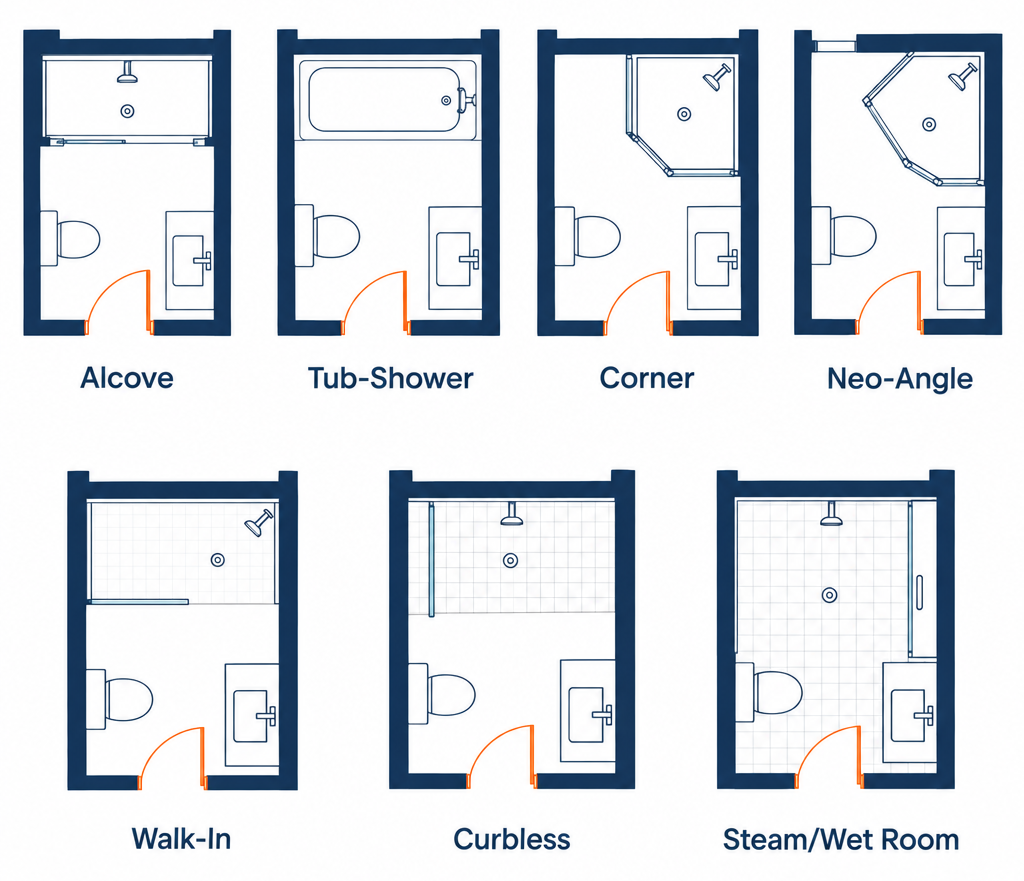
The table below sets out the seven main types side by side. Installed costs are typical US ranges for a mid-grade job, including labor, and they rise in high-cost metro areas.
| Type | Best for | Typical footprint | Installed cost | DIY-friendly? | Main drawback |
|---|---|---|---|---|---|
| Alcove (prefab or tiled) | Most bathrooms, tub replacements | 32×32 to 60×36 in | $1,500-$6,000 | Yes (prefab kit) | Three walls limit layout |
| Tub-shower combo | Homes with kids, resale value | 60×30 or 60×32 in | $1,200-$5,000 | Yes (kit) | High step-over, cramped standing room |
| Corner / neo-angle | Small bathrooms | 36×36 to 42×42 in | $1,500-$6,000 | Moderate | Tight inside, angled glass costs more |
| Walk-in (curbed, glass panel) | Primary baths, open feel | 48×36 to 72×42 in | $4,000-$15,000 | Hard | Needs room for a long panel and splash zone |
| Curbless / barrier-free | Aging in place, wheelchairs | 60×30 min (roll-in) | $8,000-$20,000 | Pro | Floor must be recessed or built up |
| Steam shower | Spa use, health routines | Any fully sealed enclosure | $6,000-$20,000+ | Pro | Needs 240V circuit, sealed ceiling, vapor-proofing |
| Wet room | Very small or very large luxury baths | Whole bathroom | $10,000-$30,000+ | Pro | Entire floor must be waterproofed and sloped |
Pro tip
Use the existing tub footprint and buy a 60×32 alcove base unless you have a specific reason not to. You keep the drain near its current location, reuse the framing, and avoid most of the cost that makes walk-in conversions expensive.
Type 1: Alcove shower
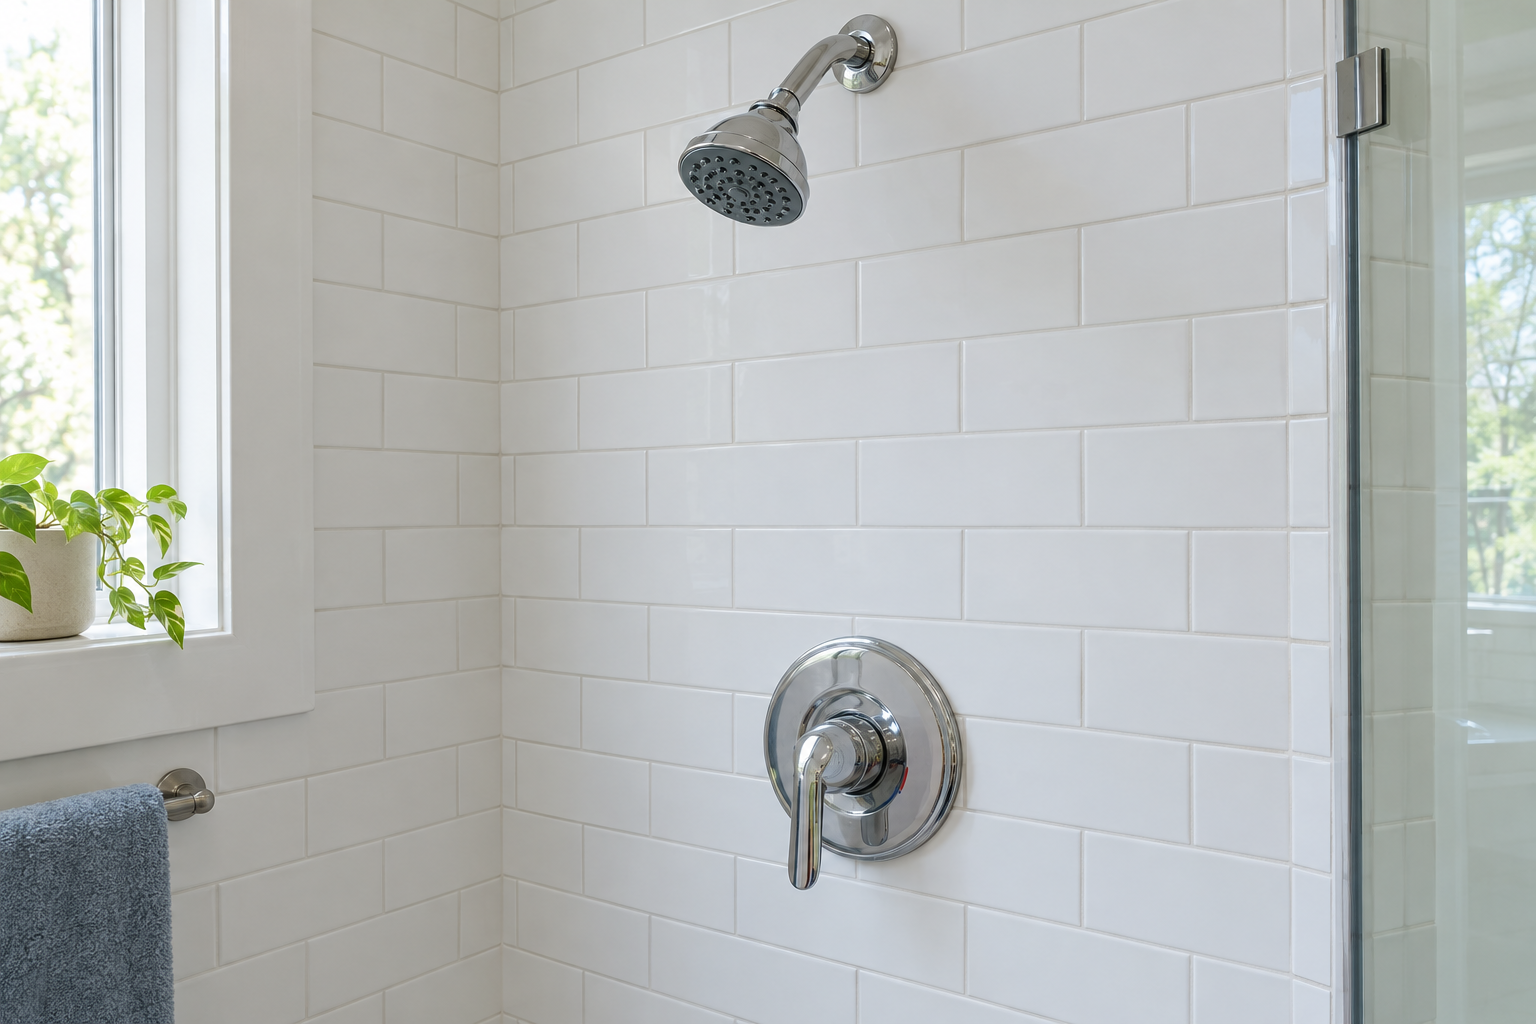
An alcove shower sits between three walls with a door or curtain on the open side. It is the most common type in American homes because it fits the same 60-inch recess as a standard tub. You can build one with a prefab acrylic or fiberglass kit, a solid-surface wall system (Swan’s Swanstone and similar products are made for this), or tile over a waterproof membrane.
Common base sizes are 32×32, 36×36, 48×34, 48×36, 60×30, 60×32 and 60×36 inches. The International Residential Code (IRC) sets the minimum interior at 900 square inches, large enough to fit a 30-inch circle. A 32×32 base clears that minimum, but it feels cramped for anyone over about 5’10”.
Pros
– Lowest cost per square foot of any stand-up shower
– Wide range of off-the-shelf kits, bases and doors
– Simple to waterproof, with only one open side to seal
– The best candidate for a DIY installation
Cons
– Three solid walls can make a small bathroom feel boxed in
– Prefab walls look builder-grade next to tile
– A one-piece unit often will not fit through an existing doorway
Type 2: Tub-shower combo
A tub with a shower head above it is still the most practical choice in a family bathroom. Appraisers and agents generally advise keeping at least one tub in the house for buyers with young children. Standard alcove tubs measure 60 inches long, 30 or 32 inches wide, and 14 to 16 inches tall at the rim.
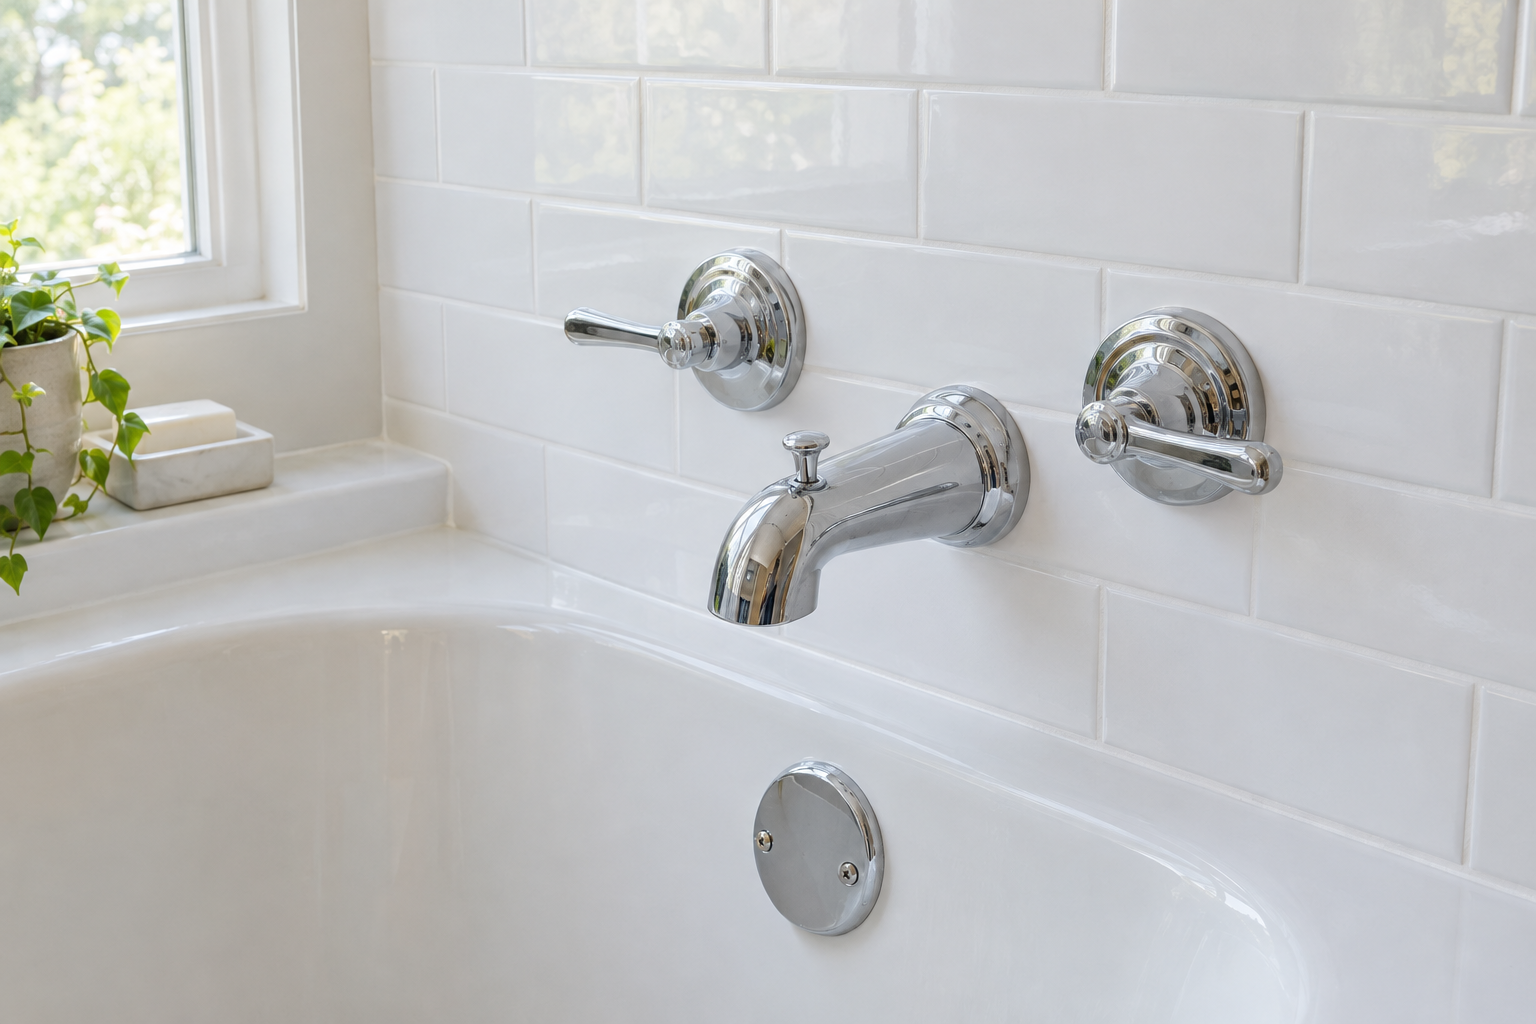
If you keep the combo and only want better water control, replacing the trim and valve guts is a far smaller job than a conversion. Our guide on replacing a bathtub faucet covers the spout and diverter side of that work.
Pros
– One fixture covers bathing and showering
– Cheapest full replacement, with kits starting near $500
– Supports resale in homes with only one or two bathrooms
Cons
– The 14 to 16 inch step-over is a fall risk for older users
– The standing area is narrow, only 30 to 32 inches front to back
– Curtains let water escape, and glass doors block access to the tub
Type 3: Corner and neo-angle showers
A corner shower uses two walls and closes the other two sides with glass. Square corner units come in 32-, 36- and 42-inch sizes. Neo-angle units cut the front corner at 45 degrees, so the door swings into the room without taking as much floor. In a 5×7 hall bath, a 36-inch neo-angle can free up enough room for a wider vanity. That kind of trade-off sits at the center of any bathroom remodel for small bathrooms.
Pros
– Smallest footprint for a true stand-up shower
– The glass on two sides makes a tight room feel bigger
– Bases and kits are common, including 38-inch neo-angle models
Cons
– Angled glass costs 20 to 40 percent more than a straight door
– A 36-inch unit is tight for washing hair or shaving legs
– More glass means more squeegee work and more seams to caulk
Type 4: Walk-in shower
A walk-in shower usually means a larger stall, at least 48 inches long, entered through a fixed glass panel or a doorless opening rather than a swinging door. Most still have a low curb, typically 2 to 4 inches high, which keeps water in without heroic floor slopes. This is the type most people picture when they say they want to “upgrade the shower.”
A doorless walk-in needs depth to keep water off the bathroom floor. Plan on at least 60 inches of length with the head on the far wall. Place the opening at least 24 to 30 inches from the spray, and use a fixed panel that covers roughly half the opening.
Pros
– Open, modern look with nothing to swing or track
– Easy to clean if you choose a single fixed panel
– Room for a bench, niches and a second head
Cons
– Doorless designs feel drafty because warm air escapes
– Needs a bigger room than most hall baths offer
– Custom tile and 3/8-inch frameless glass push costs up quickly
Type 5: Curbless (barrier-free) shower
A curbless shower has no threshold, or one of 1/2 inch or less. You roll or walk straight in. The floor slopes about 1/4 inch per foot toward a drain, usually a linear drain set at the back wall or across the entry. To get the bathroom floor and the shower floor at the same height, the installer either recesses the subfloor between the joists or builds up the rest of the bathroom floor.
ADA dimensions give a useful benchmark even in a private home. A roll-in shower is a minimum of 30×60 inches, and a transfer shower is exactly 36×36 inches. On a concrete slab, recessing the floor means cutting and removing concrete around the drain. For small areas that work is done with a rented electric breaker; our guide to using a jack hammer covers that tool. Recessing wood joists is structural work, so it needs an engineer or an experienced builder.
Pros
– The safest entry for seniors, wheelchair users and caregivers
– Seamless floor that makes a bathroom look larger
– Adds long-term value in a primary suite
Cons
– The most expensive type to build correctly in an existing home
– Floor recessing may involve joists, slabs or relocated plumbing
– Mistakes in slope or waterproofing cause leaks into the room below
Type 6: Steam shower
A steam shower adds a steam generator, usually installed in a nearby closet, vanity cabinet or attic. The generator pipes steam through a head mounted low on the wall. The enclosure must be sealed to the ceiling with a transom or full-height glass. The ceiling should be pitched at least 1/2 inch per foot so condensation runs down the walls instead of dripping on you. Keep the enclosure height to about 8 feet to limit the volume you have to heat.
Generators are sized by the enclosure’s cubic footage, with extra capacity added for tile, stone and glass, which absorb heat. Most residential units need a dedicated 240V circuit. Integrated controls make the experience simpler: Kohler’s Anthem+ platform, for example, can run the water and steam from one digital interface. That convenience depends on low-voltage wiring planned during rough-in.
Pros
– Spa experience at home, with steam ready in a few minutes
– Doubles as a normal shower
– Generators are efficient in water use per session
Cons
– Requires vapor-proof walls and ceiling, sealed glass and a dedicated circuit
– An extra $2,000 to $6,000 or more over a standard tiled shower
– Poor installs trap moisture in the framing, which leads to mold
Type 7: Wet room
In a wet room, the entire bathroom floor and the lower walls are waterproofed, and the shower area is defined only by floor slope and perhaps a glass screen. European homes use them heavily. In the US, they appear in tiny urban bathrooms and in high-end accessible remodels.
Pros
– Maximum accessibility, with no edges anywhere
– Works in a room too small for a separate stall
– Clean, minimalist look
Cons
– Everything in the room gets wet, including the toilet paper
– Every square foot of the floor needs membrane and slope
– Few US contractors build them well, so expect premium pricing
Step 1: Measure your space
Start with the footprint you have, not the one in the showroom photo. Measure wall to wall at floor level and again at 48 inches high, because old walls are rarely parallel. Then measure ceiling height, the distance from the toilet center to the nearest wall, and the clear width of every doorway and hallway between your truck and the bathroom.
Code clearances matter more than people expect. The IRC calls for 24 inches of clear floor in front of the shower opening, a finished door opening of at least 22 inches, and 15 inches from the toilet’s centerline to any side wall or fixture. If you are also swapping the vanity, lay out both together. A 36-inch shower beside a 30-inch bathroom vanity may fit on paper and still fail the clearance in front of the door.
Mark the proposed shower on the floor with painter’s tape. Stand inside it, raise your elbows as if washing your hair, and turn around. A 36×36 footprint that felt fine in a catalog often feels tight once you do this.
Pro tip
Measure the narrowest point on the path in, including stair turns. One-piece fiberglass showers usually measure more than 30 inches deep and need a doorway they cannot pass through. Multi-piece kits, sold as three-piece or five-piece, are made for remodels and fit through a standard 30-inch door.
Step 2: Check water pressure, flow and hot water
Your plumbing decides what kind of spray experience you can actually have. Screw a pressure gauge onto an outdoor hose bib or the washer hookup with every fixture off. A reading between 40 and 80 psi is normal. Below 40 psi, a large rain head will feel limp. Above 80 psi, you need a pressure-reducing valve before you install anything new, because high pressure shortens cartridge and hose life.
Next, run your current shower into a 1-gallon bucket and time it. If it fills in 24 seconds, you are getting 2.5 gallons per minute (gpm), the federal maximum for a showerhead. WaterSense-labeled heads are capped at 2.0 gpm, and California limits heads to 1.8 gpm. Those caps apply per head, which is why multi-outlet systems get thirsty fast.
Then read your water heater label. A 40-gallon tank comfortably supports one 2.0 to 2.5 gpm head for a normal shower. A rain head plus four body sprays can pull 7 to 9 gpm, which drains a 50-gallon tank in under 10 minutes. If you want that setup, you need a larger tank, a high-output tankless unit or a dedicated heater. Multi-outlet systems also need 3/4-inch supply lines and a 3/4-inch valve. Most homes have 1/2-inch lines at the shower.
Step 3: Choose the enclosure type
Use the numbers from Steps 1 and 2 to narrow the seven types down to one or two.
- Recess of 60 inches or less with a tub already there: alcove shower or tub-shower combo.
- Floor area under about 40 square feet with no tub: corner or neo-angle.
- Primary bath with at least 5 feet of open wall: walk-in with a fixed glass panel.
- Anyone in the house over 70, using a walker, or planning to stay 15+ years: curbless.
- Budget over $15,000 and a 240V circuit available: consider steam.
- Very small urban bath or full accessibility remodel: wet room.
Converting a tub to a shower stall keeps most of the plumbing in place. The tub drain sits at one end, and most 60-inch shower bases put the drain in the center or at one end to match. Removing the old tub begins with the waste and overflow, and our guide on removing a bathtub drain walks through that part.
Step 4: Choose your control valve
The valve is the part of the shower you notice every day and replace least often. The IRC requires every new shower to have a pressure-balance, thermostatic or combination valve, rated to ASSE 1016, with the maximum outlet temperature limited to 120°F. Choose your control based on how much precision and how many outlets you want.
| Valve type | How it works | Typical cost (valve + trim) | Best for |
|---|---|---|---|
| Pressure-balance | Single handle; a spool balances hot and cold when pressure shifts | $100-$350 | Most homes, one head or head plus tub spout |
| Thermostatic | Wax or bimetal element holds a set temperature; separate volume control | $300-$900 | Families, seniors, multi-outlet systems |
| Digital | Electronic mixing valve controlled by a wall panel or app | $1,000-$3,500+ | Presets, steam integration, accessible controls |
A pressure-balance valve stops the scald when someone flushes a toilet, but a single handle controls both temperature and volume. A thermostatic valve separates the two, so you set 104°F once and only change the flow. That precision is the main reason to upgrade.
Before you buy, check whether your valve brand uses a universal rough-in body. Delta’s MultiChoice and Moen’s M-CORE bodies let you change trim, and in some cases the cartridge type, without opening the wall. If you are keeping an existing valve that works but drips or drifts in temperature, replacing the shower cartridge often fixes it for $30 to $80 in parts.
Step 5: Choose the head, handheld and extras
Showerheads come in five broad types, and the right one depends on your water pressure and who uses the shower.
| Fixture | What it does | Cost | Watch out for |
|---|---|---|---|
| Fixed head | Wall-mounted on the standard arm | $20-$200 | Limited reach for kids, pets, cleaning |
| Rain head | Large face, ceiling or extended arm | $60-$500 | Feels weak below 50 psi or at 1.8 gpm |
| Handheld | Head on a hose, wall bracket | $30-$250 | Hose wear, cheap brackets loosen |
| Slide bar set | Handheld on an adjustable vertical bar | $80-$400 | Bar must be screwed into studs or blocking |
| Body sprays | Wall jets at torso height | $100-$400 each | Each adds 1-2 gpm and needs a diverter or valve port |
A slide bar set is the best single upgrade for most families. Hansgrohe, Grohe, Moen, Delta and Kohler all sell boxed bar-and-handheld sets. The bar lets a 5-foot user and a 6’4″ user each set the height, and the handheld makes cleaning the walls and rinsing a pet much easier. Choose a hose at least 59 inches long, the ADA minimum, and longer for a bench.
For two outlets, such as a rain head plus a handheld, you need a diverter. That can be a separate wall valve or a combo head with a built-in diverter that runs off a single arm. The combo head is the easiest retrofit because nothing changes behind the wall.
Step 6: Choose base, wall and door materials
Materials decide how the shower looks after five years of real life, not just on day one.
| Material | Cost (materials) | Durability | Cleaning | Notes |
|---|---|---|---|---|
| Fiberglass (gelcoat) | $300-$800 kit | 10-15 years | Easy, scratches dull it | Cheapest, can flex if not bedded |
| Acrylic | $500-$2,000 kit | 15-25 years | Easy, repairable scratches | Best value prefab |
| Solid surface / cultured stone | $1,200-$4,000 | 20+ years | Very easy, no grout | Heavy; panels glue to backer |
| Tile on membrane | $8-$30+/sq ft material | 30+ years if waterproofed | Grout needs sealing or epoxy grout | Unlimited design, highest labor |
| Large-format porcelain slabs | $20-$60/sq ft | 30+ years | Very easy | Heavy, needs specialist install |
For tile, the waterproofing matters more than the tile. Modern installs use a sheet membrane (Schluter-Kerdi), a foam board system (Wedi) or a liquid membrane (RedGard, Hydro Ban) over cement board. A traditional mortar bed with a PVC liner and a pre-slope is also acceptable. Tile and grout are not waterproof on their own. The IRC requires a nonabsorbent wall surface to at least 6 feet above the floor around a shower.
For doors, framed glass in 1/4-inch thickness costs $300 to $800 installed. Semi-frameless runs $500 to $1,200. Heavy 3/8-inch frameless glass runs $1,000 to $3,000 or more, and it needs solid blocking for the hinges. All shower glass must be tempered safety glazing, which is marked with a permanent etched stamp in a corner. Sliding bypass doors suit 60-inch tub replacements. Pivot doors suit 36- to 48-inch openings with room to swing.
Step 7: Price the job and plan the installation
Price every option two ways: materials-only for DIY, and fully installed. The gap tells you where your labor saves the most.
| Job | DIY materials | Pro installed |
|---|---|---|
| Prefab acrylic alcove kit, existing plumbing | $600-$2,000 | $2,000-$5,000 |
| Tub-to-shower conversion with prefab base and walls | $1,000-$2,500 | $3,500-$8,000 |
| Custom tile walk-in, curbed | $2,000-$5,000 | $7,000-$15,000 |
| Curbless walk-in with linear drain | $3,000-$6,000 | $10,000-$20,000 |
| Steam shower (generator, glass, tile) | $4,000-$8,000 | $8,000-$20,000+ |
| Valve swap only (pressure-balance to thermostatic) | $300-$900 | $800-$2,000 |
Most jurisdictions require a plumbing permit to move a drain, replace a valve or add a shower where none existed. You also need an electrical permit for a steam generator, fan or digital valve. Permit fees usually run $75 to $500. Skipping a permit can cause problems when you sell or file an insurance claim after a leak.
Grab bars, seats and the details people forget
Plan safety parts at rough-in while the walls are open, even if nobody needs them yet. Install 2×8 or 2×10 blocking between studs from about 30 to 40 inches high on every shower wall. That blocking lets you mount grab bars at the ADA height of 33 to 36 inches later. Bars must hold 250 pounds. Never mount them with sheetrock anchors or plastic toggles, because those pull out under a fall. A fold-down seat should sit 17 to 19 inches above the floor.
Ventilation completes the job. The Home Ventilating Institute recommends 1 CFM per square foot of bathroom floor, with a 50 CFM minimum, ducted to the outside, never into the attic. Put the fan on a timer switch so it runs 20 minutes after each shower. If you are adding a fan and new light in a bathroom with two doors, the switching layout works the same way as wiring multiple switches to one light.
Which shower should you choose?
These are the recommendations for the most common situations:
- Most homeowners replacing a tired tub: a 60×32 acrylic or solid-surface alcove with a thermostatic valve and a slide bar handheld. Expect to pay $3,000 to $6,000 installed. This is the best value in bathroom remodeling.
- Families with children under 10: keep a tub-shower combo and upgrade the valve and head.
- Small bathrooms under 40 square feet: a 36- or 38-inch neo-angle with clear glass.
- Homeowners over 60, or anyone planning to age in place: a curbless walk-in with a bench, blocking for bars, a handheld and a thermostatic valve. Budget $10,000 or more and treat it as an investment in staying in your home.
- Spa lovers with a real budget: a curbed tile walk-in with steam. Make sure you have a 240V circuit and an installer who has built steam enclosures before.
- First-time DIYers: a multi-piece acrylic kit on existing plumbing. Leave curbless, steam and wet rooms to licensed trades.
Troubleshooting common shower choices
| Symptom | Likely cause | Fix |
|---|---|---|
| Temperature spikes when a toilet flushes | Old non-balancing valve or worn cartridge | Replace the cartridge or upgrade to pressure-balance/thermostatic |
| New rain head feels weak | Low pressure, 1.8 gpm cap, oversized face | Confirm 50+ psi; choose a 10-inch face or pressure-compensating head |
| Hot water runs out in minutes | Body sprays and rain head exceed heater capacity | Cut outlets, use volume stops, or upsize to a high-output heater |
| Water reaches the bathroom floor in a curbless shower | Drain on wrong side, too little slope, short glass panel | Linear drain at the entry, longer fixed panel, recheck 1/4 in/ft slope |
| Acrylic base flexes or cracks | Base not set in a mortar bed | Pull and reset in mortar or the manufacturer-specified setting compound |
| Glass door leaks at the hinge side | Walls out of plumb more than 1/4 inch | Add an adjustable wall channel or reshim; re-caulk with 100% silicone |
| Drain backs up with two heads running | 1-1/2 inch drain line | Upsize to a 2-inch drain and trap |
| Mildew on ceiling and grout | Undersized or unducted exhaust fan | Install a fan of at least 1 CFM per sq ft, ducted outside, on a timer |
| Prefab unit won’t fit through the door | One-piece shower bought for a remodel | Return it for a three- or five-piece kit |
When to call a pro
Call a licensed plumber if you are moving the drain, changing supply lines from 1/2 inch to 3/4 inch, or installing any new valve body. Call an electrician for steam generators, digital valves, heated floors and new fan circuits. Bring in a general contractor or a structural engineer before you cut or notch floor joists for a curbless shower, cut a concrete slab near footings, or remove any wall that might be load-bearing. If you see soft subfloor, black staining on the framing or a sagging ceiling below the bathroom, have a contractor open it up before you choose any new shower.
FAQ
What is a shower shower?
When people search for a “shower shower” or “showers showers,” they usually mean a standalone shower stall rather than a tub with a showerhead over it. In practice, that is one of the stand-up types above: an alcove, corner, walk-in, curbless or steam shower. The term separates a dedicated shower you step straight into from a tub-shower combo you climb over.
What is the best walk-in shower for seniors?
A curbless walk-in shower is the best choice for seniors. Look for a threshold of 1/2 inch or less, a footprint of at least 36×36 inches (60×30 if a wheelchair or walker is involved), and a fold-down or built-in seat at 17 to 19 inches high. Add grab bars at 33 to 36 inches mounted into blocking, a handheld on a slide bar with a hose of at least 59 inches, and a thermostatic valve capped at 120°F. Choose a slip-resistant floor, such as small mosaic tile or a textured acrylic base. If a curbless floor is not possible, a low-curb prefab walk-in with a 2-inch threshold is the next best option.
What’s the average cost to have a walk-in shower?
Most walk-in showers cost $4,000 to $15,000 installed. A prefab walk-in kit on existing plumbing sits at the low end, around $4,000 to $6,000. A custom tile walk-in with frameless glass usually lands between $8,000 and $15,000. Curbless conversions that require floor recessing run $14,000 to $25,000 or more. Your location, drain relocation and glass choice move the price most.
What is the easiest type of shower to install?
A multi-piece acrylic or fiberglass alcove kit with a matching base is the easiest. It installs on existing plumbing in a framed alcove, and it needs no tile, no waterproofing membrane and no mortar except under the base if the manufacturer calls for it. A handy homeowner can finish one in a weekend or two. For the smallest job, keep your current shower and add a slide bar handheld or a shower panel that connects to the existing arm. That takes under an hour.
Can I convert a bathtub into a shower myself?
Yes, if you keep the drain in roughly the same place and use a prefab base and wall kit. The hard parts are removing the old tub, which a cast-iron tub makes very hard, and resetting the drain at the right height. A plumber should handle any valve replacement unless you are confident soldering or using PEX.
Do I need a permit to replace a shower?
A like-for-like swap of walls and doors often needs no permit. Moving a drain, replacing a valve, adding a shower where there was none, or adding a circuit for steam or a fan almost always does. Call your local building department before you buy anything, because rules vary by town.