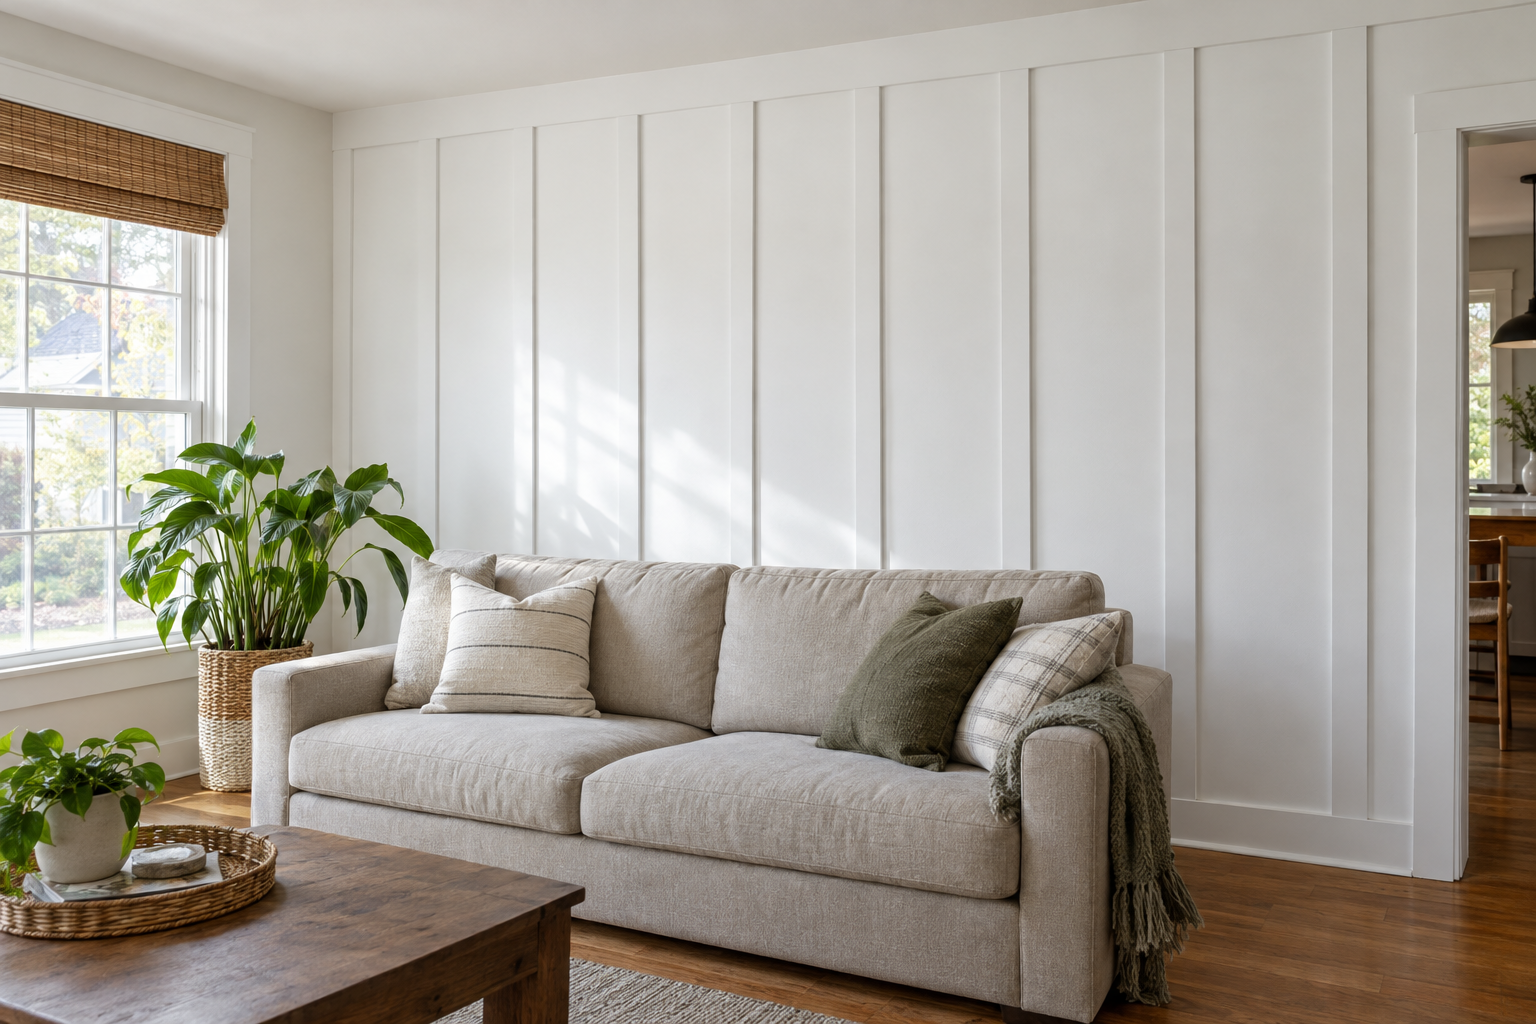
To build a board and batten wall, you nail a top rail, vertical battens and (optionally) horizontal rails over smooth drywall, then caulk every seam and paint the whole wall one color. One 12-foot accent wall takes most beginners a weekend and $150 to $400 in materials, and the only tools that really matter are a miter saw, a brad nailer and a good level.
Quick steps: install a board and batten wall
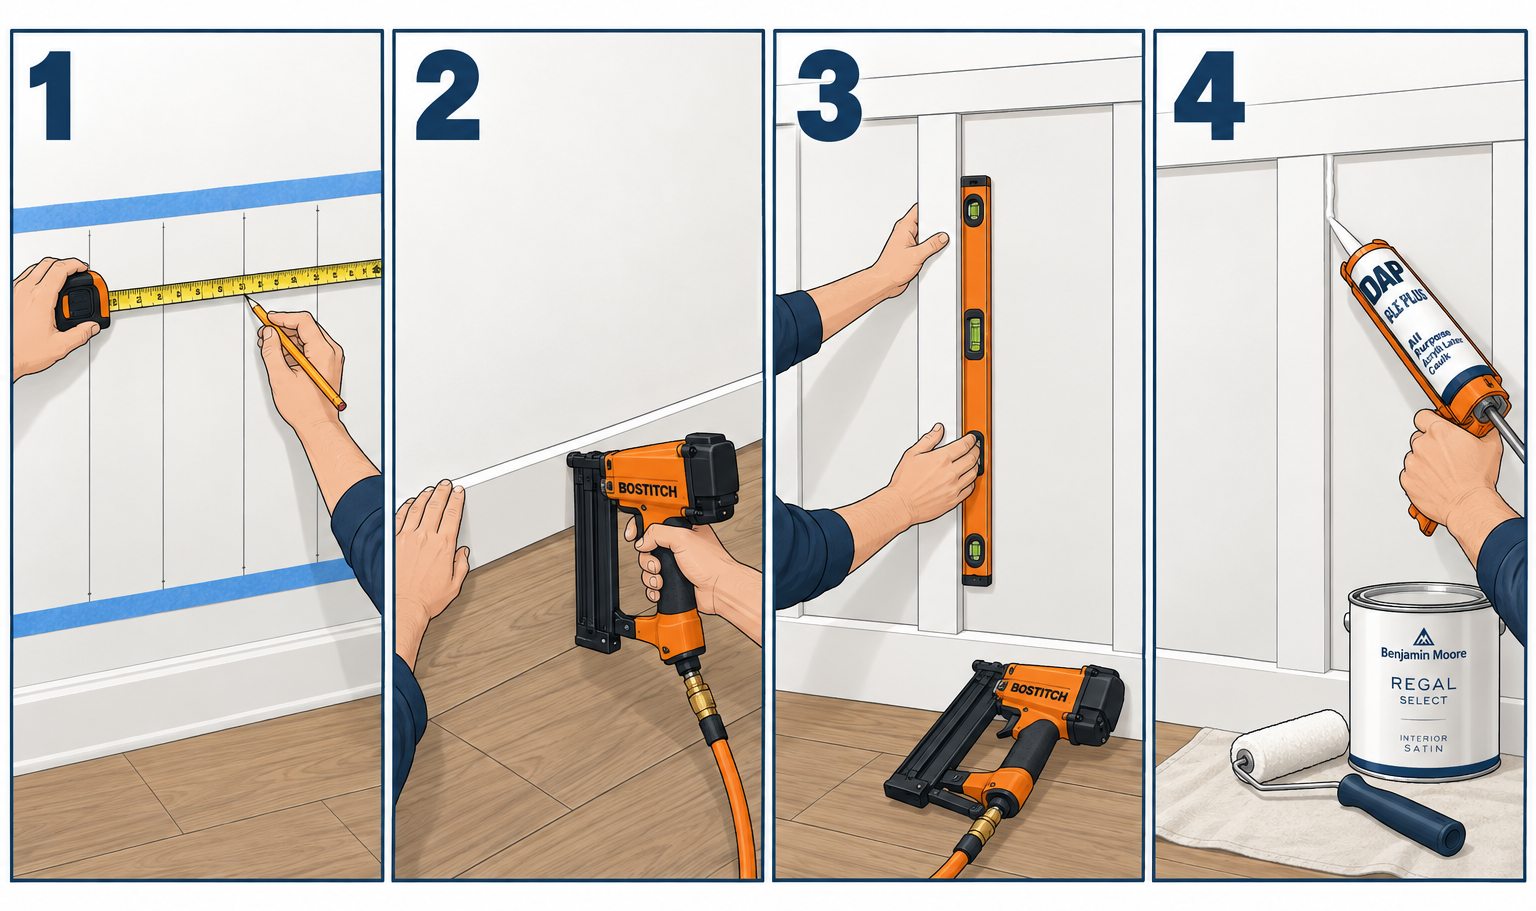
- Choose your style and buy primed MDF or pine strips.
- Do the spacing math and mark every batten on the wall.
- Remove baseboard and cover plates, find studs, smooth the wall.
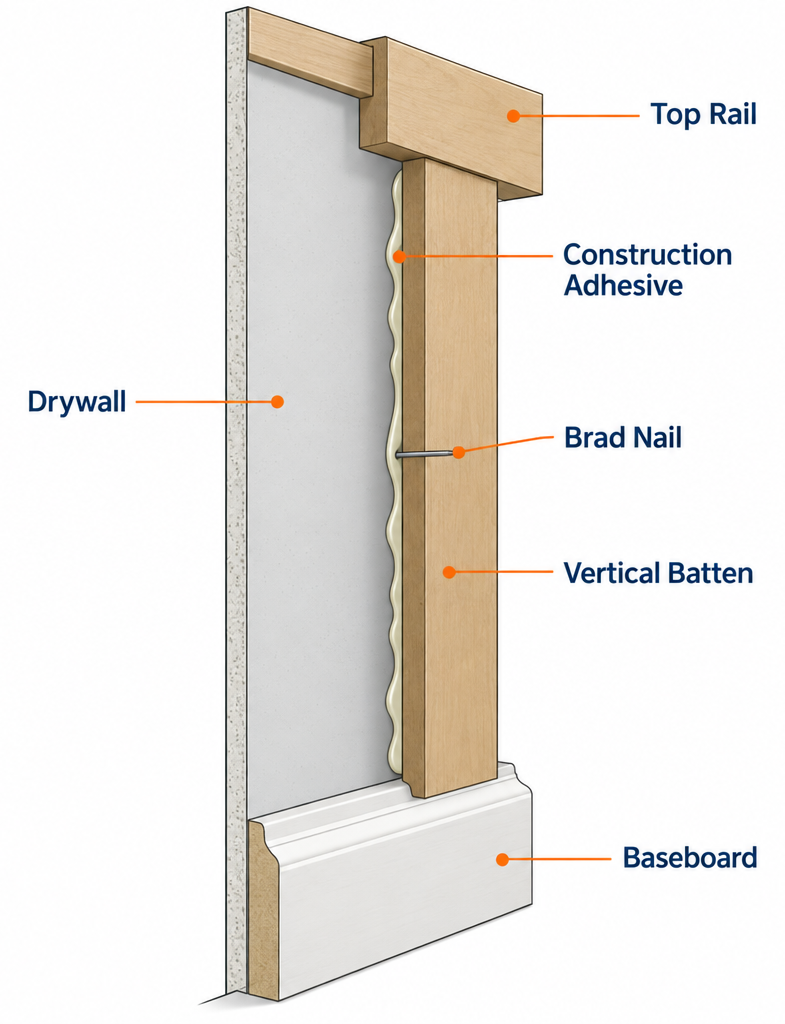
- Install the bottom board and top rail, level and nailed to studs.
- Glue and nail vertical battens between rails, checking plumb.
- Add horizontal rails if you want a grid.
- Fill nail holes, caulk every seam, sand, then prime and paint.
Tools and materials
- Miter saw (10 or 12 in.) or a miter box and fine-tooth handsaw
- 18-gauge brad nailer with 1-1/4 in. and 2 in. brads (16-gauge finish nailer for thick stock)
- Compressor, or a cordless nailer
- 4 ft level and 6 ft level (or a laser level)
- Stud finder, tape measure, pencil, speed square
- Battens: 1×3 or 1×4 primed MDF, finger-jointed pine or poplar
- Top rail: 1×4 or 1×6; optional ledge cap: 1×2 or 1×3
- Construction adhesive (PL 375, Liquid Nails Projects or similar) and caulk gun
- Paintable acrylic latex caulk (siliconized, such as DAP Alex Plus)
- Wood filler or lightweight spackle, 120 and 220-grit sanding sponges
- Shellac or oil-based primer for MDF edges (Zinsser BIN or Cover Stain)
- Satin or semi-gloss acrylic paint, 2 in. angled brush, 4 in. mini roller
- Scrap block of batten for spacing, painter’s tape
- Box extenders for any outlets or switches on the wall
- Safety glasses, hearing protection, N95 dust mask
Calculators for this job
Safety first
Shut off the breaker before you pull cover plates or touch any outlet or switch on the wall, and confirm it’s dead with a non-contact voltage tester. MDF dust is fine and irritating, so cut outdoors or wear an N95, and keep your fingers well clear of the miter saw blade on short pieces.
Step 1: Choose your style and materials
Get the look settled first, because it decides how much stock you buy and how hard the job gets.
The three common layouts:
- Wainscot height. A top rail at 36 to 66 inches with battens below it. This works well in dining rooms, hallways and mudrooms, where the lower wall takes abuse. For an 8-foot ceiling, a rail somewhere between 54 and 66 inches looks modern; 36 to 42 inches reads as a classic chair rail.
- Full-height vertical. Battens run floor to ceiling with no horizontal rails. This makes a low ceiling feel taller and is the fastest layout to install.
- Grid (square or rectangle). Vertical battens plus one or more horizontal rails. This is the popular accent wall behind beds and TVs. It’s the most work, because every horizontal piece is a short, precise cut.
Materials compared:
| Material | Typical sizes | Pros | Cons | Best for |
|---|---|---|---|---|
| Primed MDF | 1/2 or 3/4 in. thick; 1×2, 1×3, 1×4 | Cheapest, dead straight, no knots, paints smooth | Swells if wet, cut edges absorb paint, heavy dust | Bedrooms, living rooms, dining rooms |
| Finger-jointed primed pine | 1×3, 1×4, 1×6 | Holds nails better than MDF, handles humidity better | Joints can telegraph through thin paint, some boards bow | Hallways, high-traffic walls |
| Poplar | 1×2 to 1×6 | Hard, smooth, paints beautifully | Costs roughly twice as much as MDF | Stained or high-end paint-grade work |
| PVC trim board | 1×3, 1×4 | Waterproof, won’t rot | Expensive, expands with heat, needs PVC adhesive | Bathrooms, laundry rooms, exterior trim |
| Ripped plywood or hardboard | 1/4 to 3/4 in. strips | Thin, flat profile; cheap from one sheet | Rough edges need filling, plywood edge shows | Budget walls, a thin “picture frame” look |
For most interior walls, buy primed MDF in 1×3 or 1×4 for the battens and a wider 1×4 or 1×6 for the top rail. Thicker battens (3/4 inch) cast deeper shadow lines and look more like real trim. Thin strips (1/4 to 1/2 inch) are easier to nail, sit flatter and cost less, but they can look like a craft project from across the room.
Pro tip
Sight down every board at the store, holding one end at your eye like a rifle. Pine bows and twists far more than MDF; reject anything with a crown you can see from 8 feet away, because a bowed batten will never sit flat on the wall without extra nails and caulk.
Step 2: Do the layout math and mark the wall
Bad spacing is the most common reason a DIY board and batten wall looks off. Eyeballing it leaves you with an odd skinny gap at one end. The math takes five minutes.
Formula for even vertical spacing:
Gap between battens = (Wall width − number of battens × batten width) ÷ (number of battens − 1)
This assumes a batten sits tight against each end of the wall. Use the actual width, not the nominal one. A 1×3 is really 2-1/2 inches wide and a 1×4 is 3-1/2 inches.
Worked example: a 144-inch (12 ft) wall with 1×3 battens.
- 8 battens: 144 − (8 × 2.5) = 124. 124 ÷ 7 = 17.71 inches between battens.
- 9 battens: 144 − 22.5 = 121.5. 121.5 ÷ 8 = 15.19 inches between battens.
Most good-looking walls land between 12 and 24 inches of gap. Wider gaps feel farmhouse and relaxed; tighter gaps feel more formal. Pick the batten count that puts you in that range, then round to the nearest 1/16 inch.
For a grid, do the same math vertically. On an 8-foot wall with a 1×4 baseboard (3-1/2 inches), a 1×4 top rail and two horizontal rails, measure the open height between the top of the baseboard and the bottom of the top rail, subtract the rail widths, and divide by the number of spaces. Aim for roughly square boxes or a consistent rectangle, such as 16 x 24.
Marking: Run a strip of painter’s tape across the wall at about 48 inches and write the centerline of each batten on the tape. Tape keeps pencil off the drywall and lets you shuffle the layout before you commit.
Check for windows, doors and outlets now. If a batten lands 1 inch from a window casing, adjust the count or center the layout on the window instead of the wall. If you plan to hang floating shelves across the battens later, note where they’ll go so a batten doesn’t end up hidden behind a bracket.
Step 3: Prep the wall
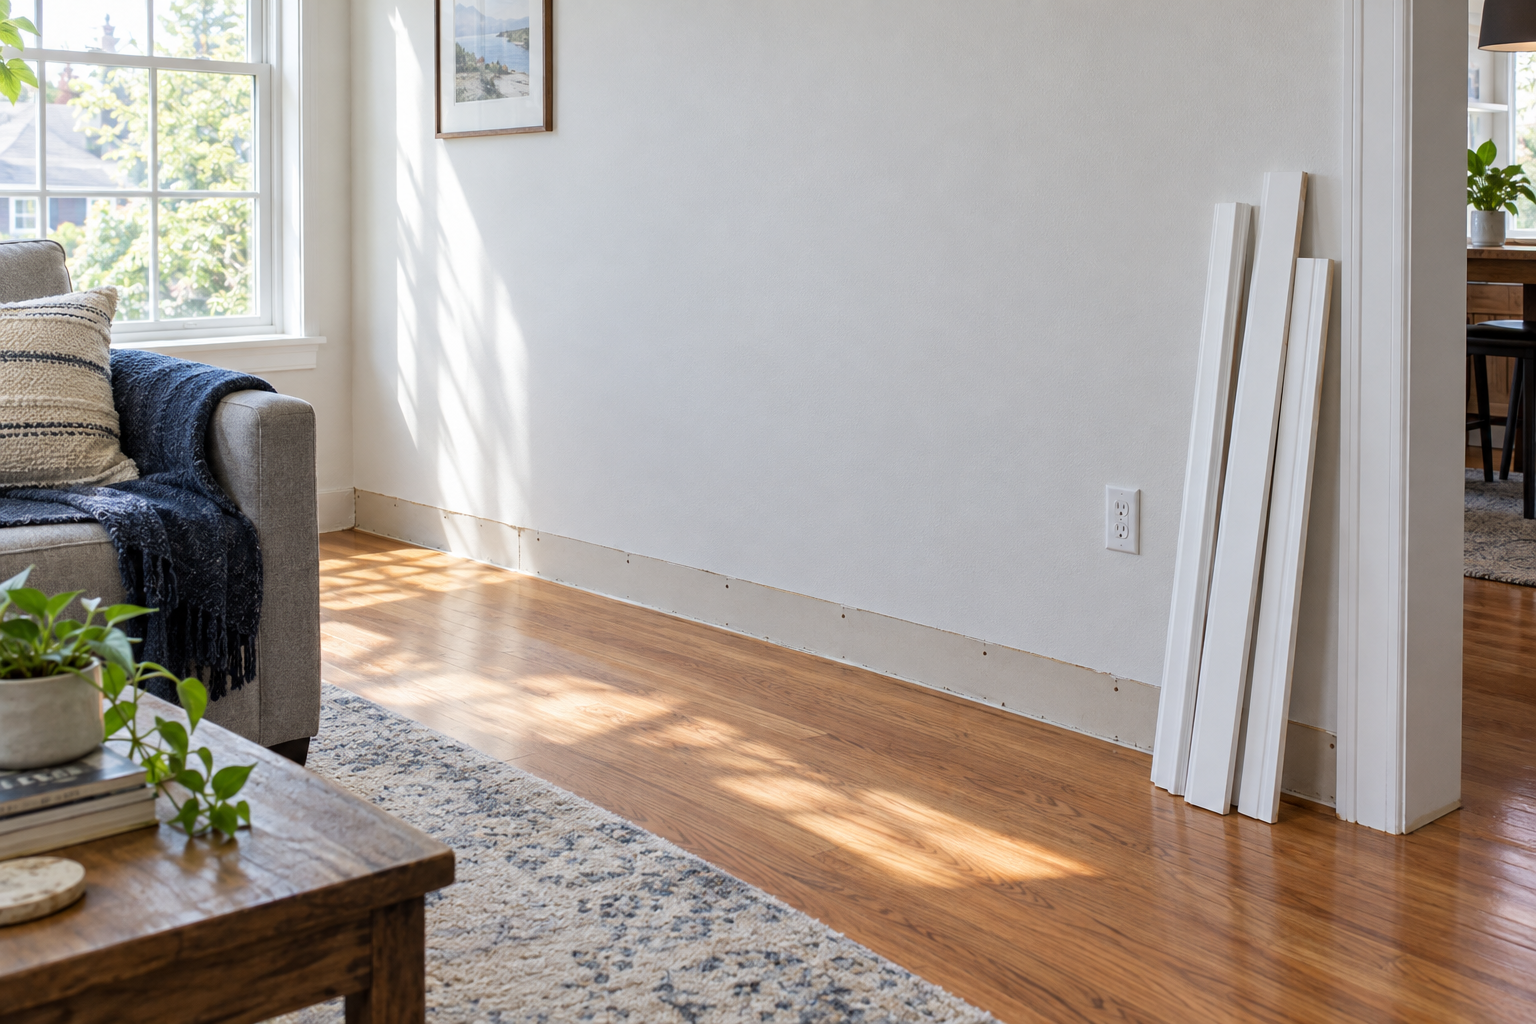
Remove the baseboard and cover plates
Most installers pull the existing baseboard so the battens can sit on a new, flat bottom board that’s thicker than the battens. You can keep the old baseboard if it’s simple and flat-topped, but battens butting into a rounded or ogee-profile baseboard look patched.
Slide a stiff putty knife behind the baseboard, then a flat pry bar against the knife, and work along the run so the molding comes off without damage to the drywall. Pull the nails through the back of the trim with nippers if you’ll reuse it.
Shut off the breaker and remove outlet and switch cover plates.
Find and mark studs
Use a stud finder and mark each stud at the top and bottom of the wall with a small pencil tick (on the floor and just below the ceiling, where trim will cover it). Studs usually sit at 16 inches on center. Your horizontal pieces (bottom board, top rail, grid rails) should hit every stud they cross. The vertical battens will land wherever the layout puts them, so most of them won’t hit a stud, and that’s fine.
Deal with wall texture
This is the step people skip, and it’s why some walls look cheap. Battens on orange-peel or knockdown texture leave the textured drywall showing in every box, and the contrast with smooth trim gets obvious under paint.
You have three options:
- Leave it. Light orange-peel is acceptable in a bedroom, especially with a flat or matte finish.
- Skim coat it. Roll on thinned all-purpose joint compound, knock it down with a wide knife, let it dry, and sand. This takes a day of drying but gives the cleanest result.
- Install a backer panel. Glue and nail 1/4-inch MDF, hardboard or lauan plywood sheets over the wall first, then put the battens on top. Plan the layout so panel seams fall behind battens.
The backer adds thickness, so outlet and switch boxes need box extenders. Electrical code requires a box to be flush with a combustible wall surface like wood or MDF, so don’t leave it recessed behind a panel.
Patch and prime
Fill old anchor holes, sand, and spot-prime. Any dent you can see now will show more after semi-gloss paint, since glossy finishes highlight flaws. Treat this like the prep for any interior painting job.
Step 4: Install the bottom board
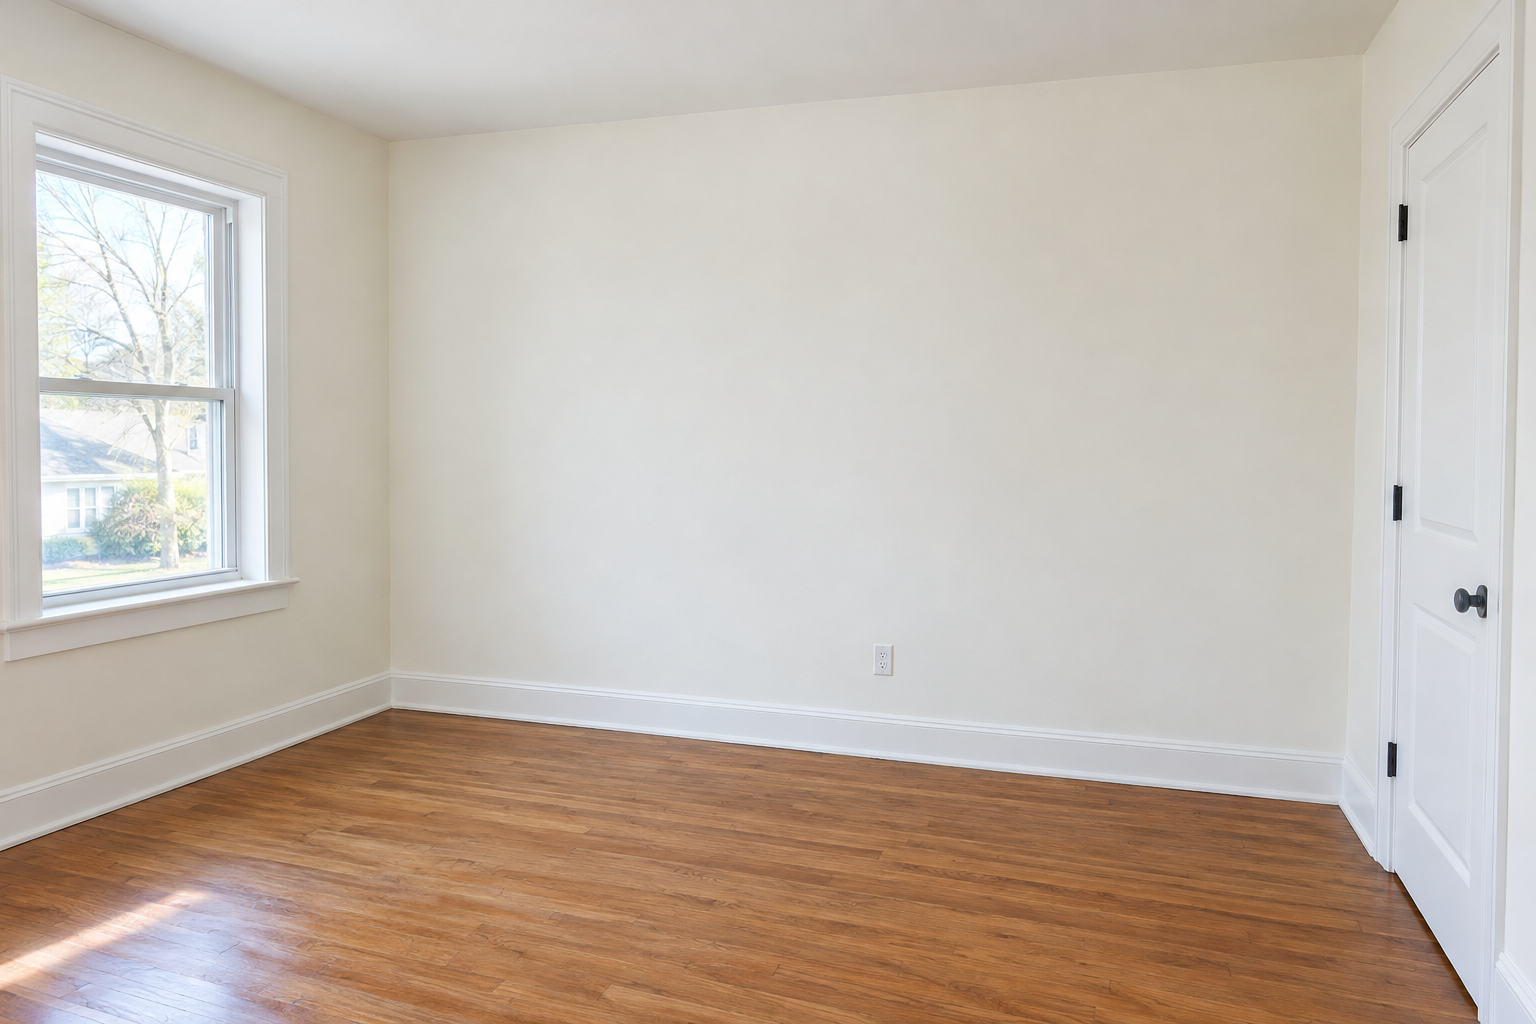
If you removed the baseboard, install a new one first. A 1×4 or 1×6 primed MDF board works, and it should be at least as thick as the battens so they don’t overhang it. If your battens are 3/4 inch thick, use a 3/4-inch baseboard, or step up to 1 inch for a visible reveal.
Check the floor with a level. Floors are rarely level. If the floor drops more than about 1/8 inch over the wall length, scribe the bottom of the board to the floor or plan to cover the gap with shoe molding. Keep the top edge of the baseboard level, because every vertical batten will measure from it.
Apply a 1/4-inch bead of construction adhesive in a zigzag on the back, press the board in place, and nail into every stud with two 2-inch brads (or 2-1/2-inch 16-gauge nails), one near the top and one near the bottom. Set the nails about 3/4 inch in from each edge so they don’t blow out the MDF.
At an outside corner, miter the baseboard at 45 degrees. At an inside corner, a straight butt joint is fine on square stock, because caulk will close it.
Step 5: Install the top rail
Measure up from the top of the baseboard to your planned rail height at both ends and the middle. Snap a chalk line or project a laser line, then confirm it with your 6-foot level. A rail that follows a sloped ceiling or a wavy floor looks fine up close and wrong from across the room. Level wins.
Glue and nail the top rail into every stud, the same as the baseboard. On a full-height wall, the top rail goes tight to the ceiling. Ceilings are wavy too, so expect a gap you’ll caulk later.
Add a ledge cap (optional). A 1×2 or 1×3 laid flat on top of the top rail, overhanging the face by 1/2 to 3/4 inch, gives a picture ledge and a finished, built-in look. Glue it and shoot 1-1/4-inch brads down into the rail every 12 inches. Ledges collect dust, so skip this in a kitchen or anywhere you hate dusting.
Pro tip
Cut the top rail and baseboard about 1/16 inch long and spring them into place on wall-to-wall runs. The slight pressure holds the board against the wall while you nail, and it closes the end gaps that otherwise need a fat bead of caulk.
Step 6: Install the vertical battens
This is where the wall comes together.
Measure every batten individually
Don’t cut all your battens to one length. Measure the gap between the baseboard and top rail at each batten location, because a floor that dips 1/4 inch in the middle means a batten that’s 1/4 inch longer there. Write the length on the tape above the mark. Cut each piece square, about 1/32 inch long, so it fits snug.
Set the end battens first
Install the battens at each end of the wall, tight to the corner. Check them with your 4-foot level on the face and edge. Corners are often out of plumb by 1/4 inch or more over 8 feet. If yours is, hold the batten plumb and caulk the tapered gap rather than following a crooked corner, which would throw off every batten after it.
Install the field battens
- Run a 1/4-inch bead of construction adhesive down the back in an S-pattern, staying 1/2 inch from the edges so it doesn’t squeeze out.
- Align the batten with your centerline mark and hold your level on the edge until it reads plumb.
- Nail it every 12 to 16 inches. Where a batten hits a stud, a straight 2-inch brad is enough. Where it lands on bare drywall, drive pairs of brads at opposing angles (one tilted up about 30 degrees, one tilted down). The crossed nails lock the batten to the drywall while the adhesive cures.
- Use a scrap block cut to your exact gap width as a spacer. Set it at the top and bottom between the last batten and the new one. It’s faster than measuring and more accurate than a tape.
Check plumb every two or three battens. Small errors add up, and by batten seven a 1/16-inch lean per piece becomes a visibly crooked box.
Adhesive does the real holding here. Brads alone in drywall will eventually loosen, especially on thin MDF strips that flex. Give the adhesive 24 hours before you hang anything heavy on the wall, and use proper sheetrock anchors or find a stud for TV mounts and shelves. Don’t trust a batten to carry the load.
Work around outlets and switches
You have two clean choices:
- Shift the layout so the batten clears the cover plate by at least 1/2 inch.
- Notch the batten around the box and use a box extender so the device sits flush with the batten face. Oversized (jumbo) cover plates can hide a slightly rough notch.
Step 7: Add horizontal rails (grid layouts only)
For a grid, cut short horizontal pieces to fit between each pair of vertical battens. Measure each opening at the height of the rail, since spacing can drift 1/16 inch from box to box.
Snap or laser a level line at each rail height across the whole wall. Glue each piece, set its top edge on the line, and nail it with a pair of angled brads into the drywall or straight into a stud where you hit one. A cut piece that’s a hair too long will bow outward. If you have to tap it in with a mallet, shave 1/32 inch off and try again.
Work across one row at a time, and step back from the wall every few pieces. Your eye catches crooked lines from 10 feet away that a level misses on a single short piece.
Step 8: Fill, caulk and sand
The finishing is what makes a board and batten wall look like built-in millwork instead of strips glued to drywall. Budget nearly as much time for this as for the carpentry.
Fill nail holes. Press lightweight spackle or wood filler into each hole with a putty knife, overfilling slightly. Let it dry (15 to 60 minutes, depending on the product and depth), then sand flush with a 220-grit sponge. Deep holes may need a second coat once the first shrinks.
Fill end joints. If you joined two battens end to end on a long run, use a 45-degree scarf joint instead of a butt joint, glue it, and fill it with wood filler or a setting-type joint compound. Sand it smooth.
Caulk every seam. Run a thin bead of paintable acrylic latex caulk wherever a batten meets the wall, where two pieces of trim meet, and along the ceiling and corners. Cut the caulk tube tip small, about 1/8 inch. Smooth each bead with a damp finger or a caulk tool and wipe the excess with a damp rag. Thin beads look crisp; fat beads look sloppy and take longer to dry.
Don’t caulk the joint where a ledge cap sits on top of the rail, since it’s a horizontal shadow line that looks intentional. Do caulk the joint underneath the ledge where it meets the rail face.
Let caulk dry per the tube’s instructions before painting, typically 30 minutes to a couple of hours for a thin bead.
Step 9: Prime and paint
Seal MDF cut edges
The cut ends and ripped edges of MDF act like a sponge. Water-based primer or paint makes the fibers swell and fuzz, leaving a rough end you can feel. Brush cut edges with a shellac-based primer (Zinsser BIN) or an oil-based primer (Zinsser Cover Stain) before you paint. It dries fast, often in under an hour, and sands smooth with 220-grit.
The factory-primed faces only need a light scuff and spot-priming over filler patches.
Choose the finish
- Satin is the best all-around sheen. It’s washable, forgiving of flaws, and shows off the shadow lines.
- Semi-gloss is tougher and easier to scrub in hallways, kids’ rooms and mudrooms, but it highlights every dent and sanding scratch.
- Matte or flat looks modern and hides texture, but it scuffs easily on a lower wall.
Paint the wall and the battens the same color. Two-tone versions exist, but single-color walls read as architecture and hold up to trend changes better.
Paint in the right order
- Cut in the inside edges of each box with a 2-inch angled brush, working paint into the caulked seams.
- Roll the flat field inside each box with a 4-inch foam or microfiber mini roller.
- Brush the edges of the battens, then roll their faces with the mini roller in one long pass.
- Let it dry per the label (usually 2 to 4 hours for recoat), lightly sand any drips, and apply a second coat.
Expect two coats over primed MDF. Dark colors may need three, or a tinted primer.
Paint sprayers make fast work of grid walls, since a brush and roller take a long time with all those inside corners. Mask the floor, ceiling and adjacent walls thoroughly, and back-roll the battens if the spray leaves texture.
What the finished wall should look like
Stand 10 feet back in raking light from a window or lamp. Every batten should read plumb against the corner, horizontal rails should line up box to box, and you shouldn’t see any nail holes, black gaps along the battens, or rough MDF edges. If you can spot the seam where a batten meets the wall, add another thin bead of caulk and touch up the paint.
Board and batten siding: what changes outside
Exterior board and batten siding uses the same idea at a larger scale, but it’s a different job. Outside, the boards are the weather barrier, so the details matter more than looks.
How it’s built: Wide vertical boards (typically 8 to 12 inches) are nailed to the house with a small gap between them, often around 1/2 inch, and narrower battens (1×2 to 1×3) cover each gap. The classic rule is to nail each board near its center and nail each batten through the gap between boards, never through both boards. That lets the wood expand and shrink with the seasons without splitting.
Why you need blocking: Wall studs run vertically, and so does the siding. Vertical boards need horizontal nailing points, so the wall needs horizontal furring strips or blocking (commonly at 24 inches on center) over the sheathing and housewrap. Furring strips also create a rainscreen gap that lets the siding dry out.
Material options:
| Siding type | Typical installed cost | Lifespan and upkeep |
|---|---|---|
| Vinyl board and batten panels | Roughly $4-9 per sq ft | Low upkeep, no painting; can crack in cold, fades over time |
| Engineered wood (LP SmartSide) | Roughly $5-10 per sq ft | Lighter than fiber cement, factory primed, repaint every 7-10+ years |
| Fiber cement (HardiePanel with HardieTrim battens) | Roughly $6-13 per sq ft | Fire and rot resistant, heavy, long-lasting paint finish |
| Real wood (cedar, pine) | Roughly $7-15 per sq ft | Classic look and high value, needs stain or paint on an ongoing schedule |
| Metal (steel board and batten) | Roughly $7-14 per sq ft | Very durable, modern farmhouse look, can dent |
Prices vary widely by region, wall height, trim count and demolition, so treat these as ballpark numbers and get at least three quotes.
Siding replacement on a whole house usually needs a building permit, involves work on ladders or scaffolding, and requires flashing at every window, door and roof line. A single shed or detached garage wall is a reasonable DIY project. A two-story house is a job for a siding contractor. Re-siding is also a smart time to fix drainage at the foundation, such as adding a French drain if water pools against the wall.
Pros and cons of board and batten walls
Pros
- Big visual change for a small budget. A full accent wall costs about what a single piece of statement furniture does.
- Adds depth and shadow lines to plain builder-grade drywall.
- Protects the lower wall from chairs, bags, dogs and kids in hallways and dining rooms.
- Hides minor drywall patches and seams behind battens.
- Easy to repaint for a new look in a few years.
Cons
- Hard to remove cleanly. Construction adhesive pulls off drywall paper, so taking it down means patching and skim coating.
- Ledges and horizontal rails collect dust.
- More inside corners to paint means touch-ups take longer than on a flat wall.
- Outlets, switches, thermostats and vents need planning or box extenders.
- Poorly done versions (thin strips, no caulk, textured walls) look cheap, which is where the “cheap DIY board and batten is everywhere” complaint comes from.
Troubleshooting
| Symptom | Likely cause | Fix |
|---|---|---|
| Gaps between batten and wall | Wall bows in or out, batten is bowed, or too little adhesive | Add angled brads to pull it tight; fill gaps up to 1/4 in. with caulk in two thin passes |
| Battens look crooked from across the room | Followed an out-of-plumb corner or skipped level checks | Pry off and reset the worst offenders within a few hours, before the adhesive cures |
| Last gap is noticeably narrower | Measured by eye or used nominal board width | Redo the spacing math with actual width; respace the last 3-4 battens to split the difference |
| Fuzzy, rough MDF ends after painting | Water-based paint swelled raw MDF edges | Sand with 220-grit, seal with shellac or oil primer, repaint |
| Caulk cracking along seams | Bead too thick, painted before it cured, or wrong caulk | Cut out, re-caulk with siliconized acrylic in a thin bead, wait the full dry time |
| Nail holes still visible | Filler shrank or wasn’t sanded flush | Second skim of filler, sand, spot-prime before topcoat |
| Box texture shows through paint | Battens installed over textured drywall | Skim coat inside each box or switch to a flat sheen; next time, add a backer panel |
| Outlet cover won’t sit flat | Box recessed behind batten or backer | Shut off the breaker and install a box extender so the device sits flush |
| Horizontal rails bow outward | Pieces cut too long and forced in | Remove, trim 1/32 in., reinstall with adhesive |
When to call a pro
Call a licensed electrician if you need to move an outlet or switch, add a new circuit for sconces on the wall, or find aluminum wiring or scorched wires when you pull a cover plate. Hire a finish carpenter for walls with stairs, arches or vaulted ceilings, and hire a siding contractor for any exterior work above one story or anything requiring a permit and flashing.
FAQ
How far apart should board and batten be spaced?
Most interior walls look best with 12 to 24 inches between battens. Use the spacing formula (wall width minus total batten width, divided by the number of gaps) so every gap is equal and you don’t end with a skinny space at the corner.
Do I need to nail into studs?
Nail the baseboard, top rail and any long horizontal pieces into studs. Vertical battens can go on bare drywall if you use construction adhesive and pairs of brads angled in opposite directions. The adhesive is what holds them long term.
What size boards should I use for board and batten?
For most rooms, use 1×3 or 1×4 primed MDF for battens and a 1×4 or 1×6 for the top rail. Use thicker 3/4-inch stock for a millwork look, or 1/2-inch strips for a lighter profile on a budget.
Can I put board and batten over textured walls?
You can, but the texture will show inside every box. Skim coat the wall smooth first, or glue up 1/4-inch MDF or hardboard backer panels before installing the battens.
How much does a board and batten accent wall cost?
Expect roughly $150 to $400 in materials for a 12 x 8 foot wall, depending on layout and board type. A handyman or carpenter typically charges $400 to $2,000 or more for one accent wall, including materials, caulking and paint, with many mid-range installs landing between $800 and $2,000.
Is board and batten going out of style?
Simple full-height or tall wainscot versions painted the same color as the wall have stayed popular for years and read as classic trim. Busy grids in high-contrast colors date faster, so pick a restrained layout if you plan to sell in the next few years.