
A good general contractor for home renovation work runs the whole job: pulling permits, scheduling subs, buying materials and handing you a finished space on a written schedule. You hire one by verifying the license and insurance first, getting three itemized bids on the same scope, then signing a contract that ties every payment to finished work. The whole hiring process takes three to six weeks if you do it right.
Quick steps: hire a general contractor
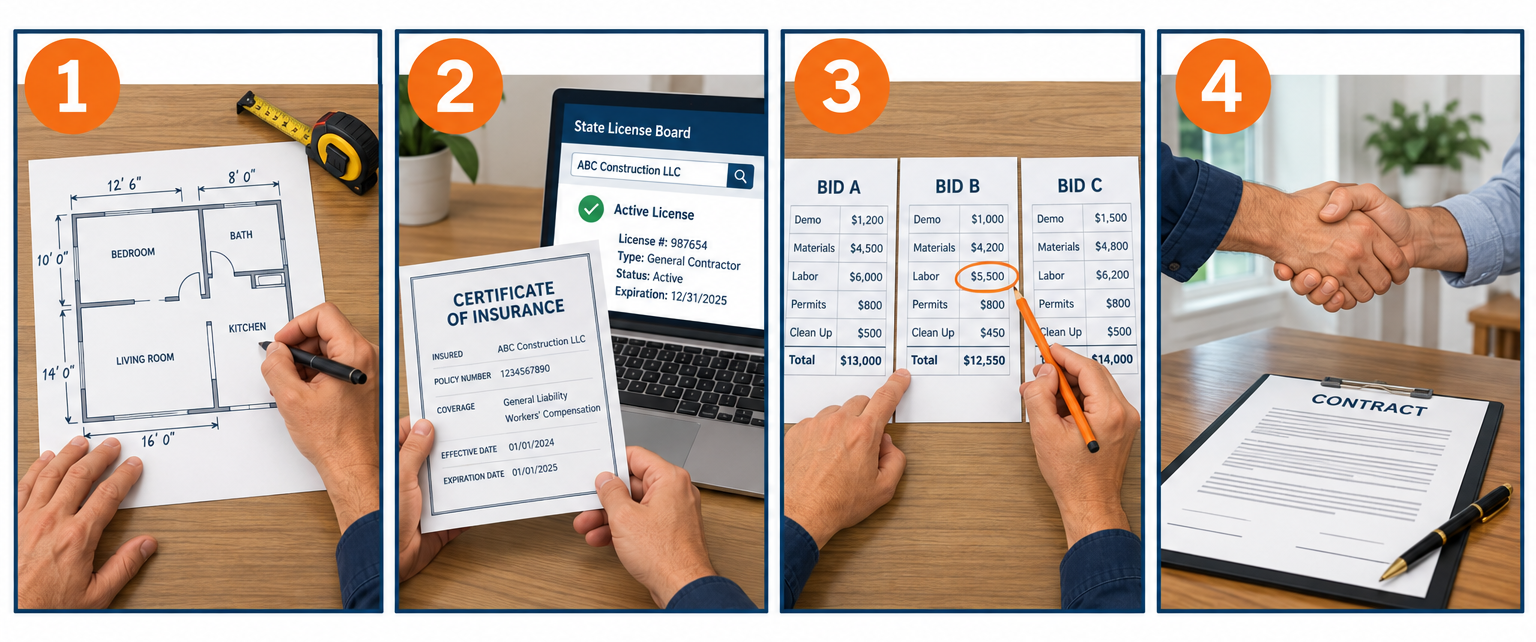
- Write a one-page scope with room sizes, finishes and a budget ceiling.
- Pull 4-6 names from your state license board, neighbors and recent permit records.
- Confirm license, general liability and workers’ comp before anyone walks through the house.
- Walk the job with three contractors and send each the identical scope.
- Compare line-item bids, not totals, and call two recent references for each.
- Negotiate a milestone payment schedule with a 10% deposit cap and 5-10% retainage.
- Sign a written contract with scope, allowances, change-order terms and a completion date.
Tools and materials
- One-page scope of work (room-by-room, with measurements)
- Tape measure or laser measure (for square footage and ceiling heights)
- Photos of each room plus inspiration images
- Your state contractor license board website
- County permit search or online permit portal
- Certificate of insurance (COI) from each contractor
- Bid comparison spreadsheet (one column per contractor)
- Lien waiver forms (conditional and unconditional)
Calculators for this job
Safety first
Never let a contractor pull the permit in your name as an “owner-builder.” That makes you legally responsible for code violations and for any worker injured on site. The permit should list the licensed contractor, every time.
Step 1: Write the scope before you call anyone
Contractors can only price what you describe, so vague scopes produce vague bids. Walk every room in the project and write down what stays, what goes and what gets replaced.
Measure as you go. A kitchen remodel bid changes a lot between 120 and 200 square feet of cabinets and flooring, so calculate square footage of a room properly, including ceiling height if walls are moving. Note window counts, existing flooring type and where the plumbing stack and electrical panel sit.
Then make three decisions on paper:
- Finish level. Builder-grade, mid-range or custom. Say it plainly. “Mid-range: semi-custom cabinets, quartz counters, tile backsplash” is enough.
- Budget ceiling. Give a real number, not a hope. Contractors design to it. A national mid-range kitchen typically runs $25,000 to $75,000; a full bathroom gut runs $10,000 to $30,000 depending on fixtures and tile.
- Must-haves versus nice-to-haves. The second list is where you cut when bids come in high.
If the project adds a bedroom, moves a load-bearing wall or changes the roofline, you need drawings before bidding. Pay an architect or a design-build firm for plans first. Bidding without them wastes everyone’s time and the numbers will be worthless.
Pro tip
Include an “unknowns” line in your scope: “Budget 10% contingency for hidden conditions behind walls.” Contractors who see that know you understand remodeling and will give you honest numbers instead of a lowball to win the job.
Step 2: Build a short list from sources that cost contractors something
Online review sites are easy to game. Use sources where a bad contractor leaves a trail.
Start with your state license board. Most states let you search by name or license number and see complaints, bond status and disciplinary actions. Then check your county or city permit portal. Search by street for finished remodels in your area and see which general contractors pulled the permits. A GC who pulls permits regularly is one who does the job by the book.
Ask three more places:
- Your local lumberyard or kitchen showroom. They know who pays on time and who gets jobs done.
- A home inspector. They see every contractor’s work after the fact.
- Neighbors with a recent remodel you can walk through.
Aim for four to six names. You will lose a couple at the verification stage. Our guide to choosing home remodeling contractors covers how to vet design-build firms versus traditional GCs if you are still deciding which model fits.
Step 3: Verify license, insurance and bond before the walkthrough

Do this over the phone or email. It takes ten minutes per contractor and screens out most problems.
License. Get the license number and look it up yourself on the state site. Confirm the name on the license matches the business you are talking to, the classification covers residential remodeling and it is active, not expired or suspended. Several states require a license for any job above a low dollar threshold, so an unlicensed contractor on a $40,000 remodel is already breaking the law before swinging a hammer.
General liability. Ask for a certificate of insurance sent directly from the agent, not a PDF the contractor forwards. Look for at least $1,000,000 per occurrence. Call the agent to confirm the policy is current.
Workers’ compensation. If anyone is on payroll, they must carry it. If the GC says “I only use subs,” ask how they confirm every sub carries their own comp. Without it, an injured worker can sue you.
Bond. Most states require a contractor bond. It is small, often $15,000 to $25,000, but its absence means the license is not in good standing.
Anyone who stalls on these documents is off the list. Legitimate home remodeling general contractors send them the same day.
Step 4: Walk the job with three contractors
Schedule each walkthrough separately and give every contractor the same written scope, the same photos and the same answers. The goal is three bids on identical work.
During the walkthrough, pay attention to what they ask. A contractor with real experience will:
- Open the panel and count open breaker slots.
- Ask where the water heater and main shutoff are.
- Check whether the house has air conditioning ducts running through walls you want to remove.
- Ask about the age of the house (pre-1978 means lead paint rules apply).
- Ask how you plan to live during construction, and whether you need moving pod companies or storage for furniture.
A contractor who glances around, says “no problem” and quotes a number on the spot is guessing. Tell each one you expect a written, itemized bid within two weeks.
Step 5: Compare the bids line by line
Put the three bids side by side in a spreadsheet. Totals mean nothing until you confirm each contractor priced the same work.
Check these items in every bid:
| Line item | What to look for |
|---|---|
| Demolition and disposal | Dumpster count, haul-away, any lead or asbestos testing |
| Permits and inspections | Who pays, who pulls, which inspections are listed |
| Rough trades | Plumbing, electrical, HVAC listed separately with sub names |
| Allowances | Dollar figures for tile, fixtures, cabinets, lighting |
| Finish work | Drywall level, paint coats, trim profile, flooring type |
| GC fee or markup | Stated as a percentage or a fixed number |
| Schedule | Start date, calendar days to completion |
| Exclusions | What is not included, written out |
Allowances are where bids hide money. A $2,000 tile allowance on a 120-square-foot bathroom covers about $16 per square foot installed, which buys basic ceramic. If you want porcelain plank or natural stone, that allowance should be $5,000 or more. A contractor who lowballs allowances wins the bid, then bills change orders for every selection you make.
Markup is normal. A GC earns 10 to 20% on top of job costs to manage the project, carry insurance and warranty the work. Bids with no visible fee have it buried in the line items.
Now call references. Ask for two clients from the last 12 months and one from three or more years ago. Ask the recent ones: did the job finish on schedule, how many change orders, and would they hire again. Ask the old one whether anything failed and how the contractor handled it.
Pro tip
Ask every reference one specific question: “What was the final cost compared to the contract price?” A contractor whose jobs regularly finish within 5-10% of contract, with change orders you requested, is the one to hire. Jobs that came in 30% over are a warning no matter how pretty the finished kitchen looks.
Step 6: Negotiate the payment schedule
Pay for work completed, never for work promised.
A standard schedule for a $60,000 remodel looks like this:
| Milestone | Payment |
|---|---|
| Contract signing | 10% deposit ($6,000) |
| Demo complete, rough plumbing and electrical passed inspection | 25% |
| Drywall hung and finished, cabinets delivered | 25% |
| Tile, flooring and paint complete | 25% |
| Final inspection passed, punch list complete | 15% (includes 5-10% retainage) |
Some states cap deposits by law. California, for example, limits a home improvement deposit to $1,000 or 10% of the contract, whichever is less. Any contractor asking for 30 to 50% up front is funding their last job with your money.
Each payment should come with a conditional lien waiver from the GC and from any sub whose work that payment covers. The waiver protects you from a mechanic’s lien if the GC fails to pay a sub. Material suppliers can lien your house too, so ask for waivers from the lumber and cabinet suppliers on bigger draws.
Retainage, usually 5 to 10%, is the only leverage you have on the punch list. Hold it until every item is finished and the final inspection card is signed.
Step 7: Sign a contract that covers the hard moments
A one-page proposal is not a contract. The agreement you sign should include:
- Full scope of work with plans and the bid attached as exhibits.
- Allowance schedule with every dollar figure listed.
- Change-order process. Nothing proceeds without a signed change order showing cost and schedule impact. Agree on the markup for changes, typically the same GC fee as the base contract.
- Start date and completion date, with a definition of “substantial completion.”
- Daily work hours and who is on site. Name the project manager or lead carpenter.
- Permits. The contractor pulls all permits and schedules all inspections.
- Cleanup and protection. Floor protection, dust walls, dumpster location, daily broom-clean.
- Warranty. One year on labor is standard; two years is better. Manufacturer warranties pass through to you.
- Termination clause. How either side ends the contract and what you owe for work done to that point.
- Dispute resolution. Mediation first, then arbitration or small claims.
Read the exclusions twice. “Painting by others” or “existing electrical assumed adequate” shifts thousands of dollars back to you.
Once signed, set up a shared folder for the contract, change orders, receipts and inspection cards. Walk the job every evening after the crew leaves. Problems caught at rough-in cost a fraction of problems found after drywall.
Troubleshooting: when the hire goes wrong
| Symptom | Likely cause | Fix |
|---|---|---|
| Bid is 40% below the others | Missing scope, low allowances or unlicensed labor | Ask for the itemized version; if they will not provide it, drop the bid |
| Contractor wants 30-50% deposit | Cash-flow problems or a deposit scam | Counter with 10%; walk if they refuse |
| No permit posted in the window two weeks in | Contractor skipped permits to save time | Stop payments until the permit is pulled in the contractor’s name |
| Crew disappears for a week | GC overbooked and moved labor to another job | Invoke the schedule clause in writing; withhold the next draw until work resumes |
| Change orders arrive every few days | Allowances were set too low or scope was vague | Review each against the contract; refuse any that cover work already included |
| Sub calls asking why they have not been paid | GC is diverting your draws | Demand lien waivers before the next payment; consider joint checks to subs |
| Punch list drags past 30 days | No retainage, so no leverage | Send a written list with a 14-day deadline; hold the final payment |
When to call a pro
Bring in an attorney who handles construction disputes if a contractor abandons the job, a sub files a lien, or the GC refuses to return a deposit after you cancel. Hire a structural engineer, not just the contractor, before removing any wall that runs perpendicular to the ceiling joists. And call your state license board the day a contractor asks you to pull the permit yourself or work without one; the board handles complaints and bond claims for exactly that.
FAQ
What does a general contractor charge for a home renovation?
Most residential GCs charge 10 to 20% of total job cost as a management fee, either built into the bid or shown as a separate line. On a $50,000 kitchen remodel that is $5,000 to $10,000. Large or complex projects sometimes run a cost-plus contract at 15 to 20% over documented costs.
Do I need a general contractor or can I hire the trades myself?
If the job touches two or more trades and needs permits, hire a GC. Coordinating the electrician, plumber, drywaller and tile setter in the right order is a full-time job, and a GC carries the liability if sequencing goes wrong. For a single-trade job like replacing a tub or a panel, hire that licensed trade directly.
How many bids should I get?
Three is the standard. Two is not enough to spot an outlier, and five or more means you cannot give each contractor the attention a good bid requires. Give all three the same scope and the same deadline.
How long does a general contractor take on a kitchen or bathroom remodel?
A full kitchen typically runs six to ten weeks of construction after permits are issued. A bathroom gut runs three to five weeks. Add two to six weeks up front for permit approval, longer if structural plans need review. Custom cabinet lead times of 8 to 12 weeks should be ordered before demolition starts.
What if the contractor finds problems behind the walls?
That is what the contingency is for. Expect 10 to 15% of the contract price in reserve for rot, outdated wiring, undersized plumbing or missing insulation. Each discovery should produce a written change order with a price and a schedule adjustment before the work proceeds.